Transcription
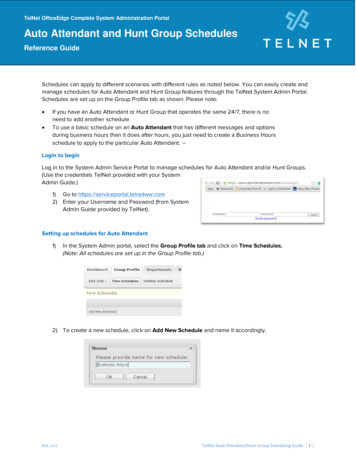
TelNet OfficeEdge Complete System Administration PortalAuto Attendant and Hunt Group SchedulesReference GuideSchedules can apply to different scenarios with different rules as noted below. You can easily create andmanage schedules for Auto Attendant and Hunt Group features through the TelNet System Admin Portal.Schedules are set up on the Group Profile tab as shown. Please note: If you have an Auto Attendant or Hunt Group that operates the same 24/7, there is noneed to add another schedule.To use a basic schedule on an Auto Attendant that has different messages and optionsduring business hours than it does after hours, you just need to create a Business Hoursschedule to apply to the particular Auto Attendant. --Login to beginLog in to the System Admin Service Portal to manage schedules for Auto Attendant and/or Hunt Groups.(Use the credentials TelNet provided with your SystemAdmin Guide.)1) Go to https://serviceportal.telnetww.com2) Enter your Username and Password (from SystemAdmin Guide provided by TelNet).Setting up schedules for Auto Attendant1)In the System Admin portal, select the Group Profile tab and click on Time Schedules.(Note: All schedules are set up in the Group Profile tab.)2) To create a new schedule, click on Add New Schedule and name it accordingly.R63, v2.0TelNet Auto Attendant/Hunt Group Scheduling Guide 1
3)Create a new schedule by clicking and dragging to set your Business Hours. Then click Save.EXAMPLE: Here we set up business hours to be Monday through Friday 9am to 5pm with a lunchbetween 12pm and 1pm, and open Saturday 10am to 1pm. Anything that is colored in will follow theBusiness Hours auto attendant, anything that is not colored in will follow the After Hours autoattendant schedule.NOTE: if your hours ever change, or if you need to adjust the schedule for unexpected closures,meetings, etc., you can simply go back in to the schedule and adjust it accordingly.Save your Settings/Apply your Schedules1)After schedules have been created for your Business and After Hours/Holidays Auto Attendants,go back to the Auto Attendant tab on the main page: click on Group Services and then selectyour Auto Attendant from the dropdown list.2)Click the Detailed Settings link below the options window.R63, v2.0TelNet Auto Attendant/Hunt Group Scheduling Guide 2
3)On the Detailed Settings page, in the Profile section, select your Business Hours schedule fromthe dropdown menu, (along with any Holidays Schedule you may have created that you want toapply) and click Save.NOTE: During the Business Hours set up in the schedule, the Auto Attendant will follow thegreeting and options created for the Business Hours Auto Attendant. Anything outside of theschedule you created will automatically point to the After Hours Auto Attendant greeting andoptions. In this example, a Holiday Schedule was set up and activated as well.R63, v2.0TelNet Auto Attendant/Hunt Group Scheduling Guide 3
Scheduling to ring to a Hunt Group during business hours, and Auto Attendant (or elsewhere) duringafter hoursYou can create a schedule that rings a Hunt Group of phones during Business Hours, but then goes toan Auto Attendant (or elsewhere) after hours. Here’s how:1)Create a schedule for the Hunt Group such as this:This sample schedule shows that the ‘open’ hours to ring the Hunt Group are from 8am to 12noon, (closed for lunch) and then again from 1pm to 5pm. Everything in the shaded area will ringdirectly to the Auto Attendant or other default ring to phone number you specify.To add the schedule to your Hunt Group1)Click on Group Services tab and then select Hunt Group from the Site Services dropdown.2) Click on the Calling Features tab3) In the Incoming Calls section, click the Edit button in the Call Forwarding Selective section (toapply the schedule designating that service rings to the Auto Attendant during the ‘closed’ hours.)R63, v2.0TelNet Auto Attendant/Hunt Group Scheduling Guide 4
4)Add the Default Call Forward to phone number in the field and then click the Add Rule button.NOTE: the phone number you add can be the Auto Attendant phone number (from your SystemAdmin doc package), or any other phone number you would like to use to direct calls After Hours(e.g., call center, answering service, on-call person, etc.)5) In the Add New Rule window, assign a Description to the rule, and select the Time Schedule tofollow to point to the Auto Attendant (or other Default Call Forward to number you designate)after hours, per the schedule you created.6) Click Save.7)R63, v2.0After saving the rule, turn the Call Forward Selective rule On, and Save the change when you aredone.TelNet Auto Attendant/Hunt Group Scheduling Guide 5
To set up Holidays schedule in advance1)Simply click on the Holiday Schedule button at thetop and then Add Holiday Schedule. (After HoursAuto Attendant setup will be used for the HolidaySchedule -- that includes the current After HoursGreeting. If you would like to change the greetingfor a particular holiday, you will need to re-recordthe After Hours greeting for that time period.)2) Use the following window to add your upcoming holidays.NOTE: In the Recurrence field, you can set it to recur automatically for dates that do not changelike Xmas Eve and Xmas Day, 4th of July, etc. by selecting Indefinite recurrence.Holidays schedules can be added to Auto Attendant and Hunt Group Call Forward Selective schedulesHere is Auto Attendant profile with Holidays schedule chosen from dropdown list.Here is a Hunt Group Call Forward Schedule with Holidays schedule chosen from dropdown listR63, v2.0TelNet Auto Attendant/Hunt Group Scheduling Guide 6
R63, v2.0 TelNet Auto Attendant/Hunt Group Scheduling Guide 3 3) On the Detailed Settings page, in the Profile section, select your Business Hours schedule from the dropdown menu, (along with any Holidays Schedule you may have created that you want to apply) and click Save. NOTE: During the Business Hours set up in the schedule, the Auto Attendant will follow the