Transcription
CDE LightbandDigital Voice ServicesUser Guide
2 Page* Feature Access Codes*62Access Voicemail*72Call Forwarding Always Activation*73Call Forwarding Always Deactivation*90Call Forwarding Busy Activation*91Call Forwarding Busy Deactivation*92Call Forwarding No Answer Activation*93Call Forwarding No Answer Deactivation*67Calling Line ID Delivery Blocking per Call*65Calling Line ID Delivery per Call*69Call Return*70Cancel Call Waiting (per call)*94Call Forwarding Not Reachable Activation*95Call Forwarding Not Reachable Deactivation*78Do Not Disturb Activation*79Do Not Disturb Deactivation*77Anonymous Call Activation*87Anonymous Call Rejection
3 PageWelcome to CDE Lightband Digital Voice ServicesWe take pride in providing superior and reliable digital voice services to ourvalued customers.This booklet should answer any questions you may have regarding DigitalVoice service, including how it works, installation instructions, and how touse some of the main features.For information on additional features and options available,please go to your online Account Portal athttps://mycdephone.com or call (931) 648-8151.My Digital Voice telephone number is:My Account Portal username and password is:
4 PageInside this BookletGeneral Information .5What is Digital Voice?. 5Making Calls with Digital Voice . 5Important 911 Information . 6Getting Started . 7Managing Your Account Online. 7Updating Account Portal Info and Password . 7How to Access Voicemail. 8Features of Digital Voice Services . 9Features Overview . 9Anonymous Call Rejection (*77) . 9Call Forwarding . 9Call Forwarding Always (*72) . 9Call Forwarding Remote Access . 10Call Forwarding Busy (*90) . 10Call Forwarding No Answer (*92) . 11Call Forwarding Selective . 12Call Forwarding Not Reachable (*94) . 12Call Hold . 12Call Return (*69). 13Call Waiting On/Off . 13Inbound Calling Line ID Delivery. 13Inbound Calling Line Name Delivery . 13Outbound Calling Line ID Blocking . 13Last Number Redial (*66) . 14Do Not Disturb (*78)To Cancel (*79) . 14Speed Dial (*74) . 14Three-Way Calling . 15Selective Call Acceptance/Selective Call Rejection . 15Sequential Ringing . 16Simultaneous Ringing . 16Voicemail Management (*62) . 17Frequently Asked Questions (FAQs) . 18Contact Information . 20
5 PageGeneral InformationWhat is Digital Voice?Digital Voice allows you to make and receive calls through your broadband Internetconnection using a standard touch tone phone.Your CDE Lightband Digital Voice service works with any touch tone, corded or cordlesstelephone. You can call anywhere at any time for less, and your phone number can goeverywhere you do!Making Calls with Digital VoiceYou can make calls by dialing the number on your phone, as you always have.For calls within your area code, you may dial 7, 10 or 11 digits.Example: 555-1212, 859-555-1212 or 1-859-555-1212When dialing outside you area code, you may use 10 or 11 digits.Example: 859-555-1212 or 1-859-555-1212To activate the International calling feature you will need to contact CDE LightbandCustomer Service at (931) 648-8151.To place international calls, dial just as you would with a standard analog telephone.(International Access Code Country Code City Code Number)Example: 011 39 (Italy) 81 (Naples) NumberTo answer a call pick up your phone’s handset like you always have.
6 PageImportant 911 InformationWhile the 911 system through Digital Voice services will work very similarly to yourstandard analog telephone, there are a few important differences of which you need to beaware. Each time you move, you will need to call our support line at (931) 648-8151 to updateyour information. It may take a few days to activate and change your 911 feature, soplease think ahead when moving the location of your digital telephone. Electrical or broadband outages can prevent 911 dialing with our system. As yourphone service is relying on both your broadband connection and electrical power (withadditional battery back-up, if available), if these go out, so will your Digital Voiceservice. Once the power and broadband connection returns, your system will functionproperly again.Additional 911 information is available on the Account Portal for you to read andreference. Please be safe and read all material related to this issue.Learn more at: https://mycdephone.com
7 PageGetting StartedManaging Your Account OnlineConfigure your Digital Voice account online.1. Open your web browser and in the address bar type: https://mycdephone.com2. Your username is your 10 digit phone number.3. Your temporary password should have been given to you when your service wasactivated. Click “forgot password” to generate a new password on the login screen.4. Enter your phone number (username) and password into the appropriate fields and thenclick the “Login” button.5. When you log in for the first time you will be prompted to create a four digit CPNIsecurity code. This verifies your identity when requesting a change from our servicedepartment. Please keep this code in a safe place for future reference to make changesto your account.6. On the “Home” page of the portal you will see a “Features” button which, when you clickon it, will enable you to configure all of your features (e.g., Call Forwarding,Simultaneous Ringing, etc.).Updating Account Portal Info and Password1. Click on the “Account Info” button to update account, personal, service address, orbilling address information. When you are done, click the “Update” button to save yourchanges.2. To change your password, click on the “Change Password” tab and follow the directions. The password length must be at least 6 characters. The password must contain at least 1 number, at least 1 lower case letter, and atleast 1 upper case letter. The password should not consist of any personally identifiable information, or easilyguessed words or digits.3. Enter your old password, enter your new password, confirm your new password, andthen click “verify”.4. Changing your CPNI security code: Click on “Account Info” in the top menu, then select“Update Account”. Once you are in your account, enter the new CPNI code in the CPNIfield then click “Update”.
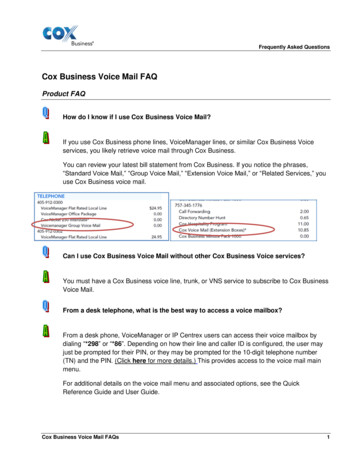
8 PageHow to Access VoicemailAccessing the Voicemail System for the First Time1. From your own phone, dial your phone number, or dial *622. The default pass code is 42273. Enter a new pass code at the voicemail prompt4. Re-enter the same new pass code at the prompt5. If your new pass code is accepted, you will hear “your password has been changedsuccessfully”6. Press the # keyOnce in the system, you will hear “Welcome to your Voice Messaging System. If you arenot calling from your home phone press the * key.”Hint: To eliminate the need to dial your own phone number when accessing yourvoicemail, please refer to the Speed Dial instructions on page 14. You can set yourown phone number as a speed dial code.Accessing Voicemail while at Home or Away1. From any phone, dial your home phone number, or dial *622. Press * to access your voicemail, once your recording picks up3. Enter your pass code at the promptVoicemail Main Menu1. To listen to your messages, press 12. To change your mailbox busy greeting, press 23. To change your mailbox no answer greeting, press 34. To compose and send a new message, press 55. To delete all messages, press 76. To go to the CommPilot Voice Portal press the * key7. To repeat this menu, press the # keyWhile1.2.3.4.5.6.7.8.Listening to the Messages MenuTo save this message, press the # keyTo erase this message, press 7To repeat this message, press 2To go back to the previous message, press 4To play the message envelope, press 5To go to the next message, press 6For additional options, press 9To go back to the previous menu, press the # keyCommPilot Voice Portal Menu1. To access your voicemail box, press 12. To record your name, press 33. To change your call forwarding options, press 44. To make a call, press 65. To change your pass code, press 86. To exit the CommPilot Voice Portal, press 97. To repeat this menu, press the # key
9 PageFeatures of Digital Voice ServicesFeatures OverviewOn the Home page of the Account Portal, you will see the “Features Configuration” buttonwhere you can choose features like Call Forwarding, Simultaneous Ringing, etc.Below is a list of our top features: Anonymous Call RejectionCall Forwarding AlwaysCall Forwarding SelectiveCall Forwarding Not ReachableCall WaitingDo Not DisturbSpeed DialSimultaneous RingingThree-Way CallingVoicemail ManagementThe following pages contain instructions for configuring these listed features. Refer to theonline Account Portal for support and information about additional features and options.Anonymous Call Rejection (*77)Use this feature to prevent or allow calls from callers who have blocked their phonenumbers from being identified. Blocked callers hear a message notifying them that theircalls are being rejected.From Your PhoneAnonymous Call Rejection can be activated using your phone. To do this dial *77. Your callsremain forwarded until you dial the deactivation code (*87).From Your Account PortalYou can activate this service at any time and configure it from your Account Portal.StepsDetailsTurn Anonymous Call Rejection on or off Click “On” or “Off.” When on, Anonymous CallRejection prevents calls from callers who havechosen to block the identification of their phonenumbers. These callers hear an automatedmessage that their call is being denied because ofthe block. The default for this service is “Off.”Save your changesClick Apply to save your changes.Call ForwardingCall Forwarding Always (*72)Use this feature to activate and edit the options for the Call Forwarding Always (CFA)service. The Call Forwarding Always service allows you to redirect your incoming phone callsto another number, such as a mobile phone or administrative assistant. Variations of Call
10 P a g eForwarding include Call Forwarding No Answer and Call Forwarding Busy. Unlike thoseservices, Call Forwarding Always redirects all of your calls, not just those received when youdo not answer or when you are talking on your phone.From Your PhoneCall Forwarding Always can be activated, and its options changed, using your phone. To dothis dial * 72, followed by the phone number to which you wish your calls to be redirected.Your calls remain forwarded until you dial the deactivation code (*73).From Your Account PortalCall Forwarding Always can also be activated, or its options changed, using your AccountPortal.StepsDetailsTurn Call Forwarding Always on or offClick “On” or “Off”. When on, Call ForwardingAlways forwards all your incoming calls to thephone number you entered in the “Calls Forwardto” text box.Confirm or enter the phone numberAdd the forward-to number in a valid format (nodashes, parentheses, or spaces are necessary)and click Apply. Please note: Forwarding to aninternational number will not be accepted.Select whether to play a ring reminderThe “Play Ring Reminder when a call is forwarded”check box causes the service to play a short ringburst on your phone when a call is forwarded. Noring reminder is played if this box is not checked.Save your changesClick Apply to save your changes.Call Forwarding Remote AccessYou can activate or deactivate Call Forwarding Always via your voicemail. Simply press * inthe main menu, then select option 4.Call Forwarding Busy (*90)Use this feature to activate and edit the options for the service.The Call Forwarding Busy service enables you to redirect calls to another destination whenan incoming call encounters a busy condition. If activated, you must specify the forwardingnumber.From Your PhoneCall Forwarding Busy can be activated and its options changed, using your phone. To dothis dial *90 followed by the phone number to which you wish your called to be redirected.Your calls remain forwarded until you dial the deactivation code (*91).
11 P a g eFrom Your Account PortalCall Forwarding Busy can also be activated, or its options changed, using your AccountPortal.StepsDetailsTurn Call Forwarding Busy on or offClick “On” or “Off”. When on, Call ForwardingBusy forwards all your incoming calls to the phonenumber you entered in the “Calls Forward to” textbox.Confirm or enter the phone number.To edit or delete a phone number, enter theapplicable phone number, in a valid format (nodashes, parentheses, or spaces are necessary)and click Apply. Please note: Forwarding to aninternational number will not be accepted.Call Forwarding No Answer (*92)Use this feature to activate and edit the options for the Call Forwarding No Answer service.The Call Forwarding No Answer service enables you to redirect calls to another destinationwhen an incoming call is not answered within a specified number of rings. If activated, youmust specify the forwarding number and the number of rings before forwarding.From Your PhoneCall Forwarding No Answer can be activated, and its options changed, using your phone. Todo this dial *92, followed by the phone number to which you wish your calls to beredirected. Your calls remain forwarded until you dial the deactivation code (*93).From Your Account PortalCall Forwarding No Answer can also be activated, or its options changed, using your AccountPortal.StepsDetailsTurn Call Forwarding Busy on or offClick “On” or “Off”. When on, Call ForwardingBusy forwards all your incoming calls to the phonenumber you entered in the “Calls Forward to” textbox.Confirm or enter the phone number.To edit or delete a phone number, enter theapplicable phone number, in a valid format (nodashes, parentheses, or spaces are necessary)and click Apply. Please note: Forwarding to aninternational number will not be accepted.Select Number of RingsSpecify the number of rings you would like tooccur before the call is forwarded.Save your changesClick Apply to save your changes.
12 P a g eCall Forwarding SelectiveCall Forwarding Selective allows you to forward specific calls matching your pre-definedcriteria to a different phone number. Use this service to forward calls from your manager, afamily member, or an important customer to your cell phone, alternate business phone, orhome phone. The criteria for each Call Forwarding Selective entry can be a list of up to 12phone numbers or digit patterns and a specified time schedule. All criteria for an entry mustbe satisfied for the call to be forwarded (phone number and day of week and time of day). Ifthe call is not forwarded, the call continues as if this service was not turned on.From Your Account PortalCall Forwarding Selective can be activated, or its options changed using your Account Portal.StepsDetailsAdd Default Call forward to phonenumberEnter the default forward to number.Add Call Forward Selective EntryAdd Description, Select Time Schedule, choose touse default forward phone number or forward todefault number. Choose between Calls from Anyphone number or Any Private Number or AnyUnavailable number or up to 12 Specific PhoneNumbers, then Click Add.Activating and Deactivating CallForward Selective ServiceOnce the Call Forwarding Selective entry has beenadded click the check box under the active columnto activate or deactivate.Call Forwarding Not Reachable (*94)Call Forwarding Not Reachable automatically forwards your incoming calls to a phonenumber of your choosing, when activated, if the device your phone is connected to losescontact with our Digital Voice System.From Your PhoneCall Forward Not Reachable can be activated and its options changed, using your phone. Todo this dial *94 and enter the number you wish your call to be redirected during an internetoutage. Dial *95 to deactivate this service.From Your Account PortalCall Forwarding Not Reachable can be activated, or its options changed using your AccountPortal.StepsDetailsTurn Call Forwarding Not Reachable onor offClick “On” or “Off” then click Apply.Adding the Forward To numberType in the number and click Apply.Call HoldPress the flash hook key and the call will be placed on hold. Hit the flash hook key again to
13 P a g eremove the call from hold.Call Return (*69)Use this feature to call the last party who called your number, whether or not the call wasanswered.From Your PhoneCall Return can be accessed using your phone. Simply dial *69.Call Waiting On/OffUse this feature to turn the Call Waiting service on or off. This service allows you to decidewhether phone calls in progress can be interrupted by other calls.NOTE: This service is not available with all access device types.From Your PhoneCall Waiting can be deactivated from your phone for individual calls by dialing *70 beforedialing your called number.From Your Account PortalCall Waiting can be activated, or its options changed, using your Account Portal.StepsDetailsTurn Call Waiting on or offClick “On” or “Off”. When this service is on andyou receive a call while another call is already inprogress, you will hear a beep. You can put thefirst call on hold to answer the incoming call.When this service is turned off, the caller hears abusy tone. The default for this service is “On”.Save your changesClick Apply to save your changes.Inbound Calling Line ID DeliveryA caller’s identity (phone number) will be displayed (if available).Inbound Calling Line Name DeliveryA caller’s name will be displayed (if available).Outbound Calling Line ID BlockingCalling Line ID Delivery Blocking allows you to block your number from being shown whenyou’re calling other numbers.From Your PhoneYou can block outbound calling on a per call basis by Pressing *67 before making any call.From Your Account PortalOutbound Calling Line ID Blocking can also be turned on or off using your account portal,turning on this feature in the portal blocks all calls until it is turned off.
14 P a g eStepsDetailsTurn Outbound Calling Line ID Blockingon or offClick “On” or “Off”. When on, Calling Line IDBlocking prevents your phone from beingdisplayed during outgoing calls. The default forthis service is “Off.”Last Number Redial (*66)Use this feature to redial the last number you called. Simply dial *66 from your phone.Do Not Disturb (*78)To Cancel (*79)Use this feature to prevent your phone from ringing. Callers are sent to Voicemail oranother specified location, such as a number indicated by the Call Forwarding Busy service.From Your PhoneThe Do Not Disturb service can be activated, or options can be changed, using your phone.To do this, dial *78. To deactivate, dial *79.From Your Account PortalDo Not Disturb can also be activated, or its options can be changed, using your accountportal.StepsDetailsTurn the service on or offClick “On” or “Off”. When on, Do Not Disturbprevents your phone from ringing and callers aregiven busy treatment (such as being sent to VoiceMessaging, if available, or forwarded to thespecified number of the Call Forwarding Busyservice, if available). The default for this service is“Off.”Select whether to play a ring reminderThe “Play Ring Reminder when a call is blocked”check box causes the service to play a short ringburst if checked. No ring reminder is played if notchecked. A ring reminder is played if this serviceblocks a call while this check box is checked. Thering reminder is a short ringing burst, 500milliseconds in duration.Save your changesClick Apply to save your changes.Speed Dial (*74)Use this feature to program numbers for Speed Dial. This service allows you to associatesingle digit codes to frequently dialed or hard to remember phone numbers. You can dial aspeed dial code instead of the full number to place calls. To use speed dial from your phone,dial the speed dial code number, then #. For example, to call the number associated withSpeed Dial Code 6, dial 6#.From your phone, Speed Dial can also be programmed by dialing *74. For example, *74 38595551212 programs Speed Dial Code 3 to dial 859-555-1212.From Your Account PortalSpeed Dial can also be activated or its options can be changed, using your account portal.
15 P a g eStepsDetailsEnter a phone numberType a complete phone number, including acountry code, if necessary for dialing on yoursystem.Enter a nameType a name or description for the speed dialcode. This name does not affect the operation ofthe speed dial code. It is just a convenience tohelp you remember why the speed dial code wasprogrammed. If a speed dial code is programmedusing *74, then the “Name” text box is blank.Save your changesClick Apply to save your changes.Three-Way CallingUse this feature to create a three-way call. When this service is assigned, you can place athree-way call using the flash-based services.From Your PhoneStepsDetailsWhile engaged on callPress Flash hook on phone. The initial call isplaced on hold.Enter phone numberEnter complete phone number or extension ofthird party. You can press # to signal the end ofthe phone number or extension.Press flash hookWhen this third party is connected, press flashhook again. All parties will then be connected inthree-way call.Press flash hookTo drop the third party, press flash hook again.Hang upIf either of the two parties hangs up, your callwith the remaining party is intact. If you hang up,the other two parties remain connected.Selective Call Acceptance/Selective Call RejectionSelective Call Acceptance and Selective Call Rejection allows you to define criteria thatcauses certain incoming calls to be allowed or blocked. If an incoming call meets yourspecified criteria for acceptance, the call is allowed to complete. All other calls are blockedand the caller is informed that you do not wish to receive the call. If an incoming call meetsyour specified criteria for being blocked, the call will not be completed. Criteria can be basedon incoming calling line identity, time of day, and day of week. Multiple criteria sets can bedefined.From Your Account PortalSelective Call Acceptance can also be activated, or its options can be changed, using youraccount portal.
16 P a g eStepsDetailsAdd Selective Call Acceptance orRejection EntryAdd Description and select Time Schedule. Choosebetween Calls from Any phone number or AnyPrivate Number or Any Unavailable number or upto 12 Specific Phone Numbers, then Click Add.Sequential RingingUse this feature to define a “find me” list of phone numbers that are alerted sequentially forincoming calls that match specified criteria. While the service searches for the user, thecalling party is provided with a greeting followed by periodic comfort announcements. Thecaller can also interrupt the search to leave a message.From Your Account PortalSequential Ringing can also be activated, or its options can be changed, using your accountportal.StepsDetailsSet up Sequential RingingAdd Description and select Time Schedule. Choosebetween Calls from Any phone number or AnyPrivate Number or Any Unavailable number or upto 12 Specific Phone Numbers, then Click Add.Use Base Location FirstIf you want your base line to be the first locationto ring, check the Base Location box to set upthen click Apply.Number of Rings for Base LocationChoose the number of rings for Base Location thenclick Apply.Skip Search ProcessIf you check Skip Search Process box, it willenable callers to skip the search process and leavea message.Enter Secondary Search LocationsYou can enter telephone numbers for up to fiveSearch Locations and the number of rings foreach.Simultaneous RingingSimultaneous Ringing allows you to list phone numbers you would like to ring in addition toyour primary phone when you receive a call. This feature is helpful when you are not atyour phone but you would like your cell phone to ring when you get a call. You can also turnoff simultaneous ringing when you are at your desk on a call. Warning: if your cell phone orother phone has voice mail that picks up before your office voice messaging picks up, yourvoice mails could be on your cell phone messaging system.From Your Account PortalSimultaneous Ringing can be activated, or its options changed using your Account Portal.StepsDetailsTurn Simultaneous Ringing on or offClick “On” or “Off” then click Apply.
17 P a g eChoose how to handle incoming callsChoose to not ring your Simultaneous locations ifyou are on a call or ring all numbers all the time.Adding LocationsEnter phone number to simultaneously ring andclick Add.Voicemail Management (*62)Voicemail Management allows you to specify how to handle your voice messages. You canretrieve voice messages by using your phone and dialing your 10 digit phone number, or*62, or you can choose to send messages directly to your e-mail (not using the phone).From Your Account PortalVoicemail can be activated, or its options changed using your Account Portal.StepsDetailsTurn your Voice Messaging service on or Click “On” or “Off”.offIndicate how you want to use the voicemessaging service in the “When a voicemessage arrives.” sectionIf you want to retrieve voice messages using yourphone and your e-mail account, select “UseUnified Messaging”.When using Unified Messaging, you can check the“Use Phone Message Waiting Indicator” box. Thisoption provides a stuttered dial tone (and blinkinglight on some phones) to inform you when youhave messages waiting.If you always listen to your voice messages usingyour e-mail account and do not use the phoneretrieval option, select “Forward it to this e-mailaddress:” and provide the e-mail address whereyou want your voice messages to be sent.Indicate whether you want to benotified by e-mail of new messagesIf a check mark appears in the “Notify me by email of the new voice message at this address:”box, a short e-mail message informing you aboutthe new caller and date/time of
CommPilot Voice Portal Menu 1. To access your voicemail box, press 1 2. To record your name, press 3 3. To change your call forwarding options, press 4 4. To make a call, press 6 5. To change your pass code, press 8 6. To exit the CommPilot Voice Portal, press 9 7. To repeat this menu, press the # key

