Transcription
Model01-513BL (BLUE); 01-513GR (GREEN);01-513PK (PINK); 01-513SL (SILVER)INSTRUCTION MANUAL ENGLISH & ESPAÑOLDigital Blood PressureArm Monitor
STOP!PLEASE ENSURE YOU HAVE ALL OF THEFOLLOWING COMPONENTS BEFORE USINGYOUR DIGITAL BLOOD PRESSURE MONITORDigital Monitor4 AAA BatteriesPre-FormedArm CuffStorage CaseInstruction ManualQuick Start GuideBlood Pressure ReadingTracking LogFAQ Information SheetIF YOU ARE MISSING ANY PARTS, INCLUDINGINSERTS OR INSTRUCTION MANUALS, DO NOTRETURN TO PLACE OF PURCHASE. CONTACTCUSTOMER CARE AT 866-326-1313.2 ENGLISH
INDEXCare & Safety Information.4-5Introduction.6Digital Blood Pressure Monitor Features .7Getting Started.8Battery Installation .9Setting Date and Time .10-11Applying Your Blood Pressure Cuff .12-13Taking Your Blood Pressure Reading .14-15Interpreting Your Results.16-17Memory Functions .18-19Care and Maintenance.20-21Device & Label Symbols.22Display Symbols.23Troubleshooting and Error Codes .24-25FCC Statement .26-27Electromagnetic Compatibility.28-31Product Specifications .32Warranty.33-34Instrucciones en Español.35-70Toll-Free Customer Care Help Line: 1-866-326-1313Monday – Friday 8:30 a.m. – 4:30 p.m. CSTManufactured for:Veridian Healthcare1175 Lakeside DriveGurnee, IL 60031www.veridianhealthcare.comMade in China#93-1179 02/14 2014 Veridian Healthcare, LLCENGLISH 3
CARE & SAFETY INFORMATIONNote: Read all instructions carefully before use. The following basicprecautions are needed when using an electrical product.Caution: Failure to read and observe all precautions could result inpersonal injury or equipment damage.Improper care or use of your blood pressure monitor may result in injury,damage to the unit or ineffective treatment. Following these instructionswill ensure the blood pressure monitor’s efficacy and long life.General Cautions & Warnings Measurement results should be discussed with your physician orhealthcare professional; never self-diagnose or attempt treatment asthis may be dangerous Intended for adult use only; this device is not approved for infant orchild use Keep out of reach of children Do not use the unit if it has any damaged parts, if it has beensubmersed in water or dropped If any abnormality occurs, discontinue use until the unit has beenexamined and repaired Only use included attachments and parts; do not use attachmentsfrom other brands or models as these may not be properly calibratedfor use with this device and may result in measurement error Do not disassemble the unit or attempt to repair it; substitution of acomponent different from that supplied may result in measurementerror and will void manufacturer warranty4 ENGLISH
CARE & SAFETY INFORMATION Always follow local regulations for proper disposal of the monitor, cuffand batteriesOperating Cautions & Warnings Prolonged over-inflation may cause congestion, swelling or bruisingin some people If you experience any discomfort or an abnormality occurs, stop usingthe device immediately; to stop the device during operation, pressthe START/STOP button and the cuff will automatically deflate Operation outside of stated operating temperature may result inmeasurement error or device malfunction; operation environmenttemperature is: 41 F – 104 F (5 C – 40 C); Humidity: 80% RH max Never use this unit while operating a vehicle or in the bathtub orshowerStorage Cautions & Warnings Storage outside of stated storage temperature may result inmeasurement error or device malfunction; storage environmenttemperature is: -4 F – 140 F (-20 C – 60 C); Humidity: 10-93% Keep the unit out of reach of small children Always keep the unit unplugged while not in use; remove thebatteries if the unit will not be used for an extended period of timeCleaning Cautions & Warnings Never immerse the unit in water to clean as it may damage the unit Follow the ‘Cleaning and Maintenance’ portion of this manual forinstruction on how to clean and care for your monitorENGLISH 5
INTRODUCTIONIt is recommended that you first seek the advice andrecommendation of your physician or healthcare professional whenusing home diagnostic devices, including blood pressure monitors.Automatic digital blood pressure monitors use the oscillometricmethod to electronically measure your blood pressure. The monitordetects your blood’s movement through the artery in your arm andconverts the movements into a digital reading. The oscillometricmethod does not require a stethoscope, making the monitor idealfor home use.Blood pressure readings determined with this device are equivalentto measurements obtained by a trained healthcare professionalusing the cuff/stethoscope auscultation method, within the limitsprescribed by the American National Standard for Electronic orAutomated Sphygmomanometers.Thank you for purchasing a Veridian Healthcare Digital BloodPressure Monitor. With proper care and use, your monitor willprovide you with many years of reliable readings.PLEASE READ THIS INSTRUCTION MANUALCOMPLETELY BEFORE OPERATING THIS UNIT.6 ENGLISH
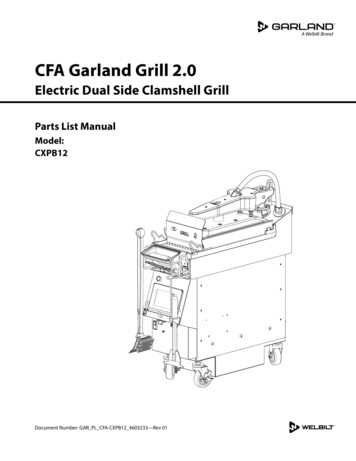
MONITOR FEATURESDigital DisplayHypertensionIndicatorBattery onSTOPButton (on/off)DETAILS OF THE DISPLAY AND INTERPRETATIONOF THE SYMBOLS ARE INCLUDED THROUGHOUTTHIS MANUAL.ENGLISH 7
GETTING STARTEDBefore Taking a Measurement1. Your readings should only be interpreted by your physician orhealthcare professional with access to your individual medicalhistory. Regular use of a home blood pressure monitor will allowyou to track and record your readings for discussion with yourphysician.2. Conduct your measurement in a quiet place while seated in arelaxed position. Rest for 15 minutes before taking your reading.If an error occurs or you desire to take a second reading, allow 15minutes between readings for your blood vessels to return tonormal.3. Avoid smoking, eating, taking medication, alcohol, physicalactivity or any other stressful activity for 30 minutes prior totaking a reading.4. Always remove any jewelry or constrictive clothing that mayinterfere with the cuff placement.5. Keep yourself and the monitor still during measuring; do not talkduring the reading.6. It is recommended that you take your readings as the same timeeach day to better monitor any indications in your results.7. Record your daily measurement on the included chart or someother written document to share with your physician.8 ENGLISH
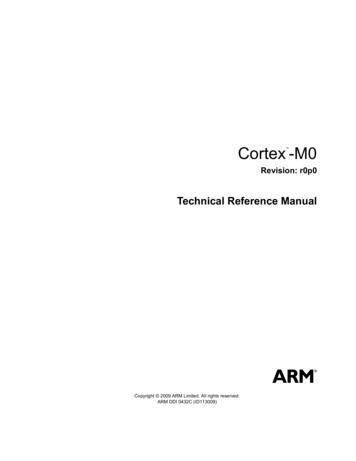
BATTERY INSTALATIONThis unit comes complete with 4 AAA batteries.Replace the batteries when any of the following occur: Low Battery symbol and ‘Lo’ appears on the display The display backlight dims or does not illuminate Monitor does not turn on after the START button is pressed1. The battery compartment is located on the underside of themonitor as shown in the below illustration. Carefully slide thecover away from the housing and the cover will open.2. Insert or replace 4 AAAbatteries into the batterycompartment, ensuring tomatch the indicatedpolarity symbols. Alwaysuse new batteries. 3. Replace the battery cover.– –4. Dispose of batteriesaccording to local disposaland recycling regulations.It is recommended to remove the batteries if the unit will not beused for an extended period of time.ENGLISH 9
SETTING DATE/TIMEIT IS NECESSARY TO SET THE DATE AND TIMEFOR THE UNIT EVERY TIME BATTERIES AREINITIALLY INSTALLED OR REPLACED.The date/time feature is on the lower right of the display screen. Thisunit stores the date and time, including year, allowing for adate/time stamp on all readings in the memory recall function.1. When the unit is off (a blank displayscreen), press and hold the SET buttonfor 2-3 seconds to activate the display.The display will illuminate and the yearwill begin flashing.2. MONTH / DATE / YEAR—press theMEM button to advance the display tothe desired year, press SET to confirmyour selection.Repeat for Month and Date-MEM toadvance, SET to confirm.10 ENGLISH
SETTING DATE/TIME3. HOUR—press the MEM button toadvance the display to the desired hour,press SET to confirm your selection.4. MINUTES—press the MEM button toadvance the display to the desiredminutes, press SET to confirm yourselection.5. After setting the final step, the displaywill briefly show ‘done’ and thenautomatically shut off.The monitor is now ready for use.ENGLISH 11
APPLYING YOUR ARM CUFFPROPER CUFF FIT AND PLACEMENT IS CRITICALIN OBTAINING ACCURATE BLOOD PRESSUREMEASUREMENTS. PLEASE READ THESEINSTRUCTIONS CAREFULLY AND CONSIDERCONSULTING WITH YOUR PHYSICIAN FORFURTHER DIRECTION.To determine the proper cuff size, measurethe circumference of your left upper arm atthe point midway between inside bend ofyour elbow and your shoulder, Fig 1.Adult Cuff fits arm circumference:8-3/4” - 16-1/2” (22-42 cm).Fig. 1Reminder, it is important to avoid smoking, eating, takingmedication, alcohol consumption or physical activity 30 minutesprior to taking a reading.If for any reason you are unable to or should not use your left arm,please modify the instructions for cuff application to your right arm.Your physician can help you identify which arm is best for you to takemeasurements from.The cuff should not be plugged into the monitor until after the cuff isapplied to your arm to avoid pulling or yanking the monitor.12 ENGLISH
APPLYING YOUR ARM CUFF1. Remove any constrictive clothing orjewelry that may interfere with cuffplacement.2. Be seated at a table or desk with yourfeet flat on the floor.Fig. 13. Insert your left arm into the cuffcylinder, keeping the air hose on theinside of the arm, Fig 1.4. Align the hose with your brachial artery,slightly to the right on the inside of thebend of the elbow, Fig 2.Fig. 25. The bottom edge of the cuff should bepositioned approximately one inchabove the elbow joint, Fig 3.6. The cuff should fit comfortably, yetsnugly around your arm. You should beable to insert one finger easily betweenyour arm and the cuff.Fig. 3If you are not comfortable with applyingyour cuff, please seek the assistance ofanother member of your household or workwith your physician to practice the cuffapplication. Incorrectly applied cuffs mayresult in inaccurate readings.ENGLISH 13
TAKING YOUR MEASUREMENTPlease read the preceding portions ofthis manual prior to taking your firstreading.Reminder, it is important to avoidsmoking, eating, taking medication,alcohol consumption or physicalactivity 30 minutes prior to taking areading.Fig. 11. Rest your elbow on a solid surface with your palm facing upward.Elevate your arm so that the cuff is at the same level as yourheart, Fig 1. Be certain that the cuff is elevated to the properlevel; you may choose to support your hand with a folded towelor book. Relax your hand.2. Press the START button to turn the unit on. The unit will run abrief self-test, and the display will briefly show ‘0’.3. The cuff will automatically begin inflating. The numbers on thedisplay screen will begin to go up. As the heart rate is beingmeasured, the heart icon will also flash.14 ENGLISH
TAKING YOUR MEASUREMENT4. When the measurement is complete, your blood pressure andpulse reading results will show on the display screen at the sametime.5. The Hypertension Indicator on the left side of the display willindicate Normal, Mild, Moderate or Severe. See page 17 forinformation regarding interpreting the Hypertension Indicatorresults.6. If an irregular heartbeat was detected during the reading, theIrregular Heartbeat Detector indicator will appear flashing on thedisplay, Fig 5. See page 16 for more information on the IrregularHeartbeat Detector feature.7. The reading will automatically be stored in memory, up to 60readings.8. Select START to turn the unit off and conserve energy andbattery life. The unit will automatically shut-off afterapproximately 1 minute.YOU CAN STOP THE INFLATION OR DEFLATIONPROCESS AT ANY TIME BY PRESSING THE STOPBUTTON.ENGLISH 15
INTERPRETING YOUR RESULTSIrregular Heartbeat DetectionAn irregular heartbeat is defined as a heartbeat rhythm that is morethan 25% slower or 25% faster than the average measurementdetected while the monitor is conducting the measurement. Whenthis device detects an irregular rhythm two or more times during thereading, the IHB symbol will appear on the display screen.This monitor will operate if the icon appears, but the results may becompromised, especially if this symbol appears often. Please consultwith your physician or trained healthcare professional for furtherinformation regarding an irregular heartbeat and if this symbolappears frequently.Normal HeartbeatPulseBloodPressureIrregular HeartbeatPulseBloodPressure16 ENGLISH
INTERPRETING YOUR RESULTSHypertension IndicatorThe graphic on the left side of the displayscreen indicates where the measurementfalls according to the World Health Organization standards.NormalMildModerateSevereSYS 140140–159160–179 180DIA 9090–99100–109 110American Heart Association ClassificationsThis chart can help you identify where a given blood pressure measurement falls according to American Heart Association standards.This chart should only be considered as a guideline; always consultwith your physician to interpret your individual results. Never adjustyour medication(s) dosage, or severely alter your diet or exercise routine without consulting with your h Blood Pressure, Stage 1High Blood Pressure, Stage 2Hypertensive Crisis 120120-139140-159 160 180Diastolicandorororor 8080-8990-99 100 110ENGLISH 17
MEMORY FUNCTIONSRecalling Measurements in MemoryThis monitor stores and recalls up to 60 measurements, plus anaverage of the last three measurements in memory. Thesemeasurements can be shared with your physician or trainedhealthcare professional for use in evaluating your overall health.1. When the monitor is off, press and release the MEM button. Theaverage blood pressure and pulse measurement of the mostrecent three readings will show with AVG icon on the screen.2. Press the MEM button again to begin scrolling through all of themeasurements from most current to oldest; an M icon and themeasurement sequence number will appear on the lower right ofthe display. For example, 8 / 30 indicates you are viewingmeasurement 8 of 30 recorded)Each measurement will indicate the date and time taken(alternating), the measurement and pulse reading, HypertensionIndicator results and Irregular Heartbeat if present.18 ENGLISH
MEMORY FUNCTIONSNOTE: The most recent record (1) is shown first. When the totalmeasurements in memory exceed 60 the last record (60) isdropped from the list.Clearing Measurements from MemoryTo delete all measurements in memory, follow these steps:1. When the monitor is off (display blank), press and hold the MEMbutton 3–4 seconds. The display will flash ‘dEL ALL’.2. Press SET to confirm deleting all measurements. The display willflash ‘dEL’ and ‘done’.3. The memory bank is now clear.ENGLISH 19
CARE & MAINTENANCEProper care and maintenance of your blood pressure monitor willhelp ensure long life for the product; improper use of the monitormay void the included warranty.Monitor Care and Maintenance Do not use any liquids on the monitor; use a soft, dry cloth toclean the monitor as needed Storage outside of stated storage temperature may result inmeasurement error or device malfunction; storage environmenttemperature is: -4 F – 140 F (-20 C – 60 C);humidity: 10-93% RH Do not store in direct sunlight Always keep the unit unplugged while not in use; remove thebatteries if the unit will not be used for an extended period oftime Do not attempt to disassemble your monitor; disassembling yourmonitor may void the manufacturers warranty Do not subject the monitor to strong shocks; take care not todrop the monitor With proper care, the monitor will maintain performance for aminimum of 10,000 measurements20 ENGLISH
CARE & MAINTENANCECuff Care and Maintenance Do not attempt to remove the cuff from the monitor housing forany reason The cuff should not be submerged or washed in a washingmachine, but may be spot cleaned with a mild-detergent asneeded; it is suggested that the cuff be cleaned once a month ifthe device is used daily To disinfect the cuff, wipe the inside (skin contact side) of the cufflightly moistened with 70-90% ethyl rubbing alcohol and allowto air dry; it is suggested to disinfect the cuff frequently whenused in clinical settings or if the cuff is contaminated in any way Never attempt to iron or dry the cuff; if the cuff becomes wet,allow the cuff to air dry completely before use or storageENGLISH 21
DEVICE & LABEL SYMBOLSThese symbols may appear on your device, instructions or packagingand may vary by make and model.SYMBOL MEANINGRead This Manual—All included manuals should beread prior to first useWarning—Symbol indicates a warning, prohibition ormandatory action that mitigates a risk that is not necessarily obvious to the device operatorType BF Applied Parts—Indicates that a part of thisunit comes in contact with the patient in order to carryout it’s intended function; in the case of this device thecuff is the Type BF Applied PartEnvironment Protection—dispose of this productproperly; consult with your local recycling ordinancesfor proper recycling and disposalKeep Dry—This device should be kept dry; never submerge the unit or cuff. Consult with the Care and Maintenance section of this manual for information oncleaning your monitor Polarity Symbol—Polarity of D.C. power connector22 ENGLISH
DISPLAY SYMBOLSSYMBOLMEANINGSystolic Blood Pressure—The ‘top’ blood pressure resultDiastolic Blood Pressure—The ‘bottom’ blood pressureresultPulse Rate—Pulse rate per minute during the measurement LoLow Battery—Battery is low and should be replacedMillimeters of Mercury—Unit of blood pressuremeasurement for this deviceIrregular Heartbeat Icon—An irregular heartbeat wasdetected during the measurement Memory—The display shows the measurementsstored in memoryAverage—The display shows the average of the lastthree measurements in memoryMovement—There was excessive movement duringmeasurement and results may be affectedENGLISH 23
TROUBLESHOOTINGPROBLEMDisplayshows anabnormalresultDisplay isblank whenpower is on24 ENGLISHPOSSIBLE CAUSESOLUTIONCuff position was notApply the cuff properlycorrect or was not tight and attempt a newenoughmeasurementBody posture was notcorrect duringmeasurementReview the ‘Taking aMeasurement’ portion ofthis manual and attempta new measurementSpeaking, excessivemovement, angry,excited or nervousanxiety duringmeasurementWait a period of timeand attempt a newmeasurement after calmhas returned; do notspeak or move duringmeasurementBatteries may beexpired or installedimproperlyCheck the polarity of thebatteries and reinstall ifnecessary; replacebatteries with newbatteries
TROUBLESHOOTING - ERROR CODESCODECAUSESOLUTIONE1The cuff is not secure/nottight enough.Re-apply the cuff and attempt new measurement.E2The cuff is wrapped tootightly.Re-apply the cuff and attempt new measurement.E3The cuff pressure is overinflated.Relax for several minutes and attempt newmeasurementE 10E 11Excessive movement wasdetected during measurement.Remain still and attemptnew measurement.E 20E 21An error occurred duringmeasurement and the results are inaccurate.Relax for several minutes and attempt newmeasurementEexxA calibration error has occurred.A calibration error hasoccurred.If an error code persists or is not remedied, please contactCustomer Care at 866-326-1313.ENGLISH 25
FCC STATEMENTNOTE:POTENTIAL FOR RADIO/TELEVISION INTERFERENCE(for U.S.A. only)This product has been tested and found to comply with thelimits for a Class B digital device, pursuant to part 15 of the FCCrules.These limits are designed to provide reasonable protectionagainst harmful interference in a residential installation. Theproduct generates, uses, and can radiate radio frequency energyand, if not installed and used in accordance with theinstructions, may cause harmful interference to radiocommunications. However, there is no guarantee thatinterference will not occur in a particular installation. If theproduct does cause harmful interference to radio or televisionreception, which can be determined by turning the product onand off, the user is encouraged to try to correct the interferenceby one or more of the following measures: Reorient or relocate the receiving antenna Increase the separation between the product and thereceiver.26 ENGLISH
FCC STATEMENT Connect the product into an outlet on a circuit different fromthat to which the receiver is connected. Consult the dealer or an experienced radio/TV technician forhelp.POTENTIAL FOR RADIO/TELEVISION INTERFERENCE(for Canada only)This digital apparatus does not exceed the Class B limits for radionoise emissions from digital apparatus as set out in theinterference-causing equipment standard entitled “DigitalApparatus”, ICES-003 of the Canadian Department ofCommunications.Cet appareil numérique respecte les limites de bruitsradioeléctriques applicables aux appareils numériques de ClaseB prescrites dans la norme sur le materiel brouilleur:“Appareils Numériques”, ICES-003 édictée par le minister descommunications.Changes or modifications not expressly approved by the partyresponsible for compliance could void the user’s authority tooperate the equipment.ENGLISH 27
ELECTROMAGNETIC COMPATIBILITYTable 1For all ME EQUIPMENT and ME SYSTEMSGuidance and manufacture’s declaration - electromagnetic emissionsThis monitor is intended for use in the electromagnetic environment specified below.The customer or the user of this monitor should assure that it is used in such an environment.Emmission TestComplianceElectromagnetic Environment GuidanceRF emissionsCISPR 11Group 1This monitor uses RF energy only for its internalfunction. Therefore, its RF emissions are very lowand are not likely to cause any interference innearby electronic equipment.RF emissionsCISPR 11Class BHarmonic emissionsIEC 61000-3-2Class AThis monitor is suitable for use in allestablishments, including domesticestablishments and those directly connected tothe public low-voltage power supply network thatsupplies buildings used for domestic purposes.Voltage fluctuations/flickeremissions IEC 61000-3-328 ENGLISHComplies
ELECTROMAGNETIC COMPATIBILITYTable 2For all ME EQUIPMENT and ME SYSTEMSGuidance and manufacture’s declaration - electromagnetic immunityThis monitor is intended for use in the electromagnetic environment specified below.The customer or the user of this monitor should assure that it is used in such an environment.Electromagnetic Environment GuidanceImmunity TestIEC 60601 Test LevelElectrostaticdischarge (ESD)IEC 61000-4-2 6 kV contact 8 kV air 6 kV contact 8 kV airFloors should be wood, concrete orceramic tile. If floors are covered withsynthetic material, the relative humidityshould be at least 30 %.Electrical fasttransient/burstIEC 61000-4-4 2 kV for powersupply lines 1 kV forinput/output lines 2 kV for powersupply linesMains power quality should be that of atypical commercial or hospitalenvironment.Compliance LevelSurgeIEC 61000-4-5 1 kV line(s) to line(s) 1 kV line(s) to line(s) Mains power quality should be that of a 2 kV line(s) to earth 2 kV line(s) to earth typical commercial or hospitalenvironment.Voltage dips, short 5 % UT 5 % UTMains power quality should be that of ainterruptions and ( 95 % dip in UT)( 95 % dip in UT)typical commercial or hospitalvoltage variations for 0.5 cyclefor 0.5 cycleenvironment. If the user of this monitoron power supply 40 % UT40 % UTrequires continued operation duringinput lines(60 % dip in UT)(60 % dip in UT)power mains interruptions, it isIEC 61000-4-11 for 5 cyclesfor 5 cyclesrecommended that this monitor be70 % UT70 % UTpowered from an uninterruptible power(30 % dip in UT)(30 % dip in UT)supply or a battery.for 25 cyclesfor 25 cycles 5 % UT 5 % UT( 95 % dip in UT)( 95 % dip in UT)for 5 sfor 5 sPower frequency magnetic fields shouldPower frequency 3 A/m3 A/mbe at levels characteristic of a typical(50/60 Hz)location in a typical commercial ormagnetic fieldhospital environment.IEC 61000-4-8ENGLISH 29
ELECTROMAGNETIC COMPATIBILITYTable 3For ME EQUIPMENT and ME SYSTEMS that are not LIFE-SUPPORTINGGuidance and manufacturer’s declaration - electromagnetic immunityThis monitor is intended for use in the electromagnetic environment specified below.The customer or the user of this monitor should assure that it is used in such an environment.Immunity TestIEC 60601 Test LevelCompliance LevelConducted RFIEC 61000-4-63 Vrms 150 kHz to80 MHz3 VrmsRadiated RFIEC 61000-4-33 V/m 80 MHz to2,5 GHz3 V/mElectromagnetic Environment GuidancePortable and mobile RF communicationsequipment should be used no closer to any partof this monitor, including cables, than therecommended separation distance calculatedfrom the equation applicable to the frequency ofthe transmitter.Recommended separation distance:d 1. 280 MHz to 800 MHz800 MHz to 2,5 GHzWhere P is the maximum output power rating ofthe transmitter in watts (W) according to thetransmitter manufacturer and d is the recommended separation distance in meters (m).Field strengths from fixed RF transmitters, asdetermined by an electromagnetic site survey,*should be less than the compliance level in eachfrequency range.**Interference may occur in the vicinity ofequipment marked with the followingsymbol:d 1. 2d 2.3NOTE 1 At 80 MHz and 800 MHz, the higher frequency range applies.NOTE 2 These guidelines may not apply in all situations. Electromagnetic propagation is affected by absorption and reflection fromstructures, objects and people.* Field strengths from fixed transmitters, such as base stations for radio (cellular/cordless) telephones and land mobile radios, amateurradio, AM and FM radio broadcast and TV broadcast cannot be predicted theoretically with accuracy. To assess the electromagneticenvironment due to fixed RF transmitters, an electromagnetic site survey should be considered. If the measured field strength in thelocation in which this monitor is used exceeds the applicable RF compliance level above, this monitor should be observed to verify normaloperation. If abnormal performance is observed, additional measures may be necessary, such as re-orienting or relocating this monitor.** Over the frequency range 150 kHz to 80 MHz, field strengths should be less than 3V/m.30 ENGLISH
ELECTROMAGNETIC COMPATIBILITYTable 4For ME EQUIPMENT and ME SYSTEMS that are not LIFE-SUPPORTINGRecommended separation distances between portable and mobile RFcommunications equipment and this monitorThis monitor is intended for use in an electromagnetic environment in which radiated RF disturbances are controlled.The customer or the user of this monitor can help prevent electromagnetic interference by maintaining a minimumdistance between portable and mobile RF communications equipment (transmitters) and this monitor asrecommended below, according to the maximum output power of the communications equipment.Rated maximumoutputpower oftransmitterWSeparation distance according to frequency of transmitterm150 kHz to 80 MHz80 MHz to 800 MHzd 1. 2800 MHz to 2,5 GHzd 1. 2d ,87,3100121223For transmitters rated at a maximum output power not listed above, the recommended separation distance d inmeters (m) can be determined using the equation applicable to the frequency of the transmitter, where P is themaximum output power rating of the transmitter in watts (W) according to the transmitter manufacturer.NOTE 1 At 80 MHz and 800 MHz, the separation distance for the higher frequency range applies.NOTE 2 These guidelines may not apply in all situations. Electromagnetic propagation is affected byabsorption and reflection from structures, objects and people.ENGLISH 31
PRODUCT SPECIFICATIONSNameAutomatic Digital Blood Pressure Arm MonitorModel Number01-513BL, 01-513GR, 01-513PK, 01-513SLDisplay SystemDigital LCD display; 1.5” x 5.6”Measuring MethodOscillometric Method, Automatic Air Inflationand MeasurementPower Source4 x1.5VMeasuring RangePressure: 0-300 mmHg; .SIZE AAAPulse: 40-199 beats/minuteAccuracyPressure: 3 mmHg; Pulse: 5%DeflationAutomatic pressure release valveMemory60 measurementsAutomatic Power-OffApproximately 1 minute after last operationBattery LifeApproximately 1 month with normal usageOperation EnvironmentTemperature 41oF – 104oF (5oC – 40oC);Humidity 80% RH maxStorage EnvironmentTemperature -4oF – 140oF (-20oC – 60oC);Humidity 10% – 93% RH maxMonitor Dimensions7” x 3-7/8” x 1-1/2”Monitor Weight12.1 oz. (without batteries)Arm Circumference8-3/4” - 16-1/2” (22-42 cm)AccessoriesAdult arm cuff, storage case, Instruction Guidebook,four AAA alkaline batteries, Quick Start Guide,
Veridian Healthcare 1175 Lakeside Drive Gurnee, IL 60031 www.veridianhealthcare.com Made in China #93-1179 02/14 2014 Veridian Healthcare, LLC. 4 ENGLISH CARE & SAFETY INFORMATION Note:Read all instructions carefully before use. The following basic precautions are needed when using an electrical product.