Transcription
How do you ArchiveTags and Messages inanSQL Database withWinCC Advanced V15?WinCC (TIA Portal) Advanced / V15 / SQL /en/view/61886098SiemensIndustryOnlineSupport
This entry originates from Siemens Industry Online Support. The conditions of usespecified there apply (www.siemens.com/nutzungsbedingungen). Siemens AG 2018 All rights reservedSecurityInformationSiemens provides products and solutions with industrial security functions that support thesecure operation of plants, systems, machines and networks.In order to protect plants, systems, machines and networks against cyber threats, it isnecessary to implement – and continuously maintain – a holistic, state-of-the-art industrialsecurity concept. Siemens’ products and solutions only form one element of such aconcept.Customers are responsible to prevent unauthorized access to their plants, systems,machines and networks. Systems, machines and components should only be connectedto the enterprise network or the internet if and to the extent necessary and withappropriate security measures (e.g. use of firewalls and network segmentation) in place.Additionally, Siemens’ guidance on appropriate security measures should be taken intoaccount. For more information about industrial security, please mens’ products and solutions undergo continuous development to make them moresecure. Siemens strongly recommends to apply product updates as soon as available andto always use the latest product versions. Use of product versions that are no longersupported, and failure to apply latest updates may increase the customer’s exposure tocyber threats.To stay informed about product updates, subscribe to the Siemens Industrial SecurityRSS Feed under 123Introduction . 31.1Configuration Notes . 41.2Components Used . 4Configuration 1: Access to the SQL Server . 52.1Configure an SQL Database . 52.2Configure the Data Source (ODBC) . 8Configuration 2: Access to the SQL Server . 133.1Configure an SQL Database . 133.23.2.13.2.2SQL Database User Data Management . 14General Information. 14Authentication via the Windows Login . 153.3Windows Firewall Settings . 183.4Configure (Remote) the Data Source (ODBC) . 214Read Out/Display the SQL Database Table. 225WinCC (TIA Portal) . 255.1Archive Configuration . 255.2Operation of the Sample Application . 26SQL DatenbankzugriffEntry ID: 61886098, V2.0,04/20182
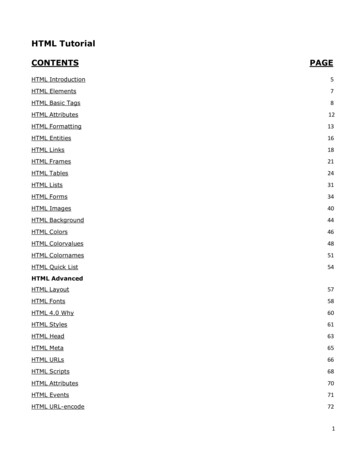
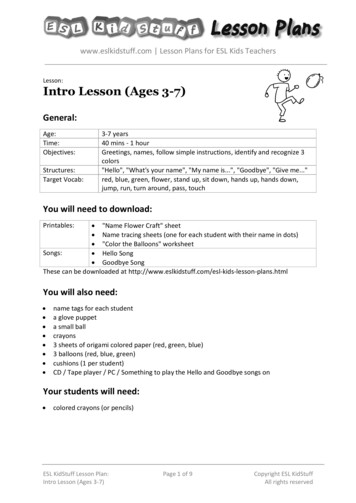
1 Introduction1IntroductionThe entry describes how to use WinCC Runtime Advanced V15 andMicrosoft SQL Server 2014 to archive tags and messages in aMicrosoft SQL database.Two configurations are described.Configuration 1, "Combined Installation" (Config. 1)There is one PC station (PC Station1) on which both the Microsoft SQL server and the WinCC Runtime Advanced run.The data of the WinCC Runtime Advanced is archived in the Microsoft SQLdatabase.Figure 1-1MS SQL-DatabaseWinCC RT Advanced Siemens AG 2018 All rights reservedPC-Station 1Configuration 2, "Separate Installation" (Config. 2)There is one PC station (PC Station1) on which the Microsoft SQL server runs.There are other PC stations (PC Station2 to "n 1") on which only the WinCC Runtime Advanced runs.The data of each WinCC Runtime Advanced station is archived in the MicrosoftSQL database of "PC-Station1".Figure 1-2PC-Station2RT AdvancedPC-Station1MS SQL-DatabaseRemoteSQL DatenbankzugriffEntry ID: 61886098, V2.0,04/2018PC-Station „n 1“RT Advanced3
1 Introduction1.1Configuration NotesNoteWhen "SQL database" is mentioned in the entry, this always refers to theMicrosoft SQL Database.The Microsoft SQL Database is a component of theMicrosoft SQL Server 2014.The entry includes the principal configuration steps for Siemens AG 2018 All rights reservedNote1.2 Creating an SQL database Archiving tags and messages in an SQL database.–Configuration 1:–Configuration 2: Output of the archived values via a trend display on the Comfort Panel. Output of the archived values via an SQL database table.There are numerous parameters and possible settings in an SQL database. Theentry can only deal with the settings required for this example.Components UsedWhen WinCC (TIA Portal) V15 is installed, the Microsoft SQL Server 2014 is alsoinstalled. You use the "Microsoft SQL Server Management Studio 17" tool to createand configure the SQL database.NoteThe "Microsoft SQL Server Management Studio 17" tool is not included in theWinCC (TIA Portal) delivery package. You can download the tool via theMicrosoft Support pages (https://support.microsoft.com).SQL DatenbankzugriffEntry ID: 61886098, V2.0,04/20184
2 Configuration 1: Access to the SQL Server2Configuration 1: Access to the SQL ServerThe SQL server and the WinCC Runtime Advanced are running together on onePC (PC Station1).2.1Configure an SQL DatabaseRequirementsThe following components must be installed on the PC. WinCC (TIA Portal) V15 Microsoft SQL Server 2014 Microsoft SQL Server Management Studio 17Furthermore you must have administrator rights.Establish a server connectionTable 2-1No.DescriptionOpen the "Microsoft SQL Server Management Studio 17" tool. Open the program folder under"Windows Start All Programs Microsoft SQL Server Tools 17". Start the tool via"Microsoft SQL Server Management Studio 17"."Microsoft SQL Server Management Studio 17" starts.2.Establish a connection to the server Siemens AG 2018 All rights reserved1. Via the drop-down list box you select the server on which the data is to bestored (1).If multiple servers are installed on the PC, then in the drop-down list box youselect the menu " Browse for more ".Under "Database Engine" you select the following server"Computer Name\WINCCPLUSMIG2014". The server you specify here isalso used for configuring the data source (ODBC) (link).Click the "Connect" button.The connection to the server is set up.SQL DatenbankzugriffEntry ID: 61886098, V2.0,04/20185
2 Configuration 1: Access to the SQL ServerNo.Description13.View of the established server connectionThe green arrow icon (1) indicates that the server connection is active. Siemens AG 2018 All rights reservedNow you can access databases already created and have the values displayed(2).How to have values displayed in the SQL database is described below (chapter4, "Read Out/Display the SQL Database Table").12Create a new databaseDatabases (Machine01, Machine02, for example) have already been created in theprevious section "Establish a server connection".In this section we describe how to create a new database. In this case we create adatabase named "Machine03".The name you use here is specified as reference when creating the data source(ODBC) (see the following table).SQL DatenbankzugriffEntry ID: 61886098, V2.0,04/20186
2 Configuration 1: Access to the SQL ServerTable 2-2No.Description1.First you execute Steps 1 to 3 in the "Establish a server connection" section,Table 2-1.2.Create a new database Siemens AG 2018 All rights reserved Right-click the file folder "Databases".In the pop-up menu that opens you select "New Database.".The "New Database" window opens. Enter a name in the window under"Database name:". The name is used subsequently when creating the datasource (ODBC) (link).For the menu item "Owner" and all the other parameters the default valueshave been accepted.Click "OK" to confirm the entries.3.View of the newly created database "Machine03".This completes the settings at this point.Note:In the course of the exercise the tags and messages will be archived in thisdatabase.SQL DatenbankzugriffEntry ID: 61886098, V2.0,04/20187
2 Configuration 1: Access to the SQL Server2.2Configure the Data Source (ODBC)An ODBC data source is used for establishing a connection to a Microsoft SQLServer.The configuration procedure is given below.Table 2-3No.1.DescriptionOpen the data source (ODBC) Open the Windows Control Panel.Windows Start Control Panel.Open the "Administration" menu.Open the menu "Data Source (ODBC)" menu. Siemens AG 2018 All rights reservedThe menu for configuring the ODBC Data Source opens (1).2.1Create new user data source In the menu bar you select the "User DSN" tab (1).Click the "Add." button (2).12SQL DatenbankzugriffEntry ID: 61886098, V2.0,04/20188
2 Configuration 1: Access to the SQL ServerNo.3.Description Select the driver "SQL Server" (1).Click "Finish".14. Name (1): Siemens AG 2018 All rights reserved– Here you enter the name that you have stored in the PC Runtime configuration in the archives under "Properties General Storagelocation". In this case "Database ArchiveMessage" (link).Server (2):– Via the drop-down list box you select the server that you selected whencreating the database server connection. In this case "HHPC\WINCCPLUSMIG2014" (link).Click the "Next " button.12SQL DatenbankzugriffEntry ID: 61886098, V2.0,04/20189
2 Configuration 1: Access to the SQL ServerNo.5.Description "Windows NT authentication" (1) is used in this example. If you select "SQLServer authentication" (2), you can specify the required Login ID andPassword in the bottom part of the window (3). You must have stored thedata previously under "Security" in the SQL database.Enable the "Connect to." check box (4).Click the "Next " button.When you click the "Next " button, the data source attempts to establish aconnection to the SQL server. If this does not work, you get an error message.In this case you should check:– That the SQL server has started.– The server name.– The security settings of the SQL database.– The user rights of the SQL database.12 Siemens AG 2018 All rights reserved43SQL DatenbankzugriffEntry ID: 61886098, V2.0,04/201810
2 Configuration 1: Access to the SQL ServerNo.6.DescriptionWhen the SQL server connection has been established, the following window isdisplayed. Enable the "Change the default database to:" option (1). Via the drop-down list box you select the database to be referred to (2).See the entries here that you stored when creating the SQL serverconnection. In this case "Machine03" (link).The values of the WinCC Runtime Advanced are archived in this SQLdatabase. In the screen you enable the two options displayed (3). Click the "Next " button.12 Siemens AG 2018 All rights reserved37. You select the option (1) as shown in the figure.Click the "Finish" button.1SQL DatenbankzugriffEntry ID: 61886098, V2.0,04/201811
2 Configuration 1: Access to the SQL ServerNo.8.DescriptionYou then get a summary of the settings that have been made. You can test theconnection via the "Test Data Source " button.Close the configuration via the "OK" button.1 Siemens AG 2018 All rights reserved9.The 1st menu screen is displayed again.The newly created user data source is displayed. In this case"Database ArchiveMessage".Via the "Configure " button you can call and change the settings that have beenmade (1).For this you first mark the name of the user data source.1This completes the settings for the data source (ODBC). Close the menu with the"OK" button.Now you can start the WinCC Runtime Advanced. Information about configuringthe WinCC Runtime Advanced is available in chapter 5, WinCC (TIA Portal).SQL DatenbankzugriffEntry ID: 61886098, V2.0,04/201812
3 Configuration 2: Access to the SQL Server3Configuration 2: Access to the SQL ServerThe SQL server runs on its own PC (PC Station1).The WinCC Runtime Advanced runs on separate PCs(PC Station2 to "n 1") and accesses the data of the SQL database remotely.The data of each WinCC Runtime Advanced station is archived in the MicrosoftSQL database of "PC Station1".In order for the PC stations to be able to access the SQL server of "PC Station1"with the WinCC Runtime Advanced, on the "PC Station1" settings have to be madeboth3.1 in the Windows user administration and in the user administration of the SQLserver, and in the Windows firewall.(Otherwise the firewall would block the incoming connection).Configure an SQL DatabaseEstablish a server connectionTable 3-1 Siemens AG 2018 All rights reservedNo.1.DescriptionThe configuration corresponds to the settings in section 2.1 "Configure an SQLDatabase".In this case the name of the server is:"Name of the PC Station1\WINCCPLUSMIG2014".Other settings In the Properties of the SQL server check that the "Allow remote connectionsto this server" option is enabled.– Right-click the SQL server and open the Properties. A window opens.– Under "Select a page" you mark the item "Connections" (1).In the "Remote server connections" section you enable the "Allow remoteconnections to this server" option (2).12SQL DatenbankzugriffEntry ID: 61886098, V2.0,04/201813
3 Configuration 2: Access to the SQL Server3.2SQL Database User Data ManagementThe settings are to be made on the PC on which the SQL server is installed. In thisexample the settings are made in the "PC Station1".3.2.1General InformationIn the later configuration of the data source (ODBC) you can choose whether theSQL server authentication is to be made Via the Windows login (1) or Via the user administration of the SQL server (2).The FAQ response describes the "Windows authentication".Figure 3-11 Siemens AG 2018 All rights reserved2Authentication via the Windows loginWhen authenticating via the Windows login the login data for the SQL server mustmatch the login data of the PC on which the WinCC Runtime Advanced is running.Example:You login as follows on the PC Station2 with the WinCC Runtime Advanced.User name:"User 1"Password:"100"In the "PC Station1" you must also create a user in the Window useradministration with the name "User 1" and the password "100".How to assign the user to the SQL database is described in the course of thisdocumentation (link).SQL DatenbankzugriffEntry ID: 61886098, V2.0,04/201814
3 Configuration 2: Access to the SQL Server3.2.2NotesAuthentication via the Windows Login You must be logged in as administrator on the "PC Station1".The SQL database provides numerous settings for access protection etc. At this pointone possible method of access protection is presented in an example.Table 3-2No.1.DescriptionPC Station1, create Windows userIn the "PC Station1" you create a Windows user. The user must have the samename and password as the user on the "PC Station2" on which the WinCCRuntime Advanced is running.In this example:User:hh Nickname, ( User1)Password:100 Siemens AG 2018 All rights reservedNote:The user must not be assigned to any special group.(Create new user under Windows 10).2.Note on the created userYou do not have to be logged in on the PC Station1 with the new "User1" in orderto operate the SQL database.SQL DatenbankzugriffEntry ID: 61886098, V2.0,04/201815
3 Configuration 2: Access to the SQL ServerNo.3.DescriptionPC Station1, SQL database, assign Windows user Siemens AG 2018 All rights reserved 4.In the SQL database you right-click the "Security" folder.In the pop-up menu that opens you select "New Login ". The "Login - New"page opens.PC Station1, "Login - New" page Select the "General" page (1).Enable the radio button "Windows authentication" (2).Click the "Search." button (3).The "Select User or Group" window opens.Via the window you call the previously created new Windows user. In thiscase "hh" (TIAV15WIN10\hh).Select the "User Mapping" page (4).1432SQL DatenbankzugriffEntry ID: 61886098, V2.0,04/201816
3 Configuration 2: Access to the SQL ServerNo.5.Description"User Mapping" page Here you define the database which the user "hh" is permitted to access.The final assignment is made in the settings of the data source ODBC (link).Select the "Server Roles" page (1). Siemens AG 2018 All rights reserved16."Server Roles" page 7.SQL DatenbankzugriffEntry ID: 61886098, V2.0,Activate the option boxes "sysadmin" and "public".Click "OK" to confirm the settings.This completes the user settings for Windows authentication.The user "hh" has been assigned automatically to all the databases selected onthe "User Mapping" page.If required, you can make further settings under "Name of the database Security Users”.04/201817
3 Configuration 2: Access to the SQL Server3.3Windows Firewall SettingsThe settings are to be made on the PC on which the SQL server is running. In thisexample on the "PC Station1".Table 3-3No.1.DescriptionEnable the firewall Call the Windows Firewall via"Windows Start Control Panel Windows Firewall".Click the text "Turn Windows Firewall on or off" (1).Another window opens.Click the "Turn on Windows Firewall" radio button. Acknowledge the entrywith "OK". You return this view.Note:The green icon indicates that the firewall is turned on (2).2 Siemens AG 2018 All rights reserved12.Add firewall ruleYou have to add a firewall rule to ensure that the incoming connection of the "PCStation2" is not blocked by the Windows Firewall of the "PC Station1". No rule isrequired if the Windows Firewall is turned off. First open the Windows Firewall again.Click the text "Advanced Settings". The following screen is displayed.Click "Inbound Rules" (1). A new window opens.1SQL DatenbankzugriffEntry ID: 61886098, V2.0,04/201818
3 Configuration 2: Access to the SQL ServerNo.Description3. In this window you click "New Rule " (2).The "New Inbound Rule Wizard" window opens. The program file of the SQLserver is called via the wizard.This measure ensures that incoming queries to the SQL server are no longerblocked by the Windows Firewall.24.New Inbound Rule WizardIn the first screen you select the "Program" radio button (1).Then click the "Next " button.In the second screen you select the "This program path:" radio button andthen click "Browse." (2). Siemens AG 2018 All rights reserved 12SQL DatenbankzugriffEntry ID: 61886098, V2.0,04/201819
3 Configuration 2: Access to the SQL ServerNo.5.Description Navigate to and mark the program file "sqlservr.exe". Make sure that youselect the correct file for the SQL database being used. This is particularlyimportant if there are different versions of the SQL server installed on thesame PC (see information under "Tip").Click the "Open" button.Then click the "Next " button. Siemens AG 2018 All rights reservedTip:Use the Windows Search function to make a prior search for the word"sqlserver.exe" on drive "C".If you have installed multiple SQL servers, then make sure you use the filecorresponding to the SQL server being used.6. 7.SQL DatenbankzugriffEntry ID: 61886098, V2.0,In the following screens the displayed default settings have been used.In the last screen you specify a name and close the wizard via the "Finish"button.This completes the settings for the Windows Firewall.Restart the PC or log out and log in again.04/201820
3 Configuration 2: Access to the SQL Server3.4Configure (Remote) the Data Source (ODBC)An ODBC data source is used for establishing a connection to a Microsoft SQLServer.The ODBC data source is configured on the PC on which the RT Advanced isrunning/installed.The configuration procedure is given below.NoteIf you cannot establish a connection to the remote server, this might be due tothe firewall of the operating system. For testing or during commissioning you cantry to turn off the firewall where the SQL database is installed. Bear in mind inthis case that you might run the risk of allowing access to unauthorized users.Table 3-4No. Siemens AG 2018 All rights reserved1.DescriptionThe configuration corresponds to the settings in section 2.2 "Configure the DataSource (ODBC) ".The only difference is in table item No. 4.For the menu item "Server" you now do not select the local server but the serverto which you want to have remote access and on which the SQL database isinstalled. Server:– Via the drop-down list box you select the remote server that you selectedwhen creating the database server connection. In this case "PCStation1\WINCCPLUSMIG2014" (link). Click the "Next " button.SQL DatenbankzugriffEntry ID: 61886098, V2.0,04/201821
4 Read Out/Display the SQL Database Table4Read Out/Display the SQL Database TableThe archived tag values of the HMI Runtime Advanced are stored in the assigneddatabase. Proceed as follows to output the archived values via the tool "MicrosoftSQL Server Management Studio 17".Table 4-1No.1.Description First perform the steps 1 to 3 as in section 2.1 "Configure an SQL Database".Select the database whose values you want to have displayed and open thefolder tree.Open the "Tables" file folder.The archive files are displayed in the folder. dbo.ArchivenameIn our example these are "dbo.Alarm log 10" and "dbo.Speed Monitoring0". Siemens AG 2018 All rights reservedNote:The "0" in the file name is generated by the system.SQL DatenbankzugriffEntry ID: 61886098, V2.0,04/201822
4 Read Out/Display the SQL Database Table Siemens AG 2018 All rights reservedNo.Description2. 3.When you enable the "New Query Editor Windows" function the script shown inthe screen is generated automatically. The script includes the function that readsout the values of the selected archive file.Click "Execute" (1) in the toolbar.Right-click the archive file.Navigate to the menu item shown in the screen.1SQL DatenbankzugriffEntry ID: 61886098, V2.0,04/201823
4 Read Out/Display the SQL Database TableNo.4.DescriptionThe figure shows the table with the values read out of the archive file after runningthe "Execute" function.To update the table you click the "Execute" function (1) again in the toolbar. Siemens AG 2018 All rights reserved1SQL DatenbankzugriffEntry ID: 61886098, V2.0,04/201824
5 WinCC (TIA Portal)5WinCC (TIA Portal)5.1Archive ConfigurationYou configure the archives in the usual manner. The only difference is in thespecification of the storage location and the data source.Table 5-1No.Description1.You call the archive via the project tree and open the Properties.In this example: "Speed Monitoring".2.Define the storage location Siemens AG 2018 All rights reserved You define the storage location in the menu "Properties General". Selectthe "Database" menu from the drop-down list box (1).Enter the name of the data source (2).This name is used to address the ODBC database with the archived tagnames (link).123.SQL DatenbankzugriffEntry ID: 61886098, V2.0,This completes the Special Settings for archiving in the SQL database.If you are using other archives, you can use the same data source name.04/201825
5 WinCC (TIA Portal)5.2Operation of the Sample ApplicationThe sample application is for testing the tag archiving and message archiving.Table 5-2No.1.Description"Theme A" pageThe "SimulateTag" function is used to assign speed values to the three motorsdisplayed.The simulated values are archived in an SQL database. You call the page witha trend archive via the " " button (1).The speed values archived in the database are read out via the trend archive.Via the icon (2) you call the system page to terminate the Runtime. Siemens AG 2018 All rights reserved212."Theme B" pageYou use the buttons to simulate fault messages.The simulated messages are archived in an SQL database.SQL DatenbankzugriffEntry ID: 61886098, V2.0,04/201826
Archiving tags and messages in an SQL database. - Configuration 1: - Configuration 2: Output of the archived values via a trend display on the Comfort Panel. Output of the archived values via an SQL database table. Note There are numerous parameters and possible settings in an SQL database. The


![March 3rd, 2017 [Manage Archive in Microsoft Outlook 2016]](/img/34/archive-outlook-2016.jpg)