Transcription
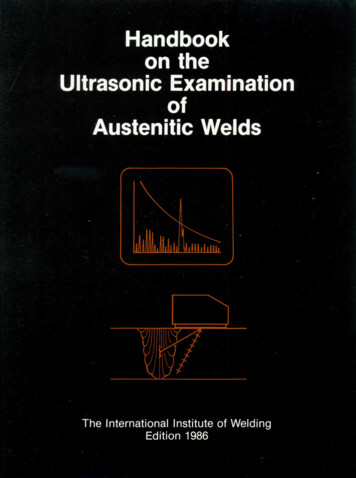
Handbookon theUltrasonic ExaminationAustenitic WeldsThe International Institute of WeldingEdition 1986
HandbookOn theUltrasonicExamination ofAustenitic WeldsCompiled byCOMMISSION V — Testing, Measurement,and Control of WeldsofTHE INTERNATIONAL INSTITUTEOF WELDINGPublished on behalf ofTHE INTERNATIONAL INSTITUTEOF WELDINGbyTHE AMERICAN WELDING SOCIETY550 NW LeJeune Road, P.O. Box 351040, Miami, FL 331351986
CONTENTSLIST OF WORKING GROUP .3Scope and ApplicationParticular Problems Involved in the Examination ofAustenitic WeldsPrinciple of the 5.43.5.53.63.73.8PersonnelRequired Information about the WeldsWelding samples availableAbsence of weld samplesSurface Preparation and MarkingCondition of the Parent MetalAgreements Before the Start of the ExaminationExtent of the examinationSensitivity requiredSpecial conditionsRegular check of equipmentReportingVisual InspectionSurface ucture of Austenitic WeldsEffects of Austenitic Structures on Ultrasound PropagationUltrasound propagation in an anisotropic structureVariation of velocityBeam directionBeam deformationEffect of the weld fusion facesReflectionRefractionMode conversionInteraction with defectsAttenuation in weld metalInfluence of weld metal on pulse characteristicsPulse spectrumInfluence of attenuation of the ultrasonic pulseScattered ultrasoundPractical implications for ultrasonic testing on austenitic weldsDefect locationAmplitude 6Conditions to be Established prior to the ExaminationUltrasonic Propagation BehaviorDescription of EquipmentIntroductionFlaw Detector, Cables and MatchingAngled Longitudinal Wave ProbesIntroductionGeneral propertiesSingle crystal probesTwin crystal probesSurface wave probesFocussing 16161718181818181919191920202223
7.77.7.17.7.27.7.2.17.7.2.27.7.2.37.8Calibration and CharacterizationIntroductionCalibration BlocksSteps in Time Base SettingProbe Characterization BlockSteps in Characterizing the ProbesIntroductionProbe index for angled longitudinal wave probesDistance amplitude curve, beam angle and beam widthDistance amplitude curveBeam angleBeam widthAmplitude behavior for different reflectors(for TRL or Focussing Probes)Estimation of dominant frequency and bandwidthDead zone and near fieldNominal signal to noise ratioDevelopment of an Examination ProcedureOutline of ActivitiesPreparation of Preliminary ProcedurePreparation of Reference BlockGeneralArtificial reflectorsSelection of ProbesWave typeProbe angleFrequencyTypeSize and geometry of probe and componentUse of Reference Blocks to Establish DAC-CurvesSensitivity SettingIntroductionSetting test sensitivityRecording levelAcceptance criteriaPreparation of Detailed ProcedureWritten procedure requirementsGeneral examination requirementsExamination coverageRate of probe movementScanning sensitivityAssessment of Procedure and Documentation8.Inspectability of the Component Compared tothe Reference Block8.18.28.38.4IntroductionSurface ConditionsGeometrical ConditionsComparison of Attenuation Between Reference Blockand ComponentSignal to Noise RatioWeld 0404041419.9.19.29.3ReportingEvaluationAdditional Investigations4141414110.General Recommendations and Comments43Reporting and Evaluation
Until recent years, austenitic steel welds werewidely regarded as uninspectable by ultrasonics.Research and development have made it possiblefor a useful level of examination to be carried outin many situations. In general, though, the methods are more complicated and the capabilitiesmore limited than for the examination of welds inferritic steel. The main practical implications ofthis are(1) Welding procedure and preparation geometry have a strong influence upon the capabilitiesof ultrasonic examination, so that careful consideration of these factors at the design stage can bevery beneficial to the examination.(2) Many technical aspects of the examinationsare strongly influenced by the particular weldstructure so that only skilled, specially trainedoperators with a full appreciation of the physicalbasis of the examination should be employed.(3) The capabilities for defect detection, positioning and size assessment are more limited thanfor ferritic weld examination. So, monitoring theoccurence of small defects can rarely be used forthe quality control of welds, as is usual with ferritic welds. Rather, it may be necessary to usefracture mechanics to set less rigorous defectacceptance standards for the particular component. These acceptance standards should be compatible with the limitations of the ultrasonictechniques.(4) The limited capabilities imply that it is prudent to supplement ultrasonic examination withradiography and surface examination techniquesto a greater extent than is necessary with ferriticwelds.2. INTRODUCTIONThis Handbook does not contain defect indication acceptance criteria.2.1 Scope and Application2.2 Particular Problems Involved in theExamination of Austenitic Welds1. GENERALThis Handbook gives recommendations for theultrasonic examination of austenitic welds by manual scanning techniques which use the pulseecho method and A-Scan presentation. The samerecommendations can be extended to mechanicalscanning techniques if special procedures areprepared for the data recording system.The Handbook advises on how to devise procedures for the detection, location, and evaluationof ultrasonic indications of weld defects. Techniques involving the use of advanced instrumentation for signal processing might give betterdetection and identification of flaws but are notcovered in this document.The applications covered are limited to buttwelds with weld metal of similar composition tothe parent material. For dissimilar weld metals orfor non butt weld geometries, procedures may bebased on the general advice of this Handbook,provided attention is paid to the requirements ofthe specific geometry and material.The recommendations given are primarily aimedat post fabrication rather than in-service inspection. Many sections of the Handbook will be relevant to both situations, but consideration of thespecific problems of in-service inspection is outside the scope of this document.The term austenitic covers a variety of materialsand material combinations, including austeniticstainless steels and nickel chromium alloys suchas "Inconel", "Incoloy", etc. The capabilities ofultrasonics for the examination of welds in austenitic materials are restricted compared to theferritic case because of the presence of largeelongated anisotropic grains (dendrites), oftenforming an ordered columnar structure, which arecharacterisitic of the austenitic weld metal. Thistype of grain structure can lead to anisotropicultrasonic behavior contrasting with the isotropicbehavior of homogenous welds made in carbon orlow alloy steels.The size, the arrangement, and the elasticanisotropy of the different grains result in highscattering associated with mode conversion effects, beam distortion, and a variation of ultrasound velocity with direction and position in theweld. The scattering of energy is observed as arelatively high noise level (grass) and high attenuation.The problems which occur in ultrasonic testingof austenitic welds differ according to the parentmaterial production method (rolled, drawn, forged,or cast), the weld processes, and the heat treat-
ment as well as the composition of the parent andweld metals.The guidelines given in this Handbook takeaccount of the above factors to indicate howoptimum test procedures can be prepared.2.3 Principle of the MethodThe ultrasonic methods applied to austeniticwelds follow basically the same principles asthose described in the Handbook on the Ultrasonic Examination of Welds. Some importantdifferences do exist, however, which influence theultrasonic method to be used and have implications for the capability of ultrasonics to detect,locate, characterize, and to estimate the size ofweld defects. The most important of these differences are the following:(1) Scattered energy from natural metallurgicaldiscontinuities generates noise indications athigher amplitude than would be expected for thecase of ferritic welds. The choice of wave mode(longitudinal, shear) and probe characterisitics(sound field, frequency, bandwidth, etc.) shouldbe optimized to allow a reliable separation of weld3. CONDITIONS TO BEESTABLISHED PRIOR TO THEEXAMINATIONSince austenitic weldments present greater difficulties for ultrasonic testing than ferritic ones,the preparation of ultrasonic procedures requiresmore attention. In "general, it is considered ofgreat importance that operators should be informed about relevant details of weld fabrication,as given in section 3.3.2. Particular written procedures which specify the examination conditionsand detailed ultrasonic techniques must be prepared in conjunction with metallurgists and NDToperators and need to take account of informationthat can be considered as fabrication know-how.3.1 PersonnelThe personnel applying this type of examination should be chosen from the best teams of6defect indications from noise indications (see section 4.2).(2) The ultrasonic beam has to cross differentregions in the parent metal and in the weld itself.The velocity of sound may vary along this path(see section 4.2) and this may change the direction of the sound beam. Consequently, this mayresult in inaccuracy in determining reflector positions.(3) Attenuation in the weld metal is generallymore severe than for ferritic welds and can bemore or less pronounced depending on the angleof the beam with respect to the preferred orientation direction of the grain structure. Therefore,the ultrasonic technique should seek to minimizebeam path length in the weld metal and, wherepossible, aim to take advantage of any directionsof reduced attenuation in the weld.(4) Beam divergence can also be directionallydependent. The beam profile is usually differentfrom that measured in parent plate (whether ferritic or austenitic) so that size estimation methodswhich depend on a knowledge of the beam profile, such as the so-called dB drop methods, arenot always suitable on austenitic welds.(5) Conventional instruments are used for examinations, but in most cases, special probes needto be applied (see section 5.3).ultrasonic operators and be qualified at least tolevel two or equivalent. Their organization shouldsubmit them regularly to requalification tests particularly oriented to austenitic materials. As wellas having good qualifications and sufficient experience in ultrasonic techniques, the personnelconcerned should be trained on representativesamples of austenitic welds to acquire specificexperience in distinguishing defects from noiseand spurious indications. For this they need thefollowing:— to be familiar with refraction/reflection rulesand mode conversions— to have experience in the use of specializedprobes (e.g. angled longitudinal wave probes)and flaw detectors (e.g. selectable bandwidth)— to have received appropriate instruction inthe metallurgy of this type of material inorder to be capable of determining the bestapproach for the examination, including howto relate defects and indications in the weldand in the parent metal— to know the capacity of other NDT methods
Calibration Blocks Steps in Time Base Setting Probe Characterization Block Steps in Characterizing the Probes Introduction Probe index for angled longitudinal wave probes Distance amplitude curve, beam angle and beam width Distance amplitude curve Beam angle Beam width Amplitude behavior for different reflectors (for TRL or Focussing Probes) Estimation of dominant frequency and bandwidth Dead .
