Transcription
Migration Guide: RemoteAdministration to theNew AVG ConsolesFor more help or troubleshooting, please visit our online documentation:https://businesshelp.avast.com/
Table of ContentsMigration Guide: Remote Administration to the New AVG Consoles1Table of Contents . 2Migrating from Remote Administration to the New AVG Consoles . 4Devices . 4Windows XP and VistaDevices . 4Remote Administration Console . 4Other . 5Remote Administration XML File Contents . 5Exclusions . 5Scan . 5Anti-Spam . 6Settings . 6Migrating to the AVGCloud Console (Recommended) . 7Setting Up Your Cloud Console . 7Exporting and Importing XML File . 7Migrating Your Devices . 9Migrating to the AVGOn-Premise Console .11Setting Up Your On-Premise Console .11Exporting and Importing XML File .11Migrating Your Devices .12Migrating Offline Networks .14Configuring the Offline On-Premise Console .14Requirements for Offline Configuration: .14Configuring the Offline Console .14Using the Updates Download Tool .15Table of Contents2
Updating Clients Using Mirror .15Locating Your Wallet Key (for Partners and Distributors) .16Adding Clients from the Offline Console .16Downloading Installer .16RA to New AVG Console Migration FAQ .18Business Console Token Missing? .18Receiving error message when importing my XML file? .19Dashboard Widgets, Reports, and Tasks do not populate after moving devices fromAVG Remote Administration to AVG Business Management Console? 19Table of Contents3
Migrating from Remote Administration to the New AVGConsolesDevices Ensure your devices are running AVG Business version 20.5 or newer Your devices must be online and have access to the internet. If you are usingoffline configuration with the On-Premise Console, see Migrating OfflineNetworks. Devices may request a reboot; this is usually due to restarts that were previouslypending, particularly if the devices have recently updated Clients you transfer from Remote Administration to the new AVG BusinessManagement Consoles will continue to use port 4158 for communication betweenthe clients and the consoleWindows XP and VistaDevices These devices only support installations of AVG client version 18.8 and will not beincluded in the XML export Customers with these devices will need to contact Business Technical Support forguidance on migrating these devicesRemote Administration Console Ensure a full, valid AVG license number is entered into your RemoteAdministration Console Update your Remote Administration Console to the latest version. If you are notprompted by the Console, you can download and run the installer file manually: 64 bit:https://s-install.avcdn.net/remote-admin/avg admin x64 all.exe 32 bit:https://s-install.avcdn.net/remote-admin/avg admin x86 all.exe If you have more than one Remote Administration console using the same AVGlicense or multiple licenses and you want to move all of your devices to oneconsole, it is recommended that you contact our support team so that we canmerge the licenses together and provide you with more information on theupgradeTable of Contents4
Other If you are using a LAN Gateway firewall, it is recommended that you whitelist ourdomain (*.avg.com) for communication between devices and consoles If you are using a proxy server for your devices, when you get to the point in theupgrade wizard of creating your AVG Business Management Console account,please set your proxy details in the Console after importing your XML file (seeConfiguring Proxy Settings for Devices) The XML file that is exported from Remote Administration only contains GroupSettings. Global settings from Remote Administration are not part of the XMLexport file You will be provided with a new AVG license key (wallet key) during the UpgradeWizard in AVG Remote Administration, which you can copy for safekeeping if youwishRemote Administration XML File ContentsThe following settings from AVG Remote Administration will be transferred to the newAVG Business Management Consoles. Group policies will be part of the XML file.Exclusions All shield exclusions (files and URLS) File Shield Scan Web Shield Firewall Email Shield Behavior ShieldScan Settings ExceptionsTable of Contents5
Anti-Spam Whitelist Blacklist Local and Exchange pluginSettings File Shield Web Shield Email Shield Behavior Shield Firewall Sandbox Self-Defense Scan Update and Program Exchange and SharePoint General Settings Password settingsTable of Contents6
Migrating to the AVGCloud Console (Recommended)Setting Up Your Cloud ConsoleEach new step assumes you have clicked Next in the Wizard to proceed.1. Launch AVG Remote Administration, which will open the Upgrade Wizard2. Read over the steps the Wizard will take you through for the migrationo You can access more detailed upgrade information on our AVGRemote Administration Upgrade Page3. Read and accept the terms & conditions and the information on the Upgrade Pageby checking the boxes4. Review your current license(s) and the license you will have after the upgradeo If you have multiple licenses for the same AVG edition, yourlicenses will be merged normally. If you have multiple licenses fordifferent AVG editions, you will be provided with one licensenumber which will have containers for each AVG edition5. Select AVG Business Cloud Management Console (Recommended)6. Click Create Cloud Console Account, which will open a browser to the AVGBusiness Cloud Console registration page.7. Enter your details and register; once your account is created, your new AVGlicense key will be automatically entered into your Cloud Console for you. Thenreturn to the Upgrade Wizard.o If your license number was not correctly entered into your CloudConsole, you may be presented with an ‘Enter your license numberbox’. If this is the case, please click on the Next button in theWizard and click on the Get Wallet Key button which will provideyou with your new AVG license key to paste into your CloudConsole.Exporting and Importing XML File1. Click the "here" link to save the XML file with your devices, settings, and groups toa location on your computer (see Remote Administration XML File Contents)Table of Contents7
2. Return to the web browser where you are logged in to the Cloud Console, thennavigate to General Settings Transfer From Other Console3. Click Import XML, locate the XML file you just saved, and import it into yourCloud Console. You will be provided with a summary of groups and devices youwill be importing4. Click Copy installation token to the clipboard5. Return to the Upgrade Wizard, and paste the token into the Business Consoletoken fieldo If desired, you can click Get Wallet key to copy your new AVGlicense number6. Click FinishTable of Contents8
Migrating Your Devices1. In the Remote Administration Console, highlight the devices you would like tomigrate2. Right-click, then select Move to AVG Business3. Your devices will begin to transfer and should appear in the AVG Business CloudConsole4. If you have AVG Antivirus, File Server, or Email Server Business Editions, go toyour Cloud Console. Then navigate to the Devices page, select all of your devices,Table of Contents9
click Actions Change subscription, select your new license number, thenclick ApplyYou can transfer devices over any period of time (Example: You can transfer somedevices on one day, some the day after and so on). The transfer of devices can takehours.IMPORTANT: The final step in the migration processrequires you to initiate the “Move to AVG Business”command in your old AVG Remote Administrationconsole. This will get your devices out of “Pending”status.Table of Contents10
Migrating to the AVGOn-Premise ConsoleSetting Up Your On-Premise ConsoleEach new step assumes you have clicked Next in the Wizard to proceed.1. Launch AVG Remote Administration, which will open the Upgrade Wizard2. Read over the steps the Wizard will take you through for the migrationo You can access more detailed upgrade information on our AVGRemote Administration Upgrade Page3. Read and accept the terms & conditions and the information on the Upgrade Pageby checking the boxes4. Review your current license(s) and the license you will have after the upgradeo If you have multiple licenses for the same AVG edition, yourlicenses will be merged normally. If you have multiple licenses fordifferent AVG editions, you will be provided with one licensenumber which will have containers for each AVG edition5. Select AVG Business On-Premise Management Console6. Download and install the On-Premise Console (see Installing the On-PremiseConsole (Windows)), at which point you will be prompted for your new AVGlicense keyo Retrieve your new Wallet Key by clicking Next in the Wizard, thenclicking Get Wallet KeyExporting and Importing XML File1. Click the "here" link to save the XML file with your devices, settings, and groups toa location on your computer (see Remote Administration XML File Contents)2. Return to the On-Premise Console, then navigate to General Settings Transfer From Other Console3. Click Import XML, locate the XML file you just saved, and import it into your OnPremise Console. You will be provided with a summary of groups and devices youwill be importing4. Click Copy installation token to the clipboardTable of Contents11
5. Return to the Upgrade Wizard, and paste the token into the Business Consoletoken fieldo If desired, you can click Get Wallet key to copy your new AVGlicense number6. Click FinishMigrating Your Devices1. In the Remote Administration Console, highlight the devices you would like tomigrateTable of Contents12
2. Right-click, then select Move to AVG Business3. Your devices will begin to transfer and should appear in the AVG Business OnPremise Console4. If you have AVG Antivirus, File Server, or Email Server Business Editions, go toyour On-Premise Console. Then navigate to the Devices page, select all of yourdevices, click Actions Change subscription, select your new license number,then click ApplyYou can transfer devices over any period of time (Example: You can transfer somedevices on one day, some the day after and so on). The transfer of devices can takehours.Table of Contents13
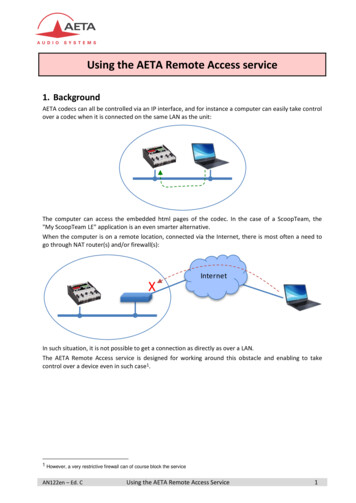
IMPORTANT: The final step in the migration processrequires you to initiate the “Move to AVG Business”command in your old AVG Remote Administrationconsole. This will get your devices out of “Pending”status.Migrating Offline NetworksCustomers with offline networks will not be able to complete the migration using theUpgrade Wizard. Devices will need to be manually added to the AVG Business OnPremise Console.Configuring the Offline On-Premise ConsoleRequirements for Offline Configuration: at least one network adapter enabled on the station the download tool requires .NET 4.5 for Windows the download tool will work when a proxy is being used as long as the proxy isconfigured in the policy for the Master Agent/Update Mirror deviceConfiguring the Offline ConsoleIf you are using the On-Premise Console, you have access to a standalone AVGUpdates Download Tool for offline or isolated networks, which will download necessaryprogram and virus definition update files.1. Install the On-Premise Console using the guidelines above; however, ensure youtick the Offline Operation check box during setupo Existing installations can be altered for offline functionality — seeSetting Online On-Premise Console to Offline. If you would ratheruninstall and reinstall the Console, you can move your database tothe new Console by following the instructions in Backing Up andMoving the On-Premise Database2. Log in to the On-Premise Console. You should be brought to theOffline Configuration tabTable of Contents14
3. On a device with access to the internet, download the AVG Updates DownloadTool (located here)4. The download tool will download all necessary update fileso You will need your Wallet Key (see Locating Your Wallet Key (forPartners and Distributors))5. Copy the offline folder from the download location (default ader) to C:\ProgramFiles\AVG\Management Console\console on the device with Console installed6. On the Offline Configuration page, click Check Configuration. If all files are inplace, you should be redirected to the DashboardUsing the Updates Download Tool1. Run AVGUpdatesDownloader.exe.2. (Optional) Change the download location using the Browse button.3. Insert wallet key.4. Click Download.Alternatively, if you would like to use Command Line, run the following command:.\AVGUpdatesDownloader.exe /auto /lic "XXXXXX-XXXXXX-XXXXXX"/dir C:\\AVGDownloaderWhen download is complete, two folders are created: \offline: appremover.exe, license, latest version information, ccupgrade.exe,Agent and AV offline installers (this folder used by the Console) \updates: program and virus definition update files for clients (this folder usedby device set as mirror)Updating Clients Using MirrorAfter client installation you must set up one device in your network as an UpdateMirror (master agent) for providing updates to other devices.When the Mirror is ready, copy the updates folder to it and create the configurationfile on the device:Table of Contents15
1. Copy the updates folder from the AVG Updates Download location (default ader) to2. In C:\ProgramData\AVG\Busienss Agent\updates\, create file with filename mirror-updates.cfg3. Add to the file: [Updates]DisableUpdateDownloading 1Program updates could take approximately 20 minutes to complete, andAnti-Spam definition updates are not supported in offline networks.Locating Your Wallet Key (for Partners and Distributors)If you have been provided with an Activation Code for your On-Premise Console, youwill need to register the code to receive your Wallet Key. Activation Codes normallyprovided when licenses are purchased will not work within the Offline Console, as thecodes have to be validated over the internet. Direct Customers, however, will receive anemail with the Wallet Key, and can use that in their Console.AVG customers should simply contact Business Technical Support to be provided thecorrect Wallet Key.Adding Clients from the Offline ConsoleDownloading Installer1. Select which type of installer you need: Windows .exe (for workstations and servers) Windows .msi (for deployment using GPO)2. Select the subscription products3. Click Advanced Settings to view the following options4. Choose the Group and Policy the device will useo If desired, you can activate your devices and select thesubscriptions to use after installation by checking the box with thatoption.Table of Contents16
5. Choose whether to automatically remove competitive antivirus products on thedeviceo The option to remove competitive antivirus products is checked bydefault. We recommend that you leave this option checked wheninstalling the Antivirus service.6. Select the installer size (Light vs Full)o If you select Light, the other services will be downloaded uponinstallation of the Antivirus agent. This option is not recommendedif you are installing Antivirus on multiple devices at the same, aseach machine will individually contact AVG servers to download theother services.7. Ensure you have defined the correct Proxy Server, if any, in the policy you areapplying to the device8. Click Download now and specify where to save the installation package(avg business agent setup.zip)–such as on a flash drive or network drive9. Unzip the folder and run avg setup.bat on the end devices.10. When prompted after installation, restart the device.Table of Contents17
RA to New AVG Console Migration FAQBusiness Console Token Missing?If you are trying to migrate your devices but find the Business Console Token ismissing (from the On-Premise Console), do the following:1. Log in to the On-Premise Console2. Click General Settings, then Transfer from Another Console3. Press F12 in the browser to open developer tools4. Select the Network tab5. Click the Copy Installation Token button6. Locate"service?serviceName InstallationPackageWS&operationName String" from the list in the dev tools menu,and copy the response to a notepad7. The installation token will be in quotes after "operationResult"o When copying the token, do not copy the quotation marks.8. Use the copied token in your Migration Wizard to begin transferring your devicesTable of Contents18
Receiving error message when importing my XML file?If you receive an error message stating "You are trying to upload an XML file whichdoes not match the product your company is using" when inserting your AVG RemoteAdministration XML file into your AVG Business Management Console, this is due toyour shared license number settings in AVG Remote Administration.To resolve the issue:1. Open AVG Remote Administration Console2. In the left menu, click Licenses3. Right-click Shared Settings and add your AVG Business Edition license numberYou will now be able to insert your XML file successfully into your AVG BusinessManagement Console.Dashboard Widgets, Reports, and Tasks do not populate aftermoving devices from AVG Remote Administration to AVGBusiness Management Console?Sometimes after you have moved your devices from AVG Remote AdministrationConsole to your new AVG Business Management Console (Cloud or On-Pemise), it cantake some hours for your devices to register to our servers. During this time you mayexperience no widgets on your dashboard, no data in your reports or inability to createtasks.Table of Contents19
To resolve the issue, you can simply restart your devices after they have moved fromAVG Remote Administration Console to your new AVG Console, or you can wait forapproximately 12 hours for those devices to complete registration to your new console.Table of Contents20
If you have AVG Antivirus, File Server, or Email Server Business Editions, go to . number which will have containers for each AVG edition 5. Select AVG Business On-Premise Management Console 6. Download and install the On-Premise Console (see Installing the On-Premise . download the AVG Updates Download Tool (located here) .
