Transcription
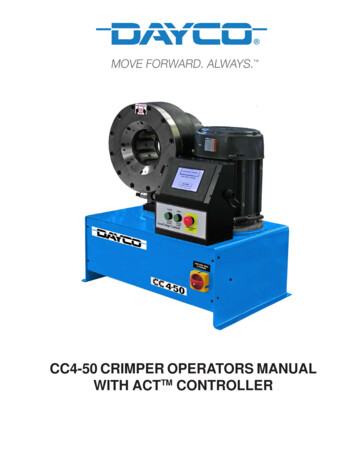
Page 1CC4-50 CRIMPER OPERATORS MANUALWITH ACTTM CONTROLLER
Page 2WARNING - SAFETY NOTEIMPORTANT - DO NOT OPERATE THIS EQUIPMENT UNTIL YOU READ AND FULLYUNDERSTAND THIS MANUAL AND ITS ASSEMBLY INSTRUCTIONSALWAYS WEAR EYE PROTECTIONWARNING!! USE ONLY THOSE HOSE AND COUPLING COMBINATIONS ANDCRIMPING EQUIPMENT SPECIFIED IN DAYCO HYDRAULIC PUBLISHEDLITERATURE. DAYCO RECOMMENDATIONS ARE BASED ON TESTING,AND USE OF HOSE AND COUPLING COMBINATIONS OTHER THAN THOSERECOMMENDED BY DAYCO CAN RESULT IN SERIOUS INJURY, DEATH ORSUBSTANTIAL PROPERTY DAMAGE. DAYCO DISCLAIMS ALL LIABILITYFOR ANY HOSE AND COUPLING ASSEMBLY THAT IS NOT MADEACCORDING TO DAYCO RECOMMENDATIONS. CONSULT YOUR LOCALDAYCO REPRESENTATIVE OR DAYCO DISTRIBUTOR IF YOU HAVE ANYQUESTIONS.DAYCO CC4-50 MANUAL (REV 8/29/2006)
INDEXPage 3COMPONENT PARTS IDENTIFICATION --------------------4SPECIFICATIONS AND INITIAL SET UP ---------------------5ACTTM CONTROL PANEL OPERATION ----------------------6DIE SET UP AND INSTALLATION ----------------------------13HYDRAULIC DIE INSTALLATION -----------------------------14AccuStopTM COUPLING --------------------------------------15INITIAL SETUP AND MAINTENANCE -----------------------16HOSE -----17TROUBLESHOOTING RIMP MITED --------------------------------------21
CRIMPER COMPONENT PARTSPage 4ACTTM CONTROL PANEL SEE SEPARATE PAGECRIMPER HEADOIL FILLER CAPMASTERPOWERSWITCHOIL LEVEL SIGHTGLASSFOOT SWITCHPLUG IN PORTFOOT SWITCHTANK DRAIN AND OILCOOLER PORTS
CRIMPER SPECIFICATIONS & SET UPPage 5SPECIFICATIONS:MAX HEAD OPENING W/O DIES ------------------------------------168 MM (6.62 IN)MASTER DIE INSIDE DIAMETER ------------------------------------130 MM (5.11 IN)MAXIMUM DIE OPENING ---------------------DIE CLOSED DIAMETER 38 MMCRIMPER SIZE ----------------------------29 IN LONG X 20 IN DEEP X 32 IN HIGHWEIGHT -----------------------573 LB (269 KG)ELECTRICAL REQUIREMENTS --------------220 VOLT 3 PHASE ----------------------440 VOLT 3 PHASE (OPTIONAL)MOTOR --------------------------------------7.5 HPRESERVIOR CAPACITY ---------8 US GALOIL TYPE ----------ISO 46 HYDRAULIC OILMASTER DIES --------------------------------145MM I.D. MASTER DIE STANDARDADAPTER DIES -----------------------------99 MM I.D. ADAPTER DIES INCLUDEDHOSE CAPACITY --------2 INCH 6 --------------------------------2-1/2 INCH INDUSTRIALINITIAL CRIMPER SET UPCHECK RESERVIOR OIL LEVEL WITH SIGHT GLASS AT REAR OF TANKCHECK ELECTRICAL CIRCUIT TO BE CERTAIN THAT IT MATCHES THE CRIMPER REQUIREMENTSSHOWN ON THE TAG ATTACHED TO THE CRIMPER CORD.MAKE CERTAIN THAT MOTOR ROTATES IN THE DIRECTION OF THE ARROW SHOWN ON THE MOTORHOUSING.IF MOTOR ROTATION IS INCORRECT REVERSE ANY TWO HOT WIRES IN THE CRIMPER PLUG.SEE INITIAL SETUP AND MAINTENANCE SECTION
AccuCrimp ACTTM CONTROL PANELPage 6Patent(s) PendingEMERGENCY STOPMANUAL MODE FUNCTION: CLOSE DIESAUTO MODE FUNCTION: CYCLE STARTMANUAL MODE FUNCTION: OPEN DIESAUTO MODE FUNCTION: CYCLE STOPNOTE:IF THE CRIMPER IS IN MANUAL MODE, THE GREENOPEN/CLOSE BUTTONS WILL OPEN. AND CLOSE THECRIMPER HEAD.IF THE CRIMPER IS IN AUTO MODE, THE BUTTONSFUNCTION AS CYCLE START AND CYCLE STOPBUTTONS.IF THE CRIMPER IS IN SEMI-AUTO MODE,PRESSING THE FOOT SWITCH OR THE CLOSEBUTTON WILL CLOSE THE CRIMPER HEAD ANDRELEASING WILL HALT THE CLOSING ACTION.
ACTTM CONTROLLER QUICK STARTPage 7To make a manual crimp, two numbers are needed:The closed diameter of the die (in either in or mm)The finished crimp diameter (in either in or mm)That’s all you need to know. ACTTM does the rest. Press START MOTOR Select CRIMP TO DIAMETER Enter the closed diameter of the die set in either in or mmand press ENTER. Note: for a 25mm die, enter 2500. ACTTMwill add the decimal point. Enter the finished crimp diameter and press ENTER. From the ENTER CRIMP screen, press the MANUAL buttonto put the crimper in manual mode Confirm that the die and finished crimp diameters are correctand that MANUAL MODE is displayed. Press and hold the green close button until the crimper stopsclosing. Check the final crimp diameter. If a minor correction isrequired see HOW TO MAKE MINOR CORRECTIONS.Tip: Pressing the CHANGE DIES button allows the crimperhead to be fully opened or closed with the green OPEN-CLOSEbuttons on the controller front panel When the CHANGE DIESbutton is blinking the dies can be opened and closed manuallywithout altering any of the crimper settings.
ACTTM CONTROLLER OPERATIONPage 8HOW TO MAKE MINOR CORRECTIONS Due to variations in hose and fitting tolerances a minor crimpadjustment may be required if the measured diameter of the finalcrimp is not within the hose and fitting manufacturer’sspecifications. ACTTM technology makes minor corrections asimple process which requires no addition or subtraction.If the finished crimp diameter is not within the requiredspecifications: Press the ADJUST CRIMP button. Enter the measured diameter of the fitting (Not the amount ofcorrection). Press SAVE. Make another crimp and verify that the fitting is withinspecifications.EXAMPLE: If the hose and fitting manufacturer specifies thatthe finished crimp should measure 1.500 to 1.520 and themeasured crimp diameter was 1.530, simply enter the measureddiameter (1.530) and press SAVE. The finished crimp diametercan be entered in either in or mm and ACTTM will make theconversion.While a single correction will usually bring the hose and fittinginto specifications, the process can be repeated as many timesas is required.ACTTM TECHNOLOGYOn crimpers equipped with ACTTM controllers the sensors whichsense the position of the dies are supplemented by a pressuretransducer which senses the “effort” required to make a crimpand compensates for variations in hose and fitting combinations.This unique feature means that the operator can enter thefinished crimp diameter and will seldom, if ever, have to enter anoffset to achieve the correct finished crimp diameter.
ACTTM CONTROLLER OPERATIONPage 9HOW TO ADD A SAVED DIEUp to 50 different dies can be saved in the computer memory.These dies can be recalled in the set up process eliminating theneed to re-enter the die size each time.To enter a saved die: From the OPTION screen, press SETUP MODE. Select SAVED DIES Select the save position (1-50) where the die is to be savedand press the EDIT button Enter a die description (up to 12 alpha/numeric characters) Enter diameter units (inch or metric) Enter the closed diameter of the die. Press SAVE and EXIT The saved die will now appear on the SELECTED DIE screen.From this screen individual dies can be cleared or edited.HOW TO RECALL A SAVED DIE Select CRIMP TO DIAMETER, and from the ENTER CRIMPscreen, select USE SAVED DIE. Select the saved die (1-50) and press LOAD and then OK.The die parameters will now be used for the crimp process. From the ENTER CRIMP screen press MANUAL. The saved die will now be shown on the crimp parametersscreen
ACTTM CONTROLLER OPERATIONPage 10HOW TO ADD A SAVED CRIMP Adjust the die diameter and crimp diameter as required andplace the crimper in MANUAL mode. Press SAVE Select a location (1-100) and press EDIT Enter a description (up to 12 characters) Press SAVE and EXIT The die and crimp setting can now be recalled from thesaved location as required (21 on the example screen shown)TO RECALL SAVED CRIMP Select USE SAVED CRIMP from the option screen Select a previously saved crimp from location 1-100. Press LOAD Press OK The saved crimp will appear on the manual screen
ACTTM CONTROLLER OPERATIONPage 11FULL AUTO MODEWith the crimper in FULL AUTO mode additional functions areavailable: The crimper will cycle automatically from the CRIMP button onthe touch screen, the green CYCLE START button on the panel, orthe foot switch. To set the position to which the dies will retract, close thecrimper to the desired retract position prior to pressing the FULLAUTO button.Note: The retraction position must be set a minimum amount abovethe finished crimp diameter or the crimper will not retract. Theminimum retraction diameters are:CC38 - Crimp Diameter plus 2 mmCC4-50 - Crimp Diameter plus 2 mmCC60 - Crimp Diameter plus 3 mm Pressing the FULL AUTO button will toggle the crimper intoSEMI-AUTO mode. In SEMI-AUTO mode, pressing the FOOTSWITCH or the CLOSE button will close the crimper head andreleasing it will cause the head to stop closing. This mode allowsthe crimper to be jogged into position allowing more precisepositioning of a fitting in the dies. Pressing the SEMI AUTO buttonwill toggle the crimper back to FULL AUTO modeIn FULL AUTO mode pressing the foot switch will start the crimpcycle and the dies will stop closing when the crimp cycle iscomplete The COUNT function is activated allowing the operator to monitorthe number of crimps made. A measurement can be required after a preset number of crimps.See SET REQUIRED MEASUREMENTSET REQUIRED MEASUREMENT Press the PRODUCTION button. Determine if 1 or 2 crimps will count as a crimp Toggle the CRIMP ADJUSTMENT REMINDER to ON. Set the COUNTS BETWEEN CRIMP MEASUREMENTSto the desired number and press OK. At the set interval, the ADJUST CRIMP screen will come up andthe operator will be asked to measure the last crimp and enter acorrection if required.
ACTTM CONTROLLER OPERATIONPage 12ACTTM ADDITIONAL FEATURES Additional features and functions of the ACTTM controllercan be accessed by pressing the MORE button on theMACHINE SET UP screen. When “Allow Crimp to Diameter” is set to “YES”, all of theadjustment functions of the crimper are available. When“Allow Crimp to Diameter” is set to “NO” only the settingsentered as a saved crimp can be used. English or Spanish language options are available. The “Use Pressure Compensation” is set to “YES” for allcrimpers equiped with a pressure transducer. A securitycode is required to turn this function on or off. Some hose and fitting manufacturers furnish a completeset of crimp specifications which can be downloaded intothe crimper memory. Prior to downloading, a warningscreen will appear warning that all previously enteredsettings will be lost. If an operation is attempted which is outside of the rangeof the die set selected or which could result in a bad crimp,a series of warning screens will appear to help diagnose theproblem.
DIE SET UP AND INSTALLATIONIndustrial and Hydraulic hose dies are available for this crimper. IndustrialDies are inserted directly into the Master Dies and hydraulic dies requirean intermediate die. Hydraulic Dies are available with an 80mm, 84mm,99mm and 130mm O.D.The I.D. of the intermediate die must match the O.D. of the hydraulic dieor accurate crimps are not possible.INDUSTRIAL DIE INSTALLATIONINTERMEDIATE ADAPTER DIE INSTALLATIONTurn on the crimper at the master power switch (See AccuCrimp ControllerInstructions) and go to Manual mode.Insert the die removal tool in the release hole to release the retainingspring and attach either an Intermediate Adapter Die or a Hydraulic Die tothe Master Die. the numbers stamped on the face of the die should facethe operator.Mount all 8 dies in a similar manner.If Industrial Dies are being used, proceed to the AccuCrimp Operatinginstructions and set up the crimper for the correct crimp diameter.If Hydraulic Dies are being used, see Hydraulic Die Installationinstructions.Page 13
HYDRAULIC DIE INSTALLATIONInstall Intermediate Adapter Dies as shown previously making certain thatthe Intermediate Adapter Die I.D. matches the Hydraulic Die O.D.Remove the Hydraulic Dies from their holder with the magnetic die insertiontool as shown.The die size stamped on the face of the die should face toward the operatorAlign the studs of the Hydraulic Dies with the holes in the Adapter Dies andwith the crimper in manual mode SLOWLY close the crimper head on thedie set.Bring the crimper head to a fully closed position and remove the die insertiontool.The dies may also be inserted manually with the crimper head in the fullyopen position.Proceed to the AccuCrimp operating instructions to set up the crimper forthe hose and fitting being crimped.For Hydraulic Die removal, place the crimper in manual mode or press theCHANGE DIES button on the controller, and bring the crimper head to t
dayco disclaims all liability for any hose and coupling assembly that is not made according to dayco recommendations. consult your local dayco representative or