Transcription
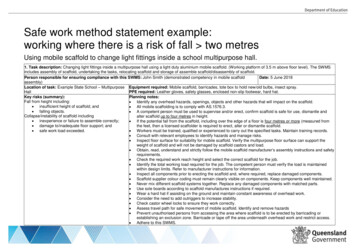
Job Safety and Environmental Analysis (JSEA) / Safe Work Method Statement (SWMS)JSEAsy Demo (Your Business name will replace this)Part 1: Project and Task IdentificationProcess Initiators of SWMSs are responsible for consulting the Project Supervisor, Quality WHS Manager or other persons directly in charge of the work and other personnel involved in the execution of the task (asappropriate) for input into the SWMS. Other persons may be consulted for technical advice or review of the SWMS to see that proposed measures are effective and workable. The task is to be broken up into steps.For each step, the safety hazards are identified. For each of the hazards identified, corrective action, precautions, equipment are identified to reduce the hazard. All involved in the task must review and sign thisSWMS form.Client: TotalTrack Pty LtdSite:The Sample University, 99 Example WayContact NameScott LeBlancAdelaide SA 5000Job TitleDirectorPhone08 8351 1540SWMS Initiated ByMobile0408 831 550FAX08 8261 9977Emailscott@totaltrack.com.auDate:SWMS No. 1Date:Work Locations/Areas:AllRev: 2Rev. Date:5/02/2017Ben WorkinSupervisor ReviewWill BwatchinManagement ReviewDate:Sample GuyDescription of Workto be Undertaken:Sunday, 5 February 2017Construction of new entranceJSEAsy Demo (Your Business name will replace this)JSEAsyPage 1 of 23
First, identify and assess the risks, then decide the best way to control them by applying the Hierarchy of Control as follows:LEVELLevel 1Level 2Level Controlling the Hazard at sourceReplacing one substance or Activity with a less hazardous oneSeparating the hazard from the personEngineeringInstalling Guards on machineryAdministrationPersonal Protective EquipmentImplementing policies and procedures for safe work practicesUse of safety glasses, hardhats, protective clothing, etc.Hierarchy of ControlsSubstitute the hazardIsolate the hazardUse engineering controlsUse administrativecontrolsEffectivenessEliminate the hazardUse PPESunday, 5 February 2017JSEAsy Demo (Your Business name will replace this)JSEAsyPage 2 of 23
JSEAsy Demo (Your Business name will replace this)Part 2: Worker Qualifications and Induction RecordPersonal Qualifications and ExperienceRequired To Carry Out the Works:Completion of White Card InductionThe ability to work unsupervised and part of a teamRoof Plumbing Trade Certificate (Preferred) or acompetency level of installing metal sheeting materialsCertificate III in Wall and Floor TilingCertificate III in Wall and Ceiling Lining (Preferred) or acompetency level of installing wall and ceing materialsCertificate III in Painting and Decorating preferred orshown competency in the application paintDuties and Responsibilities of PersonnelCompleting the Task:Adherence to company's and the site's WH&S policiesand proceduresMaintain adequate house-keeping on siteReporting of any injuries / incidents to your ProjectSupervisorOperate safely and perform daily pre-shift inspectionsFormal or Specialised Training orLicenses Required to Complete Work orOperate Specific Plant or Equipment:Competency in the Safe Operating Procedure of theselected power toolsLoad Restraint Training (TLIA107C)Heavy Vehicle Drivers licence with a class equal to orgreater than the required for the mass of the truckTraining and shown competency in the safe use of thevehicle loading deviceLicense To Operate A Vehicle Loading Crane (TLILIC0012A)Elevated Work Platform Train & Assess (TLILIC508A) High Risk Licence Class WPDogman - Certificate of CompetencySWMS Sign Off – Your signature below indicates that you have been consulted in development ofthe SWMS and accept and will implement the requirements of the SWMS and control measuresNo. NameClassificationEmployed BySignatureDate1Sample GuyCarpenterJSEAsy Demo5/01/20172Ben WorkinLabourerJSEAsy Demo5/01/20173Bringit DownDemolition WorkerNow you see it now you don't19/01/20174Jean-Claude Van ManDriverWe Deliver19/01/20175Steele RectonRiggerJSEAsy Demo19/01/20176Scott MebuggerdCeiling fixerScott's Ceilings7Scott MebuggerdtoCeiling fixerScott's Ceilings8Phil McCreviceFlusherScott's Ceilings9Slap DabberPainterSlap's Painting10 Bonnie TilerTilerWe Layum11 Surelock HomesWindow and Door installerFitum and LockumSunday, 5 February 2017JSEAsy Demo (Your Business name will replace this)JSEAsyPage 3 of 23
121314151617Sample GuyEmergency Contact Name: Sample GirlRelationship: WifePhone: 08 8351 1540Mobile: 0408 000 000QualificationLicenceNumberCompletion of White Card InductionCertificate III in CarpentryBoom Lift over 11m (WP) High RiskMotor VehicleBuilding SupervisorScissor Lift (SL) EWPA Yellow CardForklift truck (LF) High Risk LicenceS123456C987654BLD 12345698765455555Sunday, 5 February 2017JSEAsy Demo (Your Business name will replace this)JSEAsyPage 4 of 23
Part 3: Hazard Analysis, Control and Legislation WorksheetJSEAsy Demo (Your Business name will replace this)Job Safety and Environmental Analysis (JSEA)StepNo.1Process StepsPotential Hazard(s)List the steps needed to do the jobin the sequence to be done.Against each step list potential hazards thatcould cause injury when the job is done.Safe Work Method Statement (SWMS)Hazard Control MeasuresRiskRatingFor each hazard, identify control measuresto eliminate or minimise the risk of injury.NewRiskRatingAction BySite Orientation/ Induction1.1Report to client’s receptionEntering restricted areas19Follow posted signs and go directly toreception1All1.2Undertake a site inductionUnfamiliarity with emergency procedures14Listen and ensure you obtain information andsite emergency and evacuation procedures1AllUnawareness of site specific hazards14Listen and ensure you obtain informationabout any and all site hazards1AllUnawareness of restricted areas18Listen and ensure you obtain informationabout any restricted areas1AllUnawareness of other operations or hazardousactivities being undertaken on site9Listen and ensure you obtain informationabout any other activities being undertakenon site5AllBreaching minimum site PPE requirements13HI visibility clothing must be worn at all timeswhilst on siteSteel toe safety boots must be worn at alltimes whilst on siteSafety glasses must either be worn or carriedat all times whilst on site1All1All1AllNO SMOKING on site-designated smokingarea will be available and ALL butts to beplaced in binProgressive housekeeping clean as you go1All1AllControlled by Site Manager5Site SupervisorBunting or Caution tape shall define the workarea by providing a 3 meter barrier or denyingaccess whichever is more appropriate.3AllExamine Tires and wheels for followinghazards: lug nuts, cracked rims, cuts, tirepressureCheck all hydraulic rams and lines, controlsfor leaksCheck all safety devices1Driver3Driver3OperatorCheck rear view mirrors are present and in1Driver22.1Claim Work AreaAccess the siteBreaching site rules or requirements2.233.1Establish safe perimeterPeople entering work area1325Inspect and drive truckPre-operation InspectionSunday, 5 February 2017Faulty equipment machine failure14JSEAsy Demo (Your Business name will replace this)JSEAsyPage 5 of 23
Job Safety and Environmental Analysis (JSEA)StepNo.Process StepsPotential Hazard(s)List the steps needed to do the jobin the sequence to be done.Against each step list potential hazards thatcould cause injury when the job is done.Safe Work Method Statement (SWMS)Hazard Control MeasuresRiskRatingFor each hazard, identify control measuresto eliminate or minimise the risk of injury.good conditionEnsure Safe Working Limit is displayed andlegible3.23.33.43.544.14.2Board truckStart the truckDrive the truckReversing the truckFalling from truckVehicle running into objects and or personsLegislation Breach13718NewRiskRatingAction By1DriverUse hand hold and steps whenentering/exiting cabinDo not jump from cabin1All1AllEnsure parking brake is on and operational1DriverBefore starting motor, ensure transmission isin neutral and check throttle for properoperation1DriverEnsure seatbelt is worn2AllOnly persons with the appropriate licence areto dive the vehicleDo not drive or operate the vehicle whileunder the influence of drugs or alcoholEnsure the load does not exceed the safework load/ limit of the vehicleObey the road rules and speed limits of thestate or territory at all times1Driver2Driver1Driver2OperatorUnsecured load15Unsure load is secure with rated restraints1DriverStriking Overhead Tree branches13Ensure path of travel is clear of low-lying treelimbs2DriverStriking structure or overhead members25Check for clear head room3DriverInjury to people, damage to product orequipment from running into or over13Be aware of increased braking/stoppingdistance when carrying loads2DriverReversing/ Running over people and equipmentand not very good visual22Make sure that your back up alarm is working5DriverUse a spotter when reversing in the vicinity ofother people or in congested areas2DriverElectrocution25Always check for overhead power lines1DriverTipping over19Be alert for trenches, open cuts, sump holesand pitsEnsure firm ground support2Driver5CarpenterEnsure gradient/slope within safe limits1CarpenterMake sure that your back up alarm is working5DriverUse a spotter when reversing in the vicinity of2DriverDelivery of skip binInspect area to accept loadReverse vehicle to positionSunday, 5 February 2017Reversing/ Running over people and equipmentand not very good visual22JSEAsy Demo (Your Business name will replace this)JSEAsyPage 6 of 23
Job Safety and Environmental Analysis (JSEA)StepNo.Process StepsPotential Hazard(s)List the steps needed to do the jobin the sequence to be done.Against each step list potential hazards thatcould cause injury when the job is done.Safe Work Method Statement (SWMS)Hazard Control MeasuresRiskRatingFor each hazard, identify control measuresto eliminate or minimise the risk of injury.NewRiskRatingAction Byother people or in congested areas4.3Release restraintsLoad tipping or falling12Release straps slowly to ensure load doesnot move3Driver4.4Unload binObstructing access or egress15Do not block access or egress to site1DriverDo not unload in close proximity to othervehicles. Ensure sufficient space betweendump sites if several loads being dumped atsame time1Driver5Personal Injury20Ensure that you have received training in safeuse of the equipment1DriverCrushing23Ensure persons and body parts are clearbefore lowering1AllDemolition/ Removal of existing floor tiles Using an electric Jack Hammer/ Demolition Hammer5.1Carry the tool to the work areaMuscle strain13Keep Load close to body5All5.2Plug in the toolElectrocution25Check electrical lead for cracks, fraying orexposed wiresEnsure all electrical tools and cables arefunctional, tested, tagged and current1Operator1All5.3Operate the hammerEye Damage20Ensure correct use of PPE – Safety Glasses3AllHearing damage18Use correct PPE - Ear Muffs / Ear Plugs2OperatorVibration13Do not exceed the maximum hours of dailyexposure as per the manufacturersrecommendationsVibration handle to be used1Operator2OperatorDo not expose the power tool to rain or wetconditionsUse RCD protection1Operator1AllCheck for electrical services beyond beforedrilling1OperatorEnsure operator has been trained in the safeoperating procedure of power tool prior to useDo not force the power tool3Supervisor2OperatorUse the correct power tool for your application1OperatorDo not use the power tool if the switch doesnot turn it on and off1OperatorLet the machine do the work3OperatorElectrocutionInjury from using power toolsMachine jamming or kicking backSunday, 5 February 2017251825JSEAsy Demo (Your Business name will replace this)JSEAsyPage 7 of 23
Job Safety and Environmental Analysis (JSEA)StepNo.Process StepsPotential Hazard(s)List the steps needed to do the jobin the sequence to be done.Against each step list potential hazards thatcould cause injury when the job is done.Cut through body parts66.16.377.188.18.2Hazard Control MeasuresRiskRating18For each hazard, identify control measuresto eliminate or minimise the risk of injury.NewRiskRatingAction ByMake sure correct grip if formed utilising thehandleKeep cutting tools sharp and clean3Operator3OperatorAlways use two hands when operating2OperatorWear safety boots2OperatorCuts and lacerations16Wear Gloves1AllCuts and lacerations16Wear PPE if sharp edges are exposed3AllDue care by personnel2AllEnsure correct handling to prevent injury1AllEnsure correct manual handling proceduresare followedUse mechanical lifting device wherepracticableShare lifting loads1All2All3AllCleaning up work areaPick up all off cuts / rubbish from workareaManual handling injuries6.2Safe Work Method Statement (SWMS)20Eye Damage20Ensure correct use of PPE – Safety Glasses3AllPut all off cuts into bin or designatedarea provided on siteTripping over obstacles17Ensure pathway is clear2AllEnvironmental -Waste Generation11Ensure all recylcable materials are collectedfor recycling1AllEnsure work area is left clean and freeof debrisMaterial blowing away17Ensure stacked in a safe manner and tieddown if necessary3AllMuscle strain13Do not over reach with shovel3OperatorStriking foot8Wear safety boots1AllMuscle strain13Ensure correct manual handling procedures3InstallerDo not overload the Wheel Barrow5OperatorMove debris by hand using a shovelScoop the debris with the shovelPush Wheel Barrow on sitePush wheel BarrowTip the Wheel Barrow to empty9Sweep Floor9.1Pick up broomSunday, 5 February 2017Wheel barrow tipping over12Ensure firm footing and even lift3OperatorTripping hazard12Ensure path of travel is clear of obstacles anddebris3AllWheel barrow tipping over12Ensure firm footing and even lift3OperatorMuscle strain13Do not over reach3InstallerJSEAsy Demo (Your Business name will replace this)JSEAsyPage 8 of 23
Job Safety and Environmental Analysis (JSEA)StepNo.9.21010.110.211Process StepsPotential Hazard(s)List the steps needed to do the jobin the sequence to be done.Against each step list potential hazards thatcould cause injury when the job is done.Sweep the floorSafe Work Method Statement (SWMS)Hazard Control MeasuresRiskRatingFor each hazard, identify control measuresto eliminate or minimise the risk of injury.NewRiskRatingAction ByEnvironmental - Dust16Sweep using slow strokes in dusty situations1AllMuscle strain13Do not over reach3InstallerElectrocution25Ensure all power to the area has beenisolated prior to commencement1Site SupervisorEye Damage20Ensure correct use of PPE – Safety Glasses3AllLacerations17Wear gloves3AllEnvironmental - Dust16Place drop sheets around work area to collectdust and debris1AllStructure collapses25Remove from the top down3LabourerRemove systematically3LabourerDemolition of existing plasterboard lined partition stud wallRemoval of existing plasterboard usinga hammer and pinch barRemoval of existing stud framingCut masonry wall with a Quick Cut Diamond blade saw11.1Check the saw for conditionFuel Leaks13Visual inspection5Operator11.2Check condition of wheelDisc shattering18Visually inspect for cracks, nicks and blisters2Operator11.3Check that the wheel is designed forthe machineWheel could disintegrate causing horrific injuries18Make sure it is the right wheel in goodcondition for the machine and job, sizerevolution speed3Operator11.4Check that the wheel is suitable forintended purposeWheel could disintegrate causing horrific injuries18Make sure that the wheel suits the specificneeds i.e. Metal or Stone etc.3Operator11.5Check that the correct wheel flangewasher and locking nuts are fittedcorrectlyWheel could disintegrate causing horrific injuries18Make sure the wheel is tight using theappropriate tools and sitting properly on themachine3Operator11.6Check that wheel guard is firmly fixedin placeMake sure that work area is accessibleand clear of flammable product andpersonnelEye Damage20Ensure Guard is firm and in correct position2OperatorCramped work conditions15Clean area underfoot and around work area3OperatorEnvironmental -Fire9Risk assess and clear the surrounding areafor combustible hazardsin a 10metre radius including beneath the hotworks3OperatorInhalation of toxic and noxious fumes25Ensure adequate ventilation1All11.711.8Line of fireSparks and debris harming personnel23Ensure that operating stance is not in linewith sparks, debris3Operator11.9Grip the machine and allow to run upbefore applying it to the jobMachine jamming or kicking back25Make sure correct grip if formed utilising thehandle3OperatorSunday, 5 February 2017JSEAsy Demo (Your Business name will replace this)JSEAsyPage 9 of 23
Job Safety and Environmental Analysis (JSEA)StepNo.Process StepsPotential Hazard(s)List the steps needed to do the jobin the sequence to be done.Against each step list potential hazards thatcould cause injury when the job is done.11.10 Cut into the masonry surfaceMachine jamming or kicking backEnvironmental - DustEnvironmental -Spills to water -stormwaterCut through body partsCutting through concealed power cables1212.112.212.313Safe Work Method Statement (SWMS)Hazard Control MeasuresRiskRatingFor each hazard, identify control measuresto eliminate or minimise the risk of injury.NewRiskRatingAction ByLet the machine do the work3OperatorDo not apply pressure while using the saw5OperatorEnsure water supply is connected to themachine to control the generation of dustWear correct PPE – Dust Mask1Operator1OperatorUse drop sheets for catchment3AllCollect waste water and slurry using a wetvacuum3OperatorEnsure the user has been inducted with SOP2Site SupervisorNever remove guards2All22Ensure power to the area has been isolated1Site Supervisor25Ensure all electrical tools and cables arefunctional, tested, tagged and currentEnsure all power to the area has beenisolated prior to commencementUse RCD protection1All1Site Supervisor1All2516418Part demolition of existing brick wall to form new openingDrill out mortar to create starting pointKnock out brickInstall temporary needle through brickopeningElectrocutionEye Damage20Ensure correct use of PPE – Safety Glasses3AllHearing damage18Use correct PPE - Ear Muffs / Ear Plugs2OperatorEye Damage20Ensure correct use of PPE – Safety Glasses3AllStriking hand or body part9Use correct tool for the purpose1OperatorMuscle strain13If materials are of a considerable length orweight then ensure a 2 (or more) person liftand carryKeep Load close to body3All5AllInstall Acro prop13.1Lift the prop into positionMuscle strain13Ensure correct manual handling procedures3Installer13.2Lift the inner tube to the approximateheightOuter tube moving with the inner tube13Steady the outer tube by placing a foot on thebase plate2Installer13.3Insert the pin through slot in outer tubepassing through adjacent hole in innertubeTurn handle for final adjustmentPinch point injury14Do not let go of inner tube until pin is fullyinserted5InstallerProp falling over18Do not let go until prop is under tension5InstallerOverloading the prop9Do not use the prop as a jack2Installer13.4Sunday, 5 February 2017JSEAsy Demo (Your Business name will replace this)JSEAsyPage 10 of 23
Job Safety and Environmental Analysis (JSEA)StepNo.13.51414.114.214.314.41515.1Process StepsPotential Hazard(s)List the steps needed to do the jobin the sequence to be done.Against each step list potential hazards thatcould cause injury when the job is done.Secure prop into positionProp falling over1616.1Hazard Control MeasuresRiskRating18For each hazard, identify control measuresto eliminate or minimise the risk of injury.NewRiskRatingAction BySecure the top of the prop by mechanicalmeansInstall diagonal bracing to the prop using pipea coupling5Installer1InstallerKnock out bricksStrike brick with hammerEye Damage20Ensure correct use of PPE – Safety Glasses3AllStriking hand or body part9Concentrate on object2OperatorEnvironmental - Dust16Place drop sheets around work area to collectdust and debris1AllMuscle strain13Do not overreach with hammer3InstallerPlace removed bricks into wheelbarrowOverloading the wheel barrow13Do not fill above the brim2LabourerWheel barrow tipping over12Ensure wheel barrow is positioned centerally5OperatorPush the wheel barrowMuscle strain13Do not overload the Wheel Barrow5OperatorWheel barrow tipping over12Ensure firm footing and even lift3OperatorWheel barrow tipping over12Ensure firm footing and even lift3OperatorCuts and lacerations16Wear PPE if sharp edges are exposed3AllDue care by personnel2AllEnsure correct handling to prevent injury1AllEnsure correct manual handling proceduresare followedUse mechanical lifting device wherepracticableShare lifting loads1All2All3AllEmpty the wheel barrowCleaning up work areaPick up all off cuts / rubbish from workareaManual handling injuries15.2Safe Work Method Statement (SWMS)Ensure work area is left clean and freeof debris20Eye Damage20Ensure correct use of PPE – Safety Glasses3AllMaterial blowing away17Ensure stacked in a safe manner and tieddown if necessary3AllMuscle strain13Ensure correct manual handling procedures3InstallerDo not overload the Wheel Barrow5OperatorPush Wheel Barrow on sitePush wheel BarrowSunday, 5 February 2017Wheel barrow tipping over12Ensure firm footing and even lift3OperatorTripping hazard12Ensure path of travel is clear of obstacles anddebris3AllJSEAsy Demo (Your Business name will replace this)JSEAsyPage 11 of 23
Job Safety and Environmental Analysis (JSEA)StepNo.16.2Process StepsPotential Hazard(s)List the steps needed to do the jobin the sequence to be done.Against each step list potential hazards thatcould cause injury when the job is done.Tip the Wheel Barrow to emptySafe Work Method Statement (SWMS)Hazard Control MeasuresRiskRatingFor each hazard, identify control measuresto eliminate or minimise the risk of injury.NewRiskRatingAction ByWheel barrow tipping over12Ensure firm footing and even lift3Operator17Sweep Floor17.1Pick up broomMuscle strain13Do not over reach3Installer17.2Sweep the floorEnvironmental - Dust16Sweep using slow strokes in dusty situations1AllMuscle strain13Do not over reach3InstallerTripping hazard12Ensure path of travel is clear of obstacles anddebris3AllObjects / other trades obstructing lifting path171818.1Installation of Hold Down bolts into existing ConcreteMark out hole locations18.2Drill hole at pre marked locationHearing damage18Use correct PPE - Ear Muffs / Ear Plugs2Operator18.3Blow Dust out of holeInhallation of Dust12Ensure adequate ventilation1Installer18.4Inject Epoxy into holesskin irritation7Wear Gloves1OperatorWash hands immediately if contact with skinoccurs1All20Wear safety boots1All18.519Insert Bolts into holeDropping materialsAcceptance of delivery to site for materials via Crane Truck19.1Establish area to accept deliveryOther trades and or persons wanting to use area11Communicate with other site personnel toestablish availability of area2All19.2Direct vehicle to appropriate areaRunning into objects and or persons13Place “spotter” to watch path of truck3Site Supervisor19.3Untie load if securedLoad tipping or falling12Release straps slowly to ensure load doesnot move3Driver19.4Receive goods manually19.5Crane material from vehicle to groundCrane tipping over or sinking25Ensure firm ground and engage outriggers3OperatorMaterials/Packs may slide from slings21Make sure a licensed dogman/rigger slingsthe load and it is balanced before lifting3OperatorJib may come close to or touch power lines21Visual checks3OperatorWind may swing load21Make sure weather conditions are favourable,use a guy rope if necessary3OperatorLoad may strike obstacles21Attach Guy Rope1Operator13Ensure correct manual handling procedures3Installer2020.1Carrying materials from storage area to work areaLifting materialsSunday, 5 February 2017Muscle strainJSEAsy Demo (Your Business name will replace this)JSEAsyPage 12 of 23
Job Safety and Environmental Analysis (JSEA)StepNo.20.22121.1Process StepsPotential Hazard(s)List the steps needed to do the jobin the sequence to be done.Against each step list potential hazards thatcould cause injury when the job is done.Carrying materialsTripping hazardSafe Work Method Statement (SWMS)Hazard Control MeasuresRiskRatingFor each hazard, identify control measuresto eliminate or minimise the risk of injury.NewRiskRatingAction ByIf materials are of a considerable length orweight then ensure a 2 (or more) person liftand carry3All12Ensure path of travel is clear of obstacles anddebris3All20Ensure correct manual handling proceduresare followedUse mechanical lifting device wherepracticable1All2AllLand Columns into position by HandCarry Columns to desired locationManual handling injuries21.2Land and secure Columnr to preinstalled hold down boltsCrushing23Ensure persons and body parts are clearbefore lowering1All21.3Level ColumnsEye Damage20Do not look directly at laser beam2OperatorColumns falling over20Ensure firm grip on column until all nuts havebeen installed2Rigger22Tension nuts using a battery powered rattle gun22.1Push socket over nutSystem failure from incorrect fitment18Ensure the socket is the correct size for thenut to avoid stripping and damage2Rigger22.2Rattle the nutEquipment failure19Visual inspection prior to use1AllOnly use an Impact socket with Rattle Guns2RiggerEnsure firm ground support, and clear ofDebrisKeep the machine as level as possible t new steel lintel into position using duct liftersPosition Duct lifter under materialLift the materialLifter tipping or sinking12Hitting overhead objects25Look up before lifting3RiggerLoad tipping or falling12Ensure load is balanced before lifting1OperatorCrushing23Ensure persons and body parts are clearbefore lowering1AllDropping materials20Flag off area to prevent accidental entry andpossible injury from falling objectsDo not let go until member has been securedin placeWear safety boots1Installer2Installer1AllConnect steel membersLand and secure Member to preinstalled conecting structure ormemberBolt connectionSunday, 5 February 2017JSEAsy Demo (Your Business name will replace this)JSEAsyPage 13 of 23
Job Safety and Environmental Analysis (JSEA)StepNo.25Process StepsPotential Hazard(s)List the steps needed to do the jobin the sequence to be done.Against each step list potential hazards thatcould cause injury when the job is done.Safe Work Method Statement (SWMS)Hazard Control MeasuresRiskRatingFor each hazard, identify control measuresto eliminate or minimise the risk of injury.NewRiskRatingAction ByTension nuts using a battery powered rattle gun25.1Push socket over nutSystem failure from incorrect fitment18Ensure the socket is the correct size for thenut to avoid stripping and damage2Rigger25.2Rattle the nutEquipment failure19Visual inspection prior to use1AllOnly use an Impact socket with Rattle Guns2Rigger2626.1Grout ColumnsMix GroutDust escaping work areas and contaminatingsafe areas7Mix in a suitable area1Operatorskin irritation7Wash hands immediately if contact with skinoccurs1All26.2Trowell grout under columnskin irritation7Wash hands immediately if contact with skinoccurs1All26.3Clean upEnvironmental -Spills to water -stormwater4Do not wash bucket/ Container into drain oronto street1AllEnvironmental -Spills to land contamination8Empty waste into bin1OperatorTripping hazard12Ensure path of travel is clear of obstacles anddebris3AllManual handling injuries20Ensure correct manual handling proceduresare followedShare lifting loads1All3All2727.127.227.327.4Installation of Aluminium Doors and Door HardwareCollect materials from StockpilelocationsDrill holes for handset/ lockEye Damage20Ensure correct use of PPE – Safety Glasses3AllDrill bit jamming13Ensure drill bit is sharp and secured tightly inchuck3OperatorInjury from using power tools18Ensure operator has been trained in the safeoperating procedure of power tool prior to use3SupervisorInstallation door hardware using acordless drillEye Damage20Ensure correct use of PPE – Safety Glasses3AllInjury from using power tools18Ensure operator has been trained in the safeoperating procedure of power tool prior to use3SupervisorLift door into positionMuscle strain13Ensure correct manual handling procedures3InstallerDo not over reach3InstallerUse two people where appropriate to assistwith handling of door3InstallerSunday, 5 February 2017JSEAsy Demo (Your Business name will replace this)JSEAsyPage 14 of 23
Job Safety and Environmental Analysis (JSEA)StepNo.28Process StepsPotential Hazard(s)List the steps needed to do the jobin the sequence to be done.Against each step list potential hazards thatcould cause injury when the job is done.Safe Work Method Statement (SWMS)Hazard Control MeasuresRiskRatingFor each hazard, identify control measuresto eliminate or minimise the risk of injury.NewRiskRatingAction ByAcceptance of delivery to site for materials28.1Establish area to accept deliveryOther trades and or persons wanting to use area11Communicate with other site personnel toestablish availability of area2All28.2Direct vehicle to appropriate areaRunning into objects and or persons13Place “spotter” to watch path of truck3Site Supervisor28.3Untie load if securedLoad tipping or falling12Release straps slowly to ensure load doesnot move3Driver28.4Receive goods manually29Installation of plasterboard linings29.1Measure for sheet lengthCuts and lacerations16Due care by personnel2All29.2Cut sheet to length using a knifeCut through body parts18Ensure opposite hand is well clear of cuttingarea5Carpenter29.3Apply glue to framing using AcrylicStud Adhesiveskin irritation7Wash hands immediately if contact with skinoccursWear Gloves1All1OperatorRefer to manufacturers Safety Data Sheet(SDS) prior to commencement1All29.429.53030.130.23131.1Position sheet to pre installed framingScrew sheet to framingEye Damage20Ensure correct use of PPE – Safety Glasses3AllMuscle strain13If materials are of a considerable length orweight then ensure a 2 (or more) person liftand carryDo not over reach3All3Installe
could cause injury when the job is done. For each hazard, identify control measures to eliminate or minimise the risk of injury. Safe Work Method Statement (SWMS) good condition Ensure Safe Working Limit is displayed and legible 1Driver 3.2 Board truck Falling from truck 13 Use hand hold and steps when entering/exiting cabin 1All
