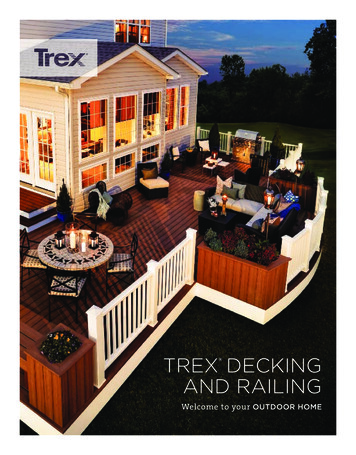
Transcription
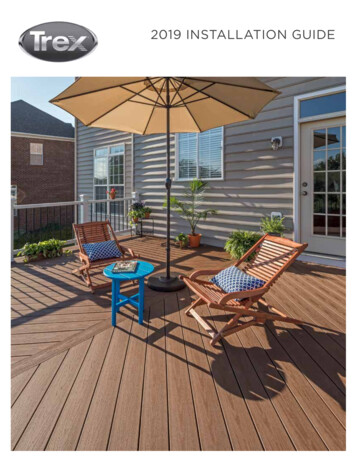
2019 INSTALLATION GUIDE
CHANGES FOR 2019 INSTALL GUIDE:Page 7Page 22Page 27Page 28 Updated storage recommendations to include new Trex Enhance profileAdded Trex Photocell Motion Controller InstructionsAdded new decking profiles (Enhance Naturals)Added new decking profiles and additional fascia fasteners to Decking andFascia Recommended Fasteners list» Page 29Updated Fascia Install Recommendations» Page 35Updated routing square edge profile recommendations for decking profiles» Page 37Updating hidden fastener instructions using square edge board as lastdeck board» Page 42-43 Updated stair spanning and installation instructions for new Trex Enhance profile» Page 62Updated ADA SKU numbers» Pages 64, 67, 72, 84, 98, 118, 119, 144, 147Updated Cocktail rail instructions for all railing configurations - new Trex Enhance profile cannot be used for Cocktail rail applications and removedContour references» Page 77Updated Transcend Stair Railing Instructions» Page 133 Revised Rod Rail instructions for method of measurement and cutting of top andbottom rails» Page 154Updated ADA Railing Profiles and Instructions» Page 160Updated Limited Warranty page»»»»NEED HELP?Trex provides a variety of valuable resources to answer your questions or concerns. Foradditional assistance, check out:» Trex.com .Here you will find a wealth of useful information on Trex’s extensive products including:installation, care and cleaning instructions and videos, technical help, and FAQs. You’ll alsofind inspiring photos of deck projects, steps to help you plan and start your project, and tipsfor selecting the right deck builder. At trex.com, you can request information, register yourwarranty, and reach out to customer service representatives who can answer even morequestions.» Call 1-800-BUY-TREX (1-800-289-8739) and speak to a Customer Loyalty Advocate whocan answer your questions.Refer to www.trex.com for up-to-date installation and technical documents that may not befound in this printed guide.This symbol indicates text continues to next page.NOTE: Construction methods are always improving. Please refer to www.trex.com for the most up-to-date installation requirements.
CONTENTSSECTION ONE: General InformationSafety. 5Tools. 5Care and Cleaning. 6SECTION TWO: Planning AheadTrex Decking. 10Railing (Including ADA Handrail). 10Trex Lighting. 10Trex RainEscape Drainage System. 10Installing Hot Tubs, Planters, and Seating. 10Installing Fireplaces and/or Fire Pits. 10Installing a Pergola.11Installing Trex Spiral Stairs .11Installing Trex Outdoor Kitchens .11SECTION THREE: LightingHow to Install Trex OutdoorLighting Outdoor Lighting SKUs.13Parts List/Tools Needed.14Lighting and Wiring Overview.14Helpful Tips.14General Information.15Planning.15Installing Wiring.15Making Connections.15Timer Operation Instructions.16Installing Post Cap Lights.16Installing Deck Rail Lights.16Installing Riser Lights.17Installing Recessed Deck Lights.17How to Program Dimmer Remote.18How to Install Trex Signature Post Cap LightParts List/Tools Needed.18Helpful Tips.19Installing Post Cap Lights.19How to Install Trex Wedge Deck Rail LightParts List/Tools Needed. 20Helpful Tips. 20How to Install Trex Photocell Motion ControllerParts List/Tools Needed.22Overview.22Motion Control Sensor Location.22Making a Post Pocket.23One Sensor Install.23Two Sensor Install.23Multiple Zone Install.24Adjustments.24Other Buttons/Functions/Zones.25SECTION FOUR: DeckingDecking, Porch Flooring & Fascia SKUs.27Decking and Fascia Recommended Fasteners.28Trex Fascia Installation Recommendations.29Framing and Fastening Tips. 30Rooftop and Sleeper Deck Systems.31Metal Framing Requirements and Gapping.32Code Compliance.33Gapping and Overhang. 34How to Install DeckingImportant Notes Before Installing Trex Decking.35Routing Square Edged Boards for Trex Hideaway Hidden Fasteners.35Abutted Board Attachment Requirements.35Metal Framing.35Installing Trex Transcend , Enhance , Select Deck Boards.36Installing Escapes Boards with Trex HideawayUniversal Hidden Fasteners.37Installing Trex Transcend Porch Boards.39Replacing Trex Boards .41Spanning Requirements For Trex Stairs.42Stairs.42Installing Trex Stair TreadsInstalled with Hidden Fasteners.43Location and Installation of Surface MountPost – Decking. 44Parts List/Tools and Materials Needed. 44How to Install Post Mounts on Pressure-TreatedWood Framing. 44Corner Post Installation. 44Line Post Installation.45How to Install Guide Blocks.45How to Install Railing System of Choice. 46Location and Installation of Post Mounts – Concrete.47Parts List/Tools Needed.47How to Install Guide Blocks.47How to Install Railing System of Choice. 48How to Install Joist Mount PostsParts List/Tools Needed. 49Inside MountFront Rim Plate – Between Joists. 50Front Rim Plate – Next to Joist. 50Side Joist.51Corner.52Composite Post Sleeve ApplicationsInstallation of Guide Blocks and Railing.53Fascia MountFront Rim Plate – Next to Joist. 54Side Joist – With Blocking.55Outside Frame Corner.56INSTALLATION GUIDETREX INSTALLATION GUIDE3
GENERAL INFORMATIONTREX INSTALLATION GUIDECONTENTS/CONTINUEDSECTION FIVE: RailingPost Sleeves, Caps and Skirts SKUs.58Trex Signature Aluminum Railing SKUs.59Trex Transcend Railing SKUs. 60Trex Select Railing SKUs.61Aluminum Gates SKUs.62Aluminum ADA Compliant Handrail SKUs.62Trex Transcend RailingParts List/Determining Balusters Needed.63Trex Transcend Railing Configurations . 64How to Install Standard Railing.65How to Install Cocktail Railing.67How to Install Traditional Railing.68How to Install Round or Square AluminumBalusters. 69How to Install Standard Glass Panel Railing.70How to Install Cocktail Style Glass Panel Railing.72How to Install Traditional Style Glass Panel Railing.73How to Install On-An-Angle Railing.75How to Install Crown and Universal Bird’sMouth Railing.75How to Install Crown and Universal Stair Railing.77Trex Signature RailingParts List/Determining Balusters Needed.81Installing Trex Signature Posts and/or Trex Signature Crossover Posts on Wood or Concrete.82Installing Pressure-Treated Post, Post Sleeves,and Skirts to Use with Trex Signature Railing.82Installing Trex Signature Posts on Concrete . .83Railing Configurations. 84Bracket Hardware – Horizontal Applications .85How to Install Horizontal Railing. 86How to Install Horizontal Railing Post to Post.87How to Install Horizontal Railing Post toCrossover Post. 90How to Install Horizontal Railing Crossover Postto Crossover Post. 94How to Install Cocktail Railing. 98How to Install Traditional Railing. 99How to Install Horizontal Swivel Brackets.101How to Install Horizontal Swivel Railing.102How to Install Foot Blocks – Horizontal Railing. 104Bracket Hardware – Stair Applications .105How to Install Stair Posts andStair Railing.106Attaching Fixed Stair Brackets and Rails toTrex Signature Posts and Pressure-Treated Postsand Post Sleeves.107Attaching Stair Swivel/Compound SwivelBrackets And Rails To Trex Signature PostsAnd Pressure-Treated Post And Post Sleeves.111Attaching Crossover Swivel Bracket OnTrex Signature Post.1144Attaching Stair Rails In Crossover PostApplications. 116How To Install Trex Signature Cocktail StairRailing. 118How To Install Trex Signature Traditional StairRailing.120How to Install Aluminum Gate. 122Trex Signature PanelsParts List/Tools Needed. 124Bracket Hardware – Horizontal Applications. 125How to Install Panels . 126How to Install Foot Blocks.130Trex Signature Horizontal Rod RailingParts List/Tools Needed. 131How to Install Horizontal Rod Railing Brackets. 132How to Install Horizontal Rod Railing. 132Installing Standard Stair Posts, or Pressure-TreatedPosts, Post Sleeves and Skirts. 137Bracket Hardware - Stair Applications. 137How to Install Stair Posts and Horizontal RodRailing Stairs. 137How to Install Horizontal Rod Railing Stairs. 137Trex Select RailingParts List/Determining Balusters Needed.143Select Railing Configurations.144How to Install Trex Select Railing .144How to Install Cocktail Railing. 147How to Install Traditional Railing.148How to Install On-An-Angle Railing.149How to Install Trex Select Stair Railing.150Trex Aluminum ADA Compliant HandrailADA Handrail Guidelines. 153Ramp Application. 153ADA Railing Profiles.154Hardware.154How to Install Trex Aluminum ADA Compliant90 Wall Return. 155Wall Mount. 155Inline Bracket. 155Rail-to-Rail Connections/Internal Connector. 155Elbows (90 , 36 , 34 , 31 , 5 ).156Handrail Return 180 .156Corner Mount.156SECTION SIX: WarrantiesTrex Transcend, Trex Enhance, Trex Select, and Trex Universal Fascia Limited Fade & Stain Warranty. 158Trex Limited Warranty.160Trex Signature /Reveal Railing Limited Warranty. 161Color Palette.163NOTE: Construction methods are always improving. Please refer to www.trex.com for the most up-to-date installation requirements.
GENERAL INFORMATIONSAFETYWhen working on any construction project, you shouldwear protective clothing and safety equipment. Wearsafety glasses, gloves, a dust mask and long sleeves,particularly when cutting in confined spaces.Trex decking and railing are heavier and more flexiblethan wood. DO NOT try to lift the same quantity ofTrex boards as you would traditional lumber. Go towww.trex.com for Safety Data Sheets (SDS).TOOLSSAWSMiter Saw:When using a mitersaw we recommendusing the Trex Blade or a carbide-tippedblade with 60 teethor more. The TrexBlade comes in threedifferent sizes andis ideal for cuttingall Trex decking andrailing products (notrecommended forTrex Elevations ).Jigsaw:For detailed and/orsmall cuts (Example:cutting deck board tofit around a post), ajigsaw with a carbidetipped blade can beused.DRILLSInstall Trexrecommended fastenerswith standard powerdrills, impact drivers(use care if using impactdrivers), or right angledrills.* Trex Blade is manufactured and sold by Freud Tools, Inc. under aTrademark License Agreement with Trex Company, Inc.SPECIFIC DECK BOARD ATTACHMENT TOOLSScrew Guns:Some Trex recommended deck fasteners are compatiblewith screw guns. Refer to the recommended fastenerspage for more information.TigerClaw Pneumatic Gun:If choosing to use theTrex Hideaway HiddenFastener Connector Clips(these are the metal clips)for Transcend or EnhanceDecking or the TigerClawTC-G Hidden Fasteners withTrex Select Decking, theTigerClaw pneumatic gun is a terrific option that allowsfor quicker install time.Trex Router Bit:Trex decking routs to giveextremely crisp edges whenusing the Trex Router Bitwith standard router, andcan be use with all TrexHideaway Hidden Fasteners.*Tiger Claw is a registered trademark of Tiger Claw, Inc.5
GENERAL INFORMATIONTREX TRANSCEND , TREX ENHANCE , AND TREX SELECT CARE ANDCLEANING GUIDEAll exterior building materials require cleaning. Generally, soap and water is all that is required to clean Transcend,Enhance, and Select products. For additional information, see below.6PROBLEMSOLUTIONDirt and DebrisThe affected area should be sprayed off with a hose to remove surface debris. Use warmsoapy water and a soft bristle brush to remove dirt and debris from the embossing pattern.Hard Water StainingHard water is water with a high amount of mineral deposits like lime, silica and calcium.When the water dries, deposits are left behind, leaving unsightly spots on surfaces. This isnot a defect of Trex products but an issue with the water itself. Generally, these depositscan be cleaned with white vinegar on decking surfaces or with the use of Magic Eraser onrailing surfaces. Rinsing is required so care should be taken to not use hard water for thispurpose. If hard water must be used, dry with a cloth or use a blower to dry surfaces. Insome cases a deck brightener product may also be used to help clean hard water stains.Chalk LinesMost colored chalks are permanent and may discolor the surface. Use only Irwin StraitLine * Dust-Off Marking Chalk (purple), available at Irwin.com.Tannins Due to DebrisRemove all debris from the deck using a hose or broom. Once the deck surface is dry, applya deck “brightener"** to the deck as directed by the manufacturer. Deck Brighteners containoxalic acid, which will also remove tannins.Ice and SnowA plastic shovel may be used to remove snow from the deck. Use calcium chloride or rocksalt to melt the snow and ice from the deck surface.Oil, Grease, and FoodAll food spills should be removed as soon as possible. The surface must be cleaned withinseven days to maintain the stain warranty. To remove, spray off with a hose and use warm,soapy water and a soft bristle brush to remove spills from the embossing pattern.Mold and MildewIf debris such as pollen and dirt is allowed to remain on the deck surface, mold can feed onthe biofilm. Using a hose and warm, soapy water with a soft bristle brush is recommendedto remove the food source and mold.Using a PressureWasher (Concrete,Stucco, or Ground-inConstruction Dirt)A pressure washer with no greater than 3100 psi*** that has a fan attachment/adjustmentand soap dispenser may be used to remove dirt, concrete dust, or other types ofconstruction dirt. Spray deck with soap, then follow by gently scrubbing each deck boardwith a soft bristle brush. Spray/rinse each individual deck board using a fan tip no closerthan 8-in (203 mm) from the decking surface. RINSE THOROUGHLY. If dirty water fromcleaning is left to dry, a film will remain on the decking surface.MaintainingTranscend andSelect RailingNever use acetone or other solvents on Trex Transcend or Select railing to maintain thebeauty of the surface. For color transfer issues (from attachment of baluster spacer), useMr. Clean Magic Eraser Original**** or Plexus Plastic Cleaner***** to help remove this.For small surface scratches, marks, or scuffs, use Dupli-Color Scratch Seal Clear SealerPen.******NOTE: Construction methods are always improving. Please refer to www.trex.com for the most up-to-date installation requirements.
GENERAL INFORMATIONTREX TRANSCEND , TREX ENHANCE , AND TREX SELECT CARE ANDCLEANING GUIDEPROBLEMSOLUTIONWhile this is not common, static electricity can occur on walking surfaces in dryclimates or in areas where dry winds and dust-borne particles lay on the deckingsurfaces. Static electricity can build up on occupants walking across any compositedecking surface, including Trex, then produce a small static shock if they touch agrounded metal surface such as railing, door, etc.Trex and StaticElectricityThis condition can be decreased greatly with the use of a product call ACL Staticide .Two products tested were General Purpose Staticide and Heavy Duty Staticide . Bothare effective in greatly reducing static electricity on Trex decking surfaces. Apply fullstrength using a mop on a dry decking surface, and allow to dry; no rinsing or dilutingneeded. Products are non-toxic, non-flammable, non-staining (will not change the colorof decking surface), completely biodegradable and safe to use. Product is water-basedand may require a second application after rain or other weather conditions. Over aperiod of time, the effect of static will dissipate naturally on the decking surface.See link for more information on product: lJob Site StorageStore decking on a flat level surface and ALWAYS use proper supports (dunnage).DO NOT store directly on the ground. When stacking decking bundles, supports(dunnage) should start approximately 8-in (203 mm) from each end and be spacedapproximately 2-ft (0.61m) on center. In addition, supports (dunnage) should line upvertically/perpendicular to the decking product. Adjust support blocks (dunnage)accordingly if bundles are loose. For Select decking, Enhance (scalloped profile only)decking, and 1x12 and 1x8 products, the maximum stack height is 12 bundles. For allother decking products maximum stack height is 14 bundles (IMPORTANT TO NOTETHAT PROPER DUNNAGE SPACING MUST BE IN PLACE FOR THESE HEIGHTS). Whenstacking multiple bundles, ensure that dunnage lines up vertically down through eachstack. ALWAYS cover decking products on site until ready to be installed.*Strait-Line is a registered trademark of Irwin Industrial Tool Company.** Use of products containing bleach or acid can lighten the lighten the surface of Trex. Use in an inconspicuous area to determine whether youlike the effect. Neither product will affect the structural integrity of Trex.***Use of a pressure washer greater than 3100 psi could damage the boards and void the warranty.****Mr. Clean and Magic Eraser are registered trademarks of The Proctor and Gamble Company.*****Plexus Plastic Cleaner is a registered trademark of BTI Chemical Company Inc.******Scratch Seal Clear Sealer Pen is a registered trademark of Dupli-Color Products Company.NOTES:» Refer to www.trex.com to view a general care and cleaning video for Transcend, Enhance, andSelect decking.» R efer to www.trex.com for a care and cleaning guide for Trex Early-Generation Composite andPVC Decking.7
GENERAL INFORMATIONTREX SIGNATURE RAILING CARE AND CLEANING GUIDEMaintaining the appearance of your Trex Signature railing is important. The occasional wash is recommended asover time your Trex Signature railing may show signs of weathering as a result of exposure to the elements. Thefrequency of cleaning will depend on the environment and exposure to various types of elements.For installations where the atmosphere is influenced by bodies of salt water or other contaminant conditions,cleaning is required every 6 to 9 months. Failure to adhere to the required cleaning guidelines will void the TrexLimited Warranty with respect to any condition resulting from such failure. For purposes of any warranty claim,you should retain documentation of the cleaning date, cleaning method used, brand and amount of chemicalused, and invoice from cleaning company (or a receipt for chemicals used).Regular cleaning may minimize the effects of weathering and remove dirt, grime and other build-up. The bestmethod of maintaining the appearance of your Trex Signature railing is to occasionally wash it using a solution ofwarm water and a non-abrasive, pH neutral detergent solution. The railing surface should be thoroughly rinsed aftercleaning to remove all residues. Use a soft white cloth, sponge or a soft bristle brush.DO NOT clean Trex Signature railing with solvents such as thinners or solutions containing chlorinatedhydrocarbons, esters or ketones.The following cleaners are recommended for cleaning Trex Signature railing:» Formula 409 Cleaner Degreaser/Disinfectant*» Spray Nine Cleaner/Disinfectant**» Simple Green All Purpose Cleaner***» Fantastik All Purpose Cleaner****» Windex Cleaner****** Formula 409 Cleaner Degreaser/Disinfectant is a trademark of Clorox Company.** Spray Nine All Purpose Cleaner/Disinfectant is a trademark of Illinois Tool Works Inc.*** Simple Green All Purpose Cleaner is a trademark of Sunshine Makers Inc.**** Fantastik All Purpose Cleaner is a trademark of SC Johnson & Son Inc.***** Windex is a trademark of SC Johnson & Son Inc.8
PLANNING AHEADPLANNINGAHEAD9
PLANNING AHEADTrex Decking:Trex RainEscape Deck Drainage System:» When installing any Trex decking product, especially» Plan ahead for deck layout to allow for properPLANNING AHEADTrex Transcend Tropicals, it is a good idea to mixand match all of the boards on the job site prior toinstallation to ensure an appealing mix of light anddark tones.» DO NOT combine Trex Select decking with other Trexdecking products. Trex Select boards are thinner thanTranscend and Enhance boards.Railing (Including ADA Handrail):See www.trex.com for more information on TrexRainEscape recommendations and installation. TrexRainEscape is manufactured and distributed by Dri-DeckEnterprises, LLC, under a trademark license with TrexCompany, Inc.» First, pick the railing style you want.» Calculate your spanning based on the railing youchose.» Determine the number of balusters you will need basedon the railing you chose.Installing Hot Tubs, Planters, and Seating:NOTE: Trex Transcend and Select railings are made tobe installed at maximum of 6' (1.83 m) or 8' (2.44 m) oncenter (depending upon type of railing you choose). Trexrailings are not true 6' (72") or 8' (96") in length. Trex Signature railing and Rod Rail are made to be installed atmaximum 6' or 8' CLEAR SPAN BETWEEN POSTS.Call 1-800-BUY-TREX for detailed questions.» Determine post locations prior to installing anydecking. In most cases, posts are usually installedbefore decking is installed.» Confirm with your local building official if ADAHandrail is required, and if so plan spanning for postsaccordingly to allow for attachment of Trex ADAHandrail. ADA Handrail requires a span of6' OC for posts.» Grill placement: A good recommendation to helpprevent damage to your railing is to not have a grilltoo close to your railing. Allow for ample airspace (6"or more is recommended) between the back/sides ofyour grill to help prevent charring or staining to therailing.See pages 63–80 for Transcend railing installation, pages81–130 for Trex Signature railing installation, pages131-142 for Rod Rail installation, pages 143–152 for Selectrailing installation, and pages 153–156 for ADA Handrailinstallation.Trex Lighting:» Plan locations of lights, power supply, timer, anddimmer. These should be accessible for service ifnecessary.» Install wiring before decking and railing have beeninstalled.» DO NOT run wires between joists and deck boards.See pages 13–25 for Trex OutdoorLighting installation.10placement of Trex RainEscape within the joist system.» Make sure joists are straight and square.» Plan ahead proper joist spanning if required (this isespecially important if installing a hot tub).» Refer to page 33 for Trex Decking Span Chart forspecific loads.Installing Fireplaces and/or Fire Pits With TrexDecking:» Determine if fire will be gas or wood burning.(NOTE: Most fire pits shown in Trex images are gasburning.)» For gas, the fire pit is installed by cutting around theTrex decking. It is not to be installed on top of Trexdecking. A fire-resistant material is installed underthe fire pit and a protective “wall" made from stone o
5 Trerx.comet1x-.8m1e SAFETY When working on any construction project, you should wear protective clothing and safety equipment. Wear safety glasses, gloves, a dust mask and long sleeves,