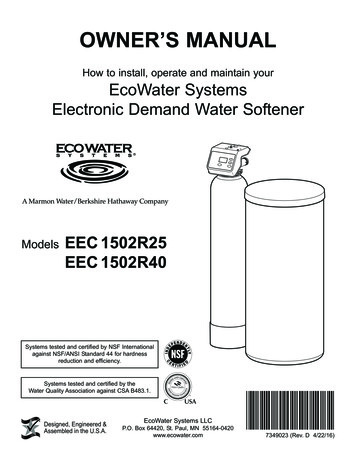
Transcription
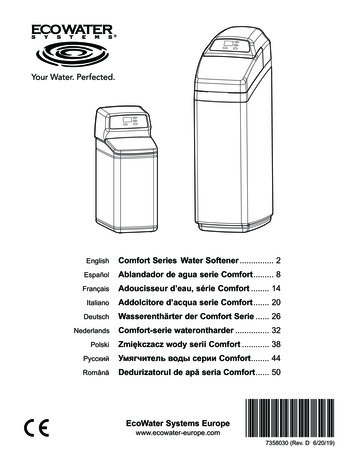
EnglishComfort Series Water Softener . 2FrançaisAdoucisseur d’eau, série Comfort . �ийRomânăAblandador de agua serie Comfort. 8Addolcitore d’acqua serie Comfort. 20Wasserenthärter der Comfort Serie . 26Comfort-serie waterontharder . 32Zmiękczacz wody serii Comfort . 38Умягчитель воды серии Comfort. 44Dedurizatorul de apă seria Comfort. 50EcoWater Systems Europewww.ecowater-europe.com7358030 (Rev. D 6/20/19)
INSTRUCTIONSComfort Series Water SoftenerEnglishModelsComfort 200Comfort 300Comfort 400TABLE OF CONTENTSPageInstallation Requirements . . . . . . . . . . . . 2Safety Guides . . . . . . . . . . . . . . . . . . . . . 2Installation Illustrations . . . . . . . . . . . . . . . 3Water Softener Programming . . . . . . . . 4-6Adding Salt . . . . . . . . . . . . . . . . . . . . . . . . 7Sanitizing . . . . . . . . . . . . . . . . . . . . . . . . . 7Troubleshooting . . . . . . . . . . . . . . . . . . . . 7INSTALLATION REQUIREMENTS Installation should only be performed by atrained professional. Make sure that the main water supply is shutoff before starting installation. Always install either an EcoWater Systemsbypass valve or a 3-valve bypass system.Bypass valves allow you to turn off water tothe softener for repairs if needed, but stillhave water in house pipes. A drain is needed for recharge dischargewater. A floor drain is preferred, close to theEcoWater Systems water softener.A laundry tub, standpipe, etc., are otheroptions. A 220-240V, 50/60 Hz, grounded, continuously “live” electrical outlet is needed, in adry location within 2 meters of the EcoWaterSystems softener. After completing installation of the system,perform a pressure test to detect any leaks. After completing pressure test, perform amanual recharge.SAFETY GUIDES Before beginning installation, read the manual and obtaintools and materials needed. The installation must conform to local plumbing andelectrical codes. Use only lead-free solder and flux for all sweat solder con-nections. Handle the water softener with care. Do not turn upsidedown, drop, or set on sharp protrusions. Do not locate the water softener:- where freezing temperatures may occur.- in direct sunlight.- where it may be exposed to wet weather. Do not attempt to treat water over 49 C. The softener requires a minimum water flow of 11 liters perminute at the inlet. Maximum allowable inlet water pressure is 8.6 bar. If daytimepressure is over 5.5 bar, nighttime pressure may exceed themaximum. Use a pressure reducing valve if necessary. This system works on 24 volt DC electrical power. Be sure touse the included power supply and plug it into a nominal220-240V, 50/60 Hz household outlet that is in a dry locationonly, grounded and properly protected by an over currentdevice such as a circuit breaker or fuse. This system is not intended to be used for treating water thatis microbiologically unsafe or of unknown quality without adequate disinfection before or after the system.European Directive 2002/96/EC requires all electricaland electronic equipment to be disposed of accordingto Waste Electrical and Electronic Equipment(WEEE) requirements. This directive or similar lawsare in place nationally and can vary from region toregion. Please refer to your state and local laws forproper disposal of the equipment.EcoWater Systems Europe www.ecowater-europe.comA detailed manual can be obtained from your local dealer or from the EcoWater website in your country.2
ECOWATERInstallation IllustrationsS Y S T E M STYPICAL INSTALLATIONIPEATER PMAIN WSOFTWATEREnglishINSTALLATION USINGTHREADED BYPASS VALVEClips220-240V,50/60 Hzelectrical outletHARDWATEROUTLETINLETOutletpower supply(included)power cordto controller(2 m long)InletBypassValveLubricatedO-ringEcoWater Systemsbypass valveFIG. 3AINSTALLATION USINGCLIP STYLE BYPASS VALVENOTE: Faceplate and support notshown for clarity of drawingWATERSOFTENERFlexibleHoseClipsvalve drain hose(do not elevate morethan 2.5 meters)FIG. 1InletPull OUT forSERVICE(normal operation)Push IN forBYPASSBlend adjusting knob turn counterclockwiseto increase hardnessof treated waterFIG. 2Afromsoftener for SERVICE:ClipsinletvalvebypassvalveFIG. 3BINSTALLATION USINGADAPTOR ELBOWS3-Valve BypassoutletvalveBypassValveLubricatedO-ringBYPASS OPTIONSEcoWater SystemsBypass ValveClipOutletto drain provide a4 cm air gapbrine tankoverflow hose(do not elevate)FlexibleHoseOutlettosoftener- open input and output valves- close bypass valve for BYPASS:- close input and output valves- open bypass valveFIG. IG. 3C
ECOWATERS Y S T E M SWater Softener ProgrammingEnglishUP buttonDisplayDOWN buttonSELECT buttonRECHARGEbuttonCONTROLLER SETTINGS REQUIREDHardness Unitupon installation, and after an extended power outage.French degrees ( f)When the power supply is plugged into the electricaloutlet, a model code and a version number are brieflyshown in the display. Then the words “PRESENTTIME” appear and 12:00 begins to flash.German degrees ( dH)A. SET PRESENT TIME OF DAYParts per million (ppm)1. If the words “PRESENTTIME" do not show in thedisplay, press theSELECT button severaltimes until they do.Conversionsgpg f x 0.584 f gpg x 1.712gpg dH x 1.043 dH gpg x 0.959gpg ppm x 0.0584ppm gpg x 17.12NOTE: If your water supply contains iron, compensatefor it by adding to the water hardness number.For example, assume your water is 20 gpg hardand contains 2 ppm iron. Add 5 to the hardnessnumber for each 1 ppm of iron. In this example,you would use 30 for your hardness number.2. Press the á UP or âDOWN buttons to set thepresent time. Up movesthe display ahead; downsets the time back.20 gpg hardness2 ppm iron x 5 10 10(times)30 HARDNESS NUMBER2. When finished setting your water’s hardness number,press the SELECT button, and the display willchange to show the “Recharge Time” screen.NOTE: Press buttons andquickly release to slowly advance the display.Hold the buttons down for fast advance.3. When the correct time is displayed, press theSELECT button, and the display will change to showthe “Hardness” screen.C. SET RECHARGE START TIMEB. SET WATER HARDNESS NUMBER1. If you completed the previous step, the word“HARDNESS" shouldshow in the display.Otherwise, press theSELECT button severaltimes until it does.2. Press the á UP or â DOWN buttons to set thevalue of your water’s hardness in grains per gallon(gpg). The default is 25. See the following table forunit conversions.41. If you completed the previous step, the words“RECHARGE TIME"should show in the display. Otherwise, pressthe SELECT button several times until they do.2. The softener’s default recharge start time is 02:00.In most households this is a good time for rechargeto start (takes about 2 hours) because water is notbeing used. During recharge hard water is bypassedto house faucets. Use the á UP or â DOWN buttons to adjust the recharge start time in 1 hour increments.3. When the desired recharge time is displayed, pressthe SELECT button, and the display will change toshow the normal run (time of day) screen.
ECOWATERS Y S T E M SNORMAL OPERATIONWater Softener ProgrammingEnglishTo change the number ofdays between recharges:During normal operation, thepresent time of day shows inthe display.1. Press and hold theSELECT button until “000- -” shows in the display.RECHARGE NOW2. Press the SELECT buttononce again and the words“Auto RECHARGE" flashin the display.For times when you expectto use more water thanusual, it may be desirable toperform a manually initiatedrecharge. To manually starta recharge cycle, press andhold the RECHARGE button for a few seconds, until“RECHARGE NOW” flashes in the display.3. Press the á UP or âDOWN buttons to set thenumber of days betweenrecharges.4. When the desired numberof days are displayed,press the SELECT buttonseveral times to advance through the remainingscreens and return to the normal run (time of day)display.The softener begins an immediate recharge. Oncestarted, you cannot cancel this recharge. Avoid usinghot water during this time, as the water heater will refillwith hard water.RECHARGE TONIGHTNOTE: The unit will recharge after the programmednumber of days, even if no water is used duringthat period. To prevent recharges during vacation, set the maximum days to “Auto” beforeleaving. You will need to set the number ofdays again when you return.To set a recharge cycle tobegin at the next presetrecharge start time, touch(press, but do not hold) theRECHARGE button.“RECHARGE TONIGHT”flashes in the display.SET 97% FEATUREWhen this feature is set ON,the unit will automaticallyrecharge when 97% ofcapacity has been used (atany time of day). The factory default setting is OFF.A recharge will begin at the next preset recharge starttime (02:00 or as set). If you decide to cancel thisrecharge before it starts, touch the same button oncemore.VACATION NOTE1. Press and hold theSELECT button until “000- -” shows in the display.EcoWater demand controlled water softeners rechargeonly while water is being used and softening capacitymust be restored. For this reason, the unit will notrecharge when you are away from home for extendedperiods. However, if you set the “Maximum DaysBetween Recharges” feature, the softener will rechargeeven when no water is used.2. Press the SELECT buttontwice and “97" will flash inthe display, alternatingwith the current setting(either “ON” or “OFF”).SET MAXIMUM DAYS BETWEENRECHARGES3. Use the á UP or âDOWN buttons to togglethe setting between “ON”and “OFF”.The default setting allows the timer to control rechargefrequency based on water usage readings from thewater meter. It provides the most economical operation.4. When the desired setting (“ON” or “OFF”) is flashing,press the SELECT button several times to advancethrough the remaining screens and return to the normal run (time of day) display.You can set a maximum time (in days) betweenrecharges. For example, no more than 3 days will passwithout a recharge occurring if you set “3 day" in thedisplay. This feature can be set from 1 to 15 days.5
ECOWATERS Y S T E M S12 OR 24 HOUR CLOCKWater Softener ProgrammingEnglishAUXILIARY OUTPUTThe timer has been factorypreset to display a 24 hourclock. If you prefer, youmay change this to display a12 hour clock.The electronic controller’s auxiliary output can be usedto operate a chlorine generator. It provides a 24V DC,up to 500 mA, current from terminal J4 on the electroniccontrol board. This current is on during the brine drawportion of the softener’s recharge cycle.1. Press and hold theSELECT button until “000- -” shows in the display.POWER OUTAGE MEMORYIf electrical power to the softener’s control is lost, internal memory will maintain most settings such as thehardness and recharge time. However, unless thepower outage was very brief, the clock’s present timewill need to be reset. During a power outage, the display will be blank and the softener will not recharge.When electrical power is restored:2. Press the SELECT buttonthree times and “24 hr"will flash in the display.3. Use the â DOWN buttonto change to a 12 hourclock display.1. Check the display.4. Press the SELECT buttonseveral times to advancethrough the remaining screens and return to the normal operation (time of day) display.2a. If the present time is displayed steadily (not flashing), the controller did not lose time and you do notneed to reset the clock.5. To change back to a 24 hour clock, follow Steps 1through 4, above, except use the á UP button inStep 3.2b. If a time is flashing in the display, then the clockneeds to be reset to the correct present time. See“Set Present Time of Day” on page 4. The flashingdisplay is to remind you to reset the clock. If youdo not reset the clock, then recharges will most likely occur at the wrong time of day.ADJUST BACKWASH TIME AND RINSETIMENOTE: If the softener was recharging when power waslost, it will finish the cycle when power returns.The timer can be changedto allow different backwashand fast rinse times, if sodesired. Each of these canbe adjusted from 0 to 30minutes.1. Press and hold theSELECT button until “000- -” shows in the display.2. Press the SELECT buttonfour times and “bA- " willflash in the display.3. Use the á UP or âDOWN buttons to set thenumber of minutesdesired for backwash.4. Press the SELECT button again and “Fr- " will flashin the display.5. Use the á UP or â DOWN buttons to set the number of minutes desired for fast rinse.6. Press the SELECT button to return to the normaloperation (time of day) display.6
ECOWATEROperating InformationS Y S T E M SADDING SALTEnglishBREAKING A SALT BRIDGESometimes a hard crust or salt “bridge” forms in the brinetank. This is usually caused by high humidity or the wrongkind of salt. When this happens, an empty space formsbetween the water and the salt. Then salt will not dissolvein the water, the resin bed will not be recharged, and hardwater will result.Push tool intoA bridge may besalt bridgeunderneath looseto breaksalt. Use a broomhandle or like tool tocheck, as shown in3-5Figure 4. Carefullycmpush it straight downinto the salt. If ahard object is felt, itis most likely a saltPencilSaltbridge. CarefullyMarkpush into the bridgeBridgein several places toSpacebreak it. Do not tryWaterto break the saltbridge by poundingon the salt tank.Brine (salt dissolved in water) is needed for everyrecharge. The water for making brine is metered intothe salt storage area by the softener valve and timer. Ifthe water softener uses all the salt before more is added,hard water will result. Lift the brine tank lid and check thesalt level frequently.If adding salt for the first time, make sure that there isabout 10 cm of water in the brine tank. Be sure that thebrinewell cover is on when adding salt.NOTE: In humid areas it is best to keep the salt level lessthan half full and add salt more often.RECOMMENDED SALT: Cube, pellet, coarse solar, etc.,water conditioner salt with less than 1% insoluble impurities. This type of salt is high purity evaporated crystals,sometimes formed into briquets. It has less than 1%insoluble (not dissolvable in water) impurities.SALT NOT RECOMMENDED: Rock salt high in impurities,block, granulated, table, ice melting, or ice cream makingsalts, etc., are not recommended.FIG. 4SANITIZING INSTRUCTIONSCare is taken at the factory to keep your EcoWater Systems softener sanitary. However, during shipping, storage,installing and operating, bacteria could get into the unit. For this reason, sanitizing is suggested* when installing:1. Remove the brinewell cover and pour about 40 ml (2 to 3 tablespoons) of common household bleach into the conditioner/refiner brinewell. Clorox and other brand names of bleach are readily available. Replace the brinewell cover.2. Initiate a “Recharge now” (See Page 5). This recharge draws the bleach into and through the softener.*Recommended by the Water Quality Association. On some water supplies, the EcoWater Systems unit may need periodic disinfecting.NOTE: We recommend that you have the conditioner/refiner serviced annually.PROBLEMNo soft waterTROUBLESHOOTING GUIDECAUSEAdd salt and then initiate a “Recharge now”.Power supply unplugged, power cableleads disconnected from electronic controlboard, fuse blown, circuit breaker off.Check for power loss due to any of these and correct. When poweris restored, set the time if the display shows “Present Time” screen(See Page 4).Salt is “bridged.”Bypass valve(s) in bypass position.Water hardsometimesError codedisplayedCORRECTIONNo salt in the storage tank.Valve drain hose plugged or restricted.Bypassed hard water being used duringrecharge, due to present time orrecharge time settings being incorrect.Hardness number setting is too low.Hot water being used when softener isrecharging.Fault in wiring, position switch, valve,motor or electronic control board.Break salt bridge (See above) and then initiate a “Recharge now”.Place bypass valve(s) in service position.Drain hose must not have kinks, sharp bends, or be raised too high.Check the present time displayed. If not correct, refer to “SetPresent Time” on Page 4. Check the recharge start time, asdescribed on Page 4.Referring to “Set Water Hardness” on Page 4, check the currenthardness setting and increase if needed. Have hardness of watersupply tested, if necessary.Avoid using hot water during recharges, because water heater refillswith hard water.Contact your dealer for service.7
INSTRUCCIONESAblandador de agua serie ComfortEspañolModelosComfort 200Comfort 300Comfort 400CONTENIDOPáginaRequisitos de instalación . . . . . . . . . . . . . . . 8Pautas de seguridad . . . . . . . . . . . . . . . . . . 8Ilustraciones de instalación . . . . . . . . . . . . . 9Programación del ablandador de agua . 10-12Adición de sal . . . . . . . . . . . . . . . . . . . . . . 13Desinfección . . . . . . . . . . . . . . . . . . . . . . . 13Resolución de problemas . . . . . . . . . . . . . 13REQUISITOS DE INSTALACIÓN Únicamente un profesional capacitado deberealizar la instalación. Compruebe que esté cerrado el suministroprincipal de agua antes de comenzar la instalación. Instale siempre ya sea una válvula de derivaciónEcoWater Systems o un sistema de derivaciónde 3 válvulas. Las válvulas de derivación le permiten cerrar la entrada de agua al ablandadorpara su reparación, si es necesario, y aún asítener agua en las tuberías de la casa. Se necesita tener un desagüe para descargarel agua de la recarga. Es preferible usar undesagüe de piso, cerca del ablandador deagua EcoWater Systems. Otras opcionespueden ser una pileta de lavadero, un tubo vertical, etc. Se necesita un tomacorriente con régimen de220-240 voltios y 50/60 hercios, alimentacióneléctrica permanente y conexión a tierra, instalado en una ubicación seca, a no más de 2metros de distancia del ablandador de aguaEcoWater Systems. Al terminar la instalación del sistema, realiceuna prueba de presión para detectar cualquierfuga. Después de la prueba de presión, realice unarecarga manual.PAUTAS DE SEGURIDAD Antes de comenzar la instalación, lea el manual y consiga todaslas herramientas y los materiales que necesitará. La instalación debe cumplir con los códigos locales de fontan-ería y electricidad. Use sólo soldadura y fundente sin plomo para todas las conex-iones de soldadura con estaño. Maneje el ablandador de agua con cuidado. No lo ponga boca EcoWater Systems Europeabajo, no lo deje caer ni lo apoye sobre protuberancias puntiagudas.No coloque el ablandador de agua:- donde puedan registrarse temperaturas de congelamiento.- expuesto a la luz solar directa.- donde pueda exponerse a la humedad climática.No intente tratar agua con una temperatura superior a los 49 C.El ablandador de agua requiere un caudal de agua mínimo de11 litros por minuto en la entrada.La máxima presión de entrada de agua permitida es de8,6 bares. Si la presión de agua durante el día supera los5,5 bares, la presión durante la noche podría exceder el máximo. Si es necesario, use una válvula reductora de presión.Este sistema funciona con energía eléctrica de 24 voltios de CC.Asegúrese de usar la fuente de alimentación incluida y de enchufarla en un enchufe doméstico con régimen nominal de220-240 voltios y 50/60 hercios, con puesta a tierra y que seencuentre en un lugar seco y debidamente protegido por un dispositivo para sobrecorriente, como un disyuntor o un fusible.Este sistema no se ha diseñado para tratar agua que sea microbiológicamente impura o cuya calidad se desconozca, sin unaadecuada desinfección antes o después del sistema.La Directiva Europea 2002/96/EC requiere que todoslos equipos eléctricos y electrónicos se desechen segúnlos requisitos sobre “Residuos de aparatos eléctricos yelectrónicos” (RAEE). Dicha directiva u otras leyes similares se han implementado a nivel nacional y puedenvariar de una región a otra. Para desechar correctamente el equipo, consulte sus leyes estatalesy locales. www.ecowater-europe.comPuede solicitar un manual detallado a su concesionario local u obtenerlo del sitio web de EcoWater en su país.8
ECOWATERIlustraciones de instalaciónS Y S T E M SINSTALACIÓN TÍPICAÍA PRINTUBERAGUADURASALIDAENTRADAE AGUACIPAL DAGUABLANDAEntradaOPCIONES DE DERIVACIÓNPerilla de ajuste de lacombinación: Gire ensentido antihorario paraaumentar la dureza delagua tratadaFIG. 2AClipsDerivación de 3 válvulasdesde elablandador Para el FUNCIONAMIENTO:MangueraflexibleSalidaFIG. 1Presione haciaADENTRO parala DERIVACIÓNFIG. 3AINSTALACIÓN CON VÁLVULADE DERIVACIÓN ESTILO CLIPManguera de desagüe dela válvula (no elevar a másde 2,5 metros)Válvula dederivaciónVálvula dederivaciónJunta tóricalubricadaNOTA: No se ilustran la placa frontalni el soporte para mayor claridad del dibujoVálvula desalidaMangueraflexibleSalidaCable eléctricoal controlador(2 m de largo)manguera de sobreflujo del tanque desalmuera (no elevar)Tire haciaAFUERA para elFUNCIONAMIENTO(operación normal)Clipsfuente de alimentación(incluida)al desagüe proporcionar unseparación de airede 4 cmVálvula de derivaciónEcoWater SystemsINSTALACIÓN CON VÁLVULADE DERIVACIÓN ROSCADAEnchufe de220-240 voltiosy 50/60 herciosVálvula de derivaciónEcoWater SystemsABLANDADORDE AGUAEspañolVálvula deentradaEntradaFIG. 2B9Válvula dederivaciónJunta tóricalubricadaFIG. 3BINSTALACIÓN CON CODOSADAPTADORESClipsMangueraflexibleSalidahacia elablandador- Abra las válvulas de entrada y salida- Cierre la válvula de derivación Para la DERIVACIÓN:- Cierre las válvulas de entrada y salida- Abra la válvula de derivaciónClipEntradaJunta tóricalubricadaCodos adaptadoresFIG. 3C
ECOWATERS Y S T E M SProgramación del ablandador de aguaEspañolBotón SUBIRPantallaBotón BAJARBotón SELECT(Seleccionar)BotónRECHARGE(Recargar)SE NECESITA AJUSTAR LOS PARÁMETROSUnidad de durezadel controlador al instalar la unidad y después de una interrupción eléctrica prolongada.Grados franceses ( f)Cuando se enchufe la fuente de alimentación a un tomacorriente eléctrico, en la pantalla aparecerán brevementeun código de modelo y un número de versión. Luegoaparecerán las palabras “PRESENT TIME” (Hora actual) ycomenzará a destellar “12:00”.Grados alemanes ( dH)Partes por millón (ppm)A. CONFIGURE LA HORA ACTUAL DEL DÍA1. Si no se ven las palabras“PRESENT TIME” (Horaactual) en la pantalla, pulsevarias veces el botónSELECT (Seleccionar)hasta que aparezcan.2. Oprima los botones áSUBIR o â BAJAR parafijar la hora actual. “Subir”hace avanzar los númerosen pantalla; “Bajar” loshace retroceder.NOTA: Pulse y suelteenseguida los botonespara hacer avanzar lentamente los números en lapantalla. Mantenga pulsados los botones paraavanzar rápidamente.3. Cuando aparezca la hora correcta, presione el botónSELECT (Seleccionar) y cambiará la pantalla paraindicar la dureza del agua.Conversionesgpg f x 0,584 f gpg x 1,712gpg dH x 1,043 dH gpg x 0,959gpg ppm x 0,0584ppm gpg x 17,12NOTA: Si su suministro de agua contiene hierro, compense aumentando el número de dureza del agua.Por ejemplo, supongamos que el agua tiene unadureza de 20 gpg y que contiene 2 ppm de hierro.Sume 5 al número de dureza por cada1 ppm de hierro. En este ejemplo, el número parala dureza del agua sería 30.20 gpg de dureza2 ppm de hierro x 5 10 10(por)30 COMO NÚMERODE DUREZA3. Cuando termine de fijar el número de dureza del agua,presione el botón SELECT (Seleccionar) y cambiará lapantalla para indicar la hora de recarga.C. CONFIGURE LA HORA DE INICIO DE LARECARGAB. CONFIGURE EL NÚMERO DE DUREZADEL AGUA1. Si cumplió el paso anterior,aparecerá la palabra“HARDNESS” (Dureza) enla pantalla. Si así no fuera,presione varias veces elbotón SELECT(Seleccionar) hasta queaparezca.2. Pulse los botones á SUBIR o â BAJAR para configurar el valor de la dureza del agua, en granos por galón(gpg). El valor predeterminado es 25. Consulte la conversión de unidades en la siguiente tabla.101. Si cumplió el paso anterior,aparecerá la frase“RECHARGE TIME” (Horade recarga) en la pantalla.Si así no fuera, presionevarias veces el botónSELECT (Seleccionar)hasta que aparezca.2. La hora predeterminada de inicio de la recarga delablandador es 02:00 AM. En la mayoría de las viviendases una buena hora para iniciar la recarga (dura unas2 horas) porque no se usa agua. Durante la recarga, sedesvía el agua dura hacia los grifos de la casa. Pulse losbotones á SUBIR o â BAJAR para ajustar la hora deinicio de recarga en incrementos de 1 hora.3. Cuando aparezca la hora deseada de recarga, presioneel botón SELECT (Seleccionar) y cambiará la pantallapara indicar el funcionamiento normal (la hora del día).
ECOWATERS Y S T E M SOPERACIÓN NORMALProgramación del ablandador de aguaEspañolPara cambiar la cantidad dedías entre ciclos de recarga:Durante el funcionamientonormal, la pantalla mostrarála hora actual del día.1. Mantenga pulsado el botónSELECT (Seleccionar)hasta que aparezca“000 - -” en pantalla.2. Presione otra vez el botónSELECT (Seleccionar) y lafrase “Auto RECHARGE”(RECARGA automática)destellará en la pantalla.3. Pulse los botones áSUBIR o â BAJAR paraconfigurar la cantidad dedías entre recargas.4. Cuando aparezca la cantidad deseada de días,pulse varias veces el botónSELECT (Seleccionar) pararecorrer las demás pantallas y volver a la pantalla defuncionamiento normal (la hora del día).NOTA: La unidad se recargará después de la cantidadprogramada de días, aunque no se haya utilizadoagua durante dicho período. Para evitar las recargas durante las vacaciones, fije la cantidad máxima de días en “Auto” (automática) antes de salir.Deberá volver a configurar la cantidad de díascuando regrese.RECARGAR AHORAPara períodos en los queprevé que utilizará más aguade lo habitual, puede queconvenga realizar un recargainiciada manualmente. Parainiciar manualmente un ciclode recarga, mantenga pulsado el botón RECHARGE(Recargar) durante unos segundos, hasta que destelle lafrase “RECHARGE NOW” (Recargar ahora) en la pantalla.El ablandador iniciará inmediatamente la recarga. Una vezque se inicie esta recarga, no podrá cancelarla. Evite usarel agua caliente durante este período, pues el calentadorde agua se llenará con agua dura.RECARGAR ESTA NOCHEPara configurar el inicio de unciclo de recarga a la siguientehora de inicio de recarga,pulse y suelte el botónRECHARGE (Recargar). Lafrase “RECHARGE TONIGHT”(Recargar esta noche) destellará en la pantalla.Se realizará una recarga a la siguiente hora predeterminadade recarga (02:00 o como se haya configurado). Si decidecancelar dicho ciclo antes de que comience, pulse unavez más el mismo botón.CONFIGURAR FUNCIÓN DEL 97%Cuando esta función estáconfigurada en ON (encendido), la unidad se recargaráautomáticamente cuando sehaya consumidoel 97% de la capacidad (acualquier hora del día). Elajuste predeterminado defábrica es OFF (apagado).1. Mantenga pulsado el botónSELECT (Seleccionar)hasta que aparezca“000 - -” en pantalla.2. Presione dos veces elbotón SELECT(Seleccionar) y destellará“97" en la pantalla, alternando con la configuraciónactual(ya sea “ON” u “OFF”).3. Use los botones á SUBIR o â BAJAR para cambiarentre “ON” y “OFF”.4. Cuando destelle la configuración deseada (“ON” u“OFF”), pulse varias veces el botón SELECT(Seleccionar) para recorrer las demás pantallas y volvera la pantalla de funcionamiento normal (la hora del día).NOTA SOBRE LAS VACACIONESLos ablandadores de agua EcoWater controlados pordemanda recargan el agua solamente mientras se consumey necesitan recuperar la capacidad de ablandamiento. Pordicha razón, la unidad no se recargará cuando la viviendano esté ocupada por periodos prolongados. Sin embargo,si se configura la función “Maximum Days BetweenRecharges” (Cantidad máxima de días entre recargas), elablandador se recargará incluso cuando no se utilice agua.CONFIGURE LA CANTIDAD MÁXIMA DEDÍAS ENTRE RECARGASEl ajuste predeterminado permite que el temporizador controle la frecuencia de las recargas en base a las lecturasde consumo de agua en el medidor de agua. Esto proporciona el funcionamiento más económico.Usted puede configurar un tiempo máximo (en días) entrerecargas. Por ejemplo, si configura “3 días” en la pantalla,no pasarán más de 3 días sin una recarga. Esta funciónpuede configurarse de 1 a 15 días.11
ECOWATERS Y S T E M SProgramación del ablandador de aguaRELOJ DE 12 Ó 24 HORASEspañolSALIDA AUXILIAREl temporizador viene configurado de fábrica con un relojde 24 horas. Si lo prefiere,puede cambiarlo al formatode 12 horas.1. Mantenga pulsado el botónSELECT (Seleccionar)hasta que aparezca“000 - -” en pantalla.2. Pulse tres veces el botónSELECT (Seleccionar) ydestellará “24 hr" en lapantalla.3. Utilice el botón â BAJARpara cambiar el reloj al formato de 12 horas.4. Pulse varias veces el botónSELECT (Seleccionar) pararecorrer las demás pantallas y volver a la pantallade funcionamiento normal (la hora del día).5. Para volver a seleccionar el reloj con formato de24 horas, siga los Pasos 1 al 4 explicados anteriormente,pero esta vez utilice el botón á SUBIR en el Paso 3.Se puede usar la salida auxiliar del controlador electrónicopara hacer funcionar un generador de cloro. Proporcionauna corriente de 24 VCC y hasta 500 mA desde el terminal J4 en el tablero de control electrónico. Esta corrienteestá encendida durante la fase de extracción de salmueradel ciclo de recarga del ablandador.MEMORIA PARA CORTES DE ELECTRICIDADSi se interrumpe el suministro eléctrico del control delablandador, la memoria interna conservará la mayoría delos ajustes, tales como dureza y hora de recarga. Sinembargo, a menos que la interrupción eléctrica haya sidomuy breve, habrá que reprogramar la hora actual del reloj.Durante una interrupción eléctrica, la pantalla quedará enblanco y el ablandador no se recargará. Cuando serestaure la electricidad:1. Revise la pantalla.2a. Si la hora actual aparece en forma continua (sindestellar), el controlador no perdió la hora y no esn
INSTRUCTIONS Comfort Series Water Softener Models Comfort 200 Comfort 300 Comfort 400 TABLE OF CONTENTS Page . SELECT button, and the display will change to show the "Hardness" screen. B. SET WATER HARDNESS NUMBER 1. If you completed the pre-vious step, the word