Transcription
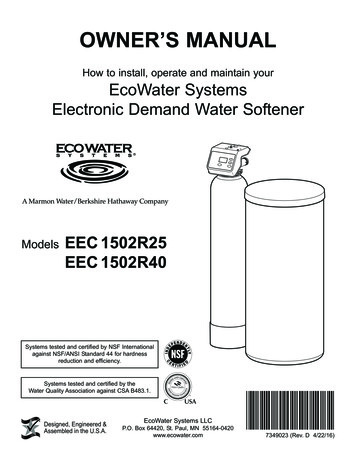
OWNER’S MANUALHow to install, operate and maintain yourEcoWater SystemsElectronic Demand Water SoftenerModelsEEC 1502R25EEC 1502R40Systems tested and certified by NSF Internationalagainst NSF/ANSI Standard 44 for hardnessreduction and efficiency.Systems tested and certified by theWater Quality Association against CSA B483.1.Designed, Engineered &Assembled in the U.S.A.EcoWater Systems LLCP.O. Box 64420, St. Paul, MN 55164-0420www.ecowater.com7349023 (Rev. D 4/22/16)
ECOWATERS Y S T E M STable of Contents, Inspect Shipment & Safety GuidesTABLE OF CONTENTSPageSpecifications & Performance Claims . . . . . . . . . . . . . . . . . . . . . . . . . . . . . . . . . . . . . . . . . . . . . . . . . . . . . . . . . . . . 3Dimensions . . . . . . . . . . . . . . . . . . . . . . . . . . . . . . . . . . . . . . . . . . . . . . . . . . . . . . . . . . . . . . . . . . . . . . . . . . . . . . . . 4Before Starting Installation . . . . . . . . . . . . . . . . . . . . . . . . . . . . . . . . . . . . . . . . . . . . . . . . . . . . . . . . . . . . . . . . . . . . 5Typical Installation Illustrations . . . . . . . . . . . . . . . . . . . . . . . . . . . . . . . . . . . . . . . . . . . . . . . . . . . . . . . . . . . . . . . . . 6Installation Instructions . . . . . . . . . . . . . . . . . . . . . . . . . . . . . . . . . . . . . . . . . . . . . . . . . . . . . . . . . . . . . . . . . . . . . . 7-9Sanitizing Procedure . . . . . . . . . . . . . . . . . . . . . . . . . . . . . . . . . . . . . . . . . . . . . . . . . . . . . . . . . . . . . . . . . . . . . . . . . 9Programming the Electronic Controller . . . . . . . . . . . . . . . . . . . . . . . . . . . . . . . . . . . . . . . . . . . . . . . . . . . . . . . 10-11Controller Features / Options . . . . . . . . . . . . . . . . . . . . . . . . . . . . . . . . . . . . . . . . . . . . . . . . . . . . . . . . . . . . . . . 11-13Routine Maintenance . . . . . . . . . . . . . . . . . . . . . . . . . . . . . . . . . . . . . . . . . . . . . . . . . . . . . . . . . . . . . . . . . . . . . 13-14Troubleshooting . . . . . . . . . . . . . . . . . . . . . . . . . . . . . . . . . . . . . . . . . . . . . . . . . . . . . . . . . . . . . . . . . . . . . . . . . 15-16Wiring Schematic . . . . . . . . . . . . . . . . . . . . . . . . . . . . . . . . . . . . . . . . . . . . . . . . . . . . . . . . . . . . . . . . . . . . . . . . . . 17Repair Parts . . . . . . . . . . . . . . . . . . . . . . . . . . . . . . . . . . . . . . . . . . . . . . . . . . . . . . . . . . . . . . . . . . . . . . . . . . . . 18-23Warranty . . . . . . . . . . . . . . . . . . . . . . . . . . . . . . . . . . . . . . . . . . . . . . . . . . . . . . . . . . . . . . . . . . . . . . . . . . . . . . . . . 24INSPECT SHIPMENTThe parts required to assemble and install the watersoftener are included with the unit. Thoroughly checkthe water softener for possible shipping damage andparts loss. Also inspect and note any damage to theshipping carton.Remove and discard (or recycle) all packing materials.To avoid loss of small parts, we suggest you keep thesmall parts in the parts bag until you are ready to usethem.SAFETY GUIDESRecommended maximum allowable inlet waterpressure is 125 psi. If daytime pressure is over 80psi, nighttime pressure may exceed the maximum.Use a pressure reducing valve if necessary. Be surethe addition of a pressure reducing valve will notreduce the flow to less than the 3 gallons per minute.Follow the installation instructions carefully. Failure toinstall the water softener properly voids the warranty.Before you begin installation, read this entire manual.Then obtain all the materials and tools you will needto make the installation.Check local plumbing and electrical codes. Theinstallation must conform to them.The water softener works on 28V DC electrical power,supplied by a direct plug-in power supply (included).Be sure to use the included power supply, and plug itinto a nominal 120V, 60 Hz household outlet that is ina dry location only, grounded and properly protectedby an overcurrent device such as circuit breaker orfuse.Use only lead-free solder and flux for all sweat-solder connections as required by state and federalcodes.Use care when handling the water softener. Do notturn upside down, drop, or set on sharp protrusions.Do not locate the water softener where freezing temperatures occur. Do not attempt to treat water over120 F. Freezing, or hot water damage voids the warranty.This system is not intended to be used for treatingwater that is microbiologically unsafe or of unknownquality without adequate disinfection before or afterthe system.Avoid installing in direct sunlight. Excessive sun heatmay cause distortion or other damage to non-metallicparts.European Directive 2002/96/EC requires allelectrical and electronic equipment to bedisposed of according to Waste Electricaland Electronic Equipment (WEEE) requirements. This directive or similar laws are inplace nationally and can vary from region toregion. Please refer to your state and locallaws for proper disposal of this equipment.The water softener requires a minimum water flow of3 gallons per minute at the inlet.2
ECOWATERSpecifications & Performance ClaimsS Y S T E M SThese models are efficiency rated. The efficiency rating is valid only at the minimum salt dose and the service flowrate. The softeners have a demand initiated regeneration (D.I.R) feature that complies with specific performancespecifications intended to minimize the amount of regenerant brine and water used in their operation.These softeners have a rated softener efficiency of not less than 3,350 grains of total hardness exchange per poundof salt (based on sodium chloride) and shall not deliver more salt than their listed rating or be operated at a sustained maximum service flow rate greater than their listed rating. These softeners have been proven to deliver softwater for at least ten continuous minutes at the rated service flow rate. The rated salt efficiency is measured by laboratory tests described in NSF/ANSI Standard 44. These tests represent the maximum possible efficiency that thesystem can achieve. Operational efficiency is the actual efficiency after the system has been installed. It is typicallyless than the rated efficiency, due to individual application factors including water hardness, water usage, and othercontaminants that reduce a softener's capacity.ModelSPECIFICATIONSEEC 1502R25EEC 1502R4010,500 @ 2.122,200 @ 6.626,600 @ 11.211,700 @ 2.330,800 @ 8.539,000 @ 14.7Water Used During Regeneration @ Minimum Salt Dose3.0 gal. / 1,000 grains3.3 gal. / 1,000 grainsAmount of High Capacity Resin36.4 lbs. (0.70 cu. ft.)56.2 lbs. (1.08 cu. ft.)6.0 gpm9.9 gpmModel CodeEC25Rated Softening Capacity (grains @ lb. salt dose)Rated Efficiency (grains / lb. @ minimum salt dose)Total Water Used Per Regeneration @ Maximum Salt DoseResin Tank Nominal Size (dia. x height)5,000 @ 2.132.4 gal.8 x 40 in.Service Flow RatePressure Drop at Rated Service FlowEC405,100 @ 2.310.4 psigIntermittent Flow @ 15 psi pWater Supply Maximum HardnessMin. - Max. Water Supply Pressure u9 x 40 in.15.0 psig7.5 gpm10.2 gpm4 ppm5 ppm70 gpgWater Supply Maximum Clear Water Iron 38.3 gal.Min. - Max. Water Supply Temperature110 gpg20 - 125 psi40 - 120 FMinimum Water Supply Flow Rate3 gpmRegeneration Cycle Flow RatesFill (flow to brine tank)Brining (flow to drain)Brine Rinse (flow to drain)Max. Backwash (flow to drain)Max. Fast Rinse (flow to drain)0.3 gpm0.15 gpm0.10 gpm2.0 gpm2.0 gpm0.3 gpm0.22 gpm0.15 gpm2.0 gpm2.0 gpmp Intermittent flow rate does not represent the maximum service flow rate used for determining the unit’s ratedcapacity and efficiency. Continuous operation at flow rates greater than the service flow rate may affect capacityand efficiency performance. Capacity to remove clear water iron is substantiated by WQA test data. State of Wisconsin requires additionaltreatment if water supply contains greater than 5 ppm clear water iron.u Canada working pressure limits: 1.4 - 7.0 kg/cm².These units conform to NSF/ANSI 44 for the specific performance claims as verified and substantiated by test data.3
ECOWATERDimensionsS Y S T E M SDIMENSIONSEEC 1502R25Nominal Resin8” dia. x 40” tallTank SizeCCOUTLETOUTLETINLETINLET-- OUTLETOUTLETAASIDE -5/8”10-5/8"DIA.DIA.SIDE VIEWVIEWSIDE45-1/2”BDDBBA48"48”FRONT VIEWVIEWFRONTSHROUD KIT - Not Included4EEC 1502R409” dia. x 40” tall47”41-3/8”41-3/4”8-1/4” dia.9-1/4” dia.3-3/4”39”39"FIG. 1
ECOWATERBefore Starting InstallationS Y S T E M SWHERE TO INSTALL THE SOFTENERTOOLS, PIPE & FITTINGS,OTHER MATERIALS YOU WILL NEED To soften all water in the home, install the watersoftener close to the water supply inlet, upstreamof all other plumbing connections, except outsidewater pipes. Outside faucets should remain onhard water to conserve salt and softening capacity. ALWAYS install an EcoWater Systems bypass valve,or a 3-valve bypass system. Bypass valves let youturn off water to the softener for repairs if needed,but still have water available to the house pipes. Place the softener near a floor drain, or other Plastic inlet and outlet fittings are included with theacceptable drain point (laundry tub, sump, standpipe, etc.) to carry away regeneration dischargewater.softener, which allow water flow equivalent to 1 inchnominal pipe. To maintain maximum valve flow, 1”pipes to and from the softener fittings are recommended. Do not reduce the pipes to less than 3/4” size. Connect the softener to the main water supplypipe UPSTREAM OF the water heater. DO NOTRUN HOT WATER THROUGH THE SOFTENER.The temperature of water passing through the softener must be less than 120 F. Use copper, brass or PEX plastic pipe and fittings. Drain hose, 1/2” inside diameter minimum, is neededfor the valve drain. If a rigid valve drain is needed, to comply with Do not install the softener in a place where it couldplumbing codes, you can buy the parts needed toconnect a 1/2” minimum copper tubing drain.freeze. Damage caused by freezing is not covered by the warranty.NOTE: The Commonwealth of Massachusetts plumbingcode 248-CMR shall be adhered to. A licensed plumbershall be used for this installation. Put the softener in a place water damage is leastlikely to occur if a leak develops. The manufacturer will not repair or pay for water damage. A 120V, 60 Hz electrical outlet, to plug the includedpower supply into, is needed near the softener. Besure the electrical outlet and power supply are inan inside location, to protect from wet weather.SINGLE BYPASS VALVEPull out for “Service”(Soft water) If installing in an outside location, you must takethe steps necessary to assure the softener, installation plumbing, wiring, etc., are as well protectedfrom the elements, contamination, vandalism, etc.,as when installed indoors.Push in for“Bypass” Keep the softener out of direct sunlight. The sun'sFIG. 2heat may soften and distort plastic parts.THE PROPER ORDER TO INSTALL WATER TREATMENT EQUIPMENTCold Waterto HouseUntreated Water toOutside FaucetsHot Waterto HouseCity Water kORWell Water SupplyWaterSoftenerWellPump5FIG. 3
ECOWATERTypical Installation IllustrationsS Y S T E M SINSTALLATION USING ECOWATER BYPASS VALVESoft WaterOUTCROSS-OVERUse if water supply flows from the left.Include single or 3-valve bypass.MAIN WATERPIPESOFTWATERHard WaterIN120V,60 HzOutletHARDWATERFROM SOFTENEROUTLETHard Waterto OutsideFaucetsTO SOFTENERINLETINSTALLATION USING 3-VALVE BYPASS1” NPTAdaptor (2)not includedMAIN WATERPIPEFor soft water SERVICE:-Open the inlet and outletvalves1” NPT InstallationAdaptor (2)*For hard water BYPASS:-Close the inlet and outletvalves-Open the bypass valveO-Ring Seal (2)*EcoWaterBypass ValveBYPASSValveOUTLETINLETValveValve1” NPTAdaptor (2)not includedClip (4)** Included with softener - Pipeand fittings supplied by installer.Clip (2)*1” NPT InstallationAdaptor (2)*ValveDrainElbowO-Ring Seal (2)*Valve INLETValveDrainHoseCONNECTING A RIGID VALVE DRAIN TUBEClipOverflowDrainElbowBrine TankOverflowHose*Cut barbs from drain fitting (pullclip to remove fitting from valve)1/2” Outside Dia. CopperTube (not included)To standpipe, sump, laundry tub or other suitable drain.Secure Valve Drain Hosein place over Floor Drain*Do not connect the watersoftener valve drain hose tothe brine tank overflow hose.BarbsCompression Fitting.1/4 NPT x 1/2” O.D.Tube (not included)1/4 NPT ThreadsFLOORDRAIN1-1/2”Air Gap1-1/2”Air GapSTANDPIPELAUNDRYTUB1-1/2” Air Gap61-1/2”Air GapSUMPFIG. 4
ECOWATERInstallationS Y S T E M S1. TURN OFF WATER SUPPLYClipsa. Close the main water supply valve near the wellpump or water meter.PlasticInstallation AdaptorsOUTLETb. Shut off the electric or fuel supply to the waterheater.(install in softener valveor bypass valve)Turbinec. Open high and low faucets to drain all water fromthe house pipes.Support2. INSTALL BYPASS VALVE AND/ORPLASTIC ADAPTORS:ClipINLETa. If installing a single bypass valve, push the bypassvalve, with lubricated o-ring seals in place, into thevalve inlet and outlet ports (See Figures 4 & 5).LubricatedO-Rings- OR -b. If installing a 3-valve bypass system, slide plasticinstallation adaptors, with lubricated o-ring seals inplace, into the valve inlet and outlet ports (SeeFigure 4 & 5).EcoWaterBypass ValveClipc. Be sure the turbine support is in place in the valveoutlet, as shown in Figure 6.d. Snap the two large plastic clips in place on the inletand outlet ports, from the top, down (See Figure7). Be sure they snap into place. Pull on thebypass valve or plastic adaptors, to make surethey are held securely in place.FIG. 5ValveOutletTurbineSupportTurbineFIG. 63. COMPLETE PLUMBING TO AND FROMTHE SOFTENERUsing the “Typical Installation Illustration” on page 6as a guide, observe all of the following cautions whileyou connect inlet and outlet plumbing:ClipO-ring Be sure incoming, hard water is directed to theBypass valve orplastic adaptorCross section ofvalve inlet or outletvalve INLET port. Be sure to install bypass valve(s). If making a soldered copper installation, do allsweat soldering before connecting pipes to thesoftener fittings. Torch heat will damage plasticparts.Snap clips into place betweenlarger diameter ringsFIG. 7 Use pipe joint compound on all external pipethreads. When turning threaded pipe fittings onto plastic fit-Turn the bypassvalve downward ifconnecting to floorlevel plumbingtings, use care not to cross-thread. Support inlet and outlet plumbing in some manner(use pipe hangers) to keep the weight off of thevalve fittings.INLET7OUTLETFIG. 8
ECOWATERInstallationS Y S T E M S6. BRINE TANK ASSEMBLYGroundClampInlet / OutletPipes4. COLD WATER PIPE GROUNDINGa. Verify that the brinewell is positioned in the recessat the bottom of the brine tank and is attached tothe side with a screw and washer.b. Make sure that the brine valve is sitting on the bottom inside the brinewell, with the brine tube exitingthe brinewell through the top slot, just below thebrinewell cover.FIG. 9c. Take the rubber grommet and hose adaptor elbowfrom the parts bag. Push grommet into the largerhole in the side wall of the brine tank. Then insertthe larger diameter end of the elbow through thegrommet.The house cold water pipe (metal only) is often usedas a ground for the house electrical system. The 3valve bypass type of installation, shown in Figure 4,will maintain ground continuity. If you use the plasticbypass, continuity is broken. To restore the ground,do either step 4a or 4b following.7. INSTALL BRINE TANK OVERFLOWHOSEa. Use the EcoWater ground clamp kit (not included)to make a jumper across the inlet and outlet pipes(See Figure 9).This drain is for safety only. If the brine tank shouldover-fill with water, the excess is carried to the drain.b. Install a #4 copper wire across the removed section of main water pipe, securely clamping at bothends – parts not included.a. Attach a length of 1/2” inside diameter hose to thedrain elbow, installed in the previous step 2. Use ahose clamp to hold it in place.b. Locate the other end of the hose at the drain point.Do not elevate this hose higher than the elbow onthe brine tank. Do not tee this hose to the valvedrain hose.5. INSTALL VALVE DRAIN HOSEa. Take a length of 1/2” inside diameter hose andattach to the valve drain fitting, securing it with ahose clamp (See Figure 4 on page 6).8. CONNECT BRINE TUBINGb. Locate the other end of the hose at a suitable drainpoint (floor drain, sump, laundry tub, etc.). Checkand comply with local codes. Refer to Figure 4 onpage 6 if codes require a rigid pipe drain run.a. Route the brine tube out of the brine tank throughthe smaller hole in the tank side wall.b. Connect the brine tube to the nozzle/venturiassembly using the ferrule nut provided (SeeFigure 10).IMPORTANT: Use high quality, thick wall hose thatwill not easily kink or collapse. Thesoftener will not backwash properly ifwater cannot exit this hose duringrecharges.Nozzle/Venturic. Tie or wire the hose in place at the drain point.Water pressure will cause it to whip during thebackwash portion of the recharge cycle. Also provide an air gap of at least 1-1/2” between the endof the hose and the drain point. An air gap prevents possible siphoning of sewer water, into thesoftener, if the sewer should back up.FerruleNutBrineValveTubingd. If raising the drain hose overhead is required to getto the drain point, do not raise higher than 8 feetabove the floor. Elevating the hose may cause aback pressure that could reduce backwash flowand proper resin bed seToDrainPointFIG. 108
ECOWATERInstallation & SanitizingS Y S T E M S9. PRESSURE TESTING FOR LEAKS,PROGRAMMING THE CONTROLLER &RINSING THE MEDIA10. ADD WATER AND SALT TO THEBRINE TANKa. Using a pail or garden hose, add about 3 gallons ofwater into the brine tank. DO NOT pour into thebrinewell.To prevent excessive air pressure in the watersoftener and plumbing system, do the followingsteps EXACTLY in order:b. Add salt to the brine tank. It is recommended to fillthe brine tank no more than 1/2 full. Level the saltwhen finished adding. You can use most watersoftener salts, but it must be clean.Recommended nugget, pellet or coarse solar saltshave less than 1% impurities.a. Fully open two or more softened cold waterfaucets nearby the water softener.b. Place the bypass valve(s) in bypass position (SeeFigures 2 & 4).c. Fully open the main water supply valve. Watchuntil the flow from the opened faucets becomessteady, with no spurting or air bubbles.NOTE: See page 14 for additional information on salt.11. SANITIZING THE WATER SOFTENERd. After about three minutes, open a hot water faucetfor one minute, or until all air is expelled.Care is taken at the factory to keep your EcoWaterSystems water softener clean and sanitary. However,during shipping, storage, installing and operating,bacteria could get into the unit. For this reason, sanitizing as follows is suggested* when installing.e. Close all faucets and check your plumbing work forleaks.f. Make sure the softener’s valve drain hose ishooked up and the open end directed to a floordrain, laundry tub or other suitable type of drain.a. Remove the brinewell cover and pour about 1-1/2oz. (2 to 3 tablespoons) of common householdbleach into the softener’s brinewell. Replace thebrinewell cover.g. Make sure the softener’s bypass valve is in thebypass position.h. Plug in the power supply.b. Make sure the bypass valve is in the service position.i. Program the electronic controller: Follow thesteps on Pages 10 and 11 to program the electroniccontroller with basic operating information, such astime and water hardness. After completing thesesteps, continue with “j. Start a recharge”, below.c. Start a recharge: Press the RECHARGE buttonand hold for 3 seconds, until “Recharge Now”flashes in the display and you hear the valve motorrun as the softener begins recharging. Thisrecharge draws the sanitizing bleach into andthrough the softener. Any air remaining in the unitis purged to the drain.j. Start a recharge: Press the RECHARGE buttonand hold for 3 seconds, until “Recharge Now” flashes in the display and you hear the valve motor runas the softener begins recharging.d. After the recharge has completed, fully open a coldwater faucet, downstream from the softener, andallow 50 gallons of water to pass through the system. This should take at least 20 minutes. Closethe faucet.k. Once the unit is in backwash, place bypassvalve(s) into the service position, as follows:(1) SINGLE BYPASS VALVE: Slowly move thevalve stem toward service position, pausing several times to allow the unit to pressurize slowly.12. RESTART THE WATER HEATER(2) 3-VALVE BYPASS: Fully close the bypassvalve and open the outlet valve. Slowly openthe inlet valve, pausing several times to allow theunit to pressurize slowly.Turn on the electric or fuel supply to the water heater,and light the pilot, if applies.NOTE: The water heater is filled with hard water and,as hot water is used, it refills with softened water. Ina few days, the hot water will be fully conditioned. Tohave fully conditioned hot water immediately, waituntil the recharge (Step 11) is complete, then drainthe water heater until water runs cold.l. Let the softener complete the backwash and fastrinse cycles (takes 10-12 minutes). When therecharge cycle ends, the softener valve returns tothe service position.*Recommended by the Water Quality Association. Onsome water supplies, the EcoWater Systems unit may needperiodic disinfecting.9
ECOWATERProgramming the Electronic ControllerS Y S T E M SDisplayUP buttonDOWN buttonSELECT buttonRECHARGE buttonFIG. 11CONTROLLER SETTINGS REQUIREDB. SET WATER HARDNESS NUMBERupon installation, and after an extended power outage.1. If you completed the previous step, the word“HARDNESS" should show in the display (SeeFigure 14). Otherwise, press the SELECT buttonseveral times until it does.When the power supply is plugged into the electricaloutlet, a model code (“EC25” for Model EEC 1502R25or “EC40” for Model EEC 1502R40) and a test number (example: J3.8), are briefly shown in the display.Then the words “PRESENT TIME” appear and 12:00PM begins to flash.FIG. 142. Press the á UP or â DOWN buttons to set thevalue of your water’s hardness in grains per gallon(gpg).FIG. 12NOTE: If your water supply contains iron, compensate for it by adding to the water hardnessnumber. For example, assume your water is20 gpg hard and contains 2 ppm iron. Add 5to the hardness number for each 1 ppm ofiron. In this example, you would use 30 foryour hardness number.A. SET PRESENT TIME OF DAYIf the words “PRESENT TIME" do not show in the display, press the SELECT button several times untilthey do.20 gpg hardness2 ppm iron x 5 10 10(times)30 HARDNESS NUMBER2. When finished setting your water’s hardness number, press the SELECT button, and the display willchange to show the “Recharge Time” screen.FIG. 131. Press the á UP or â DOWN buttons to set thepresent time. Up moves the display ahead; downsets the time back. Be sure AM or PM is correct.C. SET REGENERATION STARTING TIME1. If you completed the previous step, the words“RECHARGE TIME" should show in the display(See Figure 15). Otherwise, press the SELECTbutton several times until they do.NOTE: Press buttons and quickly release to slowlyadvance the display. Hold the buttons downfor fast advance.2. When the correct time is displayed, press theSELECT button, and the display will change toshow the “Hardness” screen.continued on next page10
ECOWATERS Y S T E M SProgramming (continued) & Controller Features / Optionscontinued from previous pagefor regeneration to start (takes about 2 hours)because water is not being used. During regeneration hard water is bypassed to house faucets. Usethe á UP or â DOWN buttons to adjust therecharge start time in 1 hour increments.3. When the desired regeneration time is displayed,press the SELECT button, and the display willchange to show the normal run time display.FIG. 152. The softener’s default regeneration start time is2:00 AM. In most households this is a good timeCONTROLLER FEATURES / OPTIONSNORMAL OPERATIONRECHARGE NOWFor times when you expect to use more water thanusual, it may be desirable to perform a manually initiated regeneration. To manually start a regenerationcycle, press and hold the RECHARGE button for afew seconds, until “RECHARGE NOW” flashes in thedisplay.During normal operation, the present time of dayshows in the display.FIG. 16FIG. 17POWER OUTAGE MEMORYIf electrical power to the softener’s control is lost,internal memory will maintain most settings such asthe hardness and recharge time. However, unlessthe power outage was very brief, the clock’s presenttime will need to be reset. During a power outage,the display will be blank and the softener will notrecharge. When electrical power is restored:The softener begins an immediate regeneration.Once started, you cannot cancel this regeneration.Avoid using hot water during this time, as the waterheater will refill with hard water.RECHARGE TONIGHTTo set a regeneration cycle to begin at the next presetregeneration time, touch (press, but do not hold) theRECHARGE button. “RECHARGE TONIGHT” flashes in the display.1. Check the display.2a. If the present time is displayed steadily (not flashing), the controller did not lose time and you donot need to reset the clock.2b. If a time is flashing in the display, then the clockneeds to be reset to the correct present time.See “Set Present Time of Day” on page 10. Theflashing display is to remind you to reset theclock. If you do not reset the clock, thenrecharges will most likely occur at the wrong timeof day.FIG. 18A regeneration will begin at the next preset regeneration start time (2:00 AM or as set). If you decide tocancel this regeneration before it starts, touch thesame button once more.NOTE: If the softener was regenerating when powerwas lost, it will finish the cycle when powerreturns.VACATION NOTEEcoWater demand controlled water softeners regenerate only while water is being used and softeningcapacity must be restored. For this reason, the unitwill not regenerate when you are away from home forextended periods.11
ECOWATERFeatures / Options (continued)S Y S T E M SSALT EFFICIENCYAUXILIARY OUTPUT CONTROLWhen this feature is ON, the water softener will operate at salt efficiencies of 4000 grains of hardness perpound of salt or higher (May recharge more oftenusing smaller salt dosage and less water). The softener is shipped with this feature set OFF.1. Press and hold for 3 seconds the SELECT button,until the display shows “000 - -“ (See Figure 19).The electronic controller’s auxiliary output may beused to operate various types of external equipment,such as a chlorine generator or chemical feeder. Itprovides a 28V DC, up to 300 mA, current from terminal J4 on the electronic control board (see Schematicon Page 17). The table below explains the choicesavailable for when the auxiliary output will be on during various portions of the recharge cycle:SELECTIONEfficiency IconRemains off indefinitely.CLChlorineOn during the brine draw portionof the recharge.FSFlowSwitchBP2. Once in this display, press the SELECT buttononce and one of the two displays in Figure 20 isshown.3. Press the á UP or â DOWN buttons to set ON orOFF. When set to ON, the efficiency icon will bedisplayed in the upper right hand corner of thenormal run display.FIG. 20AUXILIARY OUTPUTFUNCTIONOffOFFFIG. 19NAMEBypassCFChemicalFeederFRFastRinseOn during the entire recharge.On when water is flowing pastthe turbine. It will shut off 8seconds after water flow stops.After the set volume of waterhas flowed past the turbine,turns on for the time set (seeSteps 4 & 5, on the next page,to set volume and time).On during the fast rinse portion of the recharge.The default is OFF. If you wish to change to one ofthe other selections shown in the table above:4. Press the SELECT button twice to return to thenormal run display (See Figure 21).1. Press and hold the SELECT button until “000 - -”shows in the display (See Figure 19).Displayed whenefficiency isset to “ON”2. Press the SELECT button twice and “Ctrl" will flashin the display.FIG. 21In the state of California: You must turn the SaltEfficiency Feature ON. This may initiate morefrequent recharges. However, it will operate at4,000 grains per pound of salt or higher.FIG. 223. Use the á UP or â DOWN buttons to display thedesired selection, then press the SELECT button.If you selected anything other than CF, the displaywill return to the normal run (time of day) screen.If setting to CF (Chemical Feeder), there will betwo additional settings to make for operating thechemical feeder in Steps 4 and 5, on the nextpage.12
ECOWATERS Y S T E M SFeatures / Options (continued) & Routine MaintenanceThen press the SELECT button to display thescreen shown in Fig. 24.FIG. 23FIG. 244. CHEMICAL FEEDER TRIP VOLUME: If you haveset the auxiliary output control to CF (ChemicalFeeder), you will need to set the volume of waterwhich must flow past the turbine before the auxiliary output is turned on. With the alternatingscreens in Fig. 23 shown, use the á UP orâ DOWN buttons to set the trip volume, in gallons.5. CHEMICAL FEEDER TIME: Use the á UP orâ DOWN buttons to set the length of time, inseconds, that the auxiliary output will be turned on.Then press the SELECT button to accept andreturn to the normal run (time of day) screen.ROUTINE MAINTENANCECLEANING THE NOZZLE & VENTURICapA clean nozzle & venturi (See Figure 25) is a necessity for the water softener to work properly. This smallcomponent creates the suction to aspirate (bring airinto) the mineral tank during recharges. If it shouldbecome plugged with sand, silt, dirt, etc., the watersoftener will not work, and hard water will result.O-ring SealScr
OWNER'S MANUAL How to install, operate and maintain your EcoWater Systems Electronic Demand Water Softener ModelsEEC1502R25 EEC1502R40 7349023 (Rev. D 4/22/16) EcoWater Systems LLC P.O. Box 64420, St. Paul, MN 55164-0420 www.ecowater.com Designed, Engineered & Assembled in the U.S.A.