Transcription
IceWarp Unified CommunicationsIceWarp Outlook SyncUser GuideVersion 10.5Printed on 20 December, 2012
ContentsIceWarp Outlook Sync User Guide1Installation . 2Installation Pre-requisites . 3Installation Step-by-Step. 4Activation . 11Installation Crossroads . 12Upgrade from Outlook Connector . 13Import of .pst Backup File . 13Folder Sharing – Folder Access Rights . 14Troubleshooting . 17IceWarp Outlook Sync versus AntiVirus . 17Missing Installation Prerequisite File(s) . 17Vista Installation Issue . 18IceWarp Options . 19Create IceWarp Profile – Profile Manager . 19IceWarp License . 24Online Activation . 24Offline Activation . 26Synchronize. 27Folder Sync . 27Settings . 28Login Credentials . 28Advanced . 29Synchronization . 31
iiContentsAppearance . 32License . 33Logs . 34About . 35Edit Rules for IceWarp Server . 35Edit Responder for IceWarp Server . 42Bind this Profile with Server Account . 44Non POP3 Account Binding Scenario. 45Miscellaneous . 47Clean Ignore List . 47Uninstallation . 48Advanced IceWarp Outlook Sync Background . 50About . 50Mass Installations . 50Command Prompt Installations . 50Synchronization Progress Window . 51
1CHAPTER 1IceWarp Outlook Sync User GuideIceWarp Outlook Sync allows you to synchronize information between your IceWarp Server account and Microsoft Outlook.This manual describes how to install it, register the product and quickly set up some of its features as well as performing ofsome advanced procedures.LegendIconDescriptionWarning – very important!Note or tip – good to know.Note within a table.Figure link – click the link to reveal the figure. Click it again to close it. (Works only in the CHMformat.)In This ChapterInstallation . 2Activation . 11Installation Crossroads . 12Upgrade from Outlook Connector . 13Folder Sharing – Folder Access Rights . 14Troubleshooting . 17IceWarp Options . 19Miscellaneous . 47Uninstallation . 48Advanced IceWarp Outlook Sync Background . 50
2IceWarp Outlook Sync User GuideInstallationThis chapter lists installation pre-requisites and details step-by-step installation procedure.In This ChapterInstallation Pre-requisites . 3Installation Step-by-Step . 4
Installation3Installation Pre-requisites Microsoft Outlook must be installed on the machine where you want to install IceWarp Outlook Sync, but it shouldnot be running.NOTE: There are times when MS Outlook appears not to be running but it actually is. You can check it by lookingfor OUTLOOK.EXE in the Windows Task Manager. If it is listed, shut it down (End Task) before you startinstallation. You should be familiar with MS Outlook. If using WIndows XP, you need to have Service Pack 3 installed. You should have your account name, password, and server name (hostname) at hand – you will need these toconfigure your account. You should have downloaded the latest version of the IceWarp Outlook Sync from the IceWarp web site or from yourlocal provider of IceWarp Server (e.g. http://mydomain.com/install/) or from the WebClient interface in the Tools –Licenses/Integration – IceWarp Outlook Sync section. You need to have installed .NET Framework version 3.5.Even if you have .NET Framework version 4 installed, you still need to install also version 3.5.If you intend to use the .msi installation file format, you do not need to look for .NET Framework as it is a part ofthe installation package. You will just be asked whether you want to install it. You need Activation Key for its registration, e-mailed from your administrator or available from the WebClientinterface in toolbar: Tools – Licenses/Integration – IceWarp Outlook Sync section. This is not necessary when you willuse the SmartDiscover feature within the installation. You may be required to insert your original MS Outlook installation media. Make sure that you have your original MSOutlook installation media available before you intend to change your Outlook configuration. IceWarp Outlook Sync will only install on systems where the user has administrative rights. The user's rights can bechanged to install the IceWarp Outlook Sync and then reset to the original rights. Assure, you have sufficient disk space (depending on your email box size) – if you are not sure, ask your serveradministrator what is adequate.For smooth IceWarp Outlook Sync function, it is necessary users to install every important MS Outlook updateoffered by Microsoft.
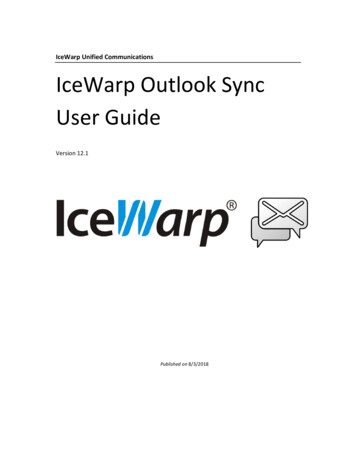
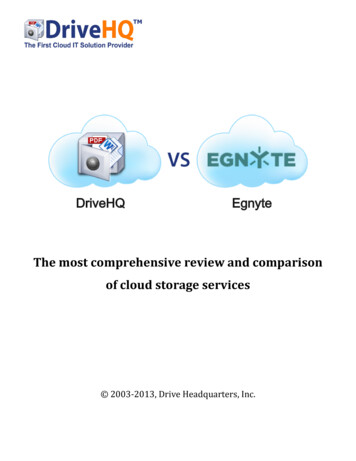
4IceWarp Outlook Sync User GuideInstallation Step-by-StepTo successfully install IceWarp Outlook Sync, follow these steps:1.Launch the latest IceWarp Outlook Sync installer. In the case you have any previous version installed, you will beoffered to Upgrade/Uninstall it. Perform upgrade (wizard will guide you).NOTE: There are two types of installation files available. The .msi file and .exe one. Use the .exe file for usualclient-based installations and .msi one for mass installations launched from a server.2.On the Welcome page, select the installation and IceWarp Outlook Sync language and click the Next button.Figure 1 – Welcome Page3.On the License confirmation page, tick the Accept license box and click Next.4.On the Outlook version detection page, the installer detects the version of MS Outlook you use. In the case theversion is not correct, tick the Disagree with detection box – this will enable the Select version list – and selectthe correct one. Click Next. It is highly probable the detected version will be correct.
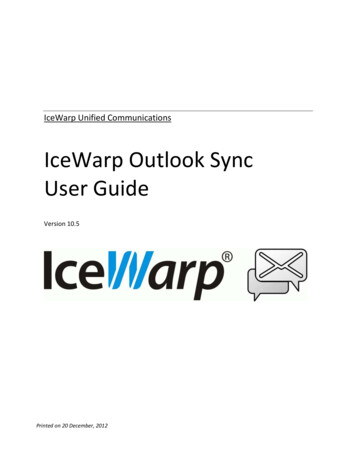
InstallationFigure 2 – Outlook Version Detection Page5.In the case the installer detects any required prerequisites missing, their list is shown on the Prerequisites page. Clickthe Install button. (Message is shown.)These prerequisites are included in the installation package – you do not need to look for them anywhere.5
6IceWarp Outlook Sync User GuideFigure 3 – Prerequisites PageNOTE: If you already have all items installed, this page is not shown.6.On the SmartDiscover page, decide whether you want to use this feature.
Installation7Figure 4 – SmartDiscover PageSmartDiscover – YESi. Fill in the Email address and Password fields and click Next. The installer will obtain all information needed fromthe server.ii. In the next step, the License activation dialog is shown. If you have a license for IceWarp Outlook Sync on theserver, click Yes. If not or if you want to use IceWarp Outlook Sync within the scope of 30 day trial period first, clickNo.You will proceed to the Outlook Profile page with its fields filled in. Also fields on the Incoming Server and OutgoingServer pages will be filled in. Just check that values are correct and click Next.Figure 5 – License Activation DialogSmartDiscover – NOi. Tick the Skip SmartDiscover and continue manually box and click Next.7.On the Outlook Profile page, fill in the Profile name, your Email address and Display name fields. Click Next.
8IceWarp Outlook Sync User GuideFigure 6 – Outlook Profile Page8.On the Incoming server page, enter your Username, Password and email server Hostname (or IP address).By default, the Port number is 143.In the case the secured connection is used (https), tick the Use secured layer box (the Port number is 993).To test the entered values, you can click the Test settings button. The positive answer is desirable.Click Next.
InstallationFigure 7 – Incoming Server Page9.On the Outgoing server page, if the same server is used for outgoing emails, tick the Same as incoming box. ForPort numbers, see lower.In the case of a different server, enter your Username, Password and email server Hostname (or IP address).By default, the Port number is 25.In the case the secured connection is used (https), tick the Use secured layer box (the Port number is 465).To test the entered values, you can click the Test settings button. The positive answer is desirable.Click Next.9
10IceWarp Outlook Sync User GuideFigure 8 – Outgoing Server Page10. On the Select installation folder page, the default installation folder is shown. If you want to change it, click theSelect button and browse for the wished location. Click Next.11. On the Installation in progress page, wait for the Installation finished message and click Next.12. On the Installation summary page, click the Finish button to complete the installation.
ActivationActivationAfter a successful installation, IceWarp Outlook Sync works in 30 day evaluation mode and will stop working if not activatedbefore the evaluation period expires. To activate your license, have your activation key ready and proceed to the IceWarpLicense (on page 24) chapter for more information.To check your license validity, select the Add-Ins tab – Settings button – License tab. See the Settings (on page 28) chapter –License section.11
12IceWarp Outlook Sync User GuideInstallation CrossroadsThis chapter describes possibilities how to "connect" IceWarp Outlook Sync with an email account and provides links todetailed procedures.During IceWarp Outlook Sync InstallationThis possibility allows you to connect IceWarp Outlook Sync with an existing account during IceWarp Outlook Syncinstallation. The whole procedure is described in the Installation Step-by-Step (on page 4) chapter.NOTE: This existing account has to be of the IMAP or POP3/IMAP type.After "No Profile" IceWarp Outlook Sync InstallationMass or command line installations can be performed as "no profile" ones. It means that IceWarp Outlook Sync is installedbut "Sync type" profile is not created. After this installation you can bind IceWarp Outlook Sync with an existing Outlookprofile. Find detailed description in the Bind this Profile with Server Account (on page 44) chapter.After Upgrade – Backup Data ImportThis method is suitable either after upgrade from any previous "connector/sync" version or when you want to import abackup pst file. Procedures are described in the Upgrade from Outlook Connector (on page 13) chapter and Import of .pstBackup File (on page 13) one.
Upgrade from Outlook Connector13Upgrade from Outlook ConnectorActually, a "plain" upgrade is not available. The recommended way is to uninstall MS Outlook Connector, install IceWarpOutlook Sync, and activate the new license using the activation key. The activation key is the same as before, available fromIceWarp WebClient or e-mailed from your administrator.All user's data will be re-downloaded from the server to the new profile.Follow these steps:1.Uninstall Outlook Connector via Control Panel – Programs and Features – Uninstall or change a program, then installIceWarp Outlook Sync (see the Installation Step-by-Step (on page 4) chapter). This will create a new profile. All datathen will be re-downloaded from the server to a new pst file.2.To preserve an existing pst file, you need to back it up before un-installing (this is rather for someone who never useda Connector or stopped using it). Then run the IceWarp Outlook Sync installer – it will guide you to create a newOutlook profile.3.If you wish to import data from your existing profile, mind not to name the new IceWarp Outlook Sync profile withthe same name as the old one, as the old one would be deleted if names match.Import of .pst Backup FileYou may want to import data from the old MS Outlook profile to the new IceWarp Outlook Sync one using Outlook featuresfor this (File – Open – Import – Import from another program or file – Outlook Data File (pst)). During this import, you canselect folders that are to be imported – the old ones that do not exist on the server. In the case you will import the wholestructure (including currently existing folders), folder items can be duplicated.To avoid data duplication it is really easier to give up on importing and just uninstall, create a new profile and let itsynchronize all data from the server. Outlook import feature can deal with import duplicities, but it is not sure, it willbe 100% successful.
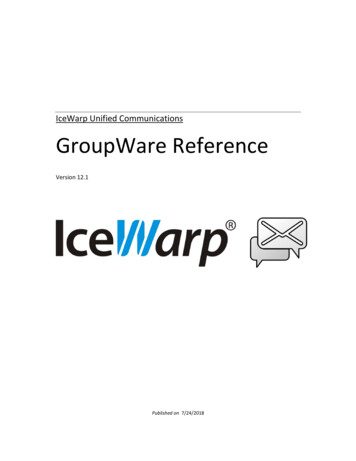
14IceWarp Outlook Sync User GuideFolder Sharing – Folder Access RightsYou may want to share some of your IceWarp Outlook Sync folders to other users. To do it, follow these steps:1.In the MS Outlook folder tree, select the folder you want to share, right-click it and select the Folder Access Rightsitem.Figure 1 – Right-click MenuThe Folder Access Rights dialog opens.
Folder Sharing – Folder Access RightsFigure 2 – Folder Access Rights Dialog2.In the Folder Access Rights dialog, click the Add button. The Select Users dialog opens.Figure 3 – Select Users Dialog15
16IceWarp Outlook Sync User Guide3.In the Select Users dialog, highlight a user and click the Select button to place this user to the Selected field. ClickOK.4.In the Folder Access Rights dialog, select access rights for individual users for both Items and Folders.You can either select a combination from a list (All, Read, Write, None, Custom) – in this case, these access rightsapply for both Items and Folders – or tick the individual check boxes. For access rights description, see the tablebelow. Click OK.5.Repeat steps #3 and 4 for other wished users.NOTE: You may want to share whole your account. In this case, right-click the account name and select the AccountAccess Rights item. Continue with step #2.NOTE: Do not set any rights for Anyone unless you want to grant access to all server users.NOTE: To remove access rights, select a user in the Folder Access Rights dialog, click the Remove button and click OK.Access RightDescription (Item/Folder)AdministerFull rights including the one to change permissions for this folder.ReadRight to see items in the folder / folder itself respectively.WriteRight to create/add new items into the folder / create new subfolders respectively.DeleteRight to delete items included in the folder / delete subfolders respectively.ModifyRight to modify items in the folder.
TroubleshootingTroubleshootingIceWarp Outlook Sync versus AntiVirusIn some cases, folder synchronization can last minutes. This is caused by an antivirus that checks incoming messages. Duringthis time IceWarp Outlook Sync waits for an IMAP server response. If the situation occurs (it is not too often), you will see amessage similar to this one:SolutionTo resolve this problem, disable email checking in your desktop antivirus program. As your IceWarp Server provides thisservice too, you need not to be afraid of doing this.You may want to have your outgoing messages checked by your antivirus program because it attaches a short message tothem to ensure recipients that messages are safe.It is possible as outgoing messages check does not cause synchronization delays. You can disable only incoming messagescheck, provided that your antivirus program supports it.Missing Installation Prerequisite File(s)During an Outlook Sync launch, you may obtain an error message announcing that some file (library etc.) is missing. Thissituation can be caused by incomplete or corrupted update of your operating system (or e. g. Service Pack 3 in the case youare using Windows XP).SolutionDownload the appropriate file and place it to the correct directory. If the problem persists, contact your administrator.17
18IceWarp Outlook Sync User GuideVista Installation IssueYou can obtain the Insufficient Rights error message when installing IceWarp Outlook Sync under Windows Vista.SolutionIt is necessary to run installation as Administrator or within an account with administrator permission.
IceWarp OptionsIceWarp OptionsAfter a successful installation, a new tab appears in the main menu of MS Outlook. Its name is Add-Ins. This is the placewhere to manage IceWarp Outlook Sync settings.In the case IceWarp Outlook Sync is not bound with any existing profile, this tab is different:NOTE: In the case you use MS Outlook 2007, find these options under the Tools main menu item.In This ChapterCreate IceWarp Profile – Profile Manager . 19IceWarp License . 24Synchronize . 27Folder Sync . 27Settings . 28Edit Rules for IceWarp Server . 35Edit Responder for IceWarp Server . 42Bind this Profile with Server Account. 44Create IceWarp Profile – Profile ManagerClicking this button allows you to create a new IceWarp IceWarp Outlook Sync profile using a profile manager. This situationcan apply in the case two or more users share one computer, one of them has installed IceWarp Outlook Sync and othershave their accounts that have not been bound to any "Connector" or "Sync" type profile.Follow these steps:19
20IceWarp Outlook Sync User Guide1.Click the button. The Create new profile dialog appears. Click the Yes button.Figure 1 – Create New Profile Dialog2.On the Create new profile page, click the Next button.Figure 2 – Create New Profile Page3.On the Outlook Profile page, fill in the Profile name, Email address and Display name fields. Click the Nextbutton.
IceWarp Options21Figure 3 – Outlook Profile Page4.On the Outlook Sync login credentials – Incoming server page, fill in your Username, Password, server Hostnameand Port. For more information about server settings and the Use secured layer check box, refer to the InstallationStep-by-Step (on page 4) chapter – step # 7. Click the Next button.
22IceWarp Outlook Sync User GuideFigure 4 – Incoming Server Page5.On the Outlook Sync login credentials – Outgoing server page, tick the Same as incoming box (if the same server isused for outgoing emails) or fill in your Username, Password, server Hostname and Port. For more informationabout server settings and the Use secured layer check box, refer to the Installation Step-by-Step (on page 4)chapter – step # 8. Click the Next button.
IceWarp OptionsFigure 5 – Outgoing Server Page6.On the New profile summary page, click the Finish button.23
24IceWarp Outlook Sync User GuideFigure 6 – New Profile Summary PageIceWarp LicenseClicking this button reveals the License dialog. On the License tab (see the Activation (on page 11) chapter), you can checkyour license validity. If it reads License subscription expires on . with some date in near future, you need to activate yourlicense.Two other tabs let you activate your license either online or offline.Online ActivationTo activate your license online, follow these steps:1.Obtain your activation key from your administrator.Another way is to get it via IceWarp WebClient: From its main menu, select the Tools – Licenses/Integration items. Inthe IceWarp Outlook Sync dialog section, click the Show license link to get the activation key.
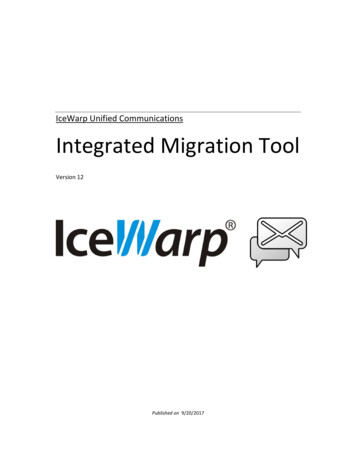
IceWarp OptionsFigure 1 – IceWarp WebClient – Licenses/Integration2.In the License dialog, select the Online Activation tab.Copy – paste your activation key into the Activation Key field.Click the Activate License button. The button will only be active if you enter a correctly formatted activation key.Figure 2 – License Dialog – Online Activation TabClick OK to finish activation.25
26IceWarp Outlook Sync User Guide3.An error message is shown in the case the activation failed.License registration may fail for the following reasons: The activation key is expired – obtain a new one and repeat the registration. The computer is blocked from accessing the Internet or access to the licensing server is temporarily unavailable. The number of client licenses has been exceeded for your organization. IceWarp licensing servers track how manysystems have been activated using a given license. If the number of activated clients exceeds the total for the license,IceWarp Outlook Sync will inform you that additional licenses need to be purchased. If you need to re-install IceWarp Outlook Sync software on a new system due to either hardware failure or systemupgrade, contact your support staff to assist you with removing the existing IceWarp Outlook Sync registration, orrequest a new activation key.Offline ActivationTo activate your license offline, follow these steps:1.To register IceWarp Outlook Sync off-line (because your computer cannot access the license server), you need toobtain the license.xml file from IceWarp website.Go to http://www.icewarp.com/purchase/, click the Lic. Maintenance button and in the Client License Activationsection, click the Activate License button.2.Copy the content of the Identification Key field (License dialog – Online Activation tab (see the above figure)) andpaste it into the web page field of the same name.Copy your activation key and paste it into the Activation Key web page field.Click the Next button.3.On the next page, click the link to download your license.xml file and save it into the wished directory.4.In the IceWarp Outlook Sync License dialog – Enter License Offline tab, click the Enter License File button.Browse for the license.xml file and click Open.
IceWarp OptionsFigure 3 – Entering license.xml FileClick OK to finish activation.If you are unable to register the IceWarp Outlook Sync, contact your support helpdesk or IT administrator, please.SynchronizeClick this button to synchronize items in the selected folder immediately.Folder SyncClick the button to synchronize whole folder structure (added or deleted folders) immediately.27
28IceWarp Outlook Sync User GuideSettingsLogin CredentialsThis tab allows you to manage your login to a server and connection with it.FieldDescriptionUsernameEnter your username for your mail server. It is filled in during installation.PasswordEnter your password for your mail server. It is filled in during installation. If changed afterinstallation, change it also here.Email addressEnter your email address. It is filled in during installation.Remember passwordTick the box if you do not want to be asked for your password always when you launchIceWarp Outlook Sync.HostnameEnter the hostname of your mail server.PortThe default port number for IMAP service is 143.Use secured connectionTick this box if you use secured connection (https) to your mail server. In this case, the portnumber selected in the Port field is different (by default, it is 993).Always trust certificateIf this box is ticked, every server certificate is trusted, no validation fails when secureconnection is used (IMAP or WebDAV).
IceWarp Options29AdvancedThis tab allows you to manage advanced settings. Usually it is not necessary to change default values. If in doubt, consult withyour administrator.FieldDescriptionAuthentication typeSelect authentication type you want to use:Conflict resolutionFull synchronizationthreshold Cram MD5 – server sends a string, credentials to be encrypted with by a client.Encrypted credentials are sent to the server. It encrypts saved credentials with the samestring and compares results. Plain – no encryption (or base64) is used.It is possible to access a server using two (or even more) clients in the same time. When someitem (contact, event, etc.) is changed from one client, and changed to a different value from theother one, the solution can be: Server wins – the data on the server are used in the case of conflict. Client wins – the last data change wins in the case of conflict.Up to this number of emails, these items are parsed and synchronized. When number of emailsexceeds this number, synchronization is based on Outlook information about items that need tobe synchronized (i. e. have been changed).
30IceWarp Outlook Sync User GuideThreshold for fulldownload (MB)Up to this email size (in megabytes), whole emails are downloaded. When email
IceWarp Outlook Sync will only install on systems where the user has administrative rights. The user's rights can be changed to install the IceWarp Outlook Sync and then reset to the original rights. Assure, you have sufficient disk space (depending on your email box size) - if you are not sure, ask your server .