Transcription
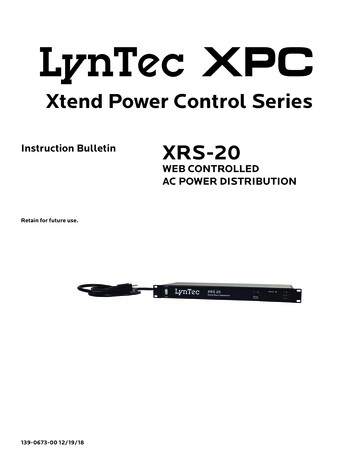
LynTec XPCXtend Power Control SeriesInstruction BulletinXRS-20WEB CONTROLLEDAC POWER DISTRIBUTIONRetain for future use.139-0673-00 12/19/18
HAZARD CATEGORIES ANDSPECIAL SYMBOLSRead these instructions carefully and look at the equipment to become familiarwith the device before trying to install, operate, service, or maintain it. Thefollowing special messages may appear throughout this bulletin or on theequipment to warn of potential hazards or to call attention to information thatclarifies or simplifies a procedure.The addition of either symbol to a “Danger” or “Warning” safety label indicatesthat an electrical hazard exists which will result in personal injury if theinstructions are not followed.This is the safety alert symbol. It is used to alert you to potential personal injuryhazards. Obey all safety messages that follow this symbol to avoid possibleinjury or death.DANGERDANGER indicates an immediately hazardous situation which, if notavoided, will result in death or serious injury.WARNINGWARNING indicates a potentially hazardous situation which, if notavoided, can result in death or serious injury.CAUTIONCAUTION indicates a potentially hazardous situation which, if notavoided, can result in minor or moderate injury.CAUTIONCAUTION, used without the safety alert symbol, indicates a potentiallyhazardous situation which, if not avoided, can result in property damage.NOTE: Provides additional information to clarify or simplify a procedure.PLEASE ted,servicedandElectrical equipmentbebeinstalled,operated,serviced,and maintainedonly by qualifiedpersonnel.Thispersonnel.document isThisnot intendedas isannotmaintainedonly electricalby qualifiedelectricaldocumentinstructionasmanualfor untrainedpersons.No responsibilityis assumedbyintendedan instructionmanualfor untrainedpersons.No responsibilityD forbyanyconsequencesout of the arisinguse of thisisSquareassumedLynTecfor any arisingconsequencesoutmanual.of the use of thismanual.
Table of ContentsContentsChapter 1--Introduction .4OVERVIEW .4Safety Precautions .4Disclaimer .4Chapter Two--Quick Start Guide .5Chapter 3--Detailed .6Installation and Setup.6Front Panel Features.6Emergency Override Rocker Switch .6Recessed Slide Switch .6Surge Protection/Network LED .6POD LEDs .6Back Panel Features . 7Network Port . 7PODs 1-3 . 7Unswitched Outlet . 7Setup Detail .8Connecting to the XRS-20 with a Router .8Connecting to the XRS-20 using a Crossover CAT5/6 cable .9Management . 10Network Setup . 10Chapter Four--Troubleshooting . 11Troubleshooting . 11Detail Specifications. 12139-0673-00.33
Chapter One--OverviewIntroductionChapter 1--IntroductionOVERVIEWThe LynTec XRS-20 is a microcontroller based powerdistribution device that can be accessed via Internet orintranet communications using an Ethernet connection.With this remote access, individual AC circuits can be turnedon and off from any LynTec RPC, RPCR, NPAC or XPCcontroller.The XRS-20 has four 20 amp capacity circuits.SAFETY PRECAUTIONSThe XRS-20 is designed to operate at 120 volts, 60 hertz.Operation with any voltage or frequency other than that candamage the equipment and create an unsafe situation.CAUTION #1: This device must be grounded.CAUTION #2: This device should be installed only byqualified electrical technicians using appropriate mountinghardware and correct installation techniques. Beforeinstalling make sure main power is off.CAUTION #3: Do not expose this product to moisture orsalty air. Doing so could cause significant damage andcreate an unsafe condition.DISCLAIMER4LynTec shall under no circumstances be held responsible forany losses, damage, or injury resulting directly or indirectlyfrom the use of the XRS-20 device in a manner contraryto accepted safe operating methods or any instructionscontained in this document. The user should determine priorto use whether this product is adequate, suitable and safe forthe application intended. Since individual applications can besubject to extreme variation LynTec makes no representationor guarantee as to the suitability of the XRS-20 for anygenerally described application.139-0673-00.4
Chapter To--Quick Start GuideChapter Two--Quick Start Guide1. Unbox the unit. The box should contain: XRS-20 deviceand user manual QR. You will need a CAT5 networkcable if attaching to a router, a CAT 5/6 crossover cable ifconnecting directly to a PC.2. With your PC/laptop on and booted up, connect the XRS20 to your router or directly to a PC/laptop using a suitablecable. If the XRS-20 is connected to a network router use astandard CAT 5 cable, if connected directly to a PC/laptopuse a CAT 5/6 crossover cable.3. Plug the XRS-20 power cord into a live AC receptacle,such as a wall outlet, with a twenty amp capacity (i.e.NEMA 5-20R).4. The XRS-20 will take about 30 seconds to boot up andconfigure itself at which point the Network light on thefront of the unit will illuminate, indi-cating networkconnectivity. If the Network light blinks or does not light atall check the cable connections.5. Open up your web browser and type in thefollowing default IP address to access the XRS-20:http://192.168.1.2506. At this point you will be prompted to log into the XRS-20.Initial login:Username: adminPassword: pw7. Use the “Network Setup” page to set a specific static IPaddress for your installation.8. See your system administrator, if you have one, for helpwith configuration.139-0673-00.55
Chapter Three--Detailed Installation & SetupChapter 3--DetailedInstallation and SetupFRONT PANEL FEATURESEmergency Override RockerSwitchThe primary intent is for the XRS-20 to be controlled via aremote Ethernet link. This switch serves as a fail safe controldevice in the event an Ethernet connection is not available orfunctioning. Moving this switch to the UP position will causethe XRS-20 to turn on the three power PODs in a prescribedtimed sequence, two seconds between each POD activation.Moving this switch to the DOWN position will cause the unitto turn off the POD outlets in the reverse order.Recessed Slide SwitchAs a second fail safe control point, this switch can be usedto manually turn on all POD outlets in the unlikely event offailure of the control circuitry contained in the XRS-20. Thisswitch will turn on all POD outlets simultaneously. When theswitch is returned to it’s “off” position the XRS-20 will revertto the prior state the unit was in.Surge Protection/Network LEDThis LED will light up solid Orange when theXRS-20 is connected to an Ethernet networkconnection. It will blink quickly green and redwhen an Ethernet cable is attached but nonetwork can be found. When no network cable isconnected the light will blink slowly green andred indicating the unit is powered up. If Surgeprotection is lost the LED will be solid red orblinking red depending on if the unit is connectedPOD LEDsAs each of the POD duplex receptacles on the back of theXRS-20 turns on a corresponding LED on the6139-0673-006
Chapter Three--Detailed Installation & SetupBACK PANEL FEATURESNetwork PortThis RJ45 connector is for connecting to your PC, router orlocal area network using a TCP/IP link.PODs 1-3There are three duplex receptacles on the back of the XRS20. Each is rated for a maximum twenty amp load and each iscontrollable to turn on or off independently of the others.Unswitched OutletThis single outlet is rated for a maximum load of twentyamps on the XRS-20. It will have power any time the iPdevice is plugged into a live AC receptacle.139-0673-00.77
Chapter Three--Detailed Installation & SetupSETUP DETAILUnbox the unit. The box should contain: XRS-20 deviceand user manual QR. Mount the XRS-20 in a 19” wide rackwith metal mounting rails, designed with 1.75” spacing. Useappropriate rack mounting hardware. Always power theXRS-20 on a grounded outlet. Do not defeat the groundingfeature of the XRS-20 power cord.Connecting to the XRS-20with a Router1. Connect the XRS-20 to your network router using a Cat 5cable plugged into the RJ45 “Network” port on the frontof the unit and the other end to your network router.2. Plug the XRS-20 power cord into a live AC receptacle,such as a wall outlet. Note: The XRS-2020 requires a 20amp, NEMA 5-20R receptacle.3. The XRS-20 will take a few seconds to boot up andconfigure itself at which point the Network light on thefront of the unit should illuminate and remain on withoutblinking, indicating network connectivity. If the Networklight blinks check the cable connections.4. Open a web browser on your PC or Laptop and type inthe following address on the navigation bar to access theXRS-20: http://192.168.1.250 Be sure to type exactly asshown. No domain such as “.com” should be added.5. You will be presented with the login box. Enter thefollowing initial username and password:Initial login:Username: adminPassword: pw8139-0673-008
Chapter Three--Detailed Installation & SetupConnecting to the XRS-20 usinga Crossover CAT5/6 cableTo connect the XRS-20 to a PC or laptop directly you willneed to change the properties of your internet connection/IPaddress.1. Plug the CROSSOVER cable into the PC/laptopnetwork socket and the other end into the XRS-20Network socket .2. Plug the XRS-20 power cord into a live AC receptacle,such as a wall outlet. Note: The XRS-2020 requires a20 amp, NEMA 5-20R receptacle.3. The XRS-20 device will take a few seconds to boot upand configure itself at which point the Network light onthe front of the unit should illuminate and remain onwithout blinking, indicating network connectivity. If theNetwork light blinks check the cable connections.4. In Windows go to your start menu and navigate to thecontrol panel. Then choose the Network Connections”icon.5. Open Network connections by double clicking on it,select the LAN or HIGH-SPEED icon, right click on thisand select properties.6. Click once on the Internet Protocol item that you willsee at the bottom of the list and select the propertiesbutton which is at the mid right.7. Check the “Use the following IP address” box and thenchange the IP address to: 192.168.1.1, then change theDefault Gateway address also to: 192.168.1.1.8. Click OK and then close the network box.9. Open a web browser on your PC and type in thefollowing address on the navigation bar to access theXRS-20: 192.168.1.250.10. The XRS-20 login box will appear, enter your logindetails and configure the XRS-20.139-0673-00.99
Chapter Three--Detailed Installation & SetupMANAGEMENTOnce you have logged into the XRS-20 you willsee”Network Setup”. You can configure the IP addressand other required network settings (dependent on yourpersonal network)Network SetupThe Network Setup Page displays the current settings of theunit and the MAC address. This page is useful for retrievingall the information you may need to set up the XRS-20 onyour network. Disable DCHP and set a static IP address for theXRS-20.10139-0673-0010
Chapter Four--TroubleshootingChapter Four--TroubleshootingTROUBLESHOOTINGThe LynTec XPS-80 is ruggedly constructed and containsquality components. There are no user serviceable partsinside this device. Unauthorized service will void all existingwarranties and may result in equipment damage andpersonal injury.Should improper performance be observed consult thefollowing guidelines for diagnosis.ConditionPossible CausesMain utility power outageThe XRS-20 will notpower up and networklight is not lit.Tripped breaker(s)The XRS-20 will notpower down.I cannot connect tothe XRS-20 via mynetwork139-0673-00.11See power up causes aboveSolutionsVerify that the utility provided power for the building isavailable.Check that the circuit breaker is not tripped. Reset thecircuit breaker by turning it OFF and then back ON.Follow above solutionsIncorrect network cableCheck you are using the correct cable, standard CAT5cable for router connection, crossover cable for direct toPC connection.Incorrect computer IP addressIf you are connecting directly to a PC you will have toconfigure your computer to have a static IP address of192.168.1.1. See your operating systems help file on how todo this.Incorrect username/passwordAre you using the correct username and password? Ifyou are accessing the login page and your login is failingyou might need to reset to factory default and try againif you have forgotten the correct username/passwordcombination. Contact LynTec for reset instructions11
Detail SpecificationsDetail SpecificationsChassis16 Gauge SteelDimensions1.72H x 19.0W x 7.0DNumber of circuitsOne @20ANumber of controlled PodsThreePower input7 Foot, SJTW with NEMA 5/20P (Note:XRS-2020 requires a NEMA 5/20Rreceptacle)Power OutputSix NEMA 5/20R (controlled), one NEMA5/20R (unswitched)Input Voltage120 VAC @60HzRelay Current Rating30APower Line ConditioningReplaceable surge protection moduleMax Voltage Surge: 10 volts line-neutral,0.50 volts groundFiltration @ 30MHz: 60 dB line-neutral,80 dB groundOperating Temp Range32-158 deg FCommunications inputEthernet (RJ-45, 8-wire)Communications ProtocolHTMLFront Panel MonitorPower On , Surge Protection and NetworkConnection LEDsLED indicates network connection, OutletOn, Sequence Delay and Current FlowFront Panel ControlOverride switch to turn on in event ofproduct or network faultStandardsUL508AFCC--Part 15, Class AETL Tested to: CU 22.2-14 and UL508A12139-0673-00.12
cable. If the XRS-20 is connected to a network router use a standard CAT 5 cable, if connected directly to a PC/laptop use a CAT 5/6 crossover cable. 3. Plug the XRS-20 power cord into a live AC receptacle, such as a wall outlet, with a twenty amp capacity (i.e. NEMA 5-20R). 4. The XRS-20 will take about 30 seconds to boot up and