Transcription
HDTV PROJECTION MONITORPRO-730HDIPRO-530HDIOperating InstructionsARB1557A En 001.P6518/8/03, 16:16
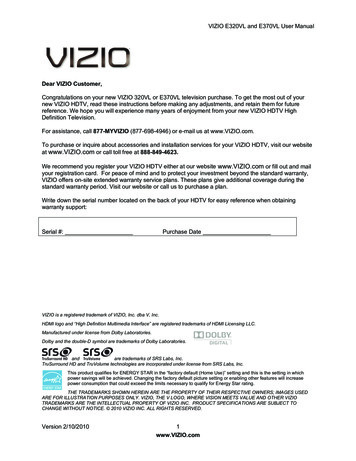
FEATURESProgressive Scan/HDTV monitorAll SDTV and HDTV signals are converted to 1080i and displayed athigh resolution.HDMI (High-Definition Multimedia Interface) withCopy Protection systemThe combination of High-Definition Multimedia Interface (HDMI) andHigh-bandwidth Digital Content Protection (HDCP) is important forviewing copy-protected digital contents through SAT/CATV BOX orDVD player. DIGITAL input terminal receives the signal in the form ofdigital information. In this way, all signals coming into this interfacehave a very high resolution and less noise compared to an analoginterface.Dual System Component Input for NTSC/ProgressiveConnection to a DVD player using the component output terminalsmakes possible a high picture-quality display, superior to that of a SVIDEO terminal connection. This also handles high resolutioncomponent input (1080i, 480p), which will function as an interfacefor high-quality images in future.Dual Tuner (Split Screen and CH Search screenfunction)Two TV tuners are provided, making it possible to split the screenvertically in two areas in order to display moving imagessimultaneously on each of them. In addition, the channel searchfunction makes it possible to check and perform other functions etc.,on the program that you choose to run in the background, whileviewing the foreground program. This adds remarkable conveniencewhen you are concerned with viewing two programs.Pioneer PureCinema III Format ConverterAn advanced and exclusive I/P (Interlace/Progressive) third generationformat converter called “PureCinema III”, delivers a high-resolutionprogressive picture (480p) or Interlaced picture(1080i). *This is USERSELECTABLEIt reproduces film material in a very smooth and film-like image.This is perfect technology for movie lovers.Anti-Reflective Tinted Protection PanelThe accompanying protective panel is AR (Anti-Reflective) coatedand tinted.This is not only to protect the screen, but to present a more naturaland high contrast image with less light reflection. This AR coating isvery durable against scratching.Lens System for HDTVThe adoption of a specialized lens system for high-resolution HDTVwhich faithfully reproduces HDTV 1080i signals allows for highly colorsaturated images to be displayed at high resolution. Also, byincorporating an “achromatic coated” lens for the blue CRT, thepicture image is reproduced with less halo and appears sharp.This HDTV monitor has thecapability to display an HDTV(1080i) picture in its 16 x 9 viewingarea.2Reference Theater mode and PRO mode Reference Theater Mode This mode reproduce film material just like a real film image. Bycutting video enhancement circuits, the picture becomes more naturaland looks film-like. PRO Mode This mode offers pro level video adjustment to the user. You can gointo several areas such as: LTI (Luminance Transient Improvement),Gamma, CONTRAST EXP, SHARP MODE, White Balance.Fully Illuminated Remote Control UnitA fully illuminated universal remote control is used that makes itpossible to operate other devices. Remote operations can thus beperformed easily even in dark rooms and similar environments.Multi-Point Convergence SystemConvergence of the red, green, blue guns* in the TV is critical to agood picture. Thanks to new convergence system digital technology,not only can the center of the screen be adjusted, so can an amazing72 other points across the entire viewing area. This ensures coloraccuracy throughout the screen. The adjustment is easily done fromthe remote control. (*guns cathode ray tubes)Program Block (V-CHIP)You can block selected programs based on the established ratingsystem for television programs and movies. The rating systems aredefined below: U.S.A. RATING SYSTEM The TV parental Guidelines are used to rate television programming: TV-Y , TV-Y7 , TV-G , TV-PG , TV-14 and TV-MA .The Motion Picture Association of America(MPAA) guidelines are usedto rate movies: G , PG , PG-13 , R , NC-17 , X and NR . CANADIAN RATING SYSTEM The Canadian English Language Rating System is used to ratetelevision programming: C , C8 , G , PG , 14 and 18 .The Canadian French Language Rating system is used to ratetelevision programming: G , 8 , 13 , 16 and 18 .In order to block programming you feel is inappropriate, rating limitscan be set on both systems using the remote control and a password.Definitions:SDTV Standard Definition TelevisionHDTV High Definition TelevisionCHTV channelRead and understand these 'Operating Instructions'before operating your Monitor.Follow the 'IMPORTANT SAFETY INSTRUCTIONSAND WARNINGS' section and all the warnings onthe product.HDMI, the HDMI logo and High-Definition Multimedia Interfaceare trademarks or registered trademarks of HDMI Licensing LLC.
Thank you for purchasing this PIONEER HDTV ProjectionMonitor.Please read the precautionary instructions enclosed with theseoperating instructions please do so before proceeding.After learning how to operate the Projection Monitor, be sureto keep this manual handy for future reference.[For U.S. model]IMPORTANT NOTICEH006AEnThe serial number for this equipment is located in the Rearpanel. Please write this serial number on your enclosedwarranty card and keep it in a secure area. This is for yoursecurity.INTRODUCTIONIn this manual, we refer to the 'HDTV PROJECTION MONITOR',as the 'Projection Monitor' or the 'Monitor'.Note on the SPLIT screen and SEARCH screen functionsThe SPLIT screen and SEARCH screen functions provided inthis monitor are intended for private viewing only.Use of the above video processing functions for profitmakingpurpose or for public viewing (clubs, hotels, etc.) without priorauthorization from the transmitter and/or owner of the videoprogram (s) may be an infringement of existing copyright laws.WARNING: Handling the cord on this product or cordsassociated with accessories sold with the product willexpose you to lead, a chemical known to the State ofCalifornia and other governmental entities to cause cancerand birth defects or other reproductive harm.Wash hands after handling.NOTICE ON ADVERSE EFFECTS TO TV TUBEImage Burn-in : Displaying the same images on your Monitor (such as still or paused images, TV/video games,close-captioning, computer programs, on-screen displays, or other images with static or virtually static portions)for a prolonged period of time may cause permanent residual images to appear on your Monitor.Avoid displaying the same image continuously over a long period of time. If the same image is displayedcontinuously for several hours, or for shorter periods of time over several days, a permanent after-image mayremain on the screen due to burning of the phosphorous materials contained in your Monitor. Such imagesmay become less noticeable if moving images are later displayed, but they will not disappear completely. ForGames, please select the Game Mode (page 52), and do not view static or virtually static images on yourMonitor for more than two hours. After displaying static or virtually static images on your Monitor, it isrecommended that you view a normal moving picture in the "WIDE" or "FULL" screen setting for three (3)times longer than the time the static or virtually static images were displayed.3
The following symbols are found in thismanual and on the labels on the product.They alert the operators and servicepersonnel of this equipment to potentiallydangerous conditions.This symbol refers to a hazard or unsafepractice which can result in severe personalinjury or death.This symbol indicates an action that isprohibited.This symbol refers to a hazard or unsafepractice which can result in personal injuryor property damage.WARNINGCAUTIONWARNINGIMPORTANT SAFETY INSTRUCTIONS AND WARNINGS Read all of these instructions.Keep these instructions for later use.Follow all warnings and instructions marked on the Monitor.FOR YOUR PERSONAL SAFETYThis Monitor is equipped with apolarized alternating current lineplug (a plug having one bladewider than the other).This plug will fit into the poweroutlet only one way. This is asafety feature.If you are unable to insert the plugfully into the outlet, try reversingthe plug. If the plug should still failto fit, contact your electrician toreplace your obsolete outlet. Donot defeat the safety purpose ofthe polarized plug.5.Do not attempt to service thisMonitor yourself as opening orremoving covers may expose youto dangerous voltage or otherhazards. Refer all servicing toqualified personnel.6.Never push the objects of any kindinto this Monitor through cabinetslots as they may touchdangerous voltage points or shortout parts that could result in a fireor electric shock. Never spill liquidof any kind on the Monitor.2.If the power cord or plug becomesdamaged or frayed, unplug thisMonitor from the wall outlet andrefer to qualified servicepersonnel for servicing.7.If the Monitor has been droppedor the cabinet has been damaged,unplug this Monitor from the walloutlet and refer to qualified servicepersonnel for servicing.3.Do not overload wall outlets andextension cords as this can resultin fire or electrical shock.8.If liquid has been spilled into theMonitor, unplug the Monitor fromthe wall outlet and refer servicingto qualified service personnel.4.Do not allow anything to rest onor roll over the power cord, anddo not place the Monitor wherethe power cord maybe subject totraffic or abuse. This may resultin electrical or fire hazard.1.4
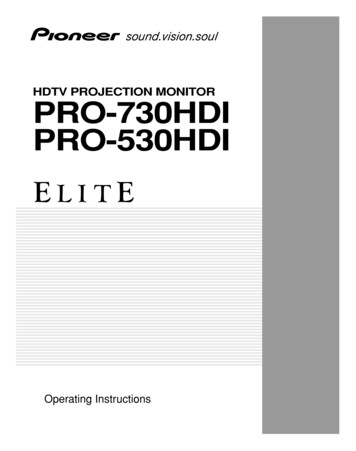
Do not subject your Monitor toimpact of any kind. Be particularlycareful not to damage the screensurface.10.Unplug the Monitor from the walloutlet before cleaning. Do not useliquid cleaners or spray-typecleaners. Use a damp cloth forcleaning.11-1. Do not place this Monitor on anunstable, uneven or an inclinedlocation. The Monitor mayoverturn, causing serious injury(to a person), and serious damageto the appliance.11-2. Be careful when placing theMonitor on a cart to move it.Quick stops, excessive force, anduneven surfaces may cause theMonitor and cart to overturn.PROTECTION AND LOCATION OF YOUR HDTV PROJECTION MONITOR12. Do not use the Monitor nearwater, for example, near abathtub, washbowl, kitchen sink,or laundry tub, in a wet basement,or near a swimming pool, etc. Never expose the Monitor to rainwater.If the Monitor system has beenexposed to rain or water, unplugthe Monitor from the wall outletand refer servicing to qualifiedservice personnel.13.14.15.16.If an outside antenna is connected through otherequipment, be sure the antenna system is grounded soas to provide protection against voltage surges and builtup static charges. In the U. S. A., section 810 of theNational Electrical Code, ANSI/NFPA 70, providesinformation on proper grounding of the mast andsupporting structure, grounding of the lead-in wire toan antenna-discharge unit, size of groundingconductors, location of antenna-discharge unit,connection to grounding electrode, and requirementsfor the grounding electrode.NEC-NATIONALELECTRICAL CODEChoose a place where light (artificialor sunlight) does not shine directlyon the screen.Avoid dusty places since thebuildup of dust inside the Monitor'schassis may result in themalfunctioning, when highhumidity persists. The Monitor has slots, oropenings in the cabinet forventilation purposes to ensure thereliable operation of the Monitor,and to protect it from overheating.These openings must not beblocked or covered. Never cover the slots or openingswith cloth or other material. Never block the bottomventilation slots of the Monitor byplacing it on a bed, sofa, rug, etc. Never place the Monitor near orover a radiator or heat register. Never place the Monitor in a builtin enclosure such as a bookcase,unless proper ventilation isprovided.ANTENNALEAD IN WIREGROUNDCLAMPANTENNADISCHARGE UNIT(NEC SECTION 810-20)ELECTRICSERVICEEQUIPMENTGROUNDING CONDUCTORS(NEC SECTION 810-21)GROUNDING CLAMPSFIG. APOWER SERVICE GROUNDINGELECTRODE SYSTEM(NEC ART 250, PART H)EXAMPLE OF ANTENNA GROUNDING INNATIONAL ELECTRICAL CODE INSTRUCTIONS5INTRODUCTION9.
17.An outdoor antenna systemshould not be located in thevicinity of overhead power lines/electric lights or power circuits, orwhere it can fall onto such powerlines or circuits. When installingan outdoor antenna system,extreme care should be taken tokeep it from touching such powerlines or circuits as contact withthem might be fatal.18.For added protection during alightning storm, or when it is leftunattended and unused for longperiods of time, unplug theMonitor from the wall outlet anddisconnect the antenna. This willprevent damage due to lightningand power-line surges.OPERATION OF YOUR HDTV PROJECTION MONITOR19.The Monitor should be operatedonly from the type of powersource indicated on the markinglabel. If you are not sure of the typeof power supply at your home,consult your dealer or local powercompany.20.If you are unable to restore normaloperation by following thedetailed procedure in youroperating instructions, unplug itfrom the wall outlet and refer toqualified service personnel forservicing. Do not adjust othercontrols than those described inthismanual.Improperadjustments may result indamage and will often requireextensive work by a qualifiedtechnician to restore the Monitorto normal operation.21.If your Monitor is to remainunused for a period of time, forinstance, when you go on aholiday, turn the Monitor 'off' andunplug it from the wall outlet.IF THE HDTV PROJECTION MONITORDOES NOT OPERATE PROPERLY22.If you are unable to restore normaloperation by following thedetailed procedure in youroperating instructions, do notattempt any further adjustment.Unplug the Monitor and call yourdealer or service technician.23.Whenever the Monitor isdamaged or fails, or there is adistinct change in performance,unplug the Monitor and have itchecked by a professional servicetechnician.624.It is normal for some Monitor tomake occasional snapping orpopping sounds, particularlywhen being turned on or off. If thesnapping or popping iscontinuous or frequent, unplugthe Monitor and consult yourdealer or service technician.FOR SERVICING AND MODIFICATION25.Do not use attachments notrecommended by the Monitor'smanufacturer as they may resultin the risk of fire, electrical shockor injury to persons.26.When replacement parts arerequired, be sure the servicetechnician uses replacement partsspecified by the manufacturer thathave the same characteristics asthe original part. Unauthorizedsubstitutions may result in fire,electrical shock, or injury.27.Upon completion of any serviceor repairs to the Monitor, ask theservice technician to performroutine safety checks to determinethat the Monitor is in a safeoperating condition.
CONTENTSINTRODUCTIONHOW TO USE THESE OPERATING INSTRUCTIONS . 8INSTALLING THE MONITOR . 9HOW TO ATTACH THE PROVIDED FRAME COVER . 10HOW TO REMOVE THE PROTECTIVE SCREEN . 11BASIC OPERATIONSBEFORE USE .CONNECTING THE ANTENNA .CONNECTING VIDEO/AUDIO EQUIPMENT .FRONT PANEL FUNCTIONS .REMOTE CONTROL UNIT FUNCTIONS .TO WATCH TV .CHECKING THE MENU .AUTO CHANNEL PRESET .CONVERGENCE ADJUSTMENT .121416202224262830BASIC FUNCTIONSPROGRAM BLOCK (V. CHIP) FUNCTION .CHANGING PASSWORD .CHANGING SCREEN SIZE .MULTI-SCREEN FUNCTION .CLOSED CAPTION DECODE FUNCTION .CHANGING CHANNEL SET UP .PICTURE ADJUSTMENTS .CHANGING SCAN MODE .SOUND ADJUSTMENTS .DIGITAL INTERFACE .MULTI-POINT CONVERGENCE ADJUSTMENT .3239414446475263646873VARIOUS FUNCTIONSCONNECTION WITH RECEIVER (1) .CONNECTION WITH RECEIVER (2) .CONNECTING THE SYSTEM REMOTE CONTROL .REMOTE CODE SET UP.75788081OTHERSMENU INDEX . 92TROUBLESHOOTING . 94SPECIFICATIONS . 967ARB1557A En 007 011.P6578/8/03, 16:34
HOW TO USE THESE OPERATINGINSTRUCTIONSThe following page is an example of the way that basic operating instructions are shown in this manual.The explanation method varies from page to page.* The screen illustrations may be different from the actual screen display.AUTO CHANNEL PRESETThe broadcast frequencies that can be received depend on your area.Memorize the broadcast stations that can be received in your area in thepresets.1Select TV.2Press MENU and select SET UP by usingthe or \ button and then pressing «button. (Refer to page 26.)3Select CHANNEL SET UP in the same way.Explanation of thefunction on thispage.Operating procedureccS ET UPC HA NN E L S E T UPC ON V E R G E N C EP RO G R AM B L O C KC H A N G E P A S SWO R DS Y S T EM I N / O U TD I G I T A L I NT ERF AC EThe button(s) thatis/are used is/areshown in dark gray.SETSELECT4SETMENUENDSelect AUTO CHANNEL PRESET .ccC HA NN E L S E T UPA UT O CHANNE L P RE S E TC HA N N E L A DD / D E LF AV OR I T E C HA NN E LEXI TSETSELECT5SETMENUENDSelect ANTENNA , then select A or B.ccA UT O CHANNE L P RE S E TA NT E NNA : AT V / C A B L E MO D E : C A T VAUT O PRE S ET S TA RTEXI TSETSELECTSETMENUENDccNOTES: The CHANNEL SET UP cannot be selected unlessthe function is set up for TV. Failure to connect antenna cable in this procedurewill result in selection of a single TV channel.A UT O CHANNE L P RE S E TA NT E NNA : A BT V / C A B L E MO D E : C A T VAUT O PRE S ET S TA RTEXI TSELECTSETSETMENUENDPrecautions etc.28Buttons used8ARB1557A En 007 011.P6588/8/03, 16:34Screen duringoperation
INSTALLING THE MONITORINSTALLATION PRECAUTIONS:OPERATING PRECAUTIONSOptimum viewing distance10 to 23 feet is the range recommended for viewing comfort.Adjust room illuminationExcessively bright or dim lighting may strain your eyes. Drawthe curtains if necessary to shut out direct sunlight.Condensation and picture blurring If the room temperature suddenly rises (or if the ProjectionMonitor is moved from a cool place to a hot place),condensation may form on the lenses resulting in picturedistortion or color fading. If this occurs, simply wait a while(with the power switch ON) and the condensation willdisappear. A gradual change in temperature can prevent condensationfrom forming.CARE OF YOUR PROJECTION MONITORDO NOT: Do not use strong cleansers, solvents, polishes, or chemicallytreated cloths to clean the screen or cabinet. Do not touch or scratch the screen. Do not fasten or place rubber or vinyl items on the Monitor. Do not stick adhesive tape onto the Monitor. Do not put any object on the Monitor.DO: Use a soft cloth to dust the screen and cabinet. Handle the screen with care to avoid scratches or damages. Ask your dealer or a Pioneer authorized service center toclean the interior of the monitor in your area if the picturebrightness is too low even with the max. level. This may becaused by dust buildup inside.USAGE GUIDELINES & PRECAUTIONSAll phosphor-based screens can be affected bydisplaying static or virtually static images for a prolongedperiod of time. After-image and permanent effects onthe screen can be avoided by taking some basicprecautions. By following the recommendations listedbelow, you can ensure longer and satisfactory resultsfrom your television. Whenever possible, avoid continuously displayingstatic or virtually static images on your Monitor(e.g., still images, TV/video games, closecaptioning, computer programs, or other imageswith static or virtually static portions). Avoid viewing the On-Screen Display for extendedperiods from a digital tuner, DVD player, VCR andall other components. Do not leave the same picture freeze-framed orpaused continuously over a long period of timewhen using the still picture mode from VCR, DVDplayer, or other component. Images which have very bright areas and very darkareas side by side should not be displayed for aprolonged period of time. When playing a game, the "GAME" mode setting(page 52) within "Picture Adjustment Settings" isstrongly recommended. It is also recommendedthat such be limited to less than two (2) hours at atime. After displaying static or virtually static imageson your Monitor, it is recommended that you viewa normal moving picture in the "WIDE" or "FULL"screen setting for three (3) times longer than thetime the static or virtually static images weredisplayed.9ARB1557A En 007 011.P6598/8/03, 16:34INTRODUCTION Keep away from magnetic fieldsThe picture may be distorted if strong magnetic fields arenearby. External speakers should be set at least 2 feet (60cm)away from the Projection Monitor. Electric fans and othermotor driven appliances and toys may also be sources ofmagnetism. Bright light or direct sunlight will dull the picture. Positionthe Projection Monitor so that the screen faces away fromwindows. While the Projection Monitor is operating, it is cooled byairflow through ventilation holes in the rear and bottom.Therefore, avoid placing it in a location where the coolingairflow is hindered (e. g. against a wall). Avoid places subject to extremely high temperatures orhumidity, or to temperatures of 41 F (5 C) or lower. Alsoavoid dusty places. If setting the Projection Monitor on a floor made of softmaterial, make sure that the floor will not damaged by theweight of the Projection Monitor. Do not put the Projection Monitor on a surface that is tilted,unsteady or prone to shake or vibrate. A shaky or slantedplatform is dangerous. Cover shiny surfaces (floor and walls) with non reflectivematerials (carpet, rugs, wallpaper, etc.).
HOW TO ATTACH THE PROVIDEDFRAME COVERATTACH THE FRAME COVER BEFORE USING THE MONITOR.2. Attaching the upper and lower frame coversPush in the upper and lower frame covers from the outsidealong the groove on the panel frame until you hear a click.PARTS INCLUDED FOR FRAME COVER INSTALLATION:2SIDE FRAME COVERS (L, R) (TRIMS) (short)2FRAME COVERS(TRIMS) (long)HOW TO ATTACH THE FRAME COVERAttachFrame coverAttach1. Attaching the side frame covers.Push in the side frame cover from the outside along thegroove on the panel frame until you hear a click.AttachAttachSide frame cover (L)NOTES FOR CARE AND CLEANING OF SCREEN: Do not hit or throw anything onto the protective screen, as adamaged protective screen may cause injury. If the protective screen surface is dirty, wipe it with a clothdipped in warm water and then wrung out. Wipe it dry witha soft, dry cloth. Never use paint thinner or other cleaners to clean theprotective screen as they may contain harmful chemicalsthat will damage the finish of the screen.HOW TO REMOVE THE FRAME COVERRemove the frame cover by the following procedure.1 Prepare a flat–blade screw driver (large) and a small andthick cloth.2 Wrap the flat–blade screw driver into the end of the sideframe covers (left and right) and remove it using a leverprinciple. Be sure to remove them from the bottom asshown in the figure.Side frame cover (L)Side frame cover (R)Side frame cover (R)Attach side frame cover along the aluminium edge guardsleaving a space of approximately 0 to 1/32 in. (0 to 1 mm)from the upper panel frame.Screen frameUpper panel frameUpper panelframeScreen frame3 Remove the upper and lower frame covers by the sameprocedure as in 2, gently.Upper frame cover0 to 1 mm(0 to 1/32 in.)Side framecoverSide frame cover10ARB1557A En 007 011.P65108/8/03, 16:34Lower frame cover
HOW TO REMOVE THE PROTECTIVESCREENThe protective screen is attached when the monitor is shipped to protect the display. We do not recommend that you remove it, butif you have to remove it, do so following the procedure shown below.1. Remove the left, right, upper, and lower frame covers.2. Remove the screws from the upper panel frame and sidepanel frames. (Not remove the screw from the lower panel.)ProtectivescreenScrew5. Remove the screws from the lower panel frame.3. While holding the screen in place, remove the upper panelframe and side panel frames.CAUTION:The panel frames are made of aluminum, so toprotect them from scratches, be extremely careful not tostrike them with the rim of the screen frame.Lowerpanel frameUpper panel frameSide viewScrew6. Reattach upper, lower and side panel frames as indicatedthen follow on HOW TO ATTACH THE FRAME COVER. UPPER SIDE VIEW Side panelframe (L)Panel frameSide panelframe (L) UPPER SIDE VIEW Panel frameProtective screenWhen the protective screen isattached.When the protective screen is notattached.(Attach the panel frames reversedas shown in the figure.)11ARB1557A En 007 011.P65118/8/03, 16:34INTRODUCTION4. Remove the protective screen from the lower panel frame.If you decide remove the protective screen.
BEFORE USEBefore you watch the TV, perform the following procedure.UHFVHFConnect the cables of the VHF antennaand UHF antenna to the ANTENNA Aterminal. (See pages 14 and 15)MixerAConnect the CATV converterto the ANTENNA B terminal.(See pages 14 and 15)BANTENNA/CABLECATVconverter B ¿ ?ÙÛConnect the power cord to theAC wall socket.Turn on the MAIN POWERbutton.When the MAIN POWER is on, the red STANDBYindicator lights up. In this state, the POWERSTANDBY/ON button or the TV Power button ofthe remote control unit can be used to turn on andoff the Monitor.Red indicatorMAIN POWERSTANDBY/ONSTANDBY ONPOWER12ARB1557A En 012 019.P65128/8/03, 18:02
BEFORE USEInserting batteries into the remote control unit1. Open theA. Never mix new and used batteries.2. Insert batteries(two AA sizebatteries supplied with theproduct). Place batteries with their terminals corresponding to the ( ) and (–) indicatorsin the battery compartment.3. Close the batterycover.B. Batteries of the same size may have different voltagesdepending on their type. Do not mix different typesof batteries.C. Insert batteries so that the plus ( ) and minus (–) sidesare aligned according to the markings in the batterycase.D. When not using the remote control unit for a longperiod of time (1 month or more), remove the batteriesfrom the remote control unit to prevent leaking ofbattery fluid. If battery liquid has leaked, thoroughlywipe the inside of the case unit all liquid is removed,and then insert new batteries.E. Do not charge, short, disassemble or throw theprovided batteries in a fire.F. When disposing of used batteries, please comply withgovernmental regulations or environmental publicinstruction’s rules that apply in your country or area.Remote control operation range30 30 23 feet (7m) Furniture and other obstacles may block the infrared lightbeam so that it cannot reach the sensor behind the ProjectionMonitor's screen. Performance of the remote control unit is adversely affectedby strong fluorescent light. Keep such lights away from thescreen.Battery replacementReplace the batteries when any of the following phenomenais observed. The transmitting LED does not blink even when the TV Powerbutton is pressed. The remote control operation range has reduced.When replacing the batteries, prepare new batteries beforeremoving the old batteries.Be sure to close the battery case cover after batteryreplacement.NOTE: Even when batteries are removed, learned commands remainin memory for about 15 minutes. If you remove the batteries, and press any button, the memoryis erased in a few seconds.13ARB1557A En 012 019.P65138/8/03, 18:02BASIC OPERATIONSbattery cover.CAUTIONIncorrect use of batteries may lead to leakage or rupture.Always be sure to follow these instructions.
CONNECTING THE ANTENNA A good color picture depends on a good TV signal. So doesgood multichannel (stereo program and SAP) sound. Askyour dealer for advice on how to install your external antennato receive the best possible signal. If you subscribe to Cable TV or have a central antenna foryour building, you will not need an external antenna.Connect the TV signal source to your Monitor properly.Use a 75-ohm coaxial cable with an F-type connector andconnect the cable as shown in the illustration.Connecting VHF/UHF antennaVHF antennaUHF antennaABANTENNA/CABLEUHFVHFU/V mixerConnecting VHF/UHF antenna with VCRAntennaorCable ing the CATV converterCable TVSplitterABCATV converterANTENNA/CABLE14ARB1557A En 012 019.P65148/8/03, 18:02
CONNECTING THE ANTENNAConnecting the CATV converter with VCRCable TVSplitterABASIC OPERATIONSBCATV converterANTENNA/CABLEVCRINVCROUTANTENNAConnecting VHF/UHF antenna and CATV converterVHF antennaUHF antennaABU/V mixerUHFVHFANTENNA/CABLECable TVCATV converter15ARB1557A En 012 019.P65158/8/03, 18:02
CONNECTING VIDEO/AUDIOEQUIPMENTDVD/DVRVCR B ¿ ?ÙÛVCRVCRVCRVideo movie, etc.SAT tunerorDigital tuner Refer to the instructions of your VCR or DVD/DVR
HDTV PROJECTION MONITOR PRO-730HDI PRO-530HDI ARB1557A_En_001.P65 1 8/8/03, 16:16. 2 Progressive Scan/HDTV monitor All SDTV and HDTV signals are converted to 1080i and displayed at . Follow all warnings and instructions marked on the Monitor. 1. This Monitor is equipped with a polarized alternating current line plug (a plug having one .