Transcription
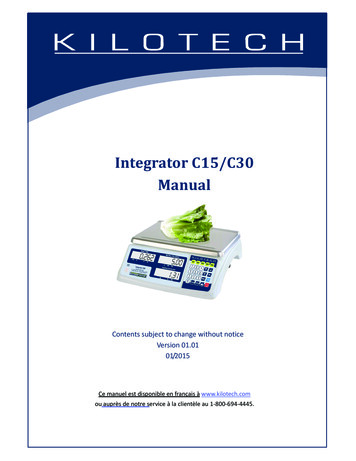
Integrator C15/C30ManualContents subject to change without noticeVersion 01.0101/2015Ce manuel est disponible en français à www.kilotech.comou auprès de notre service à la clientèle au 1-800-694-4445.
TABLE OF CONTENTSTABLE OF CONTENTS . 2Introduction . 3General Precautions . 4Specifications. 5Outline . 5Unpacking and setup. 6Packing List . 6Display and keypad . 7Faceplate .7Symbols on Display .7Keypad .8Layout and characters .8Key combinations .9Weighing operations . 10Key functions.10Store/program PLU’s . 11Recall PLU . 13Recall direct PLU .13Recall indirect PLU’s .13Miscellaneous transaction .13Parameter setting . 14Business name .14LCD contrast .15Auto off .15Internal code .16Communication settings .16The system will automatically reboot after changing the above parameter settings . 18Set date and time .18Group code.19Back feed .19Origin setting .20LCD test .20Format of barcode for printing . 21RS-232 cable pinout for host . 21Printer cable pinout (OS-203/213) . 21Error codes . 22Communication output format. 23Host .23Print out format when OS-203 / 213 printer is connected .23Available Label formats .23Display Character Reference. 25Troubleshooting . 262
IntroductionThank you for choosing a Kilotech Scale. We appreciate your business and hope that you will enjoy using yourscale. Should you require Technical Support, please contact your local dealer from whom you have purchased.Happy Weighing!3
General PrecautionsAvoid lengthy exposure to heator cold.Allow sufficient warm up time.Do not leave a load or weighton a scale for a prolongedperiod of time.Do not tamper with the scaleyourself.Do not dissemble the scaleyourself.Do not load beyond max capthe maximum weight limit.Do not pull the plug by its cordwhen unplugging.Do not use the scale near fireor corrosive gas.Do not spill water or immersein water.Avoid placing the scale near aheater.Always make sure to use aKilotech approved adapter.Do not drop the scale or applya sudden shock.Do not drag the scale.Avoid exposing to otherelectromagnetic devices.Level the scale or make sure itis on an even surface.Scale should be used withinstated temperature & humiditylimits.Allow the scale to acclimate to normal room temperature beforeuse.Turn the scale on and wait for a few minutes to allow the internalcomponents a chance to stabilize before weighing.This will void the warranty. Contact your local distributor toproperly repair your scale.This will void the warranty. Contact your local distributor toproperly repair your scale.It could cause a fluctuation to the indicator reading.These devices emit RF and can cause unstable readings. If yourscale should perform poorly, try moving the scale to a differentroom or location.A scale used on an uneven surface may provide an unstablereading.4
SpecificationsProduct NumberCapacityGraduation0-15lb:0.005lb; 15-30lb:0.01lbWeighing ModesDisplayBack LightAuto Power OffPower6Vdc4AH lead-acid battery.Product DimensionsPlatter SizeOperating Temperature / HumidityUnit price rangeTotal price rangeRS232Real Time ClockPLUMeasurement Canada and NTEP approvalC1515kg / 30lb0-6kg: 2g; 6-15kg: 5gC3030kg / 60lb0-15kg:5g;0-30lb: 0.01lb; 30-60lb:0.02lb 15-30kg:10gkg, lb0.73”,18 digits:6 digit for weight reading,6 digit forunit price,6 digit for total priceYes and adjustableYes12Vdc, 500mA with positive center AC adaptor6Vdc4AH lead-acid battery.355 370 131mm/ 14" x 14.6" x 5.2"335 225mm / 13" x 8.9"-10 C - 40 C / 14 F - 104 F / 90% RH non0.00 - 9999.99 /kg or /lb0-999.99 (limited by bar code print function,RS232(optional) USB(virtual RS232,optional)Built-in nonvolatile real time & date(optional)265 including 5 direct PLU(Addr: 1-5)OutlineInterface: (1) Main switch (2) AC power adapter input (3-4) RS232 and USB5
Unpacking and setup Remove the scale from the box and place it on a firm, level surface.Avoid locations with rapid temperature changes, excessive dust, moisture, air currents, vibrations,electromagnetic fields, heat or direct sunlight.Adjust the leveling feet until the bubble is centered in the circle of the level indicator (located on thefront panel).NOTE: Ensure that the scale is level each time its location is changed.Before using the scale for the first time, the internal rechargeable battery should be fully charged for atleast 12 hours.Connect the supplied AC adapter to the power input receptacle underneath the scale. Plug the ACadapter into a power outlet and the battery will begin charging.If the scale will be stored or transported in the future, save the packaging material to ensure the bestpossible protection for the scale.Packing List Scale6Vdc4AH lead-acid battery (installed in scale housing)12Vdc/2000mA UL adapter with positive centerManual6
Display and keypadFaceplateSymbols on DisplayWEIGHT - Weight display windowZero - Scale is zeroed, gross weight is 0, tare is 0TARE – Indicates if the TARE is active, otherwise weight indicated is gross weightKg/lb - Weight unit indicatorUNIT PRICE - Unit price display windowSAVE - Unit price fixing indicator /KG, /LB - Unit price per kg/lb indicatorTOTAL PRICE( ) - Total price display windowPRINT - Data output indicatorAC - AC Adapter in-use indicatorCHARGE - Battery being charged indicator7
Keypad-: numeric keys, Used to enter numerical data or alphabets: Direct PLU keys, Used to directly recall the stored unit price: Clear the recorded data: Confirm the operation or data entered: Save the tare weight and/or unit price: Used to set the scale to zero: Used to tare the scale.: Enter program PLU mode: Enter recall PLU mode: Transmit data to the communication port: Used to switch between units: Turns the scale on and off and functions as exit key in programming modeLayout and characters0 space ( ) ÀÂÆÇÈÉÊË ÎÏÔÙÛÜ1ABC2DEF3GHI4JKL5MNO6PQRS7TUV8WXYZ98
Key combinationsPress both key simultaneously and hold down for more than three seconds.(for details on these operations, please see their respective sections in the manual) : Used to enter the business’s name setup mode : Used to enter the LCD’s contrast setup mode : Used to enter the auto-off time setup mode Used to display A/D inner code or working voltage : Used to enter RS232 parameters setup mode : Used to enter the date and time setup mode : Used to enter Group Code setup mode : Used to set OS-203/213 Back Feed setup mode Used to enter OS-203/213 Origin setup mode : Used to enter displaying weight in 10 times resolution mode for testing : Enter LCD test mode9
Weighing operationsKey functionsPower on/off When the scale is off, first make sure the power switch on the bottom of the right hand side ofthe scale is ON. Press on/off key to power on the scale. The self-examination will run and the scale willgive the zero reading. The scale is ready for use.Press on/off for more than 3s to power off the scale.Zero The zero function is to zero out the small difference on the weight display. When the scale is atzero the zero annunciator is turned onThe scale will display “Err” when the weight to be zeroed is outside the rangeBefore you zero the scale, the tare weight should be cleared. (Only zero gross weight)Tare Weight tare: Place the receptacle (box, bowl etc ) on the scale, and when the reading is stable,press tare key to tare the weight.Key tare: Key in known tare weight and press tare key for 3 seconds. The tare annunciator will beturned on.To clear Zero or Tare, press their respective buttons.If save mode is not active, the tare weight and unit price will be auto cleared after transaction iscompleted and item has been removed from the platter.Save When activated, this function will prevent auto clearing of the unit price or tare-weight.When active, the save indicator is activated.Units key Use the key to shift between “kg”, “lb” . Note that the unit price will be set to zero duringswitchingYou cannot switch units when a tare is active. Clear the tare first, by pressing the tare button atzero load, then you can start the process to change between kg and lb.10
Print Used to transmit the data over the RS232 or USB When the price has been computed, pressprint key output the data via RS232 according to the setting style to make a price label. (see appendixfor layout example)Store/program PLU’sTo cancel and return to normal mode at any time, pressWeightDisplayTotalPriceDisplayUnit PriceDisplay0.000.000.00Keys usedPressCommentto startEnter address using numerical keys St.PLUADDRTo confirm pressEnter product name using numericalkeySt.PLUNAME To confirm pressThe system will overwrite anyprevious dataThe address range is from 1to 2651-5 is for direct unit priceUse the numerical keys toselect the letter neededOnly the last six characterswill showMax length is 20 charactersEnter item name using numericalkeysSt.PLUINGRDT To confirm pressThis field is only visible whenactivated (Host, PRTd60,PRDnd6)Max 80 charactersEnter shelf life using numerical keysSt.PLULIFE To confirm pressLife refers to shelf life of theproduct.Max number of days 25311
WeightDisplaySt.PLUTotalPriceDisplayUnit PriceDisplayKeys used“Unit.0”(kg) or“Unit.1”(lb)CommentUse thekey to switchTo confirm pressEnter price using numerical keys St.PLUUNIT.PTo confirm pressEnter tare weight using numericalkeysSt.PLU TareTo confirm pressEnter item code using numerical keys St.PLUITEM.CRepeat the steps for the next PLU or pressTo confirm pressIf the PLU data has beenchanged, the unit pricewindow will briefly display“Save” and the total pricewindow will briefly display“Data.ch”.to return to the normal weighing mode.12
Recall PLURecall direct PLURecall a PLU that is stored under a speed key by pressingkey, the stored unit price will bedisplayed in unit price window. The total price window will display “DUP. xx”, and then the actual total pricewill appear.Recall indirect PLU’sIconWeightDisplayTotal PriceDisplayUnit Price DisplayEnter the unit priceusing numerical keysrc.PLUADDR Confirm or ExitCommentTo confirm pressThe unit pricewindow will displaythe recalled unitprice. The total pricewindow displays“PLU.xxx”(xxx is theAddress) and thenwill go back to thenormal total pricedisplaying modelater, using the newunit price, tareweight, new weightunit, trade name,and shell life)To exit andreturn to regularweighing mode.ie001.The address range isfrom 1 to 265, 1-5 is fordirect unit priceMiscellaneous transactionUse the numerical keys , to enter unit price (range: 0000.00 9999.99). The programmedprice can be cleared by pressing thekey.The unit price will be cleared automatically after weighing and removing the objects.13
Parameter settingTo cancel and return to normal mode at any time, press thekeyBusiness nameWeightDisplayTotal PriceDisplayUnit Price DisplayKeys usedCommentPress both0.000.000.00 simultaneously and holddown for more than threesecondsEnter first line of Businessname using numerical keybUSI.N1XXXXXXXXXXXX To confirm pressEnter second line ofBusiness name usingnumerical keybUSI.N1XXXXXXXXXXXXDisplays thelast 12charactersMax length is20 characters To confirm press14
LCD contrastWeightDisplayTotal PriceDisplayUnit Price DisplayKeys usedCommentPress both0.000.000.00 simultaneously and holddown for more than threeseconds SetupLCd.CSTTo confirm pressX SetupBLGT.MDxTo confirm pressX valuecurrently set0 Backlightalways on1 Backlightalways off2 AutobacklightAuto offWeightDisplayTotal PriceDisplayUnit Price DisplayKeys usedCommentPress both0.000.000.00 simultaneously and holddown for more than threeseconds SetupA.OFF.tXXTo confirm pressXX valuecurrently setin minutesMax delay 30 min00 auto off15
Internal codeWeightDisplayUnit PriceDisplayTotal Price DisplayKeys usedCommentPress both 0.000.000.00simultaneously and holddown for more than threesecondsTo continue pressUoL.x.xCodExxxxxxUoL.x.x workingvoltageCode A/Dinternal countCommunication settingsTo cancel and return to normal mode at any time, press theThe settings in bold are defaultWeightDisplayUnit PriceDisplayTotal Price DisplaykeyKeys usedCommentPress both0.00Setup0.00232.out0.00XXXXXX simultaneously andhold down for morethan three secondsChose format usingnumerical keys To confirm pressSetup232.bpsXXXXXXChoose baud rate usingnumerical keys Communication formatoptions.0 HOST:1 PRTd402 PRTd603 PRTNd44 PRTNd6(see appendix for details)baud rate options1 1200bps2 2400bps3 4800bps4 9600bps16
WeightDisplayUnit PriceDisplayTotal Price DisplayKeys usedCommentTo confirm press5 19200bpsChoose baud rate usingnumerical keysSetup232.dFtXXX Format options1 8N12 7O13 7E1To confirm pressChoose format usingnumerical keysSetupPrtd.FtXXXXXX To confirm pressChoose format usingnumerical keysSetupB.PRT.FTXXXX To confirm pressChoose format usingnumerical keysSetupUSb.oUtXXXX To confirm pressChoose baud rate usingnumerical keysSetupUsb.bpsXXXXX To confirm press0 CANADA YY-MM-DD1 USADD-MMM-YY2 NumNumerical format0 5I4P1 4I5P2 5I5P3 4I6PSee Appendix for detailsbarcode formats0 NoneUSB disabled1 Host,USB activatedData will be transmittedwhen the print key ispressed and scale is stable.baud rate options1 1200bps2 2400bps3 4800bps4 9600bps5 19200bps17
WeightDisplayUnit PriceDisplayTotal Price DisplayKeys usedCommentChoose baud rate usingnumerical keysSetupUsb.dftFormat options1 8N12 7O13 7E1 XXXTo confirm pressChoose format settingusing numerical keysXXXSetup0 None1 SNData will be transmittedwhen the print key ispressed and scale is stable Urt.CFtTo confirm pressThe system will automatically reboot after changing the above parameter settingsSet date and timeWeight DisplayUnit PriceDisplayTotal Price DisplayKeys usedCommentPress both0.000.000.00 .simultaneously andhold down for morethan three secondsEnter date usingnumerical keysSetupdAtExx.xx.xx format:YY.MM.DDTo confirm pressEnter time usingnumerical keysSetuptimExx.xx.xx To confirm pressFormat:hh.mm.ss18
Group codeWeight DisplayUnit PriceDisplayTotal Price DisplayKeys usedCommentPress both0.000.000.00SetupGroUP.CXX simultaneously andhold down for morethan three secondsEnter time usingnumerical keysTo confirm pressDefault 00Range 00 99Keys usedComment Back feedWeight DisplayUnit PriceDisplayTotal Price DisplayPress both0.000.000.00 simultaneously andhold down for morethan three secondsChoose modeusing numerical keysSetupbAk.FEdXXXXXX To confirm pressPrinter mustbe on andconnected0 disable1 enable19
Origin settingWeight DisplayUnit PriceDisplayTotal Price DisplayKeys usedCommentPress both 0.000.000.00simultaneously andhold down for morethan three secondsSet value usingnumerical keysSetuporG XXXRange 0-255To confirm pressLCD testWeight Display0.00Unit PriceDisplay0.00Total Price Display0.00Keys usedCommentPress bothandsimultaneously andhold down for morethan three secondsPresskeytoexit20
Format of barcode for P9PPPP10PPPP11PPPP12PPPP13CCCCNOTE: If the fields ( “Price” and “Item code”) are greater than the parameters set, “OUT.P.R” (indicates it is outof printing range) will appear in the weight window.i.e. you enter 5 digits in a field that needs to be 4 digits.G:I:S:P:C:Group Code;Item Code;Check-sum for price;Total Price (If the weight window displays zero, it will be the unit price);Check-sum for all characters;RS-232 cable pinout for hostSCALE------------------------CABLE(9 pins)-----------------------DB9(Female) -----------DB9(Male)------------DB9(Female) ----------PIN2 -----------------PIN3 -----------------PIN5 -----------------PIN4 -----------------PIN6 -----------------PIN7 -----------------PIN8 -----------------PIN1 ----------------PIN9 ----------------NOTE: PIN4 and PIN6, PIN7 and PIN8 are shorted in the scaleHOSTDB9(Male)PIN2 RXDPIN3 TXDPIN5 GNDPIN4 DTRPIN6 DSRPIN7 RTSPIN8 CTSPIN1 NCPIN9 NCPrinter cable pinout (OS-203/213)21
Error codesErr01:The weight signal is too large.Err02:No proper data can be displayed.Err03:The weight signal is too small.Err04:Zero point is over the setting range.Err05:Zero point is below the setting range.Err06:Error in unit key operation.Err10:The EEPROM can’t be accessed.Err11:The parameters are not same with backup data.Err12:The setting parameter(s) is not in normal range.Err20:There is an error in calibration.Err30:ADC is over max. range.Err31:ADC is below min. range.Err40:Recall error, no content stored.CAP.:Capacity.UOL.:Voltage.St.PLU:To set and store the indirect unit price.ADDR. :PLU address.Unit:Weighing unit selecting.Rc.PLU:Recall indirect unit price.OUT.P.R:Data is out of printed barcode range.Data.ch:Data has been changed.Save:Data is being saved.O.RANGE: The data has been entered or the weight for tare weight is out of range.22
Communication output m:ssxxxx.xxx kg/lb/ozTare:xxx.xxx kg/lb/ozNet:xxxx.xxx kg/lb/ozUnitxxxxxx.xx /kg( /lb)Price:( /oz)Totalxxxxxx.xx Price: Print out format when OS-203 / 213 printer is connectedAvailable Label formats1: PRTd40 58mm 40mm with date3: PRTNd4 58mm 40mm without date2: PRTd60 58mm 60mm with date4: PRTNd6 58mm 60mm without date23
Display Character Reference25
TroubleshootingTroubleshootingNo display afterpressing thepower onbuttonPower-onproblem Batteries failedNo electricityAdapter or plug is not insertedproperly.Main switch is offKey button is not workingDisplayirregularcharacters afteryou press abuttonDisplay 888888,does not revertback to 0Err04Err05Err20ErrErr01Err31Err30Err11Display Lo.bAtCapacitynotaccuratePossible causesLinearity is notaccurateLCD or its driver IC are not solderedwell, or are damaged; or some keys arenot free to move down or up Zero point signal is over orbelow the limitation There are objects on theplatform Load cell is not at zero balance One foot is not level with theothers Load cell has no output The signal is too small or toolarge Scale is not stable Input incorrect number orloaded wrong load The weight exceed 9d of themax capacity The load cell output signal is toobigThe load cell signal is too small or toolarge.EEPROM on the PCB brokenSolution Check if the batteries Check the power supplywith the adapter andensure the adapter isplugged in properly atboth ends Turn on main switchContact your supplierContact your supplier Remove the objects onthe platformAdjust the foot to belevel with the other feet.Using the levelingindicator to assist.Contact your supplier Contact your supplier Empty platter and checkfor obstructionContact your supplier Contact your supplier Replace with new PCB Charge the batteryVoltage lower than 5.7V Contact your supplier fora new battery Make sure the platform The platform is not installedis levellevel Make sure the four feet The four feet are not levelare level The load cell is broken Clear the objectsbetween load cell and There are some objects betweenscaleload cell and scale. Contact your supplier26
TroubleshootingPossible causes Big errorbetween thecorners InconsistentreadingsFunctionproblem SolutionMake sure the platformis levelMake sure the four feetare levelClear the objectsbetween load cell andscaleContact your supplierMake sure the platformis levelMake sure the four feetare levelClear the objectsbetween load cell andscaleContact your supplier Contact your supplier Replace thecommunication wireContact your supplier The platform is not installedlevelThe four feet are not levelThe load cell is brokenThere are some objects betweenload cell and scale. The platform is not installedlevelBroken load cellAging problem with PCBThere is some objects betweenload cell and scale.Key button(s)is/are notfunctioning Key button(s) is/ are not workingCommunicationis erratic Communication wire is brokenThe interface is broken 27
Integrator C15/C30 Manual Contents subject to change without notice . Data output indicator AC - AC Adapter in-use indicator CHARGE - Battery being charged indicator. 8 . The unit price will be cleared automatically after weighing and removing the objects. 14 Parameter setting To cancel and return to normal mode at any time, press the key