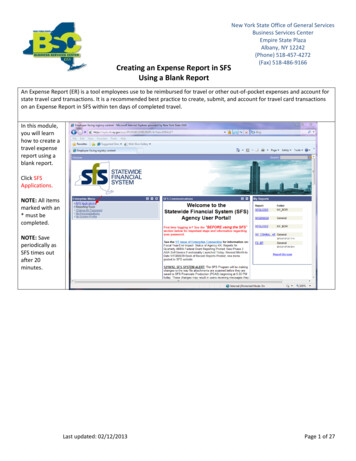
Transcription
Secure File Sharing (SFS)Using SharePoint Online DIVISION OF INFORMATION SYSTEMS & TELECOMMUNICATIONS(DIST)IT Operations ServiceEnd-User GuideIssued 7 August 2019V4.0Status: FinalPREPARED BY:Pramila Nair, Consultant (WIPRO), IT Operations Service, DISTCharles Hornsby, Senior Advisor (ICT Security), IT Operations Service, DISTDOCUMENT OWNER:Lucio Pascarelli, Deputy Director – IT Operations Service, DIST
SECURE FILE SHARING USING SHARE POINT ONLINE END-USER GUIDETable of Contents1.Introduction . 31.1 Pre-requisites . 32.Logging in to SharePoint Online . 43.Using Secure File Sharing online . 54.Using Secure File Sharing from your desktop . 94.1 Setting up SFS on your desktop . 94.2 Sharing files from your Desktop . 122
SECURE FILE SHARING USING SHARE POINT ONLINE END-USER GUIDE1. IntroductionThe work of UNHCR relies on the collection, processing and exchange of highly-sensitiveinformation, including the personal data of Persons of Concern. In line with UNHCR’s DataProtection Policy, this information is deemed confidential in nature, and should be “transferredthrough the use of protected means of communication”.The Secure File Sharing (SFS) service is an online tool based on Microsoft SharePoint. Itallows you to safely and securely share sensitive data and files with individuals outside ofUNHCR, including implementing partners.The following features of SFS make this service much more secure for sharing sensitiveinformation with external users in comparison with other channels, such as email andOneDrive: Files shared through SFS are encrypted at rest (when stored in the cloud) and intransitOnly recipients specifically authorized by the document owner can access the fileFiles are only available until the expiration date set by the document owner and arethen automatically deleted.The purpose of this document is to provide a step-by-step guidance on sharing files withexternal users through SFS service.1.1 Pre-requisitesTo use Secure File Sharing online you need: An internet browser, e.g. Microsoft Edge, Internet Explorer 11, Mozilla Firefox orGoogle Chrome Secure File Sharing Site link https://unhcr365.sharepoint.com/sites/dist-sfsTo use Secure File Sharing from your desktop you need: UNHCR provided computer Your corporate account credentials (i.e. username and password) Secure File Sharing Site link https://unhcr365.sharepoint.com/sites/dist-sfs One Drive for Business installedIMPORTANT: This service is for sharing files with external parties. It cannot be usedto receive files. You cannot upload an empty file to the SFS site You can upload a file with a maximum size of 15GB You can upload maximum 750 files per user every month (FAQ)3
SECURE FILE SHARING USING SHARE POINT ONLINE END-USER GUIDE2. Logging in to SharePoint Online Click on the Secure File Sharing (SFS) Site sLogin with your corporate account credentials: If you get a pop-up as shown below, Check Don’t show this again and Click Yes Once you are logged in, you will see the SFS site dashboard, where you will upload filesfor sharing with the external users.4
SECURE FILE SHARING USING SHARE POINT ONLINE END-USER GUIDE3. Using Secure File Sharing onlineTo use SFS online, no additional setup is needed. Follow the instructions below to startinstantly sharing files: Access the SFS site dashboard as per instructions in Section 2 “Logging in toSharePoint online” Go to Documents and click on Upload. Click Files. Select a file you want to share from your desktop or from another SharePoint online site.You can upload several files at once if you wish. In the example below, we have selectedthe test file “test1.docx”. Click Open. Once your document is uploaded, you will see a message “test1.docx” is nowavailable.5
SECURE FILE SHARING USING SHARE POINT ONLINE END-USER GUIDE Make a note of the Expiration Date encircled in the screen below. By default, the sharedfile will be available for a period of ten days, after which it will be automatically deleted.Neither you, nor the external recipient with whom you shared the file, will be able toaccess the file once the Expiration Date passes. If needed, you can change theexpiration date by clicking Quick Edit in the Menu Ribbon in the SFS online dashboard.We do not recommend extending the expiration date to more than 30 days. Do not leavethe expiration date field empty. To share the file “test1.docx” with an external user, click on the 3 dots next to the file tobring up the Option menu. Click on Share as seen below.6
SECURE FILE SHARING USING SHARE POINT ONLINE END-USER GUIDE On the Send Link screen, click on the “ ” next to “People in UNHCR with the link canedit”. You will see different categories of users, with whom you can share the file.7
SECURE FILE SHARING USING SHARE POINT ONLINE END-USER GUIDE To share with an external user, choose the option “Specific People”. If you wish to sendthe file in ‘read only’ mode, uncheck the box “Allow editing” as an additional step beforeclicking Apply. Enter an email address of the external recipient, click on the contact that will show belowand click Send.8
SECURE FILE SHARING USING SHARE POINT ONLINE END-USER GUIDE Once the document is shared, you will receive the message as shown below. Theexternal user will receive an email with a secure link, allowing the user to access this file. External users may need assistance the first time they receive a file through the SFSservice. Share with them a step-by-step guide with instructions on how to open adocument sent via SFS.4. Using Secure File Sharing fromyour desktop4.1 Setting up SFS on your desktopFollow the instructions below to synchronize File Explorer in your computer with the SFS site.Once the synchronization is complete, you will be able to share files with external users fromyour desktop. First, check if you have OneDrive application installed by selecting the Start button onyour computer and searching for “OneDrive”.oIn Windows 10, select the OneDrive desktop appoIn Windows 7, under Programs, select Microsoft OneDrive9
SECURE FILE SHARING USING SHARE POINT ONLINE END-USER GUIDEoIn Windows 8.1, search for OneDrive for Business, and then select the OneDrive forBusiness app.If you do not have this application installed, please contact Global Service Desk (GSD) atglobalsd@unhcr.org to request installation of One Drive for Business on your computer. Once the application is set up, use your corporate account (For example:user@unhcr.org ) to Sign in. Open your internet browser and go to the Secure File Sharing Site by clicking on thelink: https://unhcr365.sharepoint.com/sites/dist-sfs Click Documents Click on Sync, as shown below.10
SECURE FILE SHARING USING SHARE POINT ONLINE END-USER GUIDE Close the pop-up message “Getting Ready to Sync”. If you get a pop-up message “Didyou mean to switch apps?”, Click Yes. The setup is now complete.11
SECURE FILE SHARING USING SHARE POINT ONLINE END-USER GUIDE Go to File Explorer on your computer. On the left pane, under the folder UNHCR(circled in blue below) you will see a newly created folder Secure File Sharing(shown with an arrow). Generally, there should be no files in this folder at this point.4.2 Sharing files from your DesktopOnce you have synchronized File Explorer with SFS site, you can securely share files withexternal users from your desktop by following the instructions below. Copy and paste the file you want to share with an external user (Note: File must not beempty) into the Secure File Sharing folder in File Explorer, as marked with an arrowbelow. Since, you have setup your File Explorer to synchronize with SFS site in section4.1., this file will automatically be uploaded to the SFS site.12
SECURE FILE SHARING USING SHARE POINT ONLINE END-USER GUIDE Right click the file in File Explorer (as shown on the example of “testsfs.docx” below)and Click on Share. On the Send Link screen, click on “ ” next to “People in UNHCR with the link canedit”13
SECURE FILE SHARING USING SHARE POINT ONLINE END-USER GUIDE You will see different categories of users, with whom you can share the file. To sharewith an external user, choose the option “Specific People”. If you wish to send the filein ‘read only’ mode, uncheck the box “Allow editing” as an additional step beforeclicking Apply. Enter the email address of the external recipient, select the contact in the list below andClick Send By default, the shared file will be available for a period of ten days, after which it will beautomatically deleted. The expiration period can only be changed directly on the SFSsite (See Section 3). External users may need assistance the first time they receive a file through the SFSservice. Share with them a step-by-step guide with instructions on how to open adocument sent via SFS.14
The Secure File Sharing (SFS) service is an online tool based on Microsoft SharePoint. It allows you to safely and securely share sensitive data and files with individuals outside of UNHCR, including implementing partners. The following features of SFS make this service much more secure for sharing sensitive