Transcription
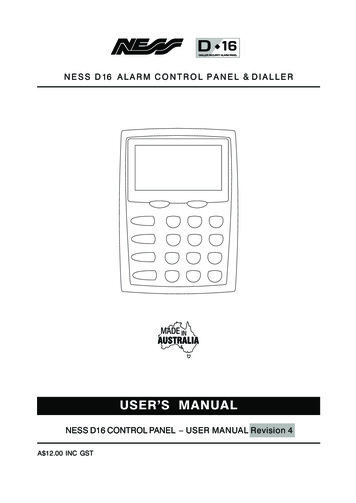
N E S S D 16 A L A R M C O N T R O L P A N E L & D I A L L E RUSER’S MANUALNESS D16 CONTROL PANEL – USER MANUAL Revision 4A 12.00 INC GST
QualityEndorsedCompanyISO9001Ness Security Products Pty LtdWWW.NESS.COM.AU“Australia’s largestdesigner andmanufacturer ofhigh quality securityproducts”HEAD OFFICE:Ness Security Products Pty LtdACN 069 984 3724 / 167 Prospect HwySeven Hills NSW 2147 AustraliaPh 61 2 8825 9222Fax 61 2 9674 2520ness@ness.com.auSYDNEY02 8825 9222MELBOURNE03 9878 1022BRISBANE07 3343 7744ADELAIDE (Aquavia Controls)08 8277 7255PERTH08 9328 2511NEW ZEALAND (NFS NZ) 64 9 573 0401D16 USER MANUALRevision 4, February 2002Document Part Number: 890-247For product: 100-687 D16 Control Panel 2002 Ness Security Products Pty Ltd ABN 28 069 984 372D16 user rev4 pmo250202Specifications may change without notice.LIC.No. QEC2074NSW Head Office only
CONTENTSFeatures . 4Introduction . 5Keypad . 6Visual Indicators . 7OPERATION . 8Arming . 9Disarming . 10Resetting Alarms . 10Monitor Mode . 11Panic . 12Duress . 12Excluding Zones . 13Alarm Memory . 14PROGRAMMING . 15Programming Options Table . 15User Code programming . 16Entry/Exit Timer programming . 17Telephone Number programming . 17Wireless Accessories . 18Monitoring, described . 19Remote Operation by Telephone . 20Troubleshooting . 22Installation Record . 23
NESS D16 FEATURES 8 or 16 Fully programmable zones Monitor Mode (Home Mode) Any combination of 8 or 16 hardwire orradio zones Outputs are separately fused withAutomatic Reset Fuses Full radio supervision Day Mode and Door Chime feature. Contact ID Dialler Format Ultra-Modern and Impact resistantHousingZone inputs can be split with two endof-line resistors so that two detectiondevices (ie reed switches) can both bemonitored to provide maximumsecurity Ness Audible Dialler Format 30 Event Memory "Follow Me" Audible Dialler Option Separate 24 Hour Tamper input Supports 16 Radio Devices (RadioPIRs, Radio Reeds etc) Single or Double Trigger Zones Supports 14 Radio Keys Remote LCD Keypads (Max 3) Fully programmable via the systemKeypad - Eliminates the need forexpensive programmers or Proms.All inputs and outputs are heavilyprotected against lightning and highvoltage supply transients. An earthterminal is provided for extra protection Inbuilt Vibration Sensor Analyser 15 User Codes All programming data is permanentlystored in a non-volatile EEprommemory ‘Arm only’ codes can be programmed Programmable Inputs to activateselectable Outputs Designed utilising the latest SMDTechnology Forced Arming Feature Simple to Program and Use. 4True Dynamic Battery Test every timethe Panel is Armed / Disarmed andevery hourArea Partitionable (2 Areas). Any Zonecan be programmed to any area, aswell as common areasComes complete with an AC plug packand supports a 12V 7Ah battery tomaintain system security under allpower supply conditionsNESS D16 CONTROL PANEL - USER MANUAL
INTRODUCTIONThe Ness D16 micro computer based 16 zonecontrol panel is the heart of your securitysystem to which all your detection devicesconnect.Arming the system may be done through thekeypad or with the use of optional Radio Keysfor Arming by remote control from outside thepremises.Each Zone of the panel can be connected toone or more detection devices to protectseparate rooms of your premises.When you enter the premises the panel willignore selected zones for the Entry Delay Timeand will not alarm unless you don’t Disarm thepanel during this allowed time.Detection devices may be connected to the D16control system directly by cabling or withoptional wireless (Radio) devices.Detection devices called Passive Infra-RedDetectors (or P.I.R’s for short) can detect themovement of an intruder by sensing their bodyheat. P.I.R’s are used to cover various criticalareas of your premises where an intruder mayenter or trespass. Another detection device usedis called a Reed Switch. Reed Switches areattached to windows and doors to detect if awindow or door has been opened. A ReedSwitch consists of a magnet which is normallyattached to the moving part of a window or doorand the Reed switch which mounts to the dooror window frame.The panel is “Armed” when it is set to detect anintruder. At other times it is “Disarmed”.Normally a zone is considered Sealed.Activation of a detection device will cause thezone to be Unsealed and may cause an alarm.Detectors such as fire detectors and panicbuttons must be able to generate an alarm at alltimes regardless of the panel setting. A zonewith this assignment is called a 24 hour zone.Some detection devices may be required togenerate an alarm or warning only when thepanel is Disarmed. A zone with this assignmentis called a Day zone.Before leaving the premises you must Arm thepanel to enable it to detect intruders andgenerate an alarm. After arming, the panel willignore detectors during the Exit Delay Time toenable you to depart without triggering an alarm.Disarming the system may be done by keypador with the use of optional Radio Keys.Monitor mode allows selected zones to beArmed while leaving others Disarmed if you wishto protect a number of zones while you are athome.If you wish to split your alarm system into twoareas with access limited to each area by codenumbers then Area operation is used. RadioKeys can also Arm and Disarm Areas.The control panel housing and the covers overexternal sirens are protected by tamperswitches to detect someone attempting todisable the security system. Activation of theseswitches will cause an instant tamper alarm.If a detector becomes faulty, you can Excludethe associated zone so that it is totally ignoredand cannot generate an alarm. Including thezone will enable it to generate an alarm again.The control panel is fitted with a rechargeablestand-by battery to ensure your security systemcontinues to operate if the mains power isinterrupted. This control panel automaticallytests the battery every hour and whenever youArm/Disarm the panel. (Dynamic Battery test).Whenever an alarm occurs, it may be silencedwith a User Code or by optional Radio Keys,otherwise it will reset at the end of Alarm ResetTime.All alarms are stored in memory and may beviewed at any time by entering Memory Mode.NESS D16 CONTROL PANEL - USER MANUAL5
KEYPADThe Ness LCD keypad provides important visualand audible indication of the system status andis the main interface for controlling the manypowerful features of the D16 system.Information is displayed on a large LCD icondisplay which is backlit for easy night viewing.DISPLAY TESTTo display all the keypad icons press and holdthebutton for at least 2 seconds. All theicons will be on whilst thebutton is helddown.Display Test can be activated at any time eitherin operating mode or any program mode.BACKLIT LCDICON DISPLAYKEYPAD BEEPER“Not Ready” lightEACH KEY PRESSNot Ready1 beepPANIC BUTTONSARM123MONITOR BUTTONMONITOR456EXCLUDE BUTTONEXCLUDE789MEMORY BUTTONMEMORYP0EARM BUTTONVALID ENTRY3 beepsERROR BEEP1 long beepPROGRAM BUTTON6MAINS POWER IS OFFor BATTERY IS LOWENTER BUTTONNESS D16 CONTROL PANEL - USER MANUAL1010 beeps
VISUAL INDICATORSKEYPAD ICON STATUSKEYPAD ICONDISPLAYZONES 1-16OFFZone is sealedZone is unsealedZone is unsealed, or Power faultor System is Armed,or phone line faultReady to ArmDisarmedArmed (AREA 1)DisarmedArmed (AREA 2)DisarmedMonitor ModeFLASHINGZone alarmMonitor Mode(LED Keypad only)NormalMains Power is offNormalThe panel’s backupbattery is lowNormalNot ReadyONMemory Mode selectedNew alarms in memoryNormalZones are excludedNormalTamper alarmNormalReceiving radio signalIndicates that a Radio Key orother radio device has alow batteryNormalDialler is on linePhone line fault orfailure to communicateNormalUser Program ModeInstaller Program ModeReady to ArmNot ready to ArmMEMORY MODE - EVENTS INDICATED BY KEYPAD LIGHTS:LIGHTMEMORY EVENTZone lights 1–16 . Zone alarm(no lights) . Panel DisarmedARMED . Panel Armed (or Area 1 Armed)ARM2 . Area 2 ArmedMAINS . Mains power failureBATTERY . Low BatteryTAMPER . Tamper alarm (Siren cover, panel etc)EXCLUDE . Panic alarmLINE . Telephone line failRADIO, EXCLUDE . Radio Key Panic alarmRADIO, BATTERY, ZONE . Radio Device battery low, (Device number is indicated by zone light/s)RADIO, BATTERY, ARM . Radio Key battery low, (Radio Key number is NOT indicated)RADIO, TAMPER, ZONE . Radio Device tamper alarm (Device number is indicated by zone light/s)RADIO, MONITOR, ZONE . Radio Supervision fail (Device number is indicated by zone light/s)NESS D16 CONTROL PANEL - USER MANUAL7
OPERATIONThis section describes the operation of ainto two partitions; Area1 and Area2.typical control panel installation. Keep inThe panel then effectively operates as twoseparate systems sharing only the siren outputsand dialler.mind that your installation may varydepending on the selected options andequipment. The operating instructions whichfollow will endeavour to cover the mostcommon options.Consult your installation company if yourequire further information.All control panel operations are controlled bythe D16 keypad except if an optional key switchor radio control equipment is installed.OPERATING RULESGenerally, the panel will be Disarmed. Armedor Monitor modes provide different levels ofsecurity for your premises when you are homeor away. Three other temporary modes;Program, Memory and Exclude, allow you toperform various operations. The panel willautomatically exit from these temporary modesif you do not press any buttons on the keypadin a 4 minute period.If you make a mistake while entering any codes,press the enter button and start again.When you are required to enter your accesscode, you are given five opportunities to enter itcorrectly. After the fifth invalid attempt the alarmis activated (requiring the correct code to silencethe alarm). This prevents anyone trying to guessyour code by entering random numbers.AREA OPERATIONArea Partitioning allows the 16 zones to be split8USER CODE ASSIGNMENTA User Code assigned to an Area can Arm andDisarm only that Area. User Codes assigned toboth Areas will operate both Areassimultaneously.COMMON AREA ZONESZones assigned to both Areas are Armed onlywhen Area1 and Area2 are both Armed. Thisallows the Common Area zone/s to be sharedby both Areas.For example, Office A and Office B operate asseparate areas but the entrance foyer used byboth offices is assigned to both areas meaningit will automatically Arm when both Areas haveArmed. The Common Area then automaticallydisarms when either Area1 or Area2 Disarms.OPERATIONArming and Disarming is carried out as normalfrom a single keypad or separate keypadsinstalled in both areas or by Radio Key.Area operation only applies to zones when theyare in the Armed state. This means that Day,24hr and Monitor zones are independent of thearea operations.Note: Area partitioning is in addition to MonitorMode. Any zone may be allocated to any area.NESS D16 CONTROL PANEL - USER MANUAL
ARMING YOUR ALARM SYSTEMARMING1. The NOT READY light must be off2. Press[User Code].or(If Arming Shortcut has been enabled by your installer).or by RADIO KEY, press the ON button3. The ARMED light will turn on Leave the premises within the Exit Delay Time At the end of Exit Delay Time, 3 beeps will soundThe control panel must be Armed prior tovacating the premises in order to detectintruders. Ensure that the panel is not inProgram, Memory or Exclude modes.Note: If the panel is already in alarm, you must firstsilence the alarm before you can Arm.If something is wrong when Arming the controlpanel, the normal 3 beeps will be replaced byother warnings.1010 beeps means Mains Power isturned off or the Backup Battery is low.SIREN WARNING:At the end of the exit time, all zones should beSealed. If any are Unsealed, the siren will soundfor 2 seconds as a warning to indicate that thosezones have been automatically excluded. Formaximum security, you should return, Disarm,check the premises and then Arm again.Continual warnings could mean that a detectoris faulty and may have to be manually excluded.If the auto-exclude option is disabled, the sirenwill sound for the duration of reset time if a zoneis Unsealed at the end of exit time.One long beep indicates an invalidentry or an alarm is outstanding and needs tobe reset by entering your User Code first.NESS D16 CONTROL PANEL - USER MANUAL9
DISARMING YOUR ALARM SYSTEMDISARMING1. Enter the protected premises via a delay zone2. Press [User Code].or by RADIO KEY, press the OFF button3. The ARMED light will turn offWhen you enter the protected premises througha delay zone, the keypad responds with regularbeeps* as a reminder to Disarm. You then haveyour programmed entry delay time to Disarmthe panel by entering one of your user codes. Ifthe panel is not Disarmed by the end of the entrydelay time, an alarm will occur.and to flash the strobe light for two seconds asan indication that you have Disarmed yoursystem.By using the optional radio keys you mayDisarm your system from within your premisesor from outside your entrance door. There is alsothe option to ‘Chirp’ the outside siren three times* If Entry Beeps are programmed on.If you make a mistake in entering your code,then you must press enter and start again. Fiveincorrect entries will cause an alarm.RESETTING AN ALARM1. Press [User Code].or by RADIO KEY, press the OFF buttonYour panel can be reset and the alarm silencedby the same key sequence as Disarming thepanel.above. To check the cause of the alarm, youcan view the alarms in memory by enteringMemory Mode.If you arrive at your premises and find the strobelight flashing (if installed), reset the panel as10NESS D16 CONTROL PANEL - USER MANUAL
MONITOR MODEMONITOR MODE2. Press[User Code].or(If Monitor Shortcut has been enabled by your installer).or by RADIO KEY, press the OFF button twice(If Radio Key Monitor Arming has been enabled by your installer)3. The MONITOR light will turn on Only the zones which have been programmed by yourinstaller to be Monitor Zones will be Armed.Monitor mode allows you to Arm selected zoneswhile others are ignored. Typically, perimeterzones (doors and windows) can be monitoredwhile you are at home.If an alarm occurs while in Monitor mode,Your installer must program which zones will beactive in Monitor mode.By using the optional Radio Keys you can enterMonitor Mode by pressing the OFF button twicewithin 4 seconds. (Your installer must enableRadio Key Monitor Arming for this to work).The panel must be fully Disarmed before Armingin Monitor Mode.entering [User Code]will silence the alarm.This will also Disarm the panel, so remember toenter monitor again if needed.NESS D16 CONTROL PANEL - USER MANUAL11
EMERGENCY FUNCTIONSPANIC ALARMPress[User Code].ortogether(If Double Key Panic has been enabled by your installer).or(If Panic Shortcut has been enabled by your installer).or by RADIO KEY, press and hold the PANICbutton for 4 secondsThe keypad PANIC function may have beenprogrammed to be either:AUDIBLE - activates siren or buzzersor SILENT - If your system is monitored by aCentral Station, sends a PANIC report bydialler. (If PANIC reports have been enabledby your installer).PANIC cannot be used while the panel is inProgram, Memory or Exclude mode.Note: Your installer may have installed a separatePANIC button. To activate the panic alarm simplypress that button.FIRE ALARMPress Sounds the siren (Fire Alarm siren sound) If your system is monitored by a Central Station, sends a FireAlarm report by dialler. (If Fire Alarm reports have been enabledby your installer).MEDICAL ALARMPressIf your system is monitored by a Central Station, sends a MedicalAlarm report by dialler. (If Medical Alarm reports have beenenabled by your installer).12NESS D16 CONTROL PANEL - USER MANUAL
EXCLUDING ZONES - DURESS FUNCTIONEXCLUDING ZONES[User Code]1. Press.or(If Exclude Shortcut has been enabled by your installer)2. (The EXCLUDE light will turn on)3. Enter the zone number of the zone/s to be Excluded.[ZONE NUMBER][ZONE NUMBER](Up to 16 zones)The zone light of each Excluded zone will turn on4. Pressto exit Exclude Mode5. (The EXCLUDE light will flash continuously)If a detector becomes faulty and cannot beSealed when arming the panel, then its zonemay be Excluded so that it does not generatealarms.When zones have been Excluded, the EXCLUDElight flashes continuously while the panel isDisarmed and also when Armed.Zone Exclude IS not permanent. Excludedzones are automatically INCLUDED next time thepanel is Disarmed.Zones can be manually included by the samemethod as Excluding. Simply use thesequence to turn OFF the[ZONE NUMBER]zone lights to be Included.Zones can only be Excluded when the panel isDisarmed.DURESS1. Disarm by pressing [5,6,8 or 9] [User Code]A DURESS alarm can be triggered to alert theCentral Station that you are being forced toDisarm the panel against your will.To Disarm and send a DURESS alarm, prefixyour User Code with one of the digits 5, 6, 8 or9 when Disarming.DURESS alarms are only used if your system ismonitored by a Central Station.DURESS IS NORMALLY NOT ENABLED. TOENABLE THE DURESS FUNCTION, CONSULTYOUR INSTALLERNESS D16 CONTROL PANEL - USER MANUAL13
ALARM MEMORYVIEW ALARM MEMORY1. Press[User Code].or(If View Memory Shortcut has been enabled by your installer)2. Press(The next most recent event will be displayed)Press(The next most recent event will be displayed)Press.and so on (Up to 30 events)3. Pressto exit Memory Mode4. (The MEMORY light will stop flashing)The D16 Control Panel stores a comprehensiveAlarm Memory. The D16 will remember Arming,Disarming, Low Battery, Mains Fail and Alarms.The memory is constantly upgraded and the last30 events are always available for viewing.This Memory display can only be selected whilethe panel is in the Disarmed state.TO CLEAR THE MEMORY LIGHTThe MEMORY light flashes continuously whenan alarm has occurred as a reminder to viewthe alarm memory.The MEMORY light stops flashing after thememory is viewed as shown above.The MEMORY light is automatically clearednext time the panel is Armed.MEMORY MODE - EVENTS INDICATED BY KEYPAD LIGHTS:LIGHTMEMORY EVENTZone lights 1–16 . Zone alarm(no lights) . Panel DisarmedARMED . Panel Armed (or Area 1 Armed)ARM2 . Area 2 ArmedMAINS . Mains power failureBATTERY . Low BatteryTAMPER . Tamper alarm (Siren cover, panel etc)EXCLUDE . Panic alarmLINE . Telephone line failRADIO, EXCLUDE . Radio Key Panic alarmRADIO, BATTERY, ZONE . Radio Device battery low, (Device number is indicated by zone light/s)RADIO, BATTERY, ARM . Radio Key battery low, (Radio Key number is NOT indicated)RADIO, TAMPER, ZONE . Radio Device tamper alarm (Device number is indicated by zone light/s)RADIO, MONITOR, ZONE . Radio Supervision fail (Device number is indicated by zone light/s)14NESS D16 CONTROL PANEL - USER MANUAL
PROGRAMMINGVarious system options, as listed below, canbe programmed by the user. These optionscan only be accessed from Program Mode.installer, the ‘Follow Me’ Telephone Numberis the telephone number the dialler will call inthe event of an alarm.User Codes may need to be re-programmedif a person has forgotten their code, to give anew user access to the system or to givesomeone temporary access.If your Ness D16 panel is monitored by aCentral Station, the Follow Me number isignored.User Codes 2-15 can be set as Arm OnlyCodes. These codes can Arm but cannotDisarm the panel. (Useful for assigning tocleaners, tradesmen etc.)For all other programming changes, talk toyour installer.The panel will automatically exit Program Modeis no buttons are pressed within a 4 minuteperiod.You may need to change the Entry and Exittimers if you find the delays are too long orshort.ToIf Audible Monitoring is programmed by yourTo exit Program Mode:enterOPTION NoFACTORYDEFAULTUser Code 1 (Master Code)P11E123User Code 2P12E3 to 6 digitsUser Code 3P13E3 to 6 digitsUser Code 4P14E3 to 6 digitsUser Code 5P15E3 to 6 digitsUser Code 6P16E3 to 6 digitsUser Code 7P17E3 to 6 digitsUser Code 8P18E3 to 6 digitsUser Code 9P19E3 to 6 digitsUser Code 10P20E3 to 6 digitsUser Code 11P21E3 to 6 digitsUser Code 12P22E3 to 6 digitsUser Code 13P23E3 to 6 digitsUser Code 14P24E3 to 6 digitsUser Code 15P25EEntry Delay 1P26E20 seconds1 to 99 secEntry Delay 2P27E60 seconds10 to 990 secExit DelayP28E60 seconds1 to 99 secFollow Me Telephone No.P00EOPTIONProgramMode:[MASTER CODE]RANGEthenPROGRAMMED3 to 6 digits3 to 6 digitsUp to 15 digitsNOTE: The Entry Delay 2 timer programs in 10 second intervals. Example: if a value of6 is programmed, the time is 60 seconds.NESS D16 CONTROL PANEL - USER MANUAL15
PROGRAMMINGthenSelects a programoption (address)KEYSEQUENCEINPROGRAMMODEThe current valueis displayedEnter newdata3 beepsENTER buttonEnter new valueusing keys 0 - 93 beepsPROGRAM buttonThe keypad lights oricons will display thecurrent valueENTER buttonTo Exit Program Mode:[MASTER CODE]2 or 3 Digit Option(00 to 119)To enter Program Mode:PROGRAMMING USER CODES1. Press[MASTER CODE](Enters Program Mode. The PROGRAM light will turn on).2. Press(The existing code will be displayed by the keypad lights)(Enter the Option Number of the User Code to be programmed. See Options Table).3. Press(Enter the new User Code twice).4. Pressthen(To exit Program Mode. The PROGRAM light will turn off).EXAMPLE 1: To program User Code 1 (The Master Code).11Enter the new codeEnter new the code againEXAMPLE 2: To program User Code 2 as an ARM ONLY code.12ARMEnter the new code16NESS D16 CONTROL PANEL - USER MANUALEnter new the code again
PROGRAMMINGPROGRAMMING ENTRY/EXIT TIMERS1. Press[MASTER CODE](Enters Program Mode. The PROGRAM light will turn on).2. Press(The existing time will be displayed by the keypad lights)(Enter the Option Number of the Timer to be programmed. See Options Table).3. Press(Enter the new time, from 1-99 seconds).4. Pressthen(To exit Program Mode. The PROGRAM light will turn off).EXAMPLE 3: To program ENTRY DELAY 1.EXAMPLE 4: To program EXIT DELAY.PROGRAMMING FOLLOW ME TELEPHONE NUMBER1. Press[MASTER CODE](Enters Program Mode. The PROGRAM light will turn on).2. Press(The existing Telephone No. will be displayed by the keypad lights)3. Press(The new Telephone No. will be displayed)(Enter the new Telephone Number).4. Pressthento exit Program Mode. The PROGRAM light will turn off.EXAMPLE 5:To program the Follow Me Telephone Number00Enter the new Telephone Number (Up to 15 digits long)EXAMPLE 6:To delete the Follow Me Telephone NumberNESS D16 CONTROL PANEL - USER MANUAL17
WIRELESS PRODUCTSOFFAsk your installer about the range Ness radiodevices for the optional extra convenience ofwireless remote control and wireless detection.Operating your Ness security system can be asconvenient as opening your car door. The NessRadio Key provides the benefits of separateON, OFF and PANIC buttons in a slim,waterproof remote control.* Ness radio products require a Ness RadioInterface (100-200) to be fitted to the controlpanel.ValidLow BatteryPart No.100-001NESS RADIO KEYPADA unique fully portable radiokeypad. The Ness RadioKeypad provides totallywireless Arming/Disarmingof the Ness D8, D16 & D24control panels.ONRADIO ACCESSORIESPANICPart No.100-664With separate buttons for ON(Arm), OFF (Disarm) and PANICfunctions.Part No.100-665NESS RADIO KEY PENDANTFully waterproof pendant styletransmitter can be used as aportable wireless Panic button.Supplied with a neckchain aswell as wristwatch straps. Ideal for use as amedical alarm for the elderly or infirm. (CentralStation Monitoring is especially recommendedwhen used for medical alarm purposes).NESS RADIO PIRNess Radio PIR (PassiveInfrared) motion detector forwireless motion detection.Also operates Monitor mode and Panic whenused with the Ness D16, D24 panels.The Ness radio Keypad is suitable for use as aportable keypad or for adding an extra keypadin areas where it is not possible to install wires.NESS RADIO KEY 3 BUTTONFully waterproof, ultra slim 3button Radio Key for remotecontrol of the D16 control panel.Part No.100-663Can be used in combination withNess hardwired detectors inareas where it is not possible toinstall wires.NESS RADIO REED SWITCHNess Radio Reed Switch forwireless door and windowprotection.Part No.100-662Part No.100-203transmitter.18NESS D16 CONTROL PANEL - USER MANUALNESS RADIO SMOKEDETECTORRadio Smoke Detectorusing Ionisation smokedetection technology. Withon board sounder. A singlebattery powers the smokedetectorandthe
AUDIBLE MONITORINGCENTRAL STATION MONITORINGThe D16 control panel has an on-board digitaldialler which can send detailed alarm messagesto a Central Monitoring Station.The digital messages can include informationabout the zone or zones which caused thealarm, tamper alarms, low battery or mainsfailure reports, and it can also (by usernumber) identify the users who Arm and Disarmthe system.FOLLOW ME TELEPHONE NUMBERAlarms are normally reported using the Primaryand Secondary telephone numbers.* WhenAudible Monitoring is enabled, the Follow MeTelephone Number is available** and can beprogrammed in User Program mode.See page 17 for information on programmingthe Follow Me Telephone Number.AUDIBLE MONITORING SEQUENCECentral Station Monitoring is highlyrecommended and is the most effective methodof monitoring your D16 alarm system. Forfurther information about 24 hour monitoring,contact your installer or Ness SecurityProducts.When triggered by an alarm, the D16 will dialthe programmed telephone number/s andoutput the audible message for 45 seconds oruntil it is acknowledged.AUDIBLE MONITORINGThe person receiving the call can thenacknowledge the alarm by pressing thekey on their telephone. Press thekey forat least 2 seconds during pauses in the audiblemessage.The D16 can also be programmed to sendaudible messages to any telephone or mobilephone.When programmed for audible monitoring, theD16 calls a pre-programmed number (ornumbers) and sounds a series of beeps overthe phone. These beeps can identify the zoneor zones which caused the alarm and well asseveral other alarm types.ACKNOWLEDGING THE ALARMIf the alarm is not acknowledged, the keypad’sLINE light will flash continuously until the panelis next Armed.CENTRAL STATION MONITORINGMONITORED PREMISESTELEPHONE LINEMONITORING STATIONAUDIBLE MONITORING* The programming of Primary and Secondaryphone numbers is an Installer Programmingoption.FIXED TELEPHONEMONITORED PREMISESTELEPHONE LINEMOBILE TELEPHONE** The Follow Me Telephone Number replacesthe Primary AND Secondary telephonenumbers.NESS D16 CONTROL PANEL - USER MANUAL19
REMOTE OPERATIONOPERATING THE D16 BY TELEPHONEThe D16 will allow a user to call in to thepanel, using a standard DTMF telephone, andremotely Arm or Disarm all areas and also turnon or off Aux 1 and Aux 2.To ensure security of operation a user canonly carry out remote operations after enteringa valid user code.REMOTE CONTROL FUNCTIONS NEED: A telephone with DTMF tones. A Valid User code programmed in the D16.The Telephone number that the D16 isconnected to.SEQUENCE OF OPERATION.1. Phone the D16 telephone number andlisten for the required number of rings (ringring.ring ring) and then hang up.signal the code was invalid and to tryagain.6. Enter the required command.See: Summary Of Telephone Commands.to finish. This tells the D16 to7. Presshang up. Also hang up your telephone.AUDIBLE FEEDBACK3 BEEPS: The User Code is valid Successful Arming or Disarming An Auxiliary output has been turned ON.1 LONG BEEP: D16 is already Armed Invalid code. Try again.1 SHORT BEEP: An Auxiliary output has been turned OFF.2. Wait 10 seconds and then call the numberagain within 50 seconds.3. The D16 will answer the second callimmediately, sound a beep for 2 secondsthen, after a pause, it will sound a lowerfrequency tone. The D16 is now ready toreceive telephone commands.4. Press thebutton on the telephone. Thistells the D16 that telephone commands willfollow. The D16 will respond with either 3beeps if all OK (One long beep means tryagain).NOTES If the D16 does not receive commands forperiods longer than 10 seconds it will assumethat the call is finished and it will hang up. If an alar
Ness Security Products Pty Ltd ACN 069 984 372 4 / 167 Prospect Hwy Seven Hills NSW 2147 Australia Ph 61 2 8825 9222 Fax 61 2 9674 2520 ness@ness.com.au . home. If you wish to split your alarm system into two areas with access limited to each area by code numbers then Area operation is used. Radio
