Transcription
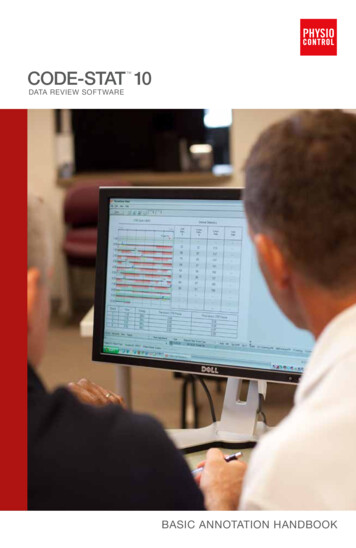
CODE-STAT 10 DATA REVIEW SOFTWAREBASIC ANNOTATION HANDBOOK
Special thanks to Dana Yost, from Redmond Medic One,for writing and guidance support.
ContentsPart I: Introduction and Set-upIntroduction. 1Before You Begin. 1Monitor/Defibrillator Set Up. 2Getting Familiar with CODE-STAT Data Review Software. 3Top Level Buttons – Case List. 5Opening a Case. 6Set Up a New Database. 7New Database. 7New Users. 9CPR Performance Gauges . 11Part II: Basic AnnotationAnnotation Basics. 13Setting Up Annotator Preferences. 13Annotation Tools . 15Suggested Basic Workflow. 17Annotating a Case. 18Part III: Record/File ManagementCreating Summary CPR Reports. 31Creating Multi-Case Reports. 31Importing and Exporting Cases. 33Importing Cases into CODE-STAT Data Review Software . 33Automatic Import of Files into CODE-STAT Database. 33Manual Import of Files into CODE-STAT Database. 39Part VI: TrueCPR Coaching DeviceTrueCPR Coaching Device. 41Viewing TrueCPR Device Data. 41CPR QUIK-VIEW Data Review Program Summary with TrueCPR Data. 44Combining Patient Data from TrueCPR and LIFEPAK Devices. 45Viewing Combined LIFEPAK monitor/defibrillator and TrueCPR Device Data. 46
Part I: Introduction and Set-up
IntroductionWelcome to CODE-STAT 10 data review software. This Basic Annotation Handbook is designed as a supplement to the CODE-STAT 10 user’s guide. It providesa step-by-step guide for reviewing and annotating cases in CODE-STAT software,and utilizing the data for continuous quality improvement (CQI).As you develop a CODE-STAT annotation system within your organization, payparticular attention to the number of annotators trained in relation to the number ofcases available to annotate. Just like other technical duties, CODE-STAT annotationrequires practice and frequency of use in order to stay proficient.For detailed instructions regarding the use of the software, please refer to theCODE-STAT user’s guide found by clickingor by going to HelpView Help.gBefore You BeginWhen using the LIFEPAK 12 and 15 monitor/defibrillators, defibrillation electrodes (pads) must be applied to the patient and the device must be in PADDLESlead in Channel 1 in order to record the impedance signal that is required toannotate cardiac arrest cases. Only defibrillation electrodes (pads) must beapplied to patient in order to record the impedance channel for LIFEPAK 20/20emonitor/defibrillator and LIFEPAK 15 monitor/defibrillator withicon on thelabel located on the back of the device in the battery well (see below).In order to utilize the automated ventilation detection algorithm, your device mustbe capable of recording continuous capnography in CODE-STAT data reviewsoftware. The LIFEPAK 12 monitor/defibrillator does not have this capability.Refer to LIFEPAK 15 monitor/defibrillator set up information on next page todetermine if your device is capable.Basic Annotation Handbook 1
Monitor/Defibrillator Set UpNot all LIFEPAK 15 monitor/defibrillators have the ability to record thecapnography waveform in CODE-STAT data review software. To determineif your 15 has this capability:1. Go into the setup mode.2. Select Monitoring. Check to see which of the setup optionsyou have below:If you see: Continuous ECGYour device does not have the ability to record continuous capnography waveformdata in CODE-STAT data review software and the automated ventilation detectorwill not be activated. You will still see the capnography waveform on the LIFEPAKscreen if you have capnography; it just won’t be recorded in the CODE-STAT datareview software. Make sure the option is set to ON.If you see: Continuous DataYour device does have the ability to record continuous capnography waveform datain CODE-STAT data review software and the automated ventilation detector will beactivated. You will still see the capnography waveform on the LIFEPAK screen if youhave capnography and it will be recorded in the CODE-STAT data review software.Make sure the option is set to All Channels.LIFEPAK 20/20eIn order to see the continuous capnography waveform in CODE-STAT software,you will need to: Enter the setup mode of monitor/defibrillatorSelect MonitoringSelect Continuous ECGSelect ON2 CODE-STAT 10 Data Review Software
Getting Familiar withCODE-STAT Data Review SoftwareFor the basic tour of CODE-STAT data review software, we will use illustrationsfrom the demo database included when the product was installed. LaunchCODE-STAT software by selecting (or double clicking) CODE-STAT Reviewer.When the Database Login screen appears, enter the following demo databasecredentials:User ID:Password:physiocontrolOnce logged in, you will see the case list view, which is used for navigatingthrough cases.Basic Annotation Training Guide 3
The following case list fields are displayed:Hide/show case details.Patient NameThe patient’s last name (if entered).Patient ID he patient ID, either automatically assigned by the device orTentered in the field. The default ID is a date and time stampalong with the device serial number.Incident IDSame as above.Case StartThe case start time and date.DeviceThe type of the device used in collecting the data.Device IDThe ID assigned to that device.Status he status of the case. This can be helpful during theTannotation and editing process.This icon is used to indicate a file attachment.This icon is used to indicate cases with audio files.NotesAdditional notes that can be entered regarding the case.You can sort the columns by clicking the column header.4 CODE-STAT 10 Data Review Software
Top Level Buttons—Case ListOpens the highlighted case. Opens CPR tab for the case you selected on the case list. pens the data entry window for the highlighted caseOin the case list view.Displays help. flashing green button indicates new cases. Click toAdisplay the new cases.I ndicates that there are cases that need assistancedue to import issues.Updates the list of cases in the case list.Hides opened case details for all cases on list.Runs DT EXPRESS.Allows for time-based filtering of the case list.Allows for filtering by report type.Opens Text search filter. lears currently selected filter criteria to display all casesCon the list.Basic Annotation Handbook 5
Opening a CaseOpen a case by double clicking it in the case list view, or highlighting it and thenclicking. This will bring you to the case view where you can see the continuouswaveform reports, 12-lead ECG, or other reports and associated events.Navigation andannotation toolsScrubber barDevice report paneEvents paneYou can navigate through a case in several ways. The buttons at the top of thepage allow you to either play the entire case, or move by page or by segment (thisis covered in more detail in the annotation section). Alternatively, you can use thehorizontal scroll (scrubber) bar to move through the case. Simply click in the yellowbox and move your mouse to the right.Clicking on any event in the events pane will navigate you to the location of theevent in the continuous ECG report.6 CODE-STAT 10 Data Review Software
Set Up a New DatabaseNew DatabaseBefore you get started working with real cases, it is important to set up a newdatabase. This allows you to keep your cases outside of the demo database.If you place real files in the demo database, they will be deleted during futureCODE-STAT software upgrade installations.To create a new database, open CODE-STAT and log in. From the case list, go toUtilitiesDatabase Utilities. Click on Add a new database or Edit an existing database configuration. Enter CODE-STAT administrator credentials (defaultname-physio, default password-control). Click OK.gFrom the CODE-STAT Database Utilities screen, click on the New Database icon.Click on Create new database.Enter database name in open box (don’t use spaces between words; use underscore instead). Complete description, if desired and click apply.Basic Annotation Handbook 7
Tip: If others need to be able to access the database for viewing cases orannotating from another desktop within your network, place the database on anetwork server where other computers have access.Once the new database is created, close the utility and open the new database bygoing to FileSelect Database and select the new database from the dropdown menu. Continue to use the original demo username and password until youhave set up new users.gNOTE: Files processed by CODE-STAT importer are imported to the databaseselected as default.8 CODE-STAT 10 Data Review Software
New UsersYou can set up unique users and assign permission level. This is helpful if youhave multiple users who will be accessing CODE-STAT software to view, edit,or annotate files.To set up users, go to UtilitiesSQLcodestat.g Database Utilities. Double click localhost\Tip: Make sure users who will be responsible for editing and annotatingcases have either a ‘user’ or ‘administrator’ access level.NOTE: You might want to create a common ‘guest’ account with an easyusername and password. This allows providers to look at cases for educationalpurposes, but prevents them from changing or deleting the cases fromthe database.Basic Annotation Handbook 9
Enter CODE-STAT administrator credentials.Name: physio (default)Password: control (default)Click.(Alternately, you can go to Userg Create user on the toolbar.)Fill in the red boxes, select Access to databases, then click Apply.The new user’s name will appear on the left hand side of the screen under Users.10 CODE-STAT 10 Data Review Software
CPR Performance GaugesTo set up CPR performance gauges (displayed on CPR report) for the first time,go to the Case List viewFileAdministrationCPR AnalyticsStatistics fields.ggggSet this up exactly as seen below: Compression ratio Compressions/minuteNOTE: Annotation of other dials will be covered in an advanced handbook.NOTE: If you use continuous capnography and have determined your LIFEPAK 15monitor/defibrillator has the capacity to record continuous waveform data inCODE-STAT (see page 2), you may also want to click ventilation rate andventilations/minute since the program, in this case, uses an automatic ventilationdetection algorithm.Basic Annotation Handbook 11
12 CODE-STAT 10 Data Review Software
Part II: Basic Annotation
Annotation BasicsSetting Up Annotator PreferencesFor training purposes, we suggest each annotator set up a copy of CODE-STATdata review software so they can follow along with this handbook.Open any case in the database by double clicking on it.Screen CalibrationIf this is the first time opening a case in the database, a screen calibration boxshould appear. If not, go to ViewCalibrate.g1. Measure the width of the black bar using a ruler.2. Enter the measurement in mm.NOTE: Calibrating the screen adjusts the display of waveforms so that the gridmeasurements are as close as possible to the actual measurements.Basic Annotation Handbook 13
Settings Maximize the CODE-STAT program to cover the full screen. The case defaults to Landscape view. To change to Portrait view,go to ViewPortrait on the toolbar. Select the number of strips visible on the screen by selecting 1-8 fromthe drop down menu.g To customize settings for CPR Performance Gauges see Part 1: Introductionand setup.NOTE: Choosing a larger number of strips will show more data on the screen butsome of the channels (e.g., impedance, ECG) will overlap waveforms. Choose alesser number of strips to keep the waveforms separated.14 CODE-STAT 10 Data Review Software
Annotation ToolsPlayback ControlsMoves back one displayed pageMoves forward one displayed pageMoves back one displayed strip (one row)Moves forward one displayed strip (one row)Plays the case in real timePauses a case playing in real timeChannels and Waveform DisplaysShow or hide impedance signal waveformShow or hide waveform from Channel 1 (e.g., ECG)Show or hide waveform from Channel 2 (e.g., SpO2)Show or hide waveform from Channel 3 (e.g., capnography)Select number of waveform strips displayed simultaneouslySelect sweep speed (horizontal time scale)of displayed waveformIncreases or decreases sweepspeedIncreases or decreases size of impedance waveformSelect gain of ECGSelect scale for viewing capnography waveformNOTE: When non-default values are selected, they are highlighted in yellow.Basic Annotation Handbook 15
AnnotationsShows or hides CPR events (compressions and ventilations)on the waveformC/VTurns on/off compression editing modeTurns on/off compression deleting mode(multiple compressions simultaneously)Turns on/off ventilation editing modeTurns on/off CPR break modeChoose annotations from dropdown list then click onwaveform to add desired annotationgTip: To add custom events, go to Case list view. Go to FileAdministrationUser Annotations and enter your custom event in thebottom box and click.gNavigation Timeline BarsThe green navigation timeline represents the impedance signal over the length ofthe case. The highlighting frameindicates the currently displayed segment ofthe waveform.Tip: To choose the ECG signal instead of the impedance signal, right-clickthe timeline and select Channel 1 (ECG). You can also view ETCO2 or True CPRsignals, if available.AnalysisShock12-LeadDevice annotationCompression periodROSC periodPeriod excluded from the CPR reportCurrent playback positionTip: Click the markers to navigate to specific positions on the timeline.16 CODE-STAT 10 Data Review Software
Suggested Basic WorkflowIn order to implement a continuous quality improvement process based on datacollected by LIFEPAK devices and reviewed through CODE-STAT software, werecommend the following basic ProgressReportShareProgressReportOpening A CaseTo open a case, first open CODE-STAT data review software, select the databaseand log in. Double click on the case from the case list that needs annotation.Basic Annotation Handbook 17
Annotating a CaseHere are the steps needed to annotate a case:1. Open CODE-STAT data review software and log in to the database.2. Open the case by double clicking on it.3. Click on Data Entry tabto enter patient’s name and demographicsas needed.4. Check that it is not a difficult case (more information below).5. Mark “Start CPR Report” annotation.6. Move through the case adding/deleting compressions and ventilationsas needed.7. Mark “ROSC” and “End ROSC” if found.8. Verify “Stop CPR Report” annotation.9. Close case and make “Closing Remarks,” if desired.10. Check your work.11. Create and Print CPR Report.12. Close case.NOTE: Ventilations will be automatically annotated only when waveformcapnography is visible.NOTE: “Stop CPR Report” defaults to last compression. To change, deleteannotation and re-annotate at desired location in case.Steps 1–3 are self-explanatory.Step 4—Recognizing difficult cases.Open the case. The impedance channel is visible over the ECG. Click C/V to displayautomated chest compression (and ventilations if capnography waveform present).Some cases are harder to annotate than others. It is recommended that you passover the more difficult cases until you have had some practice. Look for the following to determine a difficult case:For LIFEPAK 12 and certain 15 devices No Impedance Signal Found. If there is no impedance signal, this means thedefibrillator was not in PADDLES lead and therefore there is no impedancesignal recorded. The “Show CPR Events” button or the Compression buttonis inactive. A CPR Reportcannot be created without impedance data.18 CODE-STAT 10 Data Review Software
Example 4.1NOTE: The LIFEPAK 20/20e monitor/defibrillator and LIFEPAK 15 monitor/defibrillator withicon on the label located on the back of the device in thebattery well, will record the impedance signal as long as defibrillation electrodes(pads) are applied to the patient. In these devices, you do not need to be in PADDLES LEAD in Channel 1 to record the impedance channel. Large amounts of artifact. Artifact of the impedance signal will make it difficultto accurately mark compressions.Example 4.2 Variant impedance signal. If variant signals are present for only a brief period,this can easily be corrected by removing every other c marker (see examplebelow). However, correcting long periods is a time-consuming effort.Example 4.3: Variant impedance signal.Example 4.4: Variant impedance signal corrected.Tip: If the impedance signal height is too tall (out of range), simply decreasethe size using the sizing tool.Basic Annotation Handbook 19
Step 5—Start CPR Report.Turn on the “Show CPR Events button”C/VTurn on the “Compression editing button”.Determine where you would like to start measuring and add the first annotation,“Start CPR Report”. The start of the report would typically coincide with the firstsign of cardiac arrest. Sometimes the defibrillator has been powered on prior to thepads being connected and applied to the patient (as seen in example 5.1). Whenthis is the case, place the annotation “Start CPR Report” at the first ECG waveformindicating cardiac arrest.Note: “Start CPR Report” is different than “Start CPR.”Example 5.1Step 6—Annotating compressions and ventilations.A green impedance signal should be visible. Changes in the impedance signal due tocompressions are recognized by the software, and are automatically annotated witha red arrow and c for compression. The software will place a blue arrow and v for ventilation if the capnography waveform is visible. The software will pick up 9095% of the compressions and ventilations and annotate them automatically. Checkthe software’s work, and add and delete compression and ventilation annotationsas needed. Commonly, compressions may be missed at the beginning and end ofcycles (note the first two compressions are not annotated correctly in example 6.1).Additionally, compressions may be missed when the signal pattern changes. Clickto edit compressions. Hover over the compression with the mouse and click to add acompression annotation. Conversely, to remove an unwanted c , hover over it untilthe X appears and click to remove it. It is not imperative that the annotation is in anexact spot as long as there is a c for every compression.20 CODE-STAT 10 Data Review Software
Example 6.1: Missing compressionsTo edit ventilations click onand proceed as with compressions.Example 6.2: Ventilation annotationTip: Many variables go into the makeup of the impedance signal. It is notreasonable to interpret the height of the signal to be an indicator of depth orquality of the provider’s compression. The impedance signal can only give yourate and number of compressions.Step 7—Marking ROSC (Return of Spontaneous Circulation) and End ROSC.When return of spontaneous circulation is obtained, use the drop down menu toselect ROSC and mark the annotation.Example 7.1: ROSC markedExample 7.2: ROSC markedBasic Annotation Handbook 21
Marking ROSC will tell the software that the following time frame should not havecompressions. This makes the CPR Report accurate.Looking for the following information provided in the case file or other patient documentation records can assist in determining ROSC. The more that are present, thehigher the probability of ROSC. Providers stopped CPRA narrow QRS complexCPR is not started again in a reasonable amount of timeETCO2 risesA blood pressure is documentedVerbalization of ROSC (if voice recording is available)A provider event marks ROSC or charts ROSC on the medical reportBecause blood is a great electrical conductor, a rhythmic low amplitude pattern tothe impedance signal may be present, usually around the T wave on the ECG (seeexamples 7.3 and 7.4 below).Example 7.3: Notice the impedance line is very flat. No blood flow.Example 7.4: Notice the impedance signal rhythmic pattern near the T wave, suggestive of blood flowassociated with ROSC.If ROSC is lost, generally compressions will begin again. Attempt to determinewhere ROSC was lost and use the drop down menu to select “End ROSC” andmark the annotation.22 CODE-STAT 10 Data Review Software
Example 7.5: Mark where “End ROSC” is most likely. Sometimes it will be right at the start of CPR or,like in this case, where the rhythm deteriorates before the provider notices and takes action.Step 8—Verify “Stop CPR Report” annotation.This annotation tells the software the point at which performance measurementsshould stop (if ROSC is not annotated) and is automatically placed at the last compression. This avoids inaccurate statistics if the device is left on after resuscitationmeasures have ceased. (see example 8.1).If you want to edit this annotation you must first delete the original annotation, determine a different end point and select STOP CPR report from the dropdown box.NOTE: The default setting can be changed in File(under CPR Analytics).g Administration g GeneralExample 8.1: CPR stopped. Resuscitation ceased and a “Stop CPR Report” is annotated at thelast compression.Basic Annotation Handbook 23
Step 9—Closing remarks and Special Annotations.To add comments or special annotations, left click on the waveform to bring up theEdit Event box shown below. Select a category from the pull down menu (Userannotation, Medication, Procedure CPR annotation), then select from the variouschoices in the next drop down window.Tip: If it is difficult to annotate ROSC, a note may be added for future reference as to the reason ROSC was annotated where it was.Step 10—Checking Over the Work.Checking over the work is important to assure accuracy. Review for the following: Is there a Start CPR Report annotation?If there is ROSC, is it marked?How about loss of ROSC?Was ROSC regained?If the case was terminated, is there a Stop CPR Report annotation?24 CODE-STAT 10 Data Review Software
In addition, review the case for correct annotation of compressions by creating aCPR Report(Example 10.1). Look for large gaps, as well as areas where compressions appear denser(darker). Click anywhere on the CPR Report to be transported directly tothat part of the case. Delete incorrect c annotations. Add missing c annotations. If capnography waveform is visible, delete incorrect v annotations. Addmissing v annotations.Example 10.1: Notice the denser (darker) areas in minute 13 forward. This is caused by twice thenumber of compression annotations. Click on this area to go directly to that area and clean it up.Basic Annotation Handbook 25
Example 10.2: Notice how the compression annotations look clean and rhythmic. There are no areasthat are denser than others. This is a sign of good CPR performance and an accurate record. Look for and remove false compressions (generally due to movement of thepatient) in the ROSC area if applicable (Example 10.3). Although compressionslocated in the ROSC area do not alter performance measures, they can lookconfusing on the CPR Report.Example 10.3: False compressions created by movement.26 CODE-STAT 10 Data Review Software
Step 11—Creating and Printing the CPR Report.Once the work is complete, re-create a CPR Report by clicking theWhen the CPR Report appears, be sure to clickperformance dials.CPR tab.to display theCPR reportDevice Type:LIFEPAK 12Duration:00:51:12Power On:2/4/2008 11:23:21 AMIncident ID:CPR16CPR Annotations Edited:YesStatistical Parameters:1000-0300-3000-05Device Configuration:*Times have been adjusted by the systemCompressions ratio(/total time)40Compression rate60602080080 100 120140401602018010007:55 / 9:31 83 %200102/minuteCO2 07:1200:09:37SummaryCompression count 777Pauses over 10 sec 3Longest compression pauseCPR QUIK-VIEWInterval Statistics0 minStart0:00 0:441 0899598Stop9:00Example11.1: A completed CPR Report.9/3/2014 6:31:29 PM 1996 - 2014 Physio-Control, Inc. All rights reserved.Your Organization NamePage 1 of 2CODE-STAT Reports 17.0.0.2Basic Annotation Handbook 27
The report can be printed to a physical printer or a PDF file. There are two ways.From the report view, click on the printer icon. This brings up another screen.Select the printer and clickor go to FilePrintCase Reports. Currentreport is the default. Click Print.ggExample 11.2: Printing the CPR Report.Tip: If you want an electronic version of the report, change the Printerselection to Adobe PDF and save to your files.28 CODE-STAT 10 Data Review Software
Step 12—Closing a Case—Closing Remarks.To close a case and return to the case list clickon the toolbar.When closing out of a case, take the opportunity to document what has beencompleted. This is helpful because any remarks will show up on the case list,making it easier to locate the case later.Suggestedcomments:—In progress—Annotated—PDF created—CPR Report sent—(Your Initials)— 12-Lead only(interpretation)—TestThe Case Close dialog box appears every time you close a case. Before you canclose the case, you must indicate its current status: Completed—If you finished all activities related to the report.NOTE: If you don’t update or complete the status for the case, it will remain asNEW CASE in the case list.Basic Annotation Handbook 29
30 CODE-STAT 10 Data Review Software
Part III: Record/File Management
Creating Summary CPR ReportsCreating Multi-Case ReportsMulti-case reports are helpful for trending, monthly meeting updates andyearly reports.To create monthly or custom reports that look at periods of time and provide information for all the cardiac arrests during that period:1. Open CODE-STAT and login to the appropriate database.2. Filter the case list to show the reports you would like to include. The reportwill run on all of the cases displayed in the report list.3. Click Fileg Print g CPR Summary.Basic Annotation Handbook 31
4. Change the performance filter, if desired (default is set to all cases)and click Print.Example: Monthly Report.32 CODE-STAT 10 Data Review Software
Importing and Exporting CasesImporting Cases into CODE-STAT Data Review SoftwareYou can automatically import cases into CODE-STAT via: LIFENET Connect DT EXPRESS 6.0 Data Transfer SoftwareLIFENET Connect is used to send files to CODE-STAT data review software directlyfrom LIFEPAK devices in the field. This is typically part of a larger implementation.Your LIFENET implementation specialist will assist with this setup.DT EXPRESS is a stand-alone software program used to download cases from theLIFEPAK devices. It is also used to send data to CODE-STAT data review softwarefor storage/review/annotation. CODE-STAT 10 no longer has local download capabilities included in the program (like CODE-STAT 9 did). Instead CODE-STAT 10 canlink to DT EXPRESS 6.0 if they are installed on the same computer. To do this, DTEXPRESS 6.0 needs to be configured in order to move files into CODE-STAT 10 automatically. One way to do this is to setup an automatic exporter in to DT EXPRESS6.0 that moves the file into the importer folder automatically.Automatic Import of Files into CODE-STAT DatabaseTo import files automatically via LIFENET Connect or DT EXPRESS, make sureCODE-STAT Import Service is running. To check, go to the Start menu on yourcomputer and click all programsPhysio-ControlPost Event ReviewCODE-STAT 10CODE-STAT importer. Ifis displayed, the Import Serviceis already running. Ifis displayed, click on this icon to start the Import Service.ggggNow CODE-STAT Import Service is running and files will automatically be imported.Basic Annotation Handbook 33
To configure DT EXPRESS 6.0 data transfer software to automatically move filesto CODE-STAT:1. Click on Directories.2. Copy “Import files from” path – this will be used to configure an exporter inDT EXPRESS.3. Open the DT EXPRESS software by clicking onCODE-STAT data review software.on the toolbar inNOTE: Ifis disabled, you will need to install DT EXPRESS 6.0 data transfersoftware on the same computer as your CODE-STAT 10 data review software.34 CODE-STAT 10 Data Review Software
g4. Select FileConfigurationCase ExporterOK.gg Exporter
database. This allows you to keep your cases outside of the demo database. If you place real files in the demo database, they will be deleted during future CODE-STAT software upgrade installations. To create a new database, open CODE-STAT and log in. From the case list, go to Utilities g Database Utilities. Click on Add a new database or Edit .