Transcription
Instruction ManualLorex Home for iOS &AndroidVersion 3.6
Instruction ManualLorex Home for iOS &Android#LX400112; r. 2.0/56179/56212; en-USiii
Table of contents1Introduction to Lorex Home . 11.1System Requirements. 12Getting Connected . 22.1DVR / NVR Instructions . 22.2Wi-Fi Camera Instructions . 43Lorex Home Dashboard.103.1Devices .103.2Activities Menu.113.3Account Menu .124Live Viewing.144.1Live Viewing Overview .144.1.1Live Viewing - Portrait Mode.154.1.2Live Viewing - Landscape Mode .165Timeline (Playback).185.1Timeline Overview.195.1.1Timeline – Portrait Mode .205.1.2Timeline – Landscape Mode .216Manual Recordings and Snapshots .226.1Manual Recordings .236.2Snapshots.247Device Settings .257.1Basic Information .267.2Changing Device Password.277.3Enable/Disable Device Storage .307.4Formatting Device Storage .317.5Configuring SmartZone .337.6Push Notifications.367.7Audio Recording .397.8Motion Detection.417.9Continuous Recording Schedule .437.10Device Sharing .477.11Changing Time Zone .537.12Daylight Savings Time .557.13Setting Up Automatic Warning Light (Wi-Fi Cameras Only) .577.14Person/Vehicle Detection (For DVR/NVR Recorders) .597.15Person/Vehicle Detection (For Wi-Fi Cameras).628Home & Away .659Account Settings .699.1Changing Lorex Home Password .699.2Exporting Account Settings.72#LX400112; r. 2.0/56179/56212; en-USv
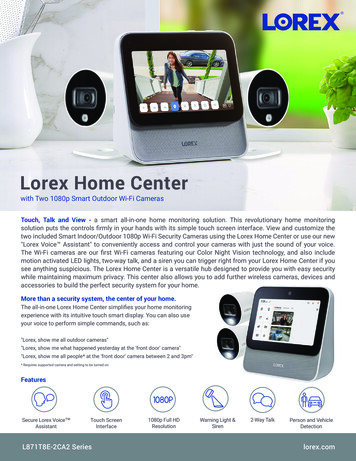
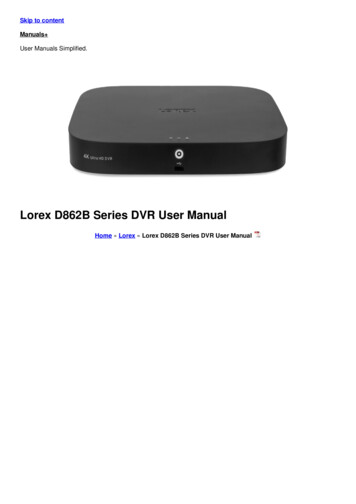
1Introduction to Lorex HomeThe Lorex Home app for Apple & Android mobile devices is used to view and configure settingsfor select Lorex devices. For a full list of compatible devices, visit lorex.com/compatibility.Lorex Home is a free mobile app that lets you view live and recorded video from your securitycameras and change system settings from anywhere. Enjoy hassle-free remote access from anywhere with no monthly fees.1.1System RequirementsThe Lorex Home app is compatible with both iOS and Android devices. The minimum versionsshown below are based on version 3.6 of the Lorex Home app.See lorex.com/compatibility for the latest list of supported apps and devices.PlatformSupported DevicesMinimumRequirementsGet App FromiOSiPhones and iPads*iOS version 9.3 or laterApple App StoreAndroidAndroid smartphones andtablets*Android version 4.0.3 orlaterGoogle Play StoreNOTE* On iPads and tablets, the Lorex Home app will scale to the size of your device’s screen.#LX400112; r. 2.0/56179/56212; en-US1
2Getting ConnectedConnect to your Lorex device using the Lorex Home app for remote access to live video streams,recorded video, and system settings.For a full list of compatible products, visit lorex.com/compatibility.NOTEIf you own a LNW16XF or LNWCM23X Series IP camera, please refer to your product manual on lorex.com forfull setup instructions.Your setup process will differ depending on whether you are setting up a DVR/NVRrecorder or a Wi-Fi camera: For DVR/NVR recorder setup instructions, see 2.1 DVR / NVR Instructions, page 2. For Wi–Fi camera setup instructions, see 2.2 Wi-Fi Camera Instructions, page 4.2.1DVR / NVR InstructionsConnect your DVR / NVR system to the Lorex Home app.Prerequisites: Download and install the most up-to-date version of the Lorex Home app from the App Storeor Google Play Store. Complete initial setup of the recorder and create a secure password before attempting mobilesetup. Ensure you recorder is powered on and is connected to a router with high-speed Internet access.NOTEThe following minimum upload speeds are required for remote video streaming: 5 Mbps for 4K video.3.5 Mbps for lower resolutions.Up to 3 devices may connect to the system at the same time. Ensure your Lorex device is up-to-date with the latest firmware version.To connect to your recorder with Lorex Home:1. Launch the Lorex Home app. Tap Sign up to create a Lorex Home account.CAUTIONThe email address and password used to create your Lorex Home account are different from the recorder'susername (default: admin) and secure password.#LX400112; r. 2.0/56179/56212; en-US2
2Getting Connected2. The Lorex Home dashboard appears (default screen is the Devices tab). Tap the symbol inthe center of the screen to set up a new device.3. Scan the QR code on your Lorex recorder using the camera on your smartphone or tablet. TheQR code could be located on the side or top panel of your recorder.NOTEIf you are having trouble scanning the QR code, or if your mobile device does not have a camera, tap Manually enter Device ID. The Device ID is printed below the QR code.#LX400112; r. 2.0/56179/56212; en-US3
2Getting Connected4. Enter the recorder’s secure password.5. Set the device time zone and Daylight Savings Time (DST) preferences if needed, then tapComplete.Congratulations! You have successfully added your security camera system to LorexHome.2.2Wi-Fi Camera InstructionsConnect your Wi–Fi camera to the Lorex Home app.Prerequisites: Download and install the most up-to-date version of the Lorex Home app from the App Storeor Google Play Store. Ensure you Wi-Fi camera is plugged into power.#LX400112; r. 2.0/56179/56212; en-US4
2Getting ConnectedNOTEThe following minimum upload speeds are required for remote video streaming: 5 Mbps for 4K video.3.5 Mbps for lower resolutions.Up to 3 devices may connect to the device at the same time.To connect to your Wi-Fi camera with Lorex Home:1. Launch the Lorex Home app. Tap Sign up to create a Lorex Home account.2. The Lorex Home dashboard appears (default screen is the Devices tab). Tap the symbol inthe center of the screen to set up a new device.CAUTIONThe password used to create your Lorex Home account is different from the secure password you will createfor the camera later in the setup process.#LX400112; r. 2.0/56179/56212; en-US5
2Getting Connected3. Scan the QR code on your Lorex Wi-Fi camera using your smartphone or tablet.NOTEIf you are having trouble scanning the QR code, or if your mobile device does not have a camera, tap Manually enter Device ID. The Device ID is printed below the QR code.4. Create a secure, 8–32 character password for the camera.#LX400112; r. 2.0/56179/56212; en-US6
2Getting Connected5. Choose your Wi-Fi network from the list of available networks.6. Enter the password for your Wi-Fi network, then tap Connect.#LX400112; r. 2.0/56179/56212; en-US7
2Getting Connected7. Wait for a few seconds while your device is added to your Lorex Home account. Finalize thesetup by setting a device name of your choice, preferred timezone, and Daylight Savings Timepreferences, then tap Complete.#LX400112; r. 2.0/56179/56212; en-US8
2Getting ConnectedCongratulations! You have successfully added your Wi–Fi camera to Lorex Home.#LX400112; r. 2.0/56179/56212; en-US9
3Lorex Home DashboardUpon launching Lorex Home, there are 3 tabs on the dashboard: Devices (default view), Activities, and Account. Devices (): Add new devices or view/configure connected devices. For a full overview ofthe Devices tab, see 3.1 Devices, page 10. Activities (): View notifications and associated recordings. For a full overview of the Activities tab, see 3.2 Activities Menu, page 11. Account (): Change settings related to your Lorex Home account. For a full overview ofthe Account tab, see 3.3 Account Menu, page 12.3.1DevicesThe Devices tab lets you add new devices, view live video, and quickly set preferences for pushnotifications. See below for a complete overview of the Devices tab.1. Notifications: Tap to turn all notifications for all connected devices on () / off ().2. Device Name#LX400112; r. 2.0/56179/56212; en-US10
3Lorex Home Dashboard3. Channel Thumbnails: Tap a channel thumbnail to view live video from a single channel. For a complete overviewof the live viewing screen, see 4 Live Viewing, page 14. DVR / NVR recorders only. Swipe back and forth to see all channels connected to thesystem. Tap the icon in the upper-right corner of a device thumbnail to quickly enable (able () or dis-) push notifications for the selected channel or camera.4. Play All: DVR / NVR recorders only. Start split-screen live viewing for all connected channelson the system (9 channels shown on screen at a time — swipe left/right to see more connectedcameras). For a complete overview of the live viewing screen, see 4 Live Viewing, page 14.5. Select Channel: DVR / NVR recorders only. Display channels in list view, along with channelnames. Tap a channel to view live video from a single channel. For complete overview of thelive viewing screen, see 4 Live Viewing, page 14.6. Add New Device: For full instructions on adding a new device, see 2 Getting Connected, page2.7. Device Settings: Configure device settings remotely. For a full overview of the device settingsscreen, see 7 Device Settings, page 25.3.2Activities MenuThe Activities tab summarizes all motion detection events recently captured by your security cameras. See below for a complete overview of the Activities tab. Motion detection events are grouped together by channel / camera. Tap any thumbnail to viewall events on a certain channel (example shown below):#LX400112; r. 2.0/56179/56212; en-US11
3Lorex Home Dashboard1. Return to Activities Tab2. Current Week: Select a date to view motion events from. Swipe left/right to see days not currently shown on screen.3. Motion Event Recordings: Tap any event to play back video of the motion event. See 5 Timeline (Playback), page 18 for full overview of playback controls.NOTEDevice storage must be enabled for video playback. See 7.3 Enable/Disable Device Storage, page 30 fordetails.4. New Event Indicator: A red dot appears beside recordings you have not yet reviewed.5. Make Selection: Tapto select one or multiple recordings. To select all recordings in the.current list, tapOnce you have selected one or more recordings:3.3 Tapto delete selected recordings. Tapto mark selected recordings as reviewed.Account MenuThe Account tab lets you change your Lorex Home account settings, such as account passwordand notification settings. You can also view all your connected devices, manual recordings, andsnapshots. See below for a complete overview of the Account tab.#LX400112; r. 2.0/56179/56212; en-US12
3Lorex Home Dashboard1. Home & Away: Set a perimeter around your property. The app will detect whether your mobile device is inside or outside of the perimeter (location services required) and allow you toset preferences for notifications for both conditions. For full instructions, see 8 Home &Away , page 65.2. My Devices: View all connected devices. Tap any device to access the Device Settings (for afull overview of Device Settings, see 7 Device Settings, page 25).3. Manual Recordings and Snapshots: View snapshots and manual recordings you have taken.For full instructions, see 6 Manual Recordings and Snapshots, page 22.4. Test Your Wi-Fi: Test your Wi-Fi connection by connecting to your Wi-Fi network near theintended mounting location.5. Alexa: Tap for Amazon Alexa setup instructions, supported voice commands, and compatibledevices.6. Google Assistant: Tap for Google Assistant setup instructions, supported voice commands,and compatible devices.7. Account Settings: Change account settings, such as Lorex Home account password, associated email address, and more. For a full overview of Account Settings, see 9 Account Settings,page 69#LX400112; r. 2.0/56179/56212; en-US13
4Live ViewingTo access the live viewing screen: From the Devices tab, tap a device thumbnail to start live view for a single channel or camera.OR DVR / NVR recorders only. Tapto start live view for all connected channels (up to 9shown at the same time). Swipe left/right to view other connected channels.4.1Live Viewing OverviewComplete overview of live viewing controls. Controls are detailed for both portrait and landscapemode. Portrait mode: 4.1.1 Live Viewing - Portrait Mode, page 15 Landscape mode: 4.1.2 Live Viewing - Landscape Mode, page 16#LX400112; r. 2.0/56179/56212; en-US14
4Live Viewing4.1.1 Live Viewing - Portrait Mode1. Return to Main Menu2. Settings: Configure settings for selected device.3. Live Video: Tap any channel to use button controls on the selected channel while viewing in multichannel views. Double-tap any channel to view in single-channel mode.4. Timeline: Tap to search for and play back recorded videos. See 5 Timeline (Playback), page18 for full details on using the timeline controls.5. Snapshot: Tap to save a still image of the current live view.6. Two-Way Audio: Two-way audio cameras only. Tap to speak into the microphone on yourmobile device. Sound will be transmitted through the camera's speaker. Tap again to listen in.NOTEEnsure audio is enabled on your recorder’s Substream before using two-way audio. See the instruction manualfor your recorder for full instructions.7. Manual Recording: Tap to begin manual recording of the current live view. Tap again to stoprecording and save the video clip to your mobile device.8. Siren: Deterrence cameras only. Tap to enable the camera's siren.9. Warning Light: Deterrence cameras only. Tap to enable the warning light.10. PTZ Controls: Pan-Tilt-Zoom cameras only. Open controls to move and configure PTZcameras.11. Pause/Restart Video12. Viewing Mode: Switch between single and multi-channel views.#LX400112; r. 2.0/56179/56212; en-US15
4Live Viewing13. Video Quality: Tap to switch to HD* video quality. Tap again for reduced video quality thatis optimized for streaming.NOTEHD resolution will be limited to the maximum screen resolution of your mobile device. This will not impactthe recording resolution of the recorder.14. Audio: Tap to mute / unmute.15. Fullscreen: Tap to view in landscape mode.4.1.2 Live Viewing - Landscape Mode1.2.3.4.Return to Portrait ModeVideo Stream BandwidthPause/Restart VideoVideo Quality: Tap to switch to HD* video quality. Tap again for reduced video quality thatis optimized for streaming.NOTEHD resolution will be limited to the maximum screen resolution of your mobile device. This will not impactthe recording resolution of the recorder.5. Audio: Tap to mute / unmute.6. Snapshot: Tap to save a still image of the current live view.7. Two-Way Audio: Two-way audio cameras only. Tap to speak into the microphone on yourmobile device. Sound will be transmitted through the camera's speaker. Tap again to listen in.NOTEEnsure audio is enabled on your recorder’s Substream before using two-way audio. See the instruction manualfor your recorder for full instructions.8. Manual Recording: Tap to begin manual recording of the current live view. Tap again to stoprecording and save the video clip to your mobile device storage.9. Timeline: Tap to search for and play back recorded videos. See 5 Timeline (Playback), page18 for full details on using the timeline controls.10. Lock Display: Lock display in fullscreen landscape view.#LX400112; r. 2.0/56179/56212; en-US16
4Live Viewing11. More: Tap to expand. Siren (disable.): Deterrence cameras only. Tap to enable the camera’s siren. Tap again toNOTEThe siren will turn off automatically after a few seconds. Warning Light (): Deterrence cameras only. Tap to enable the camera’s warning light.Tap again to disable.NOTEThe warning light will turn off automatically after a few seconds. Viewing Mode (views.): Tap to switch viewing modes between single and multi-channel12. Device Name13. Time & Date Stamp#LX400112; r. 2.0/56179/56212; en-US17
5Timeline (Playback)Play back, download, and share recorded video.To access the timeline:1. Launch the Lorex Home app. Tap a channel thumbnail to start live view. Swipe left/right toview other connected channels.#LX400112; r. 2.0/56179/56212; en-US18
5Timeline (Playback)2. Tap Timeline. The device automatically displays recordings from the current day. See belowfor full details on using timeline controls.5.1Timeline OverviewComplete overview of timeline controls. Controls are detailed for both portrait and landscapemode. Portrait mode: 5.1.1 Timeline – Portrait Mode, page 20 Landscape mode: 5.1.2 Timeline – Landscape Mode, page 21#LX400112; r. 2.0/56179/56212; en-US19
5Timeline (Playback)5.1.1 Timeline – Portrait Mode1.2.3.4.5.6.Return to Main ScreenVideo Stream BandwidthChannel NameReturn to Live ViewSearch Date: Select a different day to search for available recordings.Timeline Bar: Recordings are shown with colored bars — blue bars indicate continuous recording, andyellow indicates motion recording. Swipe back and forth to change the time. Pinch or separate fingers overtop of the timeline bar to zoom in/out on the timeline.7.8.9.10.11.SnapshotNot SupportedManual RecordingPlay/PauseMute/Unmute#LX400112; r. 2.0/56179/56212; en-US20
5Timeline (Playback)12. Fullscreen: Video switches to landscape mode. For a full overview of timeline controls inlandscape mode, see 5.1.2 Timeline – Landscape Mode, page 21.13. List View: View all recordings by date rather than searching on the timeline.14. Time & Date Stamp15. Device Settings5.1.2 Timeline – Landscape Mode1.2.3.4.5.Return to Live ViewVideo Stream BandwidthChannel NamePlay/PauseTimeline Bar: Recordings are shown with colored bars — blue bars indicate continuous recording, andyellow indicates motion recording. Swipe back and forth to change the time. Pinch or separate fingers overtop of the timeline bar to zoom in/out on the timeline.6.7.8.9.Mute/UnmuteSnapshotManual RecordingExit Fullscreen: Video switches to portrait mode. For a full overview of timeline controls inportrait mode, see 5.1.1 Timeline – Portrait Mode, page 20.10. Lock Display: Lock display in fullscreen landscape view.11. Time & Date Stamp#LX400112; r. 2.0/56179/56212; en-US21
6Manual Recordings and SnapshotsView, manage, or share video recordings and snapshots. By default, manual recordings are shown.To access manual recordings and snapshots:1. Launch the Lorex Home app. Tap the Account tab.#LX400112; r. 2.0/56179/56212; en-US22
6Manual Recordings and Snapshots2. Tap Manual Recordings and Snapshots. For an overview of manual recording options, see 6.1 Manual Recordings, page 23. For an overview of snapshot options, see 6.2 Snapshots, page 24.6.1Manual Recordings1. Return to Dashboard2. Toggle (Manual Recordings / Snapshots)#LX400112; r. 2.0/56179/56212; en-US23
6Manual Recordings and Snapshots3. Make Selection: Tap, then tap one or more recordings to make a selection. Choose from thefollowing actions: : Share recordings. : Export recordings to mobile storage (iOS only). : Delete recordings4. Recordings: Tap any recording to start playback.6.2Snapshots1. Return to Dashboard2. Toggle (Manual Recordings / Snapshots)3. Make Selection: Tap, then tap one or more snapshots to make a selection. Choose from thefollowing actions: : Share snapshots. : Export snapshots to mobile storage (iOS only). : Delete snapshots4. Snapshots: Tap any snapshot to view in full screen.#LX400112; r. 2.0/56179/56212; en-US24
7Device SettingsYou can configure settings for your security camera or system from anywhere using the LorexHome app.Device Settings Overview1. Basic Information: Tap to change the device password, set device / channel name, changethumbnail photo, or view device ID. For full instructions, see 7.1 Basic Information, page 26.2. Notifications: Configure push notifications and other motion detection settings.3. SmartZone : Set the active area for motion detection. For instructions, see 7.5 ConfiguringSmartZone , page 33.#LX400112; r. 2.0/56179/56212; en-US25
7Device Settings4. Detection Settings: Enable/disable motion detection and Person/Vehicle detection per channelon supporting recorder platforms.5. White Light: Wi–Fi cameras only. Set the brightness level for the warning light on your WiFi camera.6. Night Vision: Wi–Fi cameras only. Enable/disable IR night vision. When set to Auto, thecamera will switch over to black & white night vision as light levels drop. If disabled, thecamera will remain in color at all times.CAUTIONIf you disable night vision, you will require some ambient light in the camera’s location to ensure that colorrecordings are captured. Verify the camera’s image at night to ensure the picture is clear enough to capturedetails.7. Continuous Recording Schedule: Set a schedule for continuous video recording. For instructions, see 7.9 Continuous Recording Schedule, page 43.8. Device Storage: Enable/disable recording to the recorder’s hard drive, or format recorderstorage.9. Time Zone: Tap to change the time zone (see 7.11 Changing Time Zone, page 53) or to configure Daylight Savings Time (see 7.12 Daylight Savings Time, page 55).10. Audio Recording: Enable/disable audio recording per channel (audio-enabled camera(s)required).11. Image Rotation: Tap channels to rotate the live viewing image by 180 (used for installationswhere one or more cameras are installed upside-down).NOTERecordings and snapshots will be oriented the same way as live viewing.12. Camera LED: Wi–Fi cameras only. Enable/disable the status LED on the camera.13. Share Device: Tap to send an invite to another Lorex Home account to access the selected device. For full instructions on device sharing, see 7.10 Device Sharing, page 47.14. Firmware: Tap to check for a newer firmware version.15. Wireless Network: Wi–Fi cameras only. Change the Wi-Fi network that is associated with thecamera.16. Device Info: View the device’s model number, device ID, IP address, and MAC address.17. Restart: Restart your Lorex device remotely. Wait a few minutes before connecting to the device after restarting.18. Remove Device: Remove device from Lorex Home.NOTERemoving a device will not affect recordings or snapshots on your mobile device storage.7.1Basic InformationConfigure basic product settings.#LX400112; r. 2.0/56179/56212; en-US26
7Device Settings1. Device Photo: Tap to choose a thumbnail image for your Lorex device. By default, the thumbnail will be automatically generated using the most recent live image.2. Device Name: Tap to edit the name of your device.3. Channel Name: Tap to edit channel names.4. Device ID: Displays your Lorex product’s Device ID.5. Device Password: Tap to update the password for your device.NOTEUpdating the device password using Lorex Home will also change the password used to access the devicelocally.7.2Changing Device PasswordYou can change the password for your Lorex device at any time using the Lorex Home app.NOTEThe procedure below is for updating the password for a specific Lorex device, not the password used for the LorexHome app. The security product has its own login credentials, which are separate from the login credentials usedfor the Lorex Home app. If you have forgotten the password you created for the Lorex Home app, tap Forgot password? on the login screen.To change your password:#LX400112; r. 2.0/56179/56212; en-US27
7Device Settings1. Launch the Lorex Home app. Tap#LX400112; r. 2.0/56179/56212; en-USabove the device you want to change the password for.28
7Device Settings2. Tap the thumbnail for your device.3. Tap Device Password.4. Enter your current password and the new password.NOTEYour password must be at least 8 characters in length, and must contain at least 2 of the following charactertypes: lowercase (abc), uppercase (ABC), number (123), special character (! %).#LX400112; r. 2.0/56179/56212; en-US29
7Device Settings5. Tap7.3to save changes.Enable/Disable Device StorageBy default, your Lorex device will automatically save recordings to the pre-installed hard drive.To enable/disable device storage:1. Launch the Lorex Home app. Tap#LX400112; r. 2.0/56179/56212; en-USabove the device you want to enable/disable storage for.30
7Device Settings2. Tap Device Storage.3. Tap the toggle switch to enable/disable device storage.7.4Formatting Device StorageFormat device storage (hard drive or microSD card) using the Lorex Home app.CAUTIONFormatting permanently erases all data saved to your device’s storage. Formatting cannot be undone.To format device storage:#LX400112; r. 2.0/56179/56212; en-US31
7Device Settings1. Launch the Lorex Home app. Tap#LX400112; r. 2.0/56179/56212; en-USabove the device you want to format storage for.32
7Device Settings2. Tap Device Storage.3. Tap Format Storage Device.CAUTIONFormatting permanently erases all data saved to your device’s storage. Formatting cannot be undone.7.5Configuring SmartZone SmartZone allows you to customize your device’s motion detection region. Areas of the cameraimage that trigger unwanted motion events can be ignored, such as a busy sidewalk or trees blowing in the wind.To configure SmartZone :#LX400112; r. 2.0/56179/56212; en-US33
7Device Settings1. Launch the Lorex Home app. Tap#LX400112; r. 2.0/56179/56212; en-USabove the device you want to set a SmartZone for.34
7Device Settings2. Tap SmartZone .3. DVR / NVR recorders only. Tap to select a channel to configure the SmartZone for.4. By default, the entire image has a red overlay, meaning that a motion event happening anywhere on screen will trigger an event. To set a customized SmartZone , tap Clear Area. Thered overlay disappears, meaning that motion detection is disabled for the entire image.5. Tap-and-drag over parts of the camera image where you would like motion to be detected.NOTEIf the camera is pointed at any high-traffic scenes or moving objects that will trigger unwanted motion events,it is recommended to leave those parts of the image disabled in SmartZone setup.#LX400112; r. 2.0/56179/56212; en-US35
7Device Settings6. Tap Save to apply changes.7.6Push NotificationsBy default, your Lorex device will send push notifications to your mobile device when motion isdetected.NOTEIf you are receiving too many motion notifications for your liking, it is recommended to configure a SmartZone to ignore motion detected in certain areas of the image (see 7.5 Configuring SmartZone , page 33 for details).To enable/disable push notifications:#LX400112; r. 2.0/56179/56212; en-US36
7Device Settings1. Launch the Lorex Home app. Tapfor.#LX400112; r. 2.0/56179/56212; en-USabove the device you want to configure notifications37
7Device Settings2. Tap Notifications.3. DVR / NVR recorders only. Tap a channel to enable/disable push notifications for.#LX400112; r. 2.0/56179/56212; en-US38
7Device Settings4. Tap the toggle switch to enable/disable notifications.7.7Audio RecordingEnable audio-enabled channels for audio recording using the Lorex Home app.CAUTIONAudio recording and / or use of listen-in audio without consent is illegal in certain jurisdictions. Lorex Corporationassumes no liability for use of its products that does not conform with local laws.To enable/disable audio recording:1. Launch the Lorex Home app. Tapfor.#LX400112; r. 2.0/56179/56212; en-USabove the device you want to configure audio recording39
7Device Settings2. Tap Audio Recording.3. DVR / NVR recorders only. Select a channel to configure audio recording for.#LX400112; r. 2.0/56179/56212; en-US40
7Device Settings4. Tap the toggle switch to enable/disable audio recording on the selected channel.CAUTIONIf you are using voice commands with your security product via Amazon Alexa or Google Assistant ,audio recording must be turned on for any channels you want to use voice commands with.7.8Motion DetectionEnable/disable motion detection.To enable/disable motion detection:1. Launch the Lorex Home app. Taption for.#LX40
Up to 3 devices may connect to the device at the same time. To connect to your Wi-Fi camera with Lorex Home: 1. Launch the Lorex Home app. Tap Sign up to create a Lorex Home account. 2. The Lorex Home dashboard appears (default screen is the Devices tab). Tap the symbol in the center of the screen to set up a new device. CAUTION