Transcription
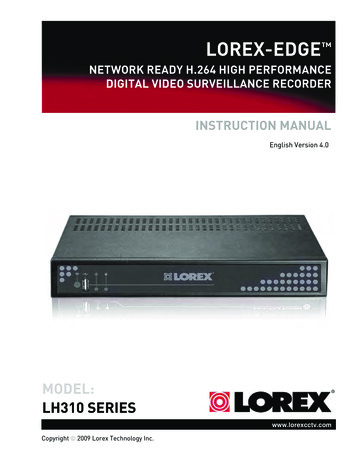
LOREX-EDGE NETWORK READY H.264 HIGH PERFORMANCEDIGITAL VIDEO SURVEILLANCE RECORDERINSTRUCTION MANUALEnglish Version 4.0MODEL:LH310 SERIESwww.lorexcctv.comCopyright 2009 Lorex Technology Inc.
Thank you for purchasing the LH310 Series Lorex-Edge H.264 Digital Video SurveillanceRecorder.This manual refers to the following models: LH314 (4-channel) LH318 (8-channel) LH316 (16-channel)To learn more about this product and to learn about our complete range of accessoryproducts, please visit our website at:www.lorexcctv.comCAUTIONRISK OF ELECTRIC SHOCKDO NOT OPENCAUTION: TO REDUCE THE RICK OF ELECTRIC SHOCK DO NOTREMOVE COVER. NO USER SERVICABLE PARTS INSIDE.REFER SERVICING TO QUALIFIED SERVICE PERSONNEL.The lightning flash with arrowhead symbol, within an equilateraltriangle, is intended to alert the user to the presence of uninsulated"dangerous voltage" within the products ' enclosure that may be ofsufficient magnitude to constitute a risk of electric shockThe exclamation point within an equilateral triangle is intended toalert the user to the presence of important operating andmaintenance (servicing) instructions in the literature accompanyingthe appliance.WARNING: TO PREVENT FIRE OR SHOCK HAZARD, DO NOTEXPOSE THIS UNIT TO RAIN OR MOISTURE.CAUTION: TO PREVENT ELECTRIC SHOCK, MATCH WIDE BLADEOF THE PLUG TO THE WIDE SLOT AND FULLY INSERT.
BEFORE YOU STARTTHIS PRODUCT MAY REQUIRE PROFESSIONAL INSTALLATIONLOREX IS COMMITTED TO FULFILLING YOUR SECURITY NEEDS We have developed user friendly products and documentation.Please read the Quick Start Guide and User Manual before youinstall this product. Consumer Guides and Video Tutorials are available on our website at www.lorexcctv.com/support If you require further installation assistance, please visitwww.lorexcctv.com/installation or contact a professionalinstaller. Please refer to the “Need Help” insert for technical support andcustomer care information. Please note that once the components of this product have beenunsealed, you cannot return this product directly to the storewithout the original packaging.www.lorexcctv.com
AVANT DECOMMENCERANTES DEEMPEZARCE PRODUIT POURRAIT EXIGER UNEINSTALLATION PROFESSIONNELLEESTE PRODUCTO PUEDE EXIGIR UNAINSTALACIÓN PROFESIONALLOREX S’ENGAGE À SATISFAIREVOS BESOINS SÉCURITAIRESLOREX SE COMPROMETE A SATISFACERSUS NECESIDADES EN SEGURIDAD Veuillez lire le guide de démarrage rapide et lemode d’emploi avant d’installer ce produit. Favor de leer la guía de instalación rápida y laguía del usuario antes de instalar este producto. Les guides du consommateur et les séancesde tutorat vidéo sont disponibles sur l’Internet envisitant www.lorexcctv.com/support Puede conseguir las guías del consumidor ylos cursos en enseñanza video sobre el Internetvisitando www.lorexcctv.com/support Si vous avez besoin de l’aide pour l’installation,veuillez visiter www.lorexcctv.com/installationou contactez un spécialiste en installation Si necesita ayuda para la instalación, visitewww.lorexcctv.com/installation o contacte unespecialista en instalaciones Veuillez référer à l’insert “Need Help” pourob tenir de l’information sur le service à la clientèle et le support technique Favor de referir al documento “Need Help” paraobtener información acerca del servicio al clientey al soporte técnico Veuillez constater qu’une fois que lescom posantes de ce produit ont été retirées del’emballage, vous ne pourrez plus retourner ceproduit directement au magasin. Favor de notar que una vez que los componentes de este producto han sido removidos delembalaje, no podrá devolver este producto directamente a la tiendaw w w . l o r e x c c t v . c o m
NEED HELP?CONTACT US FIRSTDO NOT RETURN THIS PRODUCT TO THE STOREPlease make sure to register your product at www.lorexcctv.com to receive product updates and information3Easy Ways to Contact Us: Online:Product Support is available 24/7 including productinformation, user manuals, quick start up guides an d F A Q ’ sat www.lorexcctv.com/supportTo order accessories, visitw ww.lorexcctv.com By Email:Technical Support (for technical/installation issues)s u pport@lorexcorp.comCustomer Care (for warranty and accessory sales)c u stomerservice@lorexcorp.comCustomer Feedbacki n f o@lorexcorp.com By Phone:N O RTH AMERICA: 1-888-425-6739 (1-888-42-LOREX)M E XICO: 1-800-514-6739I N TERNATIONAL: 800-425-6739-0(Example: From the UK, dial 00 instead of )Technical Support (for technical/installation issues)Press option 1 for English, and then press option 1ORCustomer Care (for warranty and accessory sales)Press option 1 for English, and then press options 2 t o 5
NECESITA AYUDAVOUS AVEZ BESOIND’AIDE?COMUNÍQUESE PRIMEROCON NOSOTROSCONTACTEZ-NOUSD’ABORDNO DEVUELVA ESTE PRODUCTO A LA TIENDANE RETOURNEZ PAS CE PRODUIT AU MAGASINCerciórese de por favor colocar su producto en www.lorexcctv.com/registration para recibir actualizaciones y la información del productoVeuillez veiller à enregistrer votre produit à www.lorexcctv.com/registration pour recevoir des mises àjour et l’information de produit33maneras sencillas de comunicarsecon nosotros : wwwEn línea:apoyo al producto disponible 24/7 incluyendo información del producto, manuales para el usuario, guíasde inicio rápido y preguntas más frecuentes enfaçons faciles de nous contacter : wwwwww.lorexcctv.com/supportPour commander des accessoires, visitezwww.lorexcctv.comPor Correo Electrónico:soporte técnico (para asuntos técnicos/la instalación)www.lorexcctv.com support@lorexcorp.comOPar Courriel:support technique (pour les questions techniques etd’installation) support@lorexcorp.comOUservice à la clientèle (pour les questions de garantieet les ventes d’accessoires)servicio al cliente (respecto a la garantía y a la ventade accesorios) le support des produits est disponible 24 heures sur 24, 7jours sur 7, y compris les informations sur les produits, lesguides de l’utilisateur, les guides de démarrage rapide et lesfoires à questionswww.lorexcctv.com/supportPara colocar pedidos de accesorios, visite En @lorexcorp.comComentarios de clienteCommentaires des clientsinfo@lorexcorp.cominfo@lorexcorp.comPor Teléfono:L’Amérique du Nord: 1-888-425-6739 (1-888-42-lorex)MEXICO: 1-800-514-6739INTERNACIONAL: 800-425-6739-0(Ejemplo: Desde el Reino Unido, marque el 00 en lugar del )soporte técnico (para asuntos técnicos/la instalación)oprima la opción 1 para inglés y luego oprima la opción 1Oservicio al cliente (respecto a la garantía y a la venta deaccesorios) oprima la opción 1 para inglés y luego oprimalas opciones 2 A 5sus opiniones son bienvenidas eninfo@lorexcorp.compara colocar pedidos de accesorios, visitewww.lorexcctv.com Par Téléphone:Norte América: 1-888-425-6739 (1-888-42-lorex)MEXICO: 1-800-514-6739INTERNATIONAL: 800-425-6739-0(Exemple: À partir du Royaume-Uni, composez 00 au lieu de )support technique (pour les questions techniques etd’installation) appuyez sur l’option 1 pour l’anglais, etensuite sur l’option 1OUservice à la clientèle (pour les questions de garantieet les ventes d’accessoires) appuyez sur l’option 1 pourl’anglais, et ensuite sur les options 2 à 5nous serions heureux de recevoir voscommentaires à info@lorexcorp.com pourcommander des accessoires, visitezwww.lorexcctv.com
Important SafeguardsIn addition to the careful attention devoted to quality standards in the manufacture process of yourvideo product, safety is a major factor in the design of every instrument. However, safety is yourresponsibility too. This sheet lists important information that will help to assure your enjoymentand proper use of the video product and accessory equipment. Please read them carefully beforeoperating and using your video product.Installation1. Read and Follow Instructions - All the safety andoperating instructions should be read before thevideo product is operated. Follow all operatinginstructions.2. Retain Instructions - The safety and operatinginstructions should be retained for future reference.3. Heed Warnings - Comply with all warnings on thevideo product and in the operating instructions.4. Polarization - Do not defeat the safety purpose of thepolarized or grounding-type plug.A polarized plug has two blades withone wider than the other.A grounding type plug has two bladesand a third grounding prong.The wide blade or the third prong areprovided for your safety.If the provided plug does not fit intoyour outlet, consult an electrician forreplacement of the obsolete outlet5. Power Sources - This video product should beoperated only from the type of power sourceindicated on the marking label. If you are not sure ofthe type of power supply to your location, consultyour video dealer or local power company. For videoproducts intended to operate from battery power, orother sources, refer to the operating instructions.6. Overloading - Do not overload wall outlets ofextension cords as this can result in the risk of fireor electric shock. Overloaded AC outlets, extensioncords, frayed power cords, damaged or cracked wireinsulation, and broken plugs are dangerous. Theymay result in a shock or fire hazard. Periodicallyexamine the cord, and if its appearance indicatesdamage or deteriorated insulation, have it replacedby your service technician.7. Power-Cord Protection - Power supply cords shouldbe routed so that they are not likely to be walked onor pinched by items placed upon or against them,paying particular attention to cords at plugs,convenience receptacles, and the point where theyexit from the video product.8. Ventilation - Slots and openings in the case areprovided for ventilation to ensure reliable operationof the video product and to protect it fromoverheating. These openings must not be blocked orcovered. The openings should never be blocked byplacing the video equipment on a bed, sofa, rug, orother similar surface. This video product shouldnever be placed near or over a radiator or heatregister. This video product should not be placed ina built-in installation such as a bookcase or rackunless proper ventilation is provided or the videoproduct manufacturer’s instructions have beenfollowed.9. Attachments - Do not use attachments unlessrecommended by the video product manufacturer asthey may cause a hazard.10. Camera Extension Cables – Check the rating of yourextension cable(s) to verify compliance with yourlocal authority regulations prior to installation.11. Water and Moisture - Do not use this video productnear water. For example, near a bath tub, wash bowl,kitchen sink or laundry tub, in a wet basement, neara swimming pool and the like.Caution: Maintain electrical safety. Power lineoperated equipment or accessories connected tothis unit should bear the UL listing mark of CSAcertification mark on the accessory itself and shouldnot be modified so as to defeat the safety features.This will help avoid any potential hazard fromelectrical shock or fire. If in doubt, contact qualifiedservice personnel.12. Accessories - Do not place thisvideo equipment on an unstablecart, stand, tripod, or table. Thevideo equipment may fall, causingserious damage to the videoproduct. Use this video productonly with a cart, stand, tripod,bracket, or table recommended by the manufactureror sold with the video product. Any mounting of theproduct should follow the manufacturer’sinstructions and use a mounting accessoryrecommended by the manufacturer.vii
ServiceUse13. Servicing - Do not attempt to service this videoequipment yourself as opening or removing coversmay expose you to dangerous voltage or otherhazards. Refer all servicing to qualified servicepersonnel.19. Cleaning - Unplug the video product from the walloutlet before cleaning. Do not use liquid cleaners oraerosol cleaners. Use a damp cloth for cleaning.14. Conditions Requiring Service - Unplug this videoproduct from the wall outlet and refer servicing toqualified service personnel under the followingconditions.A. When the power supply cord or plug isdamaged.B. If liquid has been spilled or objects have falleninto the video product.C. If the video product has been exposed to rainor water.D. If the video product does not operate normallyby following the operating instructions. Adjustonly those controls that are covered by theoperating instructions. Improper adjustment ofother controls may result in damage and willoften require extensive work by a qualifiedtechnician to restore the video product to itsnormal operation.E. If the video product has been dropped or thecabinet has been damaged.F. When the video product exhibits a distinctchange in performance. This indicates a need forservice.15. Replacement Parts - When replacement parts arerequired, have the service technician verify that thereplacements used have the same safetycharacteristics as the original parts. Use ofreplacements specified by the video productmanufacturer can prevent fire, electric shock orother hazards.16. Safety Check - Upon completion of any service orrepairs to this video product, ask the servicetechnician to perform safety checks recommendedby the manufacturer to determine that the videoproduct is in safe operating condition.17. Wall or Ceiling Mounting - The cameras providedwith this system should be mounted to a wall orceiling only as instructed in this guide, using theprovided mounting brackets.18. Heat - The product should be situated away fromheat sources such as radiators, heat registers,stoves, or other products (including amplifiers) thatproduce heat.viii20. Product and Cart Combination - Video and cartcombination should be moved with care. Quick stops,excessive force, and uneven surfaces may cause thevideo product and car combination to overturn.21. Object and Liquid Entry - Never push objects for anykind into this video product through openings as theymay touch dangerous voltage points or “short-out”parts that could result in a fire or electric shock.Never spill liquid of any kind on the video product.22. Lightning - For added protection for this videoproduct during a lightning storm, or when it is leftunattended and unused for long periods of time,unplug it from the wall outlet and disconnect theantenna or cable system. This will prevent damageto the video product due to lightning and power linesurges.
General Precautions1. All warnings and instructions in this manual should be followed.2. Remove the plug from the outlet before cleaning. Do not use liquid aerosol detergents. Use awater dampened cloth for cleaning.3. Do not use this unit in humid or wet places.4. Keep enough space around the unit for ventilation. Slots and openings in the storage cabinetshould not be blocked.5. During lightning storms, or when the unit is not used for a long time, disconnect the powersupply, antenna, and cables to protect the unit from electrical surge.FCC CLASS B NOTICENoteThis equipment has been tested and found to comply with the limits for a Class B digital device, pursuant toPart 15 of the FCC Rules. These limits are designed to provide reasonable protection against harmfulinterference in a residential installation. This equipment generates, uses, and can radiate radio frequencyenergy and, if not in-stalled and used in accordance with the instruction, may cause harmful interference toradio communications.However, there is no guarantee that interference will not occur in a particular installation. If this equipmentdoes cause harmful interference to radio or television reception (which can be determined by turning theequipment on and off), the user is encouraged to try to correct the interference by one or more of the followingmeasures: Reorient or relocate the receiving antenna Increase the separation between the equipment and receiver Connect the equipment into an outlet on a circuit different from that to which the receiver isconnected Consult the dealer or an experienced radio or television technician for assistanceThis equipment has been certified and found to comply with the limits regulated by FCC, EMC, andLVD. Therefore, it is designated to provide reasonable protection against interference and will notcause interference with other appliance usage.However, it is imperative that the user follows this manuals guideline to avoid improper usagewhich may result in damage to the unit, electrical shock and fire hazard injuryIn order to improve the feature functions and quality of this product, the specifications are subjectto change without notice from time to time.www.lorexcctv.comix
Features Stand-alone network 4/8/16 channelDVR Small form factor (11.5" x 1.6"x 7.0") EDGE design for stand alone or VESAmount (Wall & LCD) 3D graphics for sharp, color rich, highcontrast video DVI/VGA output for display on PCmonitor or TV with DVI/VGA input (DVI to VGA adapter included)* HDMI compatible† H.264 compression for efficient file transfer & storage (up to 50% more than MPEG-4)** Simultaneous Pentaplex operation (view, record, playback, and remote view and backup) View and record at VGA resolution: up to 640x480 per channel Supports up to 1TB "Security Certified" SATA HDD "FLEX" IR extender (Remote control does not require line-of-sight) USB mouse, Internet browser, QuickTime Player , USB backup 4/1 Alarm input/output 2-channel audio Record on motion detection, schedule or continuous Email notification of events (8/16-channel only) Internet Remote Functions: View, Search & Playback, Backup and Setup‡ Windows Vista compatible Free Lorex DDNS (Dynamic Domain Name System) service keeps you connected anywhere,all the time*DVI output only on 8/16-channel models; VGA output only on 4-channel models.†DVI to HDMI adapter cable required (not included).**Recording capacity may vary based on recording resolution & quality, lighting conditions and movement in the scene.‡Requires a high speed Internet connection and router (not included)Windows Vista is a registered trademark of Microsoft Corporation. Other trademarks are the property of Lorex Technology Inc. Wereserve the right to change models, configurations or specifications without notice or liability. Product may not be exactly as shown.x
TABLE OF CONTENTSGetting Started . . . . . . . . . . . . . . . . . . . . . . . . . . . . . . . . . . . . . . . . . . . . . . . . . 1Basic Setup . . . . . . . . . . . . . . . . . . . . . . . . . . . . . . . . . . . . . . . . . . . . . . . . . . . . . . . . . . . . . 2Mount the System . . . . . . . . . . . . . . . . . . . . . . . . . . . . . . . . . . . . . . . . . . . . . . . . . . . . . . . . . . . . . . . . . . . . . 2Connect the Cameras . . . . . . . . . . . . . . . . . . . . . . . . . . . . . . . . . . . . . . . . . . . . . . . . . . . . . . . . . . . . . . . . . . 2Connect the Monitor . . . . . . . . . . . . . . . . . . . . . . . . . . . . . . . . . . . . . . . . . . . . . . . . . . . . . . . . . . . . . . . . . . . 2Connect the Ethernet cable . . . . . . . . . . . . . . . . . . . . . . . . . . . . . . . . . . . . . . . . . . . . . . . . . . . . . . . . . . . . . 2Connect the Flex-IR Extender . . . . . . . . . . . . . . . . . . . . . . . . . . . . . . . . . . . . . . . . . . . . . . . . . . . . . . . . . . . 2Front Panel . . . . . . . . . . . . . . . . . . . . . . . . . . . . . . . . . . . . . . . . . . . . . . . . . . . . . . . . . . . . . 3All models . . . . . . . . . . . . . . . . . . . . . . . . . . . . . . . . . . . . . . . . . . . . . . . . . . . . . . . . . . . . . . . . . . . . . . . . . . . . . . . . . . . 3Rear Panel . . . . . . . . . . . . . . . . . . . . . . . . . . . . . . . . . . . . . . . . . . . . . . . . . . . . . . . . . . . . . . 34-channel . . . . . . . . . . . . . . . . . . . . . . . . . . . . . . . . . . . . . . . . . . . . . . . . . . . . . . . . . . . . . . . . . . . . . . . . . . . . . . . . . . . 3Rear Panel . . . . . . . . . . . . . . . . . . . . . . . . . . . . . . . . . . . . . . . . . . . . . . . . . . . . . . . . . . . . . . 48-channel . . . . . . . . . . . . . . . . . . . . . . . . . . . . . . . . . . . . . . . . . . . . . . . . . . . . . . . . . . . . . . . . . . . . . . . . . . . . . . . . . . . 416-channel . . . . . . . . . . . . . . . . . . . . . . . . . . . . . . . . . . . . . . . . . . . . . . . . . . . . . . . . . . . . . . . . . . . . . . . . . . . . . . . . . . 4Mouse Control . . . . . . . . . . . . . . . . . . . . . . . . . . . . . . . . . . . . . . . . . . . . . . . . . . . . . . . . . . 5Remote Control . . . . . . . . . . . . . . . . . . . . . . . . . . . . . . . . . . . . . . . . . . . . . . . . . . . . . . . . . 6Starting the System . . . . . . . . . . . . . . . . . . . . . . . . . . . . . . . . . . . . . . . . . . . . . 8Onscreen Display . . . . . . . . . . . . . . . . . . . . . . . . . . . . . . . . . . . . . . . . . . . . . . . . . . . . . . . . 8Using the Split-Screen Selector . . . . . . . . . . . . . . . . . . . . . . . . . . . . . . . . . . . . . . . . . . . 12Setting the Date and Time . . . . . . . . . . . . . . . . . . . . . . . . . . . . . . . . . . . . . . . 13Recording. . . . . . . . . . . . . . . . . . . . . . . . . . . . . . . . . . . . . . . . . . . . . . . . . . . . . 14Event Recording . . . . . . . . . . . . . . . . . . . . . . . . . . . . . . . . . . . . . . . . . . . . . . . . . . . . . . . . 14Recording Audio . . . . . . . . . . . . . . . . . . . . . . . . . . . . . . . . . . . . . . . . . . . . . . . . . . . . . . . . 14Playback. . . . . . . . . . . . . . . . . . . . . . . . . . . . . . . . . . . . . . . . . . . . . . . . . . . . . . 15Playback Markers . . . . . . . . . . . . . . . . . . . . . . . . . . . . . . . . . . . . . . . . . . . . . . . . . . . . . . 16Event List . . . . . . . . . . . . . . . . . . . . . . . . . . . . . . . . . . . . . . . . . . . . . . . . . . . . . 17Channel Filter . . . . . . . . . . . . . . . . . . . . . . . . . . . . . . . . . . . . . . . . . . . . . . . . . . . . . . . . . . 17Smart Search . . . . . . . . . . . . . . . . . . . . . . . . . . . . . . . . . . . . . . . . . . . . . . . . . . . . . . . . . . 18Event Details . . . . . . . . . . . . . . . . . . . . . . . . . . . . . . . . . . . . . . . . . . . . . . . . . . . . . . . . . . . 18Searching for Recorded Data . . . . . . . . . . . . . . . . . . . . . . . . . . . . . . . . . . . . . . . . . . . . . 19Managing Passwords . . . . . . . . . . . . . . . . . . . . . . . . . . . . . . . . . . . . . . . . . . . 21Using the Password Wheel . . . . . . . . . . . . . . . . . . . . . . . . . . . . . . . . . . . . . . . . . . . . . . . 21Enabling and Disabling Passwords . . . . . . . . . . . . . . . . . . . . . . . . . . . . . . . . . . . . . . . . 21Changing Passwords . . . . . . . . . . . . . . . . . . . . . . . . . . . . . . . . . . . . . . . . . . . . . . . . . . . . 22Using the Main Menu . . . . . . . . . . . . . . . . . . . . . . . . . . . . . . . . . . . . . . . . . . . 23Camera . . . . . . . . . . . . . . . . . . . . . . . . . . . . . . . . . . . . . . . . . . . . . . . . . . . . . . . . . . . . . . . 24xi
Setup . . . . . . . . . . . . . . . . . . . . . . . . . . . . . . . . . . . . . . . . . . . . . . . . . . . . . . . . . . . . . . . . . 24Record . . . . . . . . . . . . . . . . . . . . . . . . . . . . . . . . . . . . . . . . . . . . . . . . . . . . . . . . . . . . . . . . 25Schedule . . . . . . . . . . . . . . . . . . . . . . . . . . . . . . . . . . . . . . . . . . . . . . . . . . . . . . . . . . . . . . . . . . . . . . . . . . . 27Format HDD . . . . . . . . . . . . . . . . . . . . . . . . . . . . . . . . . . . . . . . . . . . . . . . . . . . . . . . . . . . . . . . . . . . . . . . . . 28Storage Calculator . . . . . . . . . . . . . . . . . . . . . . . . . . . . . . . . . . . . . . . . . . . . . . . . . . . . . . . . . . . . . . . . . . . . . . . . . . . 28Alarm . . . . . . . . . . . . . . . . . . . . . . . . . . . . . . . . . . . . . . . . . . . . . . . . . . . . . . . . . . . . . . . . . 28Motion . . . . . . . . . . . . . . . . . . . . . . . . . . . . . . . . . . . . . . . . . . . . . . . . . . . . . . . . . . . . . . . . . . . . . . . . . . . . . 30Backup . . . . . . . . . . . . . . . . . . . . . . . . . . . . . . . . . . . . . . . . . . . . . . . . . . . . . . . . . . . . . . . . 31Formatting the USB Drive . . . . . . . . . . . . . . . . . . . . . . . . . . . . . . . . . . . . . . . . . . . . . . . . . . . . . . . . . . . . . 31LAN . . . . . . . . . . . . . . . . . . . . . . . . . . . . . . . . . . . . . . . . . . . . . . . . . . . . . . . . . . . . . . . . . . 32Upgrading Firmware . . . . . . . . . . . . . . . . . . . . . . . . . . . . . . . . . . . . . . . . . . . . . . . . . . . . . . . . . . . . . . . . . . 33REMOTE ACCESS: DVR Netviewer . . . . . . . . . . . . . . . . . . . . . . . . . . . . . . . . 34System Requirements . . . . . . . . . . . . . . . . . . . . . . . . . . . . . . . . . . . . . . . . . . . . . . . . . . . 34Configuring QuickTime . . . . . . . . . . . . . . . . . . . . . . . . . . . . . . . . . . . . . . . . . . . . . . . . . . 35Using DVR Netviewer . . . . . . . . . . . . . . . . . . . . . . . . . . . . . . . . . . . . . . . . . . . 36Network User Profiles . . . . . . . . . . . . . . . . . . . . . . . . . . . . . . . . . . . . . . . . . . . . . . . . . . . 36Logging In to Your System . . . . . . . . . . . . . . . . . . . . . . . . . . . . . . . . . . . . . . . . . . . . . . . . 36DVR Netviewer Main Screen . . . . . . . . . . . . . . . . . . . . . . . . . . . . . . . . . . . . . . . . . . . . . . 38Live Viewing . . . . . . . . . . . . . . . . . . . . . . . . . . . . . . . . . . . . . . . . . . . . . . . . . . . . . . . . . . . 40Playback . . . . . . . . . . . . . . . . . . . . . . . . . . . . . . . . . . . . . . . . . . . . . . . . . . . . . . . . . . . . . . 40Using the Pop-Up Calendar . . . . . . . . . . . . . . . . . . . . . . . . . . . . . . . . . . . . . . . . . . . . . . . 41Backup . . . . . . . . . . . . . . . . . . . . . . . . . . . . . . . . . . . . . . . . . . . . . . . . . . . . . . . . . . . . . . . . 42Setup . . . . . . . . . . . . . . . . . . . . . . . . . . . . . . . . . . . . . . . . . . . . . . . . . . . . . . . . . . . . . . . . . 44Streaming . . . . . . . . . . . . . . . . . . . . . . . . . . . . . . . . . . . . . . . . . . . . . . . . . . . . . . . . . . . . . . . . . . . . . . . . . . 44Bitrate . . . . . . . . . . . . . . . . . . . . . . . . . . . . . . . . . . . . . . . . . . . . . . . . . . . . . . . . . . . . . . . . . . . . . . . . . . . . . 44PPPoE . . . . . . . . . . . . . . . . . . . . . . . . . . . . . . . . . . . . . . . . . . . . . . . . . . . . . . . . . . . . . . . . . . . . . . . . . . . . . 45DDNS . . . . . . . . . . . . . . . . . . . . . . . . . . . . . . . . . . . . . . . . . . . . . . . . . . . . . . . . . . . . . . . . . . . . . . . . . . . . . . 45System Status . . . . . . . . . . . . . . . . . . . . . . . . . . . . . . . . . . . . . . . . . . . . . . . . . . . . . . . . . . . . . . . . . . . . . . . 47Resuming Live Viewing . . . . . . . . . . . . . . . . . . . . . . . . . . . . . . . . . . . . . . . . . . . . . . . . . . . . . . . . . . . . . . . . 47Mail . . . . . . . . . . . . . . . . . . . . . . . . . . . . . . . . . . . . . . . . . . . . . . . . . . . . . . . . . . . . . . . . . . . . . . . . . . . . . . . . 48Title . . . . . . . . . . . . . . . . . . . . . . . . . . . . . . . . . . . . . . . . . . . . . . . . . . . . . . . . . . . . . . . . . . . . . . . . . . . . . . . 48Appendix A: System Specifications . . . . . . . . . . . . . . . . . . . . . . . . . . . . . . .Appendix B: Setting up Local and Remote Viewing . . . . . . . . . . . . . . . . . .Appendix C: Changing Ports On Your System . . . . . . . . . . . . . . . . . . . . . . .Appendix D: Connecting Motion / Alarm Devices . . . . . . . . . . . . . . . . . . . .Appendix E: Full Connectivity Diagram . . . . . . . . . . . . . . . . . . . . . . . . . . . .Appendix F: Replacing the Hard Drive . . . . . . . . . . . . . . . . . . . . . . . . . . . . .Appendix G: Connecting Audio . . . . . . . . . . . . . . . . . . . . . . . . . . . . . . . . . . .Appendix H: Playing Saved Video . . . . . . . . . . . . . . . . . . . . . . . . . . . . . . . . .Appendix I: Taking Screenshots . . . . . . . . . . . . . . . . . . . . . . . . . . . . . . . . . .Troubleshooting . . . . . . . . . . . . . . . . . . . . . . . . . . . . . . . . . . . . . . . . . . . . . . .xii49516165666770717274
GETTING STARTEDThe system comes with the following components:POWER SUPPLYEDGE DVRREMOTE CONTROL*MOUNTING KITUSB MOUSEDVI / VGA ADAPTER**ETHERNET CABLEFLEX-IR EXTENDERINSTRUCTION MANUALQUICKSTART GUIDEDOCUMENTATION CD*Remote control included with the system may vary depending on model.**Only included with 8 and 16-channel models.HARD DRIVE SIZE, NUMBER OF CHANNELS, AND CAMERA CONFIGURATION MAY VARYBY MODEL. PLEASE REFER TO YOUR PACKAGE FOR SPECIFIC DETAILS.CHECK YOUR PACKAGE TO CONFIRM THAT YOU HAVE RECEIVED THE COMPLETE SYSTEM,INCLUDING ALL COMPONENTS SHOWN ABOVE.1
Getting StartedBasic SetupThe system is designed to mount to the back of most LCD monitors with a VESA mount. If desired,you can mount it to a wall or leave the system in a standard horizontal position.ATTENTION: You can only mount the system to an LCDmonitor that has a VESA mount and an independent stand.1. Mount the Systema. Screw the provided mounting screws into the two topholes in the rear panel of your LCD monitor. Make surethe screws are only 3/4 of the way in; this will allowsufficient clearance to hang the system.b. Carefully place the system (front panel facing up) overthe screws and slide down into place.2. Connect the Camerasa. Connect BNC cameras to the BNC ports on the rearpanel.Figure 1.0 Mounting holes on bottom panelVESA mount3. Connect the Monitora. Connect the VGA / DVI cable (not included) from your LCDmonitor to the VGA port (4 CH) / DVI port (8/16 CH only) onthe rear panel of the system.4. Connect the Ethernet cablea. Connect the included Ethernet cable to the LAN port onthe
LOREX SE COMPROMETE A SATISFACER SUS NECESIDADES EN SEGURIDAD LOREX S’ENGAGE À SATISFAIRE VOS BESOINS SÉCURITAIRES ESTE PRODUCTO PUEDE EXIGIR UNA INSTALACIÓN PROFESIONAL CE PRODUIT POURRAIT EXIGER UNE INSTALLATION PROFESSIONNELLE Veuillez lire