Transcription
0voy.bk : 0VOYFRNT.FM5 Page i Thursday, July 2, 1998 1:13 PMHP ProCurveSwitch 2400M and 4000MManagement and Configuration Guide
0voy.bk : 0VOYFRNT.FM5 Page ii Thursday, July 2, 1998 1:13 PM Copyright 1998 Hewlett-Packard CompanyAll Rights Reserved.This document contains information which is protected bycopyright. Reproduction, adaptation, or translation withoutprior permission is prohibited, except as allowed under thecopyright laws.Publication Number5967-6914June 1998Applicable ProductDisclaimerThe information contained in this document is subject tochange without notice.HEWLETT-PACKARD COMPANY MAKES NO WARRANTYOF ANY KIND WITH REGARD TO THIS MATERIAL,INCLUDING, BUT NOT LIMITED TO, THE IMPLIEDWARRANTIES OF MERCHANTABILITY AND FITNESSFOR A PARTICULAR PURPOSE. Hewlett-Packard shall notbe liable for errors contained herein or for incidental orconsequential damages in connection with the furnishing,performance, or use of this material.Hewlett-Packard assumes no responsibility for the use orreliability of its software on equipment that is not furnishedby Hewlett-Packard.HP ProCurve Switch 4000M (J4121A)HP ProCurve Switch 2400M (J4122A)WarrantyTrademark CreditsSee the Customer Support/Warranty booklet included withthe product.Microsoft, Windows, Windows 95, and Microsoft WindowsNT are registered trademarks of Microsoft Corporation.Internet Explorer is a trademark of Microsoft Corporation.Ethernet is a registered trademark of Xerox Corporation.Netscape is a registered trademark of Netscape Corporation.A copy of the specific warranty terms applicable to yourHewlett-Packard products and replacement parts can beobtained from your HP Sales and Service Office orauthorized dealer.Hewlett-Packard Company8000 Foothills Boulevard, m/s 5551Roseville, California 95747-5551http://www.hp.com/go/network city
0voy.bk : 0VOYFRNT.FM5 Page iii Thursday, July 2, 1998 1:13 PMPrefacePrefaceUse of This Guide and Other Switch 2400M and Switch4000M DocumentationThis guide describes how to use the browser interface and console interfacefor the HP ProCurve Switch 2400M and HP ProCurve Switch 4000M (hereafterreferred to as the “Switch 2400M and Switch 4000M”). If you need information on specific parameters in the console interface,refer to the online help provided in the console interface.If you need information on specific features in the HP Web BrowserInterface (hereafter referred to as the “web browser interface”), use theonline help available with the web browser interface. For more information on Help options, refer to “Online Help for the HP Web BrowserInterface” on page 3-9.If you need further information on Hewlett-Packard switch technology,refer to HP’s Network City website at:http://www.hp.com/go/network cityiii
0voy.bk : 0VOYFRNT.FM5 Page iv Thursday, July 2, 1998 1:13 PM
0voy.bk : 0VOYTOC.FM Page v Thursday, July 2, 1998 1:13 PMContents1 Selecting a Management Interface2 Configuring an IP Address on the SwitchMethods for Configuring an IP Address and Subnet Mask . . . . . . . 2-2Manually Configuring an IP Address . . . . . . . . . . . . . . . . . . . . . . . . . . . 2-33 Using the HP Web Browser InterfaceOverview . . . . . . . . . . . . . . . . . . . . . . . . . . . . . . . . . . . . . . . . . . . . . . . . . . . . . 3-1Web Browser Interface Requirements . . . . . . . . . . . . . . . . . . . . . . . . . . 3-2Starting an HP Web Browser Interface Session with the Switch . . 3-3Using a Standalone Web Browser in a PC or UNIX Workstation . . . . 3-3Using HP TopTools for Hubs & Switches . . . . . . . . . . . . . . . . . . . . . . . 3-4Tasks for Your First HP Web Browser Interface Session . . . . . . . . . 3-5Viewing the “First Time Install” Window . . . . . . . . . . . . . . . . . . . . . . . . 3-5Creating Usernames and Passwords in the Browser Interface . . . . . . 3-7Online Help for the HP Web Browser Interface . . . . . . . . . . . . . . . . . . 3-9The Web Browser Interface Screen Layout . . . . . . . . . . . . . . . . . . . . 3-11The Overview Window . . . . . . . . . . . . . . . . . . . . . . . . . . . . . . . . . . . . . . 3-11The Port Utilization and Status Displays . . . . . . . . . . . . . . . . . . . . . . . 3-12The Alert Log . . . . . . . . . . . . . . . . . . . . . . . . . . . . . . . . . . . . . . . . . . . . . . 3-14The Tab Bar . . . . . . . . . . . . . . . . . . . . . . . . . . . . . . . . . . . . . . . . . . . . . . . 3-19Setting Fault Detection Policy . . . . . . . . . . . . . . . . . . . . . . . . . . . . . . . . 3-234 Using the Switch Console InterfaceOverview . . . . . . . . . . . . . . . . . . . . . . . . . . . . . . . . . . . . . . . . . . . . . . . . . . . . . 4-1Starting and Ending a Console Session . . . . . . . . . . . . . . . . . . . . . . . . . 4-2How To Start a Console Session: . . . . . . . . . . . . . . . . . . . . . . . . . . . . . . 4-2How To End a Console Session: . . . . . . . . . . . . . . . . . . . . . . . . . . . . . . . 4-3Main Menu Features . . . . . . . . . . . . . . . . . . . . . . . . . . . . . . . . . . . . . . . . . . 4-4v
0voy.bk : 0VOYTOC.FM Page vi Thursday, July 2, 1998 1:13 PMScreen Structure and Navigation . . . . . . . . . . . . . . . . . . . . . . . . . . . . . . . 4-5Using Password Security . . . . . . . . . . . . . . . . . . . . . . . . . . . . . . . . . . . . . . . 4-9To set Manager and Operator passwords: . . . . . . . . . . . . . . . . . . . . . . 4-10Rebooting the Switch . . . . . . . . . . . . . . . . . . . . . . . . . . . . . . . . . . . . . . . . . 4-13The Command Prompt . . . . . . . . . . . . . . . . . . . . . . . . . . . . . . . . . . . . . . . . 4-155 Using HP TopTools or Other SNMP Tools To Monitor andManage the SwitchSNMP Management Features . . . . . . . . . . . . . . . . . . . . . . . . . . . . . . . . . . 5-1SNMP Configuration Process . . . . . . . . . . . . . . . . . . . . . . . . . . . . . . . . . . 5-3Advanced Management: RMON and HP Extended RMON Support 5-4RMON . . . . . . . . . . . . . . . . . . . . . . . . . . . . . . . . . . . . . . . . . . . . . . . . . . . . . 5-4Extended RMON . . . . . . . . . . . . . . . . . . . . . . . . . . . . . . . . . . . . . . . . . . . . 5-46 Configuring the SwitchOverview . . . . . . . . . . . . . . . . . . . . . . . . . . . . . . . . . . . . . . . . . . . . . . . . . . . . . 6-1Configuration Features . . . . . . . . . . . . . . . . . . . . . . . . . . . . . . . . . . . . . . . 6-2Support URLs Feature . . . . . . . . . . . . . . . . . . . . . . . . . . . . . . . . . . . . . . . . . 6-4Support URL . . . . . . . . . . . . . . . . . . . . . . . . . . . . . . . . . . . . . . . . . . . . . . . 6-4Management Server URL . . . . . . . . . . . . . . . . . . . . . . . . . . . . . . . . . . . . . 6-5IP Configuration . . . . . . . . . . . . . . . . . . . . . . . . . . . . . . . . . . . . . . . . . . . . . . 6-6Configuring IP Addressing Parameters from the Web Browser Interface6-7Configuring IP Addressing Parameters from the Switch Console . . . 6-8How IP Addressing Affects Switch Operation . . . . . . . . . . . . . . . . . . . 6-10DHCP/Bootp Operation . . . . . . . . . . . . . . . . . . . . . . . . . . . . . . . . . . . . . 6-10Globally Assigned IP Network Addresses . . . . . . . . . . . . . . . . . . . . . . 6-14SNMP Communities . . . . . . . . . . . . . . . . . . . . . . . . . . . . . . . . . . . . . . . . . . 6-16Configuring SNMP Communities from the Switch Console . . . . . . . 6-16Trap Receivers . . . . . . . . . . . . . . . . . . . . . . . . . . . . . . . . . . . . . . . . . . . . . . . 6-19Configuring SNMP Communities from the Console . . . . . . . . . . . . . . 6-19Console/Serial Link . . . . . . . . . . . . . . . . . . . . . . . . . . . . . . . . . . . . . . . . . . 6-21Using the Switch Console To Configure the Console/Serial Link . . . 6-22vi
0voy.bk : 0VOYTOC.FM Page vii Thursday, July 2, 1998 1:13 PMSystem Information . . . . . . . . . . . . . . . . . . . . . . . . . . . . . . . . . . . . . . . . . . 6-23Configuring System Parameters from the Web Browser Interface . 6-23Configuring System Information from the Console . . . . . . . . . . . . . . 6-24Port Settings . . . . . . . . . . . . . . . . . . . . . . . . . . . . . . . . . . . . . . . . . . . . . . . . . 6-25Configuring Port Parameters from the Web Browser Interface . . . . 6-26Configuring Port Parameters from the Switch Console . . . . . . . . . . . 6-28Network Monitoring Port Features . . . . . . . . . . . . . . . . . . . . . . . . . . . . 6-29Configuring Port Monitoring from the Web Browser Interface . . . . 6-29Configuring Port Monitoring from the Switch Console . . . . . . . . . . . 6-31Spanning Tree Protocol (STP) . . . . . . . . . . . . . . . . . . . . . . . . . . . . . . . . 6-34Configuring STP from the Web Browser Interface . . . . . . . . . . . . . . . 6-35Using the Switch Console To Configure STP . . . . . . . . . . . . . . . . . . . 6-36How STP Operates . . . . . . . . . . . . . . . . . . . . . . . . . . . . . . . . . . . . . . . . . 6-37Traffic/Security Filter Features . . . . . . . . . . . . . . . . . . . . . . . . . . . . . . . 6-39Configuring Port Monitoring from the Switch Console . . . . . . . . . . . 6-39Filter Types and Operation . . . . . . . . . . . . . . . . . . . . . . . . . . . . . . . . . . 6-42Port-Based Virtual LANs (VLANs) . . . . . . . . . . . . . . . . . . . . . . . . . . . . . 6-44Overview of Using VLANs . . . . . . . . . . . . . . . . . . . . . . . . . . . . . . . . . . . 6-47Using the Switch Console To Configure VLAN Parameters . . . . . . . 6-48Further VLAN Operating Information . . . . . . . . . . . . . . . . . . . . . . . . . 6-55Effect of VLANs on Other Switch Features . . . . . . . . . . . . . . . . . . . . . 6-59VLAN Restrictions . . . . . . . . . . . . . . . . . . . . . . . . . . . . . . . . . . . . . . . . . . 6-60Load Balancing: Port Trunking . . . . . . . . . . . . . . . . . . . . . . . . . . . . . . . . 6-63Interoperability . . . . . . . . . . . . . . . . . . . . . . . . . . . . . . . . . . . . . . . . . . . . 6-65Trunk Configuration Options . . . . . . . . . . . . . . . . . . . . . . . . . . . . . . . . . 6-65Using the Console To Configure Port Trunks . . . . . . . . . . . . . . . . . . . 6-66Operating Information . . . . . . . . . . . . . . . . . . . . . . . . . . . . . . . . . . . . . . 6-69IP Multicast (IGMP) Service Features—Multimedia Traffic Control 6-71Configuring IGMP from the Web Browser Interface . . . . . . . . . . . . . 6-72Using the Switch Console To Configure IGMP . . . . . . . . . . . . . . . . . . 6-74How IGMP Operates . . . . . . . . . . . . . . . . . . . . . . . . . . . . . . . . . . . . . . . . 6-767 Monitoring and Analyzing Switch OperationOverview . . . . . . . . . . . . . . . . . . . . . . . . . . . . . . . . . . . . . . . . . . . . . . . . . . . . . 7-1vii
0voy.bk : 0VOYTOC.FM Page viii Thursday, July 2, 1998 1:13 PMStatus and Counters Screens . . . . . . . . . . . . . . . . . . . . . . . . . . . . . . . . . . 7-2General System Information . . . . . . . . . . . . . . . . . . . . . . . . . . . . . . . . . . 7-4Switch Management Address Information . . . . . . . . . . . . . . . . . . . . . . . 7-5Module Information . . . . . . . . . . . . . . . . . . . . . . . . . . . . . . . . . . . . . . . . . 7-6Port Status . . . . . . . . . . . . . . . . . . . . . . . . . . . . . . . . . . . . . . . . . . . . . . . . . 7-7Port Counters . . . . . . . . . . . . . . . . . . . . . . . . . . . . . . . . . . . . . . . . . . . . . . . 7-9Address Table . . . . . . . . . . . . . . . . . . . . . . . . . . . . . . . . . . . . . . . . . . . . . 7-13Port Address Table . . . . . . . . . . . . . . . . . . . . . . . . . . . . . . . . . . . . . . . . . 7-14Spanning Tree (STP) Information . . . . . . . . . . . . . . . . . . . . . . . . . . . . . 7-16IP Multicast (IGMP) Status . . . . . . . . . . . . . . . . . . . . . . . . . . . . . . . . . . 7-18VLAN Information . . . . . . . . . . . . . . . . . . . . . . . . . . . . . . . . . . . . . . . . . . 7-208 TroubleshootingTroubleshooting Approaches . . . . . . . . . . . . . . . . . . . . . . . . . . . . . . . . . . . 8-2Browser or Console Interface Problems . . . . . . . . . . . . . . . . . . . . . . . . 8-3Unusual Network Activity . . . . . . . . . . . . . . . . . . . . . . . . . . . . . . . . . . . . . 8-4Using the Event Log To Identify Problem Sources . . . . . . . . . . . . . . . 8-8Diagnostics . . . . . . . . . . . . . . . . . . . . . . . . . . . . . . . . . . . . . . . . . . . . . . . . . . 8-13Ping and Link Tests . . . . . . . . . . . . . . . . . . . . . . . . . . . . . . . . . . . . . . . . . 8-13Executing Ping or Link Tests from the Console Interface . . . . . . . . . 8-15Browse Configuration File . . . . . . . . . . . . . . . . . . . . . . . . . . . . . . . . . . . 8-17Using the Command Prompt . . . . . . . . . . . . . . . . . . . . . . . . . . . . . . . . . 8-18A File TransfersOverview . . . . . . . . . . . . . . . . . . . . . . . . . . . . . . . . . . . . . . . . . . . . . . . . . . . . A-1Downloading an Operating System (OS) . . . . . . . . . . . . . . . . . . . . . . . A-2Using TFTP To Download the OS File . . . . . . . . . . . . . . . . . . . . . . . . . A-2Using the SNMP-Based HP Download Manager . . . . . . . . . . . . . . . . . A-5Switch-to-Switch Download . . . . . . . . . . . . . . . . . . . . . . . . . . . . . . . . . A-5Using Xmodem to Download the OS File . . . . . . . . . . . . . . . . . . . . . . . A-6Troubleshooting TFTP Downloads . . . . . . . . . . . . . . . . . . . . . . . . . . . . A-7Transferring Switch Configurations . . . . . . . . . . . . . . . . . . . . . . . . . . . A-9viii
0voy.bk : 0VOYTOC.FM Page ix Thursday, July 2, 1998 1:13 PMB MAC Address ManagementOverview . . . . . . . . . . . . . . . . . . . . . . . . . . . . . . . . . . . . . . . . . . . . . . . . . . . . B-1The Base and VLAN MAC Addresses . . . . . . . . . . . . . . . . . . . . . . . . . . . B-2The Port MAC Addresses . . . . . . . . . . . . . . . . . . . . . . . . . . . . . . . . . . . . . B-3ix
0voy.bk : 0VOYTOC.FM Page x Thursday, July 2, 1998 1:13 PM
0voy.bk : 1VOY.FM5 Page 1 Thursday, July 2, 1998 1:13 PM1Selecting a ManagementInterfaceSelecting a Management InterfaceThis chapter describes the following: Management interfaces for the Switch 4000M and the Switch 2400M Advantages of using each interfaceUnderstanding Management InterfacesManagement interfaces enable you to reconfigure the switch and to monitorswitch status and performance.The HP Switch 4000M and the Switch 2400M offer the following interfaces:Note The web browser interface --an interface that is built into the switch andcan be accessed using a standard web browser (such as NetscapeNavigator or Microsoft Internet Explorer). For specific requirements, see“Web Browser Interface Requirements” on page 3-2. The switch console—an ASCII console interface built into the switch HP TopTools for Hubs & Switches--an easy-to-use, browser-basednetwork management tool that works with HP proactive networkingfeatures built into managed HP hubs and switches (included on a CD withthe switch at no extra cost—available Fall 1998)HP TopTools is designed for installation on a network management workstation. For this reason, the HP TopTools system requirements are different fromthe system requirements for accessing the switch’s web browser interfacefrom a non-management PC or workstation. For HP TopTools requirements,refer to the information printed on the sleeve in which the HP TopTools CDis shipped, or to the system requirements information included in the user’sguide included on the HP TopTools CD.Each interface consists of a series of management features, accessed eitherthrough a menu-driven screen system or a split Window with tab navigation.Each approach has its advantages that are described in the next sections.This manual describes how to use the web browser interface (chapter 3) andthe switch console (chapter 4), and how to configure the switch using eitherinterface (chapter 6).1-1
0voy.bk : 1VOY.FM5 Page 2 Thursday, July 2, 1998 1:13 PMSelecting a Management InterfaceSelecting a ManagementInterfaceTo use HP TopTools for Hubs & Switches, refer to the HP TopTools User’sGuide and the TopTools online help, both of which are available on theCD-ROM shipped with your HP switch. For information on the methods foraccessing browser interface Help for the Switch 4000M and Switch 2400M,refer to “Online Help for the Web Browser Interface” on page 3-9.1-2
0voy.bk : 1VOY.FM5 Page 3 Thursday, July 2, 1998 1:13 PMSelecting a Management InterfaceAdvantages of Using the HP Web Browser InterfaceSelecting a ManagementInterfaceFigure 1-1. Example of the HP Web Browser Interface Display Easy access to the switch from anywhere on the network Familiar browser interface--locations of window objects consistentwith commonly used browsers Faster configuration, avoid cycling through a series of screens—requires less keystrokes, uses mouse clicking for navigation; no terminalsetup; Telnet access to the switch console Many features have all their fields in one screen so you can view allvalues at once More visual cues, using colors, status bars, device icons, and othergraphical objects to represent values rather than numeric values Display of acceptable ranges of values available in configuration listboxes1-3
0voy.bk : 1VOY.FM5 Page 4 Thursday, July 2, 1998 1:13 PMSelecting a Management InterfaceSelecting a ManagementInterfaceAdvantages of Using the Console InterfaceFigure 1-2. Example of the Console Interface Display1-4 Contains a complete set of features and parameters Out-of-band access (through RS-232 connection) to switch, so networkbottlenecks, crashes, lack of configured or correct IP address, andnetwork downtime do not slow or prevent access Ability to configure management access, for example, creating an IPaddress, and setting Community Names and Authorized Managers Telnet access from a management station or the web browser interfaceto the full console functionality Faster navigation, avoiding delays for slower display of graphicalobjects over a web browser interface More secure; configuration information and passwords are not seen onthe network
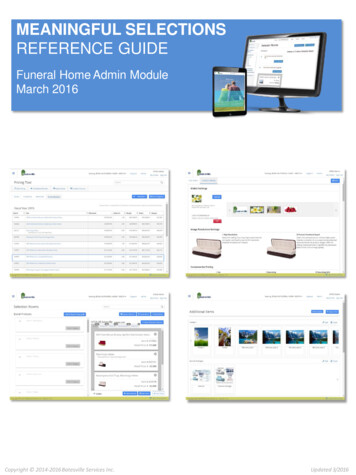
0voy.bk : 1VOY.FM5 Page 5 Thursday, July 2, 1998 1:13 PMSelecting a Management InterfaceHP TopTools for Hubs and SwitchesFigure 1-3. Example of HP TopTools Main ScreenNetwork Devices: Enables fast installation of hubs and switches. Quickly finds and notifies you of the location of problems, saving valuabletime. Notifies you when HP hubs use “self-healing” features to fix or limitcommon network problems. Identifies users by port and lets you assign easy-to-remember names toany network device. Enables you to configure and monitor network devices from your PC.Network Traffic:1-5Selecting a ManagementInterfaceYou can operate HP TopTools from a PC on the network to monitor traffic,manage your hubs and switches, and proactively recommend networkchanges to increase network uptime and optimize performance. Easy to installand use, HP TopTools (formerly HP AdvanceStack Assistant) is the answer toyour management challenges.
0voy.bk : 1VOY.FM5 Page 6 Thursday, July 2, 1998 1:13 PMSelecting a ManagementInterfaceSelecting a Management Interface Watches the network for problems. Shows traffic and “top talker” nodes on screen. Uses traffic monitor diagrams to make bottlenecks easy to see. Improves network reliability through real-time fault isolation. See your entire network without having to put RMON probes on everysegment (up to 1500 segments).Network Growth:1-6 Monitors, stores, and analyzes network traffic to determine whereupgrades are needed. Uses Network Performance Advisor to give clear, easy-to-follow plansdetailing the most cost-effective way to upgrade your network.
0voy.bk : 2VOY.FM5 Page 1 Thursday, July 2, 1998 1:13 PM2Configuring an IP Address on the SwitchThis chapter helps you to quickly assign an IP address and subnet mask to theswitch. (Without an IP address and subnet mask—the factory default configuration—the switch operates as a multi-port transparent bridge, managedonly by using the direct RS-232 Console port.)For more information on this topic, refer to “IP Configuration” on page 6-6.2-1Configuring an IP Addresson the SwitchConfiguring an IP (Internet Protocol) address and subnet mask enables theswitch to operate as a managed device in your network, giving you in-band(networked) access to the HP web browser interface built into the switch, andto other HP proactive networking features available in the switch or throughthe HP TopTools for Hubs & Switches network management software (available Fall, 1998). For a listing of switch features available with and without anIP address, refer to “How IP Addressing Affects Switch Operation” on page6-10.
0voy.bk : 2VOY.FM5 Page 2 Thursday, July 2, 1998 1:13 PMConfiguring an IP Address on the SwitchMethods for Configuring an IP Address and Subnet MaskMethods for Configuring an IP Addressand Subnet MaskConfiguring an IP Addresson the SwitchIf the switch has not already been configured with an IP address and subnetmask compatible with your network, use either of the following two methodsto do so: Manually, using the switch’s RS-232 console port: This is the easiestmethod if you have direct-connect or modem access to a terminalemulator on a PC (such as HyperTerminal in Windows 95 or Windows NT),or a direct connection to a VT-100 ASCII terminal. Refer to “ManuallyConfiguring an IP Address” on the next page. Automatically, using the DHCP/Bootp process: This method is usedto download a configuration from a Bootp or DHCP server (console notneeded). To use this method, refer to “DHCP/Bootp Operation” on page6-10.An IP address and subnet mask for the switch should be assigned by yournetwork administrator and be compatible with the IP addressing used in yournetwork. The purpose of this section is to help you quickly configure an IPaddress and subnet mask in the switch. For more information about IPaddressing, refer to “IP Configuration” on page 6-6.If your network is a standalone network, your IP addressing and subnet maskscheme can be set up in any way that meets your local needs. However, if youwill be connecting your network to other networks that use globally assignedIP addresses, refer to “Globally Assigned IP Network Addresses” on page 6-14.2-2
0voy.bk : 2VOY.FM5 Page 3 Thursday, July 2, 1998 1:13 PMConfiguring an IP Address on the SwitchManually Configuring an IP AddressManually Configuring an IP AddressThis section describes how to use the switch console to configure an IPaddress. The following assumes that no VLANs have been configured on theswitch.Note1.Use the instructions in your switch installation manual to connect a PCrunning a terminal emulator, or a terminal, to the RS-232 Console port onthe switch, and display the Main Menu.Figure 2-1. The Main Menu2-3Configuring an IP Addresson the SwitchIn its factory default configuration, all ports on the switch belong to one,default virtual LAN (VLAN), and only one IP address is needed. If youconfigure the switch with more than one VLAN, each VLAN may have its ownIP address. For more on VLANs, refer to “Port-Based Virtual LANs (VLANs)”on page 6-44.
0voy.bk : 2VOY.FM5 Page 4 Thursday, July 2, 1998 1:13 PMConfiguring an IP Address on the SwitchManually Configuring an IP Address2.From the Main Menu, select2. Switch Management Access Configuration1. IP Configuration.3.Press [E] to select Edit, then use the downarrow key ([v]) to selectIP Config [DHCP/BOOTP].4.Use the Space bar to display Manual at the IP Config parameter.5.Press the downarrow key ([v]) to display these three parameters andselect the IP Address field:Configuring an IP Addresson the SwitchIP Address:Subnet Mask:Gateway:Figure 2-2. The Internet (IP) Service Screen2-46.Enter the IP address you want to assign to the switch.7.Select the Subnet Mask field and enter the subnet mask for your network.8.If you want to reach off-subnet destinations, select the Gateway field andenter the address of the gateway router for your subnet.9.Press [Enter], then [S] (for Save).
0voy.bk : 2VOY.FM5 Page 5 Thursday, July 2, 1998 1:13 PMConfiguring an IP Address on the SwitchManually Configuring an IP Address10. Press [0] to return to the Main Menu.11. Do the following to reboot the switch:a.Press [6] to select Reboot Switch.b. When prompted, press [Y] for “Yes” and press [Enter].Where To Go From HereThe above procedure configures your switch with an IP address and subnetmask. With the proper network connections, you can now manage the switchfrom a network management station or from a PC equipped with a webbrowser.To access the switch using a web browser, refer to chapter 3, “Using theHP Web Browser Interface”. To continue to use the console interface, refer to chapter 4, “Using theSwitch Console Interface”. To access the switch using a network management tool, refer to chapter5, “Using HP TopTools or Other SNMP Tools to Monitor and Manage theSwitch”. Inbound telnet access to the switch is enabled in the factory default. To change the current Telnet access parameter, turn to “Using theSwitch Console To Configure the Console/Serial Link” on page 6-22. To use Telnet to access the switch console from the web browserinterface, click on the Configuration tab in the web browser interface,then click on telnet session to the switch console. If you need information on how to access the switch via the web browser interface, referto chapter 3, “Using the HP Web Browser Interface”.For problems or error indications, refer to chapter 8, “Troubleshooting”.2-5Configuring an IP Addresson the Switch
0voy.bk : 2VOY.FM5 Page 6 Thursday, July 2, 1998 1:13 PM
0voy.bk : 3VOY.FM5 Page 1 Thursday, July 2, 1998 1:13 PM3Using the HP Web Browser InterfaceOverviewThe HP web browser interface built into the switch lets you easily access theswitch from a browser-based PC on your network. This lets you do thefollowing: Optimize your network uptime by using the Alert Log and other diagnostictools Make configuration changes to the switch Maintain security by configuring usernames and passwordsUsing the web browser interface to configure the switch is covered in chapter6, “Configuring the Switch”. This chapter covers the following:System requirements for using the web browser interface (page 3-2) Starting a web browser interface session (page 3-3) Tasks for your first web browser interface session (page 3-5) NoteCreating usernames and passwords in the web browser interface(page 3-7)Selecting the fault detection configuration for the Alert Log operation(page 3-23)Getting access to online help for the web browser interface (page 3-9)Description of the web browser interface: Overview window and tabs (page 3-11)Port Utilization and Status displays (page 3-12) Alert Log and Alert types (page 3-14) Setting the Fault Detection Policy (page 3-23)If you want security beyond that achieved with user names and passwords,you can disable access to the web browser interface. This is done by changingthe Web Agent Enabled parameter setting in the Serial Link configurationscreen in the switch console. See “Console/Serial Link” on page 6-21.3-1Using the HP Web BrowserInterface
0voy.bk : 3VOY.FM5 Page 2 Thursday, July 2, 1998 1:13 PMUsing the HP Web Browser InterfaceWeb Browser Interface RequirementsWeb Browser Interface RequirementsYou can use equipment meeting the following requirements to access the webbrowser interface on your intranet.Using the HP Web BrowserInterfaceTable 3-1.System Requirements for Accessing the HP Web Browser InterfacePlatform Entity and OS VersionMinimumRecommendedPC Platform90 MHz Pentium120 MHz PentiumHP-UX Platform (9.x or 10.x)100 MHz120 MHzRAM16 Mbytes32 MbytesScreen Resolution800 X 6001,024 x 768Color Count25665,536Internet Browser*PCs:(English-language browser only) Netscape Communicator4.x Microsoft InternetExplorer 4.xUNIX: Netscape Navigator 3.1or laterPCs: NetscapeCommunicator4.03 or laterUNIX: NetscapeNavigator 3.1 orlaterPC Operating SystemMicrosoft Windows 95 and Windows NTUNIX Operating SystemStandard UNIX OS*For notes on using Netscape and Microsoft web browsers, go to HP’s Network City website, http://www.hp.com/go/network city.3-2
0voy.bk : 3VOY.FM5 Page 3 Thursday, July 2, 1998 1:13 PMUsing the HP Web Browser InterfaceStarting an HP Web Browser Interface Session with the SwitchStarting an HP Web Browser InterfaceSession with the SwitchYou can start a web browser session in the following ways: Using a standalone web browser on a network connection from a PC orUNIX workstation: NoteDirectly connected to your networkConnected through remote access to your networkUsing a management station running HP TopTools for Hubs & Switcheson your network.HP TopTools is designed for installation on a network management workstation. For this reason, the HP TopTools system requirements are different fromthe system requirements for accessing the switch’s web browser interfacefrom a non-management PC or workstation. For HP TopTools requirements,refer to the information printed on the sleeve in which the HP TopTools CD isshipped, or to the system requirements information in the user’s guideincluded on the HP TopTools CD.This procedure assumes that you have a supported web browser (page 3-2)installed on your PC or workstation, and that an IP address has been configured on the switch. (For more on assigning an IP address, refer to chapter 2,“Configuring an IP Address on the Switch”.)1.Make sure the JavaTM applets are enabled for your browser. If they arenot, do one of the following: In Netscape 4.03, click on Edit, Preferences., Advanced, then selectEnable Java and Enable JavaScript options. 2.In Microsoft Internet Explorer 4.x, click on View, Internet Options,Security, Custom, [Settings] and scroll to the Java Permissions. Then referto the online Help for specific information on enabling the Javaapplet
HP TopTools for Hubs & Switches--an easy-to-use, browser-based network management tool that works with HP proactive networking features built into managed HP hubs and switches (included on a CD with the switch at no extra cost—available Fall 1998) Note HP TopTools is designed for installation on a network management worksta-tion.