Transcription
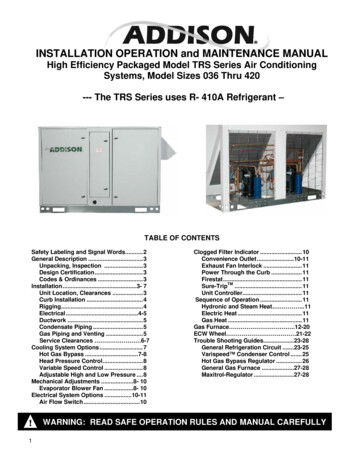
INSTALLATION OPERATION and MAINTENANCE MANUALHigh Efficiency Packaged Model TRS Series Air ConditioningSystems, Model Sizes 036 Thru 420--- The TRS Series uses R- 410A Refrigerant –TABLE OF CONTENTSSafety Labeling and Signal Words.2General Description .3Unpacking, Inspection .3Design Certification.3Codes & Ordinances .3Installation.3- 7Unit Location, Clearances .3Curb Installation .4Rigging.4Electrical .4-5Ductwork .5Condensate Piping .5Gas Piping and Venting .5Service Clearances 6-7Cooling System Options .7Hot Gas Bypass .7-8Head Pressure Control.8Variable Speed Control .8Adjustable High and Low Pressure .8Mechanical Adjustments .8- 10Evaporator Blower Fan .8- 10Electrical System Options .10-11Air Flow Switch.10!1Clogged Filter Indicator .10Convenience Outlet .10-11Exhaust Fan Interlock .11Power Through the Curb .11Firestat.11Sure-TripTM .11Unit Controller.11Sequence of Operation .11Hydronic and Steam Heat .11Electric Heat .11Gas Heat .11Gas Furnace .12-20ECW Wheel 21-22Trouble Shooting Guides.23-28General Refrigeration Circuit .23-25Varispeed Condenser Control .25Hot Gas Bypass Regulator .26General Gas Furnace .27-28Maxitrol-Regulator .27-28WARNING: READ SAFE OPERATION RULES AND MANUAL CAREFULLY
Insert for all ADDISON product manualsInstructions:In accordance with California Proposition 65 requirements, place enclosed label(s) in a highly visible location on outside ofequipment to be repaired (i.e., near equipment’s serial plate). See label placement drawing in equipment’s Installation, Operation and Service manual for label location (when available). Avoid placing label on areas with extreme heat, cold, corrosive chemicals or other elements. Extra labels are also included where repair of multiple units is involved. To order additionallabels, please call 1.407.292.4400.To obtain a copy of the manual or for more information, visit the applicable website(s) below:Incluya en todos los Manuales de productos de ADDISON Instrucciones:De conformidad con los requerimientos de la Propuesta 65 de California, ubique la(s) etiqueta(s) adjunta(s) en un lugar bienvisible en el exterior del equipo a ser reparado (es decir, cerca de la placa serial). Ver dibujo de instalación de la etiqueta enel Manual de Operaciones y Mantenimiento (si esta disponible). Evite colocar la etiqueta en áreas con calor, frío, productosquímicos corrosivos u otros elementos. Se incluyen etiquetas adicionales para el caso de reparación de varias unidades.Para ordenar etiquetas adicionales, por favor llamar al 1.407.292.4400.Para obtener una copia del manual o para obtener mas información visite los sitios Web correspondientes a continuación.www.addison-hvac.comPage 1 of 1Installation Code and Annual Inspections: All installation and service of ADDISON equipment must be performed by a contractor qualified in theinstallation and service of equipment sold and supplied by Addison and conform to all requirements set forth in the ADDISON manuals and all applicablegovernmental authorities pertaining to the installation, service, operation and labeling of the equipment. To help facilitate optimum performance andsafety, Addison recommends that a qualified contractor conduct, at a minimum, annual inspections of your ADDISON equipment and perform servicewhere necessary, using only replacement parts sold and supplied by Addison.Further Information: Applications, engineering and detailed guidance on systems design, installation and equipment performance is available throughADDISON representatives. Please contact us for any further information you may require, including the Installation, Operation and Service Manual.This product is not for residential use.This document is intended to assist licensed professionals in the exercise of their professional judgment.Código de Instalación e Inspecciones Anuales: Todas las instalaciones y mantenimientos de productosADDISON deben ser realizados sólo por personal cualificado en la instalación y mantenimiento de los equiposvendidos y suministrados por Addison y/o por sus distribuidores y deben cumplir con todos los requisitosdispuestos en los manuales de ADDISON y con todos los estándares locales aplicables a la instalación,mantenimiento, funcionamiento y etiquetado del equipo. Para conseguir un funcionamiento óptimo y seguro,Addison recomienda que un técnico cualificado revise anualmente sus equipos y realice el mantenimientosiempre que sea necesario, usando exclusivamente piezas de repuesto de ADDISON .Información adicional: A través de los distribuidores de Addison está disponible la información sobreaplicaciones, guías detalladas sobre diseño de sistemas e instalación y funcionamiento de los productos. Porfavor contacte con nosotros si necesita más información o si requiere un manual de instalación,funcionamiento y mantenimiento.Este producto no es para uso residencial.La intención de este documento es la de ayudar a los profesionales autorizados en el libre ejercicio de suprofesión. 2012 AddisonAddison7050 Overland RoadOrlando, FL 32810 U.S.A.Telephone: 1.407.292.4400Fax: 1.407.290.1329www.addison-hvac.comAll rights reserved. No part of this work covered by the copyrights herein may be reproduced or copied in any form or by any means –graphic, electronic, or mechanical, including photocopying, recording, taping, or information storage and retrieval systems – withoutwritten permission of Addison.www.addison-hvac.comPrinted in U.S.A.P/N 91070020 Rev B 03/12
SAFETY LABELING AND SIGNAL WORDSDanger, Warning and CautionThe signal words DANGER, WARNING andCAUTION are used to identify levels of hazardseriousness. The signal word DANGER is onlyused on product labels to signify an immediatehazard. The signal words WARNING andCAUTION will be used on product labels andthroughout this manual and other manuals thatmay apply to the product.Danger LabelWhite lettering on a black background except the wordDANGER which is white with a red background.!DANGERElectric Shock Hazard.Turn Off All PowerBefore Servicing.Signal WordsDANGER – Immediate hazards which WILLresult in severe personal injury or death.WARNING – Hazards or unsafe practiceswhich COULD result in severe personal injuryor death.Warning LabelWhite lettering on a black background except the wordWARNING which is white with an orange background.CAUTION – Hazards or unsafe practices whichCOULD result in minor personal injury orproduct or property damage.!WARNINGFire Hazard.Use copper wire only.Signal Words in ManualsThe signal word WARNING is used throughoutthis manual in the following manner:!WARNINGThe signal word CAUTION is used throughout thismanual in the following manner:Failure to observe couldresult in propertydamage, bodily injury ordeath.Caution LabelWhite lettering on a black background except the wordCAUTION which is white with a yellow background.!CAUTIONCuts and Abrasion Hazard.CAUTIONProduct LabelingSignal words are used in combination with colors and/orpictures on product labels. Following are examples ofproduct labels with explanations of the colors used.!Wear gloves and handlewith care.Failure to observe couldresult in bodily injury.WARNINGThis unit contains HFC-(R410A), an azeotropic mixture of R-32 (Difluoromethane) and R-125(Pentafluoroethane). DO NOT VENT HFC-(R410A) to the atmosphere. The U. S. Clean Air Act requires therecovery of any residual refrigerant. Do not use R-22 service equipment or components on R410Asystems.2
GENERAL DESCRIPTIONThe model TRS Series A packaged cooling and heating unit is designed to cool a conditioned space with mechanicalrefrigeration, chilled water, energy conservation wheel or a combination of these systems. During the heating modesupply air may be heated by indirect fired gas, electric strip, steam or hot water. The cabinet design provides space for anumber of options, including 100% outside air applications and the use of desiccant wheels. Most of these options will becovered in this manual; for those of a more custom nature, consult the ADDISON Application Engineering Department.Model TRS units are designed for rooftop curb, slab mounted or installed on post and rail applications. Horizontal supplywith 100% outside air does not require a curb and may be slab mounted. Horizontal or vertical supply with vertical returnis available with a 14” high solid bottom roof curb (sold separately as an option). Horizontal supply and return air ductconnections are made with the use of a 24” high solid bottom roof curb (sold separately as an option).Unpacking, InspectionWhen received, the unit should be checked for damage that might have occurred in transit. If damage is found, it shouldbe noted on the carrier’s Freight Bill. Request for inspection by carrier’s agent should be made in writing at once.Design CertificationAll units are certified by Electrical Testing Laboratories (E.T.L.) under ANSI/UL 1995. The gas furnace designs arecertified by E.T.L. under the appropriate ANSI standards for use with natural or propane (L.P.) gas as specified whenordering unit.Codes and OrdinancesThese units must be installed in accordance with the standard of the National Fire Protection Association or the NationalFuel Gas Code. The National Fuel Gas Code is available from the American Gas Association, 1515 Wilson Boulevard,Arlington, VA 22209. NFPA Publications are available from the National Fire Protection Association, Batterymarch Park,Quincy, MA 02269. Local authorities having jurisdiction should be consulted before installations are made to verify localcodes and installation procedures.All field wiring to the unit must be done in accordance with these instructions, the National Electric Code (ANSI/NFPA 701981) in the United States and all local codes and ordinances.Clearances from the heater and vent to construction or material in storage must conform with the National Fuel GasCode, pertaining to gas-burning devices, and such material must not attain a temperature over 160 F by continuedoperation of the heater.Installation should be done by a qualified agency in accordance with the instructions in this manual and in compliancewith all codes clearances and requirements of authorities having jurisdiction.INSTALLATIONUnit Location, ClearancesA 36" clearance must be allowed for access to the compressor and electrical panel. A 24" clearance must be maintainedfor the air inlet to the condenser coil(s). Do not locate the unit under an overhang that will short circuit hot air to the coilintakes.When installed at ground level, the unit should be mounted on a level concrete slab which should extend at least 2"beyond the unit on all sides. The top of the slab should be 2" above the ground level. The depth of the slab below theground level and its structural design is governed by the type of soil and climatic conditions. The slab must not be incontact with any part of the building wall or foundation. The space between the slab and building wall prevents thepossibility of transmitting vibration to the building. The dimensions of the slab or roof mount should be checked andverified before the equipment arrives. Unit supports, roof opening, roof curb flashing, drain requirements, and electriclocations are important to a good installation.When installing the equipment on top of a building, the following should be considered. Structural members supportingthe unit must be sufficiently strong for the weight of the unit and mounting rails. Transmission of sound into the building issometimes a problem when the structure is not strong enough.Locate the unit as near as possible to the center of the area to be environmentally controlled. Sufficient clearance must beavailable for service, edge of roof, other units, or hazards. The condenser air inlet and discharge air must beunobstructed by overhang, walls, or other equipment. Avoid locations next to exhaust fans or flues.Select a location where external water drainage cannot collect around the unit. Locate the unit so roof runoff water doesnot pour directly on the unit. Provide gutter or other shielding at roof level.Where snowfall is anticipated, mount the unit above the maximum snow depth for the area.3
INSTALLATION (CONT’D)Curb Installation, ProtrusionsProper installation for the TRS series requires that the roof mounting of the curb be firmly and permanently attached to theroof structure. Check for adequate fastening method prior to setting rooftop unit on curb.Inspect curb to insure that none of the utility services (electric, gas, drain lines) routed through the curb protrude abovethe curb. Being a fully welded solid bottom curb, duct connections can be made before unit is set on curb. Duct openingsare to be sized and cut by the installing contractor in the solid curb.RiggingWARNING: Be sure that the crane and lift material (bars, cable, chain), (or other lifting device) capacity is adequate forthe unit weight. See Addison Products Company specification literature for unit weights. The total unit weight calculatedmust include all appropriate options for your unit. Certain options can add significant weight to a unit.Spreader bars keep the lift cables from damaging the cabinet once the unit has been lifted, these bars will be required inall instances. Keep the tension equal, improper lift tension can damage wiring, refrigeration lines and the water tightintegrity of the cabinet as well as sheet metal damage to the unit cabinet.Figure 1Lower unit carefully onto roof mounting curb or mounting rails or ground level slab. While rigging unit, center of gravity willcause condenser end to be lower than supply/return air end. Bring condenser end of unit into alignment with curb. Withcondenser end of unit resting on curb member and using curb as fulcrum, lower front end of unit until entire unit is seatedon curb.Rigging RemovalRemove spreader bars, lifting cables and other rigging equipment. Use caution not to dent scratch or otherwise damagecabinet or intake and exhaust hoods.CAUTION: Do not allow crane hooks and spreader bars to rest on roof of the unit.ELECTRICALWiring ConnectionsPower wiring should be connected to the main power terminal block located within the unit main control section. Powerwiring connections on units with factory disconnects should be made at the line side of the disconnect switch.Low voltage wiring connections are made to the remote mounted controller or time clock.DO NOT TAMPER WITH FACTORY WIRINGContact your local representative or the factory if assistance is required. The internal power and control wiring of theseunits is factory installed and each unit is thoroughly tested prior to shipment.Independent Power SourceIt is recommended that an independent 115-volt power source be brought to the vicinity of the rooftop unit for portablelights and tools used by the service mechanic.Main Power WiringThe units are factory wired for the voltage shown on the nameplate.Main power wiring should be sized for the minimum wire ampacity shown on the nameplate.An external weather-tight disconnect switch properly sized for the unit total load is required for each unit. Disconnect mustbe installed in accordance with Local and/or National Electric Codes.4
INSTALLATION (CONT’D)Power wiring may enter the Rooftop Unit through the through the unit base and roof curbs on all models. Install conduitconnectors at the entrance locations. External connectors must be weatherproof.GroundingAll units must be properly grounded. The ground lug is provided for this purpose. DO NOT use the ground lug forconnecting a neutral conductor. The unit must be electrically grounded in accordance with local codes, or in the absenceof local codes, with the NEC ANSI/NFPA 70 1981.Once it is established that supply voltage is within the utilization range, check and calculate if an unbalanced conditionexists between phases. Calculate percent voltage unbalance as follows:Contact power company if phase unbalance exceeds 2%.Control System Wiring: For commercial equipment the following table lists the minimum size of 24 volt class 2 wire to beused.Note: Wiring - Consult the wiring diagram furnished with the unit. These units are custom designed for each application.The unit wiring diagram is located inside the control panel of each unit.DuctworkProperly sized and installed ductwork is critical to reliable performance of the unit and system. The TRS Series is downflow (vertical), horizontal supply and 100% outside air or horizontal supply and return duct connections with the use of atall horizontal duct curb. All duct connections with the use of a curb are to be field sized and cut. All ductwork must beinstalled according to local codes, practices and requirements.Industry manuals should be used as a guide to sizing and designing the duct system. Ducts passing throughunconditioned spaces must be well insulated with vapor barrier to prevent condensation.Condensate PipingA condensate trap must be provided by customer. Drainage of condensate directly onto the roof is acceptable if permittedby local codes. It is recommended that a small drip pad of either stone, or tar, wood or metal be provided to prevent anypossible damage to the roof. If condensate is to be piped into the building drainage system, the drain line must penetratethe roof external to the unit. Refer to local codes for additional requirements.5
INSTALLATION (CONT’D)Figure 2CAUTION: Units with high internal and external static pressure drops will require a deeper trap. Use the graphand table in Figure 2.WARNINGGAS PIPING AND VENTINGFor TRS units with gas furnace options locate the gas furnace instruction manual located inside each unit controlvestibule. This manual will provide you with specific installation requirements and important safety and warninginformation that must be reviewed prior to installation of the gas heating equipment.Gas-fired appliances are not designed for use in hazardous atmospheres containing flammable vapors orcombustible dust, in atmospheres containing chlorinated or halogenated hydrocarbons, or in applications withairborne silicone substances. Improper installation, adjustment alteration, service, or maintenance can causeproperty damage, injury, or death. Read the installation, operation, and maintenance instructions thoroughly beforeinstalling or servicing this equipment.WARNINGFOR YOUR SAFETYThe use and storage of gasoline or other flammable vapors and liquids in open containers in the vicinity of thisappliance is hazardous.6
INSTALLATION (CONT’D)ClearancesAdequate clearance around the unit must be kept for safety, accessibility, service, and maintenance. 48 inches clearanceis required on the side (furnace and electrical) end of the unit. This clearance must be maintained for compressor removaland up to 64 inches in the case of a furnace or ECW wheel unit.All combustible materials must be kept out of the area. A 48 inch clearance is also required on the front (outside air) endof the unit for blower removal and for adequate outside air accessibility. The clearance of 64 inches on the filter accessside of the unit is required for ECW wheel removal if installed. A clearance of 36 inches is required on the condenser sidefor an adequate supply of condenser air.Accessibility, Service and Maintenance ClearancesCombustion Air ClearancesREQUIRED bustiblesTo NonCombustiblesWidthOfTRSFurnace36"Plus 6"0"24"0"Series*Provide clearance as shown for safety, for combustion, and for service.COOLING SYSTEM OPTIONSHot Gas BypassHot gas bypass is a means of capacity control during lower ambient temperature conditions. The Hot Gas Bypass valveis an adjustable valve and should be set to open when the refrigerant suction pressure drops to 107-112 psig. It variesunit capacity by introducing discharge refrigerant into the evaporator circuit where it creates a false evaporator load. Thehot gas is cooled prior to its return to the compressor as it passes through the evaporator.The Hot Gas Bypass Solenoid Valve is energized through the thermostat and routs discharge gas to the hot gas bypassvalve. It is de-energized during the pump down cycle.7
COOLING SYSTEM OPTIONS (CONT”D)Head Pressure ControlLow ambient control. Cycling the condenser fan or fans in response to compressor discharge pressure will permit stableoperation in ambients down to 32F. The operating pressure switch is adjustable to match customer needs; it is factory setto re-energize the fans when discharge pressure drops to 295 psig and energize them when pressure increases to 410psig.Variable Speed ControlThe VARISPEED Fan Control System controls the compressor discharge pressure. The speed control moduleresponds to discharge pressure; it speeds the condenser fan up as pressure rises and slows the fan down as pressurefalls due to load conditions or as outdoor ambient temperature falls.Head pressure control is accomplished with one or two variable speed condenser fan drives and controller, factory set tobegin fan rotation at 311 psig and be at full fan speed at 410 psig.Dual compressor, dual fan units have one variable speed motor and controller on each circuit.Single or tandem compressor, four fan units have one variable speed motor and control and three 3 phase constantspeed motors. Two adjustable pressure controls are used on the 3 fans, the first operating one fan between 443 psig and358 psig, the second operating two fans between 460 psig and 375 psig.CAUTION: Pressure settings on the constant speed fans must NOT be set so as to permit operation below 358 psig orthe variable speed motor may stall and overheat.Single compressor, single fan units will have one variable speed motor and control.At low ambient, the variable speed fan operates, increasing in speed until maximum RPM is achieved at or around 45 Fambient. An adjustable pressure switch operates the constant speed three-phase fan set to energize the motor at 443psig and de-energize at 358 psig. In the ambient temperature span of approximately 50 F to 53 F, the variable speed fanwill ramp between maximum and minimum speed while the constant speed fan cycles. The start-stop cycle varies from45 seconds to 2½ minutes during this period.At 53 F, both fans are operating; the variable speed at minimum RPM and the constant speed at full RPM. As the ambientcontinues to rise, the variable speed motor increases to full speed and remains there.If the application calls for a closer setting between maximum and minimum pressure settings on the constant speed fan,for example 443 psig on, 388 psig off, the effect will be to lengthen the temperature span during which the cycling takesplace, for example 50 F to 57 F.Adjustable High and Low Pressure SwitchesStandard cooling units are equipped with non-adjustable pressure switches. The low pressure switch is set to open at135 psig and is an automatic reset switch closing at 99 psig. The high pressure switch is set to open at 640 psig andis a manual reset switch set to close at 595 psig.Units can be equipped with adjustable high and low pressure switches for those installations that require finer settingsthan the non-adjustable switches provide. Low pressure switches have both set point and differential adjustments and areautomatic reset. High pressure switches must not be set above 640 psig and are manual reset. Set point and differentialare adjustable.MECHANICAL ADJUSTMENTSSET FAN RPM.All evaporator motor sheaves are set when tested and shipped from the factory. Actual rpm must be set and verified witha tachometer. Refer to the following Blower Performance Chart for basic unit fan rpm.With disconnect switch open, place a jumper wire across Terminals R and G at TS1 Terminal Block. Close disconnectswitch; evaporator fan motor will operate so rpm can be checked.FAN ROTATION CHECKCheck that fan rotates clockwise when viewed from the drive side of unit and in accordance with rotation arrow shown onblower housing. If it does not, reverse two incoming power cables at TB Terminal Block.Do not attempt to change load side wiring. Internal wiring assures all motors will rotate in correct direction onceevaporator fan motor rotation check has been made.8
MECHANICAL ADJUSTMENTS (CONT’D)FORWARD CURVEFigure 4Blower RotationDRIVE BELT TENSION AND ALIGNMENTFor ease of service the TRS model unit is equipped with a slide out fan assembly. Two screws must be removed and thewire harness wire tie must be cut to allow the fan to slide forward.WARNING: The fan can slide completely out of the cabinet so us extreme care not to slide fan out to a pointwhere the fan could fall out of the cabinet causing severe personal injury and or equipment and roof damage.Leave at least 12 inches of the fan slide flanges engaged to the blower box rails to allow for proper support of thefan. Never apply additional weight or stand on the blower as a step!Fan belt alignment and tension should be checked. Tension should be 3/4" depression per foot of belt span betweenpulleys.Personal injury hazard. Use extreme care during the following procedures and obey Safety Information.Failure to do so may result in personal Injury.The following safety rules MUST always be followed when working near belt drive.Always Turn The Power Off1. Turn the power to the unit OFF before you begin working on it.Always Wear Protective Clothing2. NEVER wear loose or bulky clothes, such as neckties, exposed shirttails, loose sleeves, or lab coats around beltdrives. Wear gloves while inspecting sheaves to avoid nicks, burrs, or sharply worn pulley edges.The blower speed is changed by adjusting the variable speed pulley mounted on the blower motor.If the blower speed needed is different than the speed of the blower as shipped, follow the steps below to change theblower speed. Before changing the blower speed, read the above safety rules first.3. Turn electric power OFF.4. Remove the side blower access panel. Loosen the four motor mount bolts5. Turn the motor adjustment bolt counterclockwise until the belt is slack enough to come off easily.6. Remove the belt. Do NOT pry off belt.7. Loosen set screw(s) on the outer half of the adjustable pulley.8. The unit has one of two different types of adjustable pulleys.9. Remove key if unit has a keyway type pulley.10. To set the blower for a desired CFM (L/s), first turn the outer half of the adjustable pulley clockwise until it meets theinner half of the pulley.9
MECHANICAL ADJUSTMENTS (CONT’D)11.Turn the outer half of the adjustable pulley counter clockwise the correct number of turns to obtain the desired CFM(L/s).NOTE: To increase the blower speed, turn the outer half of the adjustable pulley clockwise. To decrease the blowerspeed, turn the outer half of the adjustable pulley counter clockwise.12. Replace key if unit has keyway type pulley.13. Tighten set screw(s).14. Put on belt.15. Turn motor adjustment bolt clockwise until the belt has enough tension at the proper deflection. Use one of thecommercially available belt tension gauges to set the correct tension at the proper deflection.16. Use a straight edge (angle iron, straight piece of board or anything with a straight surface or edge) to check thealignment of the blower pulley with blower motor pulley.18. It may be necessary to back the tension off the belt temporarily and tighten one of the motor mount bolts before it ispossible to adjust the angle of the blower motor.19. Tighten all four blower motor mount boltPreliminary CheckFigure 6ELECTRICAL SYSTEM OPTIONSAirflow Switch. Designed to prevent system operation unless there is proof of blower operation. A differential pressureswitch measures the air pressures at the suction and discharge of the blower.Clogged Filter Indicator. Dirty or clogged filters are indicated when the preset pressure differential across the filters isreached. The indicator is factory installed and is manually reset. It includes contacts for remote indication.Convenience Outlet. (Field Wired) A 115V GFCI receptacle mounted in a 2"x4" enclosure and is furnished with a15 amp circuit breaker. Separate 115-volt power source and ground is required.10
ELECTRICAL SYSTEM OPTIONS (CONT’D)Convenience Outlet. (Factory Wired) A 115V GFCI receptacle mounted in a 2"x4" enclosure may be furnished with a 15amp circuit breaker, disconnect and 1500 Watt transformer. The transformer will be field connected to the line side of theunit disconnect switch.Exhaust Fan Interlock. A relay installed in the unit control panel is energized when the blower is energized to interlockthe unit with building exhaust fan(s).Power Through the Curb. A chase is installed in the curb, directly under the electrical control section to bring powerwiring inside the curb, preventing a separate roof penetration. The sleeve must be sealed after wiring is completed withsuitable mastic to prevent water from entering the space.Firestat. This control, mounted in the return air section, de-energizes t
www.addison-hvac.com Código de Instalación e Inspecciones Anuales: Todas las instalaciones y mantenimientos de productos ADDISON deben ser realizados sólo por personal cualifi cado en la instalación y mantenimiento de los equipos vendidos y suministrados por Addison y/o por sus distribuidores y deben cumplir con todos los requisitos