Transcription
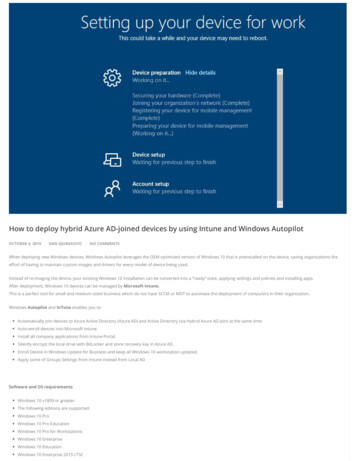
How to deploy hybrid Azure AD-joined devices by using Intune and Windows AutopilotOCTOBER 4, 2019 DAN DJURASOVIC NO COMMENTSWhen deploying new Windows devices, Windows Autopilot leverages the OEM-optimized version of Windows 10 that is preinstalled on the device, saving organizations thee ort of having to maintain custom images and drivers for every model of device being used.Instead of re-imaging the device, your existing Windows 10 installation can be converted into a “ready” state, applying settings and policies and installing apps.After deployment, Windows 10 devices can be managed by Microsoft Intune.This is a perfect tool for small and medium-sized business which do not have SCCM or MDT to automate the deployment of computers in their organization.Windows Autopilot and InTune enables you to:Automatically join devices to Azure Active Directory (Azure AD) and Active Directory (via Hybrid Azure AD Join) at the same time.Auto-enroll devices into Microsoft Intune.Install all company applications from Intune Portal.Silently encrypt the local drive with BitLocker and store recovery key in Azure AD.Enroll Device in Windows Update for Business and keep all Windows 10 workstation updated.Apply some of Groups Settings from Intune instead from Local ADSoftware and OS requirementsWindows 10 v1809 or greater.The following editions are supported:Windows 10 ProWindows 10 Pro EducationWindows 10 Pro for WorkstationsWindows 10 EnterpriseWindows 10 EducationWindows 10 Enterprise 2019 LTSC
Licensing requirementsOne of the following is required:Microsoft 365 Business subscriptionsMicrosoft 365 F1 subscriptionsMicrosoft 365 Academic A1, A3, or A5 subscriptionsMicrosoft 365 Enterprise E3 or E5 subscriptions, which include all Windows 10, O ce 365, and EM S features (Azure AD and Intune).Enterprise Mobility Security E3 or E5 subscriptions, which include all needed Azure AD and Intune features.Intune for Education subscriptions, which include all needed Azure AD and Intune features.Azure Active Directory Premium P1 or P2 and Microsoft Intune subscriptions (or an alternative MDM service).Local AD RequirementAD Connect (the most recent version)Windows Server 2016 to install Intune ConnectorAn overview of deployment steps1. Create new OU and new GPO to con gure SCP entry in the registry of your devices.2. Con gure Delegation to new OU for computer object which is going to have Azure Intune Connector3. Recon gure AD Connect to include new OU in syncing scope4. Install Intune Connector on windows 201q6 server hosted on-premises.5. Con gure a couple Groups in Azure AD6. Con gure Device Settings to allow users to join devices to Azure AD7. Con gure automatic MDM enrollment8. Create and assign an Autopilot deployment pro le9. Create and assign a Domain Join pro le10. Load Hardware Hashes from workstation to Azure AD11. Boot up workstation to start deployment.Let’s review the steps that this goes through:1. The workstation boots up and connects to the network.2. Autopilot pro le is downloaded to workstation.3. Workstation is asking for Azure AD credentials , which are used to enroll the device in Intune. The workstation does not join Azure AD.4. The device enrolls in Intune, using the “Domain Join” device con guration pro le settings, the device will request an Opasses this request to the Oine Domain Join blob from Intune. Intuneine Domain Join connector service and gets back the blob. That blob is passed back to the client PC.The client PC applies the O ine Join Blob blob and then restarts to complete the Active Directory join process.5. The workstation won’t reboot if it can’t nd a domain controller.The most common errros on this steps is “Something went wrong” with error 0x80070774.6. After the reboot, the enrollment status page (ESP) will be shown to process the device con guration .7. Now, the user will be asked to sign in again , but this time using their Active Directory credentials.The AD account signs on, goes through the rst sign-on experience and then desktop is presented.Create new OU and new GPO to con gure SCP entry in the registry of your devices.Create new OU where provisioned Computers will be created.In our case, we created the following OUOU AutoPilot Domain Join,DC 9tech,DC caFor a computer to be able joined in Azure AD, we will need to con gure SCP entry settings using the following GPOCreate a Computer-based GPO with the following names and settings.OUPolicy NameOU AutoPilot Domain Join,DC 9tech,DC caHybrid Azure AD join
Con gure client-side registry setting for SCPUse the following example to create a Group Policy Object (GPO) to deploy a registry settingCreate new GPO (Hybrid Azure AD join) and locate the following path: Computer Con guration Preferences Windows Settings RegistryRight-click on the Registry and select New Registry Item1. On the General tab, con gure the followingAction: UpdateHive: HKEY LOCAL MACHINEKey Path: alue name: TenantIdValue type: REG SZValue data: The GUID or Directory ID of your Azure AD instance (This value can be found in the Azure portal Azure Active Directory Properties Directory ID)Click OK2. Right-click on the Registry and select New Registry Item1. On the General tab, con gure the following.Action: UpdateHive: HKEY LOCAL MACHINEKey Path: alue name: TenantNameValue type: REG SZValue data: Your veri ed domain name if you are using federated environment such as AD FS. Your veri ed domain name or your onmicrosoft.com domain name, forexample, contoso.onmicrosoft.com if you are using managed environmentClick OK2. Close the editor for the newly created GPO3. Link the newly created GPO (Hybrid Azure AD join) to the desired OU (OU AutoPilot Domain Join,DC 9tech,DC ca) containing domain-joined computers that belong toyour controlled rollout populationLogin to AD Connect Server and run Synchronization Service ManagerNavigate to containers using the following gureSelect your OU, Save, and Exit
Open Powershell on AD Connect Server and run the following Powershell Command.Start-ADSyncSyncCycle -PolicyType initialWe need to run this command each time we make modi cation in OU ScopeYou can run this script on AD Connect server during deployment to speed up domain join operation to Azure AD.Script will run sync process every 300 sec. i 1for(; i -le 10; i ){Start-ADSyncSyncCycle -PolicyType deltaWrite-Host istart-sleep -seconds 300}Con gure Delegation to new OU for computer object which is going to have Azure IntuneConnectorThe Intune Connector for your Active Directory creates autopilot-enrolled computers in the on-premises Active Directory domain.The computer that hosts the Intune Connector must have the rights to create the computer objects within the domain.Open Active Directory Users and Computers (DSA.msc).Right-click the organizational unit that you’ll use to create hybrid Azure AD-joined computers, and then select Delegate Control.In the Delegation of Control wizard, select Next Add Object Types.In the Object Types pane, select the Computers check box, and then select OK.
In the Select Users, Computers, or Groups pane, in the Enter the object names to select box, enter the name of the computer where the Connector is installed.Select Create a custom task to delegate Next. Select the Only the following objects in the folder checkbox, and then select the Computer objects, Create selected objects in this folder, and Delete selected objectsin this folder checkboxes.Under Permissions, select the Full Control checkbox.This action selects all the other options.Select Next, and then select Finish.Install the Intune ConnectorThe Intune Connector for Active Directory must be installed on a computer that’s running Windows Server 2016 or later. The computer must also have access to the internetand your Active Directory.1. In Intune, select Device enrollment Windows enrollment Intune Connector for Active Directory (Preview) Add connector.2. Follow the instructions to download the Connector.3. Open the downloaded Connector setup le, ODJConnectorBootstrapper.exe, to install the Connector.4. At the end of the setup, select Con gure.5. Select Sign In6. Enter the user Global Administrator or Intune Administrator role credentials.7. The user account must have an assigned Intune license.
8. Go to Device enrollment Windows enrollment Intune Connector for Active Directory (Preview), and then con rm that the connection status is Active.Create Azure AD Group for AutoPilot DevicesNavigate to Home 9 Tech Groups – All groupsGroup Name All Autopilot DevicesMemberShip Type DynamicGo to Advanced rule box, do one of the following:To create a group that includes all your Autopilot devices, enter(device.devicePhysicalIDs -any -contains “[ZTDId]”)Create Intune Users GroupTo limit who can join devices in Intune, create the following groupGroup Name Intune UsersMembership type AssignedMembers Add all users which will be using Intune and AutoPilot
Con gure MDM Global SettingsNavigate toHome\9 Tech – Mobility (MDM and MAM)\Con gureMDM User scope Some ADD Intune Users (Group created in the previous step )MDM User scope Some ADD Intune Users (Group created in the previous step )Con gure Device SettingsThis setting will allow only members of Intune Users groups to join a workstation to Azure ADNavigate toHome\Azure Active Directory\Devices\Device settingSelect the users and groups that are allowed to join devices to Azure AD Selected Intune Users
Create and assign an Autopilot deployment pro leAutopilot deployment pro les are used to con gure the Autopilot devices.In Intune, select Device enrollment Windows enrollment Deployment Pro les Create Pro le.Type a Name AutoPilot Pro le User DrivenFor Deployment mode, select User-driven.In the Join to Azure AD as box, select Hybrid Azure AD joined (Preview).Do not select Out-of-box experience (OOBE) and then select Save.Select Create to create the pro le.In the pro le pane, select Assignments.
Select Select groups.In the Select groups pane, select the AutoPilot All Autopilot Devices device group, and then click Select.It takes about 15 minutes for the device pro le status to change from Not assigned to Assigning and, nally, to Assigned.Turn on the enrollment status page1. In Intune, select Device enrollment Windows enrollment Enrollment Status Page.2. In the Enrollment Status Page pane, select Default Settings.3. In the Show app and pro le installation progress box, select Yes.4. Con gure the other options as needed.5. Select Save.Create and assign a Domain Join pro le1. In Intune, select Device con guration Pro les Create Pro le.2. Enter the following properties:3. Name: AutoPilot Hybrid Pro le4. Description: Enter a description for the pro le.5. Platform: Select Windows 10 and later.6. Pro le type: Select Domain Join (Preview).7. Select Settings, and then provide aComputer name pre x PCDomain name 9tech.caOrganizational unit in DN format OU AutoPilot Domain Join,DC 9tech,DC caDo not experiment with computer pre x putting %serial% variable. It will fail on O ine Domain Join Process.
Select OK CreateThe pro le is created and displayed in the list.To assign the pro le. navigate to Assignments and select AutoPilot User Driven Group.Turn on default enrollment status page for all usersTo turn on the enrollment status page, follow the steps below.1. In Intune choose Device enrollment Windows enrollment Enrollment Status Page.2. In the Enrollment Status Page blade, choose Default Settings.3. For Show app and pro le installation progress, choose Yes.4. Choose the other settings that you want to turn on and then choose Save.
Registering DevicesRegister devices from an OEMIf you’re buying new devices, some OEMs can register the devices for you.If you are using existing devices, you will need to pull out a unique hardware ID for the device that needs to be captured and uploaded to the service.This harvesting process will collect ID from a device running Windows 10 version 1703 or later installation.Yes, you will need to install Windows 10 to an old device to get the hardware key.Extract Hardware Hashes from existing devicesI created the following three les which will automate all the processes.Put all these three les on a USB ————Windows Registry Editor Version 5.00[HKEY LOCAL MACHINE\SOFTWARE\Policies\Microsoft\WindowsStore] “AutoDownload” �——–Export Key and Sysprep to @echo offcolor 06ECHO -----------------------ECHO Collecting Hardware KeyPowershell.exe -ExecutionPolicy Bypass -File "% dp0\Get-WindowsAutoPilotInfo.ps1" -OutputFile % dp0\%computername%.csvECHO --------------------------Echo Hardware Keys has been uploaded to USB DRIVEreg import "% dp0\disableST.reg"ECHO -----------------------ECHO Microsoft Store updates have been disabled.
powershell -executionpolicy Bypass -Command "Get-AppxPackage -AllUsers Remove-AppxPackage"ECHO ----------------------------ECHO All Microsoft Store Applications have been removed.ECHO ----------------------------ECHO Press any key to sysprep computer and shutdown.ECHO ------------------------pauseEcho ------------------------ECHO Executing SYSPREP.System will go down shortly. DOECHO DO NOT SHUTDOWN SYSTEMC:\Windows\System32\Sysprep\Sysprep.exe /generalize /oobe /shutdown /quietTIMEOUT 5Get-WindowsAutoPilotInfo.ps1Download Get-WindowsAutoPilotInfo.ps1 from the following /Get-WindowsAutoPilotInfo/1.6Run a le to export keyTo run process, navigate to a USB drive to Export Key and Sysprep to USB.bat le.Right-click and run le as AdministratorThis is what will happen after you run a le.1. Get-WindowsAutoPilotInfo.ps1 will export hardware ID to a USB drive2. Microsoft Store updates will be disabled3. All Microsoft apps will be removed from PC4. Sysprep will be run and the system will be shut down.Deploying WorkstationBoot up workstation.Pick up regionPick up Keyboard
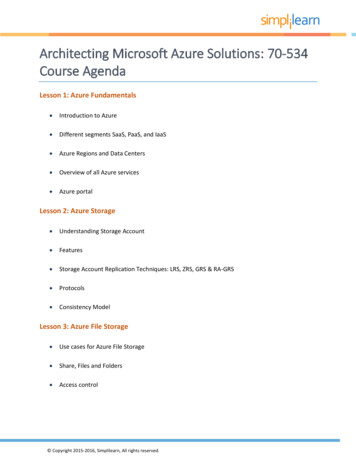
Skip keyboard layoutOn next screen, you will get customized message welcoming you to your domainThis is a sign that workstation got Auto Pilot Pro le from Azure.Type your O ce 365 ID.
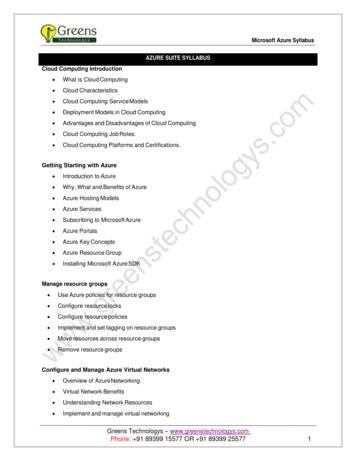
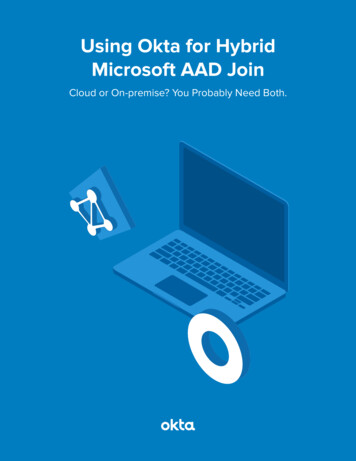
After you authenticate, you will receive Enrollment page with status of enrollment.As you can see , workstation has been joined to local AD Domain.Computer object is created in local AD and AD connect created AD Joined Device in Azure ADHere is a properties of Device in Azure AD.When your Autopilot devices are registered, before they’re enrolled into Intune, they’re displayed in three places (with names set to their serial numbers):
1. The Autopilot Devices pane in the Intune in the Azure portal. Select Device enrollment Windows enrollment Devices.2. The Azure AD devices pane in the Intune in the Azure portal. Select Devices Azure AD Devices.3. The Azure AD All Devices pane in Azure Active Directory in the Azure portal by selecting Devices All Devices.After your Autopilot devices are enrolled, they’re displayed in four places:1. The Autopilot Devices pane in the Intune in the Azure portal. Select Device enrollment Windows enrollment Devices.2. The Azure AD devices pane in the Intune in the Azure portal. Select Devices Azure AD Devices.3. The Azure AD All Devices pane in Azure Active Directory in the Azure portal. Select Devices All Devices.4. The All Devices pane in the Intune in the Azure portal. Select Devices All Devices.After your Autopilot devices are enrolled, their names become the hostname of the device. By default, the hostname begins with DESKTOP-.I hope thius blog will help you with your depymnet./Dan Djurasovic4 Oct 2019 LinkedIn E-MailABOUT THE AUTHORDan is a Senior IT Consultant with over a dozen years of IT experience, specializing in Microsoft O ce 365, Exchange Server Azure IaaS and Active Directory.Dan is Currently employed with https://www.tuor.ca 2016 djurasovic.com
Automatically join devices to Azure Active Directory (Azure AD) and Active Directory (via Hybrid Azure AD Join) at the same time. Auto-enroll devices into Microsoft Intune. Install all company applications from Intune Portal. Silently encrypt the local drive with BitLocker and store recovery key in Azure AD.