Transcription
TechnologyGrade 7Book 2CAPSLearner BookDeveloped and funded as an ongoing project by the Sasol InzaloFoundation in partnership with the Ukuqonda Institute.
Published by The Ukuqonda Institute9 Neale Street, Rietondale, 0084Registered as a Title 21 company, registration number 2006/026363/08Public Benefit Organisation, PBO Nr. 930035134Website: http://www.ukuqonda.org.zaFirst published in 2014 2014. Copyright in the work is vested in the publisher.Copyright in the text remains vested in the contributors.ISBN: 978-1-920705-01-5This book was developed with the participation of the Department of Basic Education ofSouth Africa with funding from the Sasol Inzalo Foundation.Contributors:Graham Barlow, Louis Botha, John de Klerk, Jacqui Greenop, Chris Human, Piet Human,Riekie Human, Xenia Kyriacou, Morne Labuschagne, John Laurie, Ezekiel Makwana, RallaiMaleka, Mafahle Mashegoana, Themba Mavuso, Peter Middleton, Lebogang Modisakwena,Peter Moodie, Neil Murtough, Sarah Niss, Humphrey Nkgogo, Phillip Radingoane, Jan Randewijk,Margot Roebert, Marlene Rousseau, Marcus Taba, Yvonne Thiebaut, Cecile Turley,Louis van Aswegen, Karen van Niekerk, Elene van Sandwyk, Hettie Vos, Magdaleen SnymanIllustrations and graphics:Astrid Blumer (Happy Artworks Studio), Ian Greenop, Chris Human, Piet Human,Peter Middleton, Peter Moodie, Melany Pietersen (Happy Artworks Studio),Theo Sandrock, Lisa Steyn Illustration, Heine van As (Happy Artworks Studio),Leonora van Staden, Geoff WaltonCover illustration: Leonora van StadenPhotographs:Lenni de Koker, Ian Greenop, Chris Human, Tessa Olivier, Elsa Retief (GalleryProductions)Text design: Mike SchrammLayout and typesetting: Lebone Publishing ServicesThanks for free sharing of ideas, and free access to photographs, to:Thanks to people or institutions who placed photographs in the publicdomain on www.commons.wikimedia.org, with no attribution required.Thanks to people or institutions that placed photographs in the public domain onwww.commons.wikimedia.org, with no attribution required.Thanks to Teravolt (2010), whose photo appears on page 2, for sharing that photo onwww.wikipedia.org under the Creative Commons Attribution 3.0 Unported Licence.Thanks to Mark Heard (2010), whose photo appears on page 88, for sharing that photo onwww.wikipedia.org under the Creative Commons Attribution 2.0 Generic Licence.Thanks to Mark Knobil (2005), whose photo appears on page 93, for sharing that photo on www.wikipedia.org under the Creative Commons Attribution 2.0 Generic Licence.
Thanks to Denis Bastianelli, CIRAD, (2007), whose photo appears on page 99, for sharing thatphoto on www.wikipedia.org under the Creative Commons Attribution 3.0 Unported Licence.Printed by [printer name and address]COPYRIGHT NOTICEYour freedom to legally copy this bookThis book is published under a Creative Commons Attribution-NonCommercial 3.0Unported Licence (CC BY-NC).You are allowed and encouraged to freely copy this book. You can photocopy, printand distribute it as often as you like. You may download it onto any electronicdevice, distribute it via email, and upload it to your website, at no charge. You mayalso adapt the text and illustrations, provided you acknowledge the copyrightholders (“attribute the original work”).Restrictions: You may not make copies of this book for a profit-seeking purpose.This holds for printed, electronic and web-based copies of this book, and any partof this book.For more information about the Creative Commons Attribution-NonCommercial3.0 Unported (CC BY-NC 3.0) licence, seehttp://creativecommons.org/licenses/by-nc/3.0/
Table of contentsTerm 3Chapter 1:Magnetism .1Chapter 2:Investigation: Metals and magnetism .13Chapter 3:Simple electric circuits .25Chapter 4:Simple mechanisms combined .35Chapter 5:Build a model crane .51
Term 4Chapter 6:Emergency situations .83Chapter 7:Processing food for emergency situations .93Chapter 8:Making and evaluating emergency meals . 105Chapter 9:Protective clothing . 115Chapter 10: Mini-PATShelters for refugees . 125
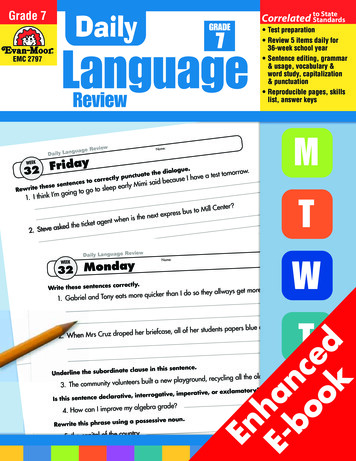
Chapter 1MagnetismIn this chapter, you will learn all about magnetism. You will investigate magnetic fields, and you willexperiment to see which kinds of materials are magnetic.1.1What is magnetism?. 21.2Permanent magnets and magnetic fields. 51.3Which substances will stick to a magnet?. 11Figure 1: The back of a speaker can be used to pick up certain items!Technology grade 7 term 31
1.1 What is magnetism?Some people use fridge magnets to keep notes or lists on the fridge’s door. Youeven get magnets in the shape of words or letters that you can put on a fridge doorto play with. The magnets make the letters stick to the metal of the fridge door.Can you think of other ways in which magnets can help us in our daily lives?In this chapter, you will learn about different types of magnets and how we usethem in everyday life.Thousands of years ago, humans discovered that aMagnetism is a force that cancertain type of rock could attract iron. This rock wasattract (bring closer) or repelcalled lodestone. People believed that it had magical(push away) objects that havepowers! Pieces of lodestone would also push or pulla magnetic material like ironother pieces of lodestone.inside them.The ability to attract iron is called magnetism.We now know that lodestone contains a materialcalled magnetite, which is a kind of iron oxide. Ironoxides are chemical compounds of iron and oxygen.“Lodestone” is a natural magnet.All magnets are able to attract other magnets ormagnetic objects. Magnetic objects consist of iron orsome other metals.Experiment with a magnet to pick up paperclips.You will notice that if you hold the magnet far away,nothing happens. If you move the magnet closer to theFigure 2: Lodestone attractspaperclips, the paperclips will suddenly stick to thepieces of iron.magnet.Think about these questions: What is it about a magnet that attracts these particular objects? Does a magnet have to touch a magnetic object to attract it?To find out more about magnetism, do the following investigation.2TECHNOLOGY GRADE 7 TERM 3
Action researchYou need the following for this activity: a ruler, a paperclip, and at least three different kinds of magnets.Put the ruler flat on your desk. Place apaperclip so that it is in line with the zeromark of the ruler. Put one magnet at theother end of the ruler. Slowly push themagnet toward the paperclip, as shownin the picture. The moment the paperclipmoves towards the magnet, stop movingit.Look at the measurement on the rulerto see how far apart the magnet andpaperclip were when they came together.Do this again with all of your magnets.Figure 31. Fill in the table to show the distance at which each magnet attracted thepaperclip.Distance from paperclipMagnet 1Magnet 2Magnet 3Magnet 4CHAPTER 1: magnetism3
2. Which magnet is the strongest?3. Which magnet is the weakest?What does this show us?A magnet has an invisible magnetic field around it. The field is stronger close tothe magnet, and weaker further away. The magnet does not affect the paperclipuntil the paperclip is close enough to be within this field.Stronger magnets can attract magnetic materials from further away than weakermagnets can. This is because a stronger magnet has a larger magnetic field.A few questions to answer1. Name three situations in which you have seen or used magnets.2. How would you find out if an object is magnetic or not?3. You have two magnets, one is magnet A, which can attract a paperclip from10 cm away. The other magnet, magnet B, can attract a paperclip from 12 cmaway. Which magnet is stronger? Explain your answer.4TECHNOLOGY GRADE 7 TERM 3
4. Why can a magnet have an effect on a paperclip from a distance? Explain it inyour own words.1.2 Permanent magnets and the magnetic fieldsYou have learnt that magnets can pull certain objects towards them becausethe objects have a magnetic field around them. An object that a magnet movesbecomes a “temporary” magnet. A temporary magnet is not a magnet all thetime. When you move the paperclip within the magnetic field of the magnet, thepaperclip also becomes a magnet. The paperclip loses its magnetic field quickly.The north pole of a magnetpoints to the Earth’s magneticnorth pole if it is allowed toswing freely on a thread.Figure 4: The north pole of a magnet points to the Earth’s magnetic north pole.A permanent magnet keeps its magnetic properties for a long time. A temporarymagnet acts as a magnet only as long as it is in the magnetic field of a permanentmagnet.A lodestone is a natural permanent magnet. You investigate permanent magnetsthat have been made artificially. These magnets have a north end and a south end,but they can come in different shapes. There are two basic shapes of magnets thatyou will use: bar magnets and horseshoe magnets.CHAPTER 1: magnetism5
Figure 5: Bar magnetFigure 6: Horseshoe magnetBar magnets are rectangular, with a north pole on one end of the bar and asouth pole on the opposite end of the bar. This means that the poles are far apart.Horseshoe magnets also have a north and a south pole, but the bar has beenbent into a curved shape. This bend brings the north and south poles closertogether than they would be in a bar magnet.Let us investigate what the north and south poles of the magnet mean.Investigating magnet polesFor this investigation, you will need two bar magnets, with the north and southpoles marked. Work in small groups.1. Hold a bar magnetin one hand and putanother bar magneton your desk. Bringthe north end ofthe magnet in yourhand close to thenorth end of themagnet on the desk.Write down whathappens when youbring the northpoles of the twobar magnets closerFigure 7together.6TECHNOLOGY GRADE 7 TERM 3
2. Now bring the southpole of one of the barmagnets close to thesouth pole of the otherbar magnet. Write downwhat happens whenyou bring the southpoles of the two barmagnets closer together.Figure 83. Now bring the north end of onebar magnet close to the southpole of the other bar magnet.Write down what happenswhen you bring the north poleclose to the south pole.Figure 9You should have noticed that as the north poles were brought together, there wasa “resistance” to getting too close. This is why you found it difficult to get the northor south poles to touch each other. However, when you bring the north pole closeto the south pole, they pull towards each other.When the poles are the same, the force pushes them apart, but when the polesare different, the force pulls them together. So a north pole and a south poleattract each other, while a north and a north pole or a south and a south pole repeleach other.The magnetic field around each magnet has direction.We say that unlike poles of a magnet attract eachother and like poles repel each other.CHAPTER 1: magnetism7
Visualising magnetic fields (extension)Although we cannot see magnetic fields, we can detect them using iron filings.Work in small groups to do this investigation.You will need the following for this activity: two bar magnets, a piece of firm white paper, just bigger than the magnets, and iron filings.Iron filings are tiny pieces of iron that look like a fine powder. Be careful – thefilings will stick to the magnets, so you must make sure that you keep a piece ofpaper between the magnets and the filings at all times.1. Put one of the bar magnets on the table in front of you.2. Put the piece of white paper over the magnet.3. Lightly draw the outline of the bar magnet on the paper, and mark the positionsof the north and south poles.4. Carefully sprinkle the iron filings onto the paper in the area of the magnet.You should see the iron filings making a pattern around the magnet. Gentlyspread the iron filings around the magnet so that you can see the wholepattern. Notice the places where there are lots of iron filings very close togetherand the places where the iron filings are more spread out.5. Use the space below to draw the pattern that the iron filings make.The iron filings show you the pattern of the magnetic field. Each tiny piece ofiron behaves like a magnet and lines up with the magnetic field around the barmagnet.8TECHNOLOGY GRADE 7 TERM 3
If you are not able to see the magnetic field pattern for yourself, here is aphotograph of iron filings around one bar magnet:Figure 10To draw a magnetic field around a magnet, you use lines to represent the path ofthe iron filings. Figure 10 shows the lines. These are called magnetic field lines. Thelines always have arrows that point from the north pole to the south pole.Figure 11Notice the following about the magnetic field linesin Figure 11: The field lines have arrows on them. The field lines come from the north pole and goto the south pole. The field lines are closer together at the poles. The magnetic field is stronger in the placeswhere the lines are closer together. Further away from the magnet the lines getfurther and further apart, showing that the fieldis much weaker.CHAPTER 1: magnetism9
Now repeat the steps using two bar magnets with the north and south poleslabelled. Put the north pole of one magnet close to the south pole of the othermagnet. Put the paper over the magnets and sprinkle the iron filings on top of thepaper.6. Use field lines to draw the pattern you see. Draw the lines closer together wherethere are many iron filings and further apart where there are fewer.Do your field lines look like those in Figure 9, where the magnets attract eachother?7. Now repeat the steps using the north pole of one magnet close to the northpole of the other magnet. Put the paper over the magnets and sprinkle the ironfilings on top. Draw the pattern you see.Do your field lines look like those in Figures 7 and 8, where the magnets repeleach other?10TECHNOLOGY GRADE 7 TERM 3
1.3 Which substances will stick to a magnet?Practical InvestigationFor this investigation, you will need the following: a bar magnet or a horseshoe magnet, pins, ceramic, such as a mug, iron nails, wood, plastic, copper, paper, and coins.You will now find out which materials are attracted to magnets, and whichmaterials are not.1. Hold a magnet close to each of the objects in turn. The material will either beattracted to the magnet, or not. Put a tick in the column that matches what yousee:MaterialAttracted to magnetNot attracted to magnetpinsceramiciron nailswoodplasticcopperpapercoins2. List the items that stuck to the magnet.CHAPTER 1: magnetism11
3. What do you notice about all of the items that did stick to the magnet?4. Are all metals attracted to magnets?Did you see that the materials that do not contain metal did not stick to themagnets? That means that non-metals are not highly magnetic substances. We saythat they are not magnetic.Did you see that the only things that were attracted to the magnet were metals?Does that mean that all metals are magnetic? You will investigate this further inthe next chapter.All substances are magnetic in some way. However, many substances have veryweak forms of magnetism, so that there is not enough attraction to make themmove towards a magnet. Strongly magnetic substances will stick to a magnet.Next weekIn the next chapter, you will learn how people use the property of magnetism inthe recycling industry.12TECHNOLOGY GRADE 7 TERM 3
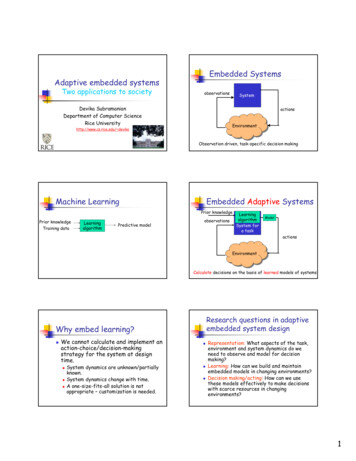
Chapter 2Investigation: Metals andmagnetismIn Chapter 1 you learnt about magnets and magnetism. Now you will investigate which metals areattracted to magnets and which are not. You will also learn why it is good to recycle scrap metal andhow this important work is done.We can also recycle materials other than metal. Plastic, paper, cardboard and other materials thatare often thrown away could be recycled instead. Since we are running out of basic resources, weneed to reuse or recycle as much as we can instead of simply throwing things away.You will start work on a recycling plan for your school by recording the waste produced by yourschool and how much of it could have been recycled. Many factories use waste materials, so you candevelop a plan to raise funds for your school by recycling waste.2.1Magnetic and non-magnetic materials. 162.2Case study: Recycling scrap metals. 192.3Recycling plan for your school. 23Figure 1: Metals used in the homeTechnology grade 7 term 313
Figure 214TECHNOLOGY GRADE 7 TERM 3
Figure 3CHAPTER 2: investigation: metals and magnetism15
2.1 Magnetic and non-magnetic materialsYou learnt about magnetism and magnets in Chapter 1. You learnt that non-metalsdo not stick to magnets, while other metals do stick to magnets. We say that thesemetals are magnetic.Look at the objects made of different metals in Figure 4:Lead solderSteel electricity pylonsCast-iron stoveCopper beadingBrass horn. Brass is a mixtureof copper and zinc.Silver trumpetGold earringsNickel cupboard fittingsSteel cableBronze pot. Bronze iscopper mixed with tin.Steel keysTin canAluminium computer partsFigure 4: Some different types of metal16TECHNOLOGY GRADE 7 TERM 3
1. Which of the objects are made of magnetic metals? Fill in the table below:MaterialIs the material magnetic?YesNoSteel pylonCast-iron potSilver trumpetCopper beadingBrass hornLead solderGold earringsNickel fittingsSteel cableAluminium computer partsBronze potTin canKeysHow many of the metals are magnetic? If you said only three, then you arecorrect. They are steel, iron and nickel, and they all contain iron and are magnetic.Any metal containing iron and that is magnetic, is called a ferrous metal.Many people think that tin is magnetic, but it is not.Ferrous metals are metalsThe tins that you buy food and other household goodsthat contain iron.in are actually made of very thin steel and are coveredwith another thin layer of tin to stop them fromWhen a metal is in contactcorroding. Steel is a mixture of iron and carbon. Whenwith oxygen, it forms rust overyou place a magnet next to a tin can, it is attracted totime.the iron in the steel, not the tin.Rust is also magnetic.Often, you will see iron that has rusted. This isTin and zinc don’t rust, so wecalled corrosion. Rusty iron is still magnetic.use them to protect iron andsteel.CHAPTER 2: investigation: metals and magnetism17
Figure 5: The coating of zinc has wornoff this corrugated steel roof.Investigation: Test which metals are magneticCommon metal objects.In your daily life you see many useful metal objects around you. Some are verybig, such as cars and buses. Some are very small, such as paperclips.1. In the first column, list 15 metal itemsthat you use or often see around you.2. In the second column, write down whatmetal each object is made of. If anobject consists of more than one metal,write down which metal makes upthe biggest part. For example: cars aremainly made of steel.Figure 6: Things you find around the house: a3. Test the items to see whether theyfork, a strainer, needles and screws.are magnetic or not. Write down yourresults in the last column.Object18MetalTECHNOLOGY GRADE 7 TERM 3Magnetic: Yes/No
2.2 Case study: Recycling scrap metalsAre you surprised that so many things we use everyday are made of metal? We use different metals tohelp us with almost everything we do. This meansthat factories need a constant supply of metal sothat they can keep manufacturing all these items. Weuse millions of tons of steel, aluminium and othermetals every year. But the earth’s supply of metal willeventually run out. Can you think of the problems thiswill lead to?The answer is to recycle the scrap metal.Everything that is made of metal can bebroken up and sorted into its basic partsand used again. This will help to save thecountry millions of rand each year and willalso stop us from using up all the planet’sresources.Metal is ideal for recycling as it can bemelted down and reused without losing itsstrength.Recycling is to use somethingover and over again. It may bein a different form, but we usethe basic materials again andagain.Collecting scrap metalThe process of collecting scrap metal forFigure 7: Steel recycling balesrecycling starts when people learn to notthrow metal objects away. Everything made ofmetal can be recycled and everyone has to makesure that nothing that can be reused is thrownaway.At home, make sure that all small metal objects,such as empty tins, are collected separately andsent to recycling centres. Bigger objects such asold household appliances will be collected byscrap metal dealers. Scrap metal dealers sort thedifferent types of metals they collect into pilesand send these to the factories. The factories thenFigure 8: The internationalrecycling symbol. When youmelt down the metal objects so that the metalsee this sign, it means that thecan be used again.materials used to make theproduct can be recycled.CHAPTER 2: investigation: metals and magnetism19
Figure 9: Scrap metal yards use magnets to sort piles of scrap metal.Can you see how a magnet can be used to help sort piles of metal? Scrap dealersuse large magnets to pull out the magnetic metals from the piles. This speeds upthe process.Making money from recyclingTo encourage people not to waste valuable materials that can be recycled, scrapmetal dealers will pay for scrap metal. They usually pay by mass, so it doesn’treally matter what shape or form the metal comes in, it is the mass that counts.But this can create problems too. Some people steal metal objects such as steelmanhole covers and copper wire from telephone and electricity cables, to try andmake money. Stealing these articles is not only dishonest, but it also puts otherpeople in danger. If manhole covers are stolen, then there are holes in the roadsthat people can drive or fall into. Stolen electricity cables can cause loss of power.20TECHNOLOGY GRADE 7 TERM 3
Collecting scrap metal honestly1. Do you think there are metal items that scrap metal dealers should not acceptfrom people trying to sell them? Discuss your ideas with another learner. Writedown the items you think scrap metal dealers should not buy.2. List a few scrap metal objects that people can collect to sell to scrap metal dealers.3. If you were collecting scrap metal to sell to a scrap metal dealer, how would youshow that you had gathered the items legally? Here is an example: “I would getthe owner of the house to give me a letter saying that she gave me the items.”Write down any other steps you could take.Identifying recyclable materialsScrap metal is not the only recyclable material. Most waste can be recycled.There are companies that specialise in collecting all forms of recyclable waste, andthis serves the community in many ways.In the last section of this chapter, you are going to investigate what a recyclingscheme for your school will achieve. Before you start collecting materials, discussin the class which waste materials the school produces could be recycled.Remember that it is not only your classroom, but the whole school.Get one learner to write these items on the board, with a few examples of thematerials you are likely to find at school.For example:Plastic: milk bottles, cold drink bottles.Cardboard: food cartons, boxes.CHAPTER 2: investigation: metals and magnetism21
How much recyclable waste is produced by the school? For the next week, keep a record of the amount of waste that the schoolproduces. It would be helpful if the rest of the school knowsSafetythat you are collecting recyclable waste. AskWhen you are collecting wasteyour principal if you can have a special wastematerials, always wear gloves.bin or small area where learners can bring theirWash your hands thoroughlyrecyclable waste. If your school has extra wasteafter you have finished sortingthe material.bins, you could put them next to the normal binsand put recycling labels on them. Collect the recyclable material and sort it into piles. Put this recyclable materialinto black bags. Tie each bag when it is full and mark them clearly. Get advicefrom your teacher on where to store the material while you are collecting it. Find out if there are scrap dealers near you or your school who will collect thewaste, and ask them how much they will pay for the various types of material.22TECHNOLOGY GRADE 7 TERM 3
2.3 Recycling plan for your schoolMaking money from recyclingYou have been collecting and storing recyclable waste for one week. Now do thefollowing exercises as a class: Gather all the waste you have collected and make sure it is correctly sorted: onepile for paper, one pile for cardboard, one pile for plastic. Place the piles into bags and mark them carefully according to what is in thebag. Weigh the various types of material. Work out the total amount of each materialthat you have. Multiply the weight of the material by the value the scrap dealer said he or shewould pay for that material.For example:3 kg aluminium tins at R3,50 per kg: R3,50 3 R10,50 Total all the amounts for all of the materials. Discuss ways you could improve the collecting system. Discuss ways to make sure the whole school is involved and interested in thisproject.Write an individual report on the value of recycling for your schoolYou have worked as a class to see how much recyclable material can be collectedover a week from the school, and how much money could be made for schoolprojects. Each of you must now write a report on the process.You need to include the following topics:1. Which materials could the school recycle?2. What amounts of each material could be collected each week on average?3. Who will collect the waste each day?4. Where will you store the waste material safely and hygienically?5. What scrap dealer or recycling company will collect the material, and howmuch will they pay for it?6. Should you bring extra material from home or other collection points to add tothe piles each week to make more money?7. Should you involve the whole school in the project?8. Write down new ideas about how to make the process of recycling moreefficient while raising extra money.CHAPTER 2: investigation: metals and magnetism23
Next weekIn the next lesson, you will learn about simple electrical circuits, how to drawcircuit diagrams, and how to make an electromagnet.24TECHNOLOGY GRADE 7 TERM 3
Chapter 3Simple electric circuitsIn this chapter, you will learn what an electric circuit is and how to connect all the parts of an electriccircuit. You will learn how to draw circuit diagrams. You will also learn how electromagnets work andhow to make a simple electromagnet.3.1Circuits and components. 283.2Building your own electrical circuit. 303.3Electromagnets. 32Figure 1: A bulb can form part of an electric circuit. The filament in the bulb forms part of the circuit.Technology grade 7 term 325
Figure 226TECHNOLOGY GRADE 7 TERM 3
CHAPTER 3: simple electric circuits27
3.1 Circuits and componentsAn electric circuit needs three basic things to work:1. An energy source. This can be a cell or a stronger power source.2. A complete circuit. There has to be an unbroken pathway of conductingmaterials through which the electrical current can flow.3. A load. There has to be some form of resistance in the circuit. This could be inthe form of a light bulb, a resistor, a motor or other electrical components.To show how an electric circuit should beconnected, we draw circuit diagrams with symbolsthat show each component. This is a simple way torepresent the electric circuit. This table shows thesymbol we use for each component:NamePictureelectrochemical cell orcellbatteries in series, whichmeans they are next toeach otherswitchlight bulbresistorbuzzer28TECHNOLOGY GRADE 7 TERM 3A component is one part of awhole system.Symbol
NamePictureSymbolconducting wiresThe following is an example of a simple electric circuit. This circuit consists ofa cell, a switch, and a light bulb that have been connected by insulated copperconducting wires.Circuit diagrams are shown as rectangular boxes, even though the real circuitlooks quite different.Figure 3Questions to answer1. What are the three things that you need to make an electric circuit?2. How do you think you can see if the circuit in the picture at the top of this pageis working?3. If you made a mistake while putting the circuit together and the connectionswere not complete, what do you think would happen?CHAPTER 3: simple Electric circuits29
3.2 Building your own electrical circuitBuild simple circuitsFor this practical exercise, you will need the following objects: several 1,5 V cells or one 9 V cell, insulated copper wires, a switch, and a light bulb.1. Divide into groups of three or four.2. Connect the components
The field is stronger close to the magnet, and weaker further away. The magnet does not affect the paperclip until the paperclip is close enough to be within this field. Stronger magnets can attract magnetic materials from further away than weaker magnets can. This is because a stronger magnet has a larger magnetic field. A few questions to .