Transcription
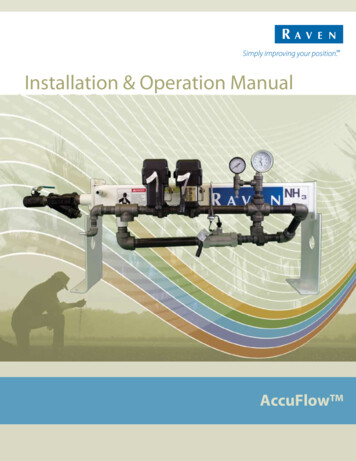
Installation & Operation ManualAccuFlow
DisclaimerWhile every effort has been made to ensure the accuracy of this document,Raven Industries assumes no responsibility for omissions and errors. Nor is anyliability assumed for damages resulting from the use of information containedherein.Raven Industries shall not be held responsible or liable for the effects ofatmospheric conditions and sunspot activity on the performance of our products.Raven Industries cannot guarantee the accuracy, integrity, continuity, oravailability of the GPS signal from the U.S. Department of Defense/NAVSTARGPS satellites, the OmniSTAR correction service or the WAAS correctionservice.Raven Industries accepts no responsibility for the use of the signal for other thanthe stated purpose. Raven Industries shall not be responsible or liable forincidental or consequential damages or a loss of anticipated benefits or profits,work stoppage or loss or impairment of data arising out of the use, or inability touse, the SmarTrax or any of its components.
Table of ContentsChapter 1Important Safety Information. 1Anhydrous Ammonia (NH3) Under Pressure . 1Discharging the AccuFlow System . 2Additional Safety Information . 3Electrical Safety . 3Chapter 2Introduction. 5Kit Contents . 5Parts for Fittings and Assemblies (P/N 063-0171-495, Boxed) . 6Parts for Dual Cooler System Fittings and Assemblies(P/N 063-0172-987) . 7Contacting Raven Industries . 8Chapter 3Installation. 9Assembling the AccuFlow System . 9AccuFlow System Diagrams . 11Mounting the AccuFlow System . 13Emergency Shut-off Rope Installation . 15Plumbing the AccuFlow System . 15Mounting the Manifold . 16AccuFlow Multi-Section Control . 17Dual Cooler Installation . 19Checking for System Leaks . 22Chapter 4Calibration & Operation . 23Adjusting the Boom Cal . 23Adjusting the Speed Cal . 23Adjusting the Meter Cal . 24Calculating the Required Capacity . 24System Capacity Chart . 25Adjusting the Valve Cal . 25Charging the AccuFlow System . 26Verifing AccuFlow Operation . 27Chapter 5Service & Maintenance. 29Discharging the AccuFlow System . 29Servicing and Storing the AccuFlow System . 30Opening the Super Cooler . 31Flow Meter Maintenance and Adjustment . 33Manual No. 016-0171-122i
Table of ContentsChapter 6Troubleshooting . 35Chapter 7System Diagrams . 41Chapter 8Testing Speed and Flow Meter Extension Cables . 55Speed Sensor Extension Cable . 55Pin Designations and Voltage Readings . 55Testing the Speed Sensor Extension Cable . 55Flow Meter Extension Cable . 56Pin Designations and Voltage Readings . 56Testing the Flow Meter Cable . 56iiViper Pro Installation & Operation Manual
CHAPTER1Important SafetyInformationChapter1NOTICE Read this manual carefully before installing the AccuFlow system. Review procedures for safe handling and use of anhydrous ammonia (NH3) with your NH3 supplier.If you are not trained to handle anhydrous ammonia, contact your NH3 supplier or the appropriateagricultural department for information on training Please review the operation and safety instructions included with your implement and/or controller. Follow safety information presented within this manual and review operation of the AccuFlow system withyour anhydrous ammonia (NH3) supplier. Follow all safety labels affixed to the AccuFlow system components. Be sure to keep safety labels in goodcondition and replace any missing or damaged labels. To obtain replacements for missing or damagedsafety labels, contact your local Raven dealer. Do not attempt to modify or lengthen any of the system control cables. Extension cables are available fromyour local Raven dealer. If you require assistance with any portion of the installation or service of your Raven equipment, contactyour local Raven dealer for support.DANGERAnhydrous Ammonia (NH3) Under PressureAnhydrous ammonia can cause severe burning, blindness, or death. Carefully read and follow all safetyinstructions and warnings before operating or servicing equipment.1.Review safety requirements associated with NH3 and the AccuFlow manual with your NH3 supplier.a.Always wear proper personal protective equipment when working with the AccuFlow system andanhydrous ammonia. Appropriate protective clothing includes, but is not limited to: Goggles or Face Shield Protective Suit and Gloves Respiratorb.DO NOT allow any one to operate the AccuFlow system without proper instruction and training.Manual No. 016-0159-4031
Chapter 12.3.Use caution when handling anhydrous ammonia (NH3) products.a.Stand ‘up wind’ when working around anhydrous ammonia (NH3) and related equipment. Always keepanhydrous ammonia equipment away from buildings, livestock, and other people.b.Anhydrous ammonia may cause sickness or death. Never work on NH3 equipment in confined spaces.Seek immediate medical attention if symptoms of illness occur during, or shortly after, use ofanhydrous ammonia products.c.Keep a source of clean water (at least five gallons) readily available while working with anhydrousammonia. In case of exposure, flush exposed skin or eyes immediately with large quantities of waterand seek immeditate medical attention.d.NH3 can be harmful to the environment if not used properly. Follow all local, state, and federalregulations regarding proper handling of anhydrous ammonia.Thouroughly bleed all system lines and disconnect nurse tank hose before beginning service ormaintenance. Allow a minimum of one (1) hour to fully discharge the system. Verify gauge pressure isat zero before opening the system.a.4.Always remove the AccuFlow system from service before performing maintenance.Use extreme caution when opening a previously pressurized system.Before performing service or maintenance on the AccuFlow system, read and follow the instructionsprovided in the Discharging the AccuFlow System section on page 29 to properly dischargeDischarging the AccuFlow SystemThe AccuFlow system must be discharged of all anhydrous ammonia and the system must be completely shutdown before the implement can be transported.DANGERDO NOT transport the AccuFlow system while itis charged with anhydrous ammonia. TheAccuFlow Super Cooler and product lines mustbe completely discharged before transportingthe implement.The following procedure outlines the proper method for discharging NH3 from the AccuFlow system andpreparing the system for transport, service, or maintenance.DANGERUse extreme caution when opening apreviously pressurized system. Exposure toanhydrous ammonia can cause severe burning,blindness, or death. To avoid injury or death,always wear proper personal protectiveequipment.Note:2Personal protective equipment such as a respirator, protective suit and gloves are required whenworking with anhydrous ammonia products.AccuFlow Installation & Operation Manual
Important Safety Information1.Toggle the console or vehicle Master Switch to the off position.2.Completely close the main shut-off valve on the supply or nurse tank.3.Resume field application until the pressure gauge reads no remaining pressure is in the AccuFlow system.4.Verify that the console and/or vehicle Master switch, and all section switches, are in the off position.5.Completely close the Emergency Shut-off valve on the AccuFlow Super Cooler.6.Bleed and disconnect the nurse tank supply hose from the AccuFlow system.7.Toggle the console Master and all section switches to the on position.8.While standing upwind from the implement, slowly open bleed valve(s) until fully open. Refer to Figure 1 onpage 10 for assistance locating AccuFlow bleed valve(s).9.Allow a minimum of one (1) hour to fully discharge the system. Verify that the pressure gauge on theAccuFlow Manifold reads zero and the Super Cooler is not cold to the touch before opening the system.This ensures that all liquid NH3 has evaporated and pressure has been discharged.Additional Safety InformationElectrical SafetyCAUTIONDo not reverse power leads. Doing so couldcause severe damage to the equipment.Always make sure that the power leads areconnected to the correct polarity as marked.Ensure that the power cable is the last cable tobe connected.Manual No. 016-0159-40331Before transporting the AccuFlow system or beginning service or maintenance:
Chapter 1Notes:4AccuFlow Installation & Operation Manual
IntroductionCHAPTERChapter22The AccuFlow system is designed to provide continuous and automatic control of anhydrous ammoniaapplications via a Raven Serial (i.e. SCS 440 or 660) or CAN (i.e. SCS 4000/5000, Viper Pro, or Envizio Pro)Console. The application rate is monitored by a flow meter connected to the Super Cooler and controlled bythe Raven Console via the control valve(s). Simply set the target application rate on your Raven console andlet the system adjust for the vehicle speed.Note:To properly measure and control application, anhydrous ammonia must be in a liquid state when itpasses through the flow meter. To remain liquid, anhydrous ammonia must be stored at atemperature of -28 F (-33 C) or kept under pressure at higher temperatures.To help ensure that the ammonia is in a liquid state as it passes through the flow meter, and thusaccurately measured, the AccuFlow Super Cooler uses a small amount of anhydrous ammoniafrom the nurse tank to reduce the temperature of the ammonia being applied.Kit ContentsPlease review the following tables for components, parts, and fittings you should have received with yourRaven AccuFlow system. It may be necessary to order some components of the AccuFlow system separately.Before beginning assembly and installation, verify that all required components have been purchased.AccuFlowSystems and KitsComponentsAccuFlow Super CoolerFittings for AssemblyFittings for Assembly,Dual CoolerFlow Meter, RFM 60SValve, Standard,1” Carbon SteelValve, On/OffValve, Fast, 1” CarbonSteelNote:P/N063-0172-877063-0172-495Single Cooler KitsDual Cooler SystemsTwo Valve KitFast Valve KitTwo Valve KitFast Valve 11063-0172-97811063-0172-979111AccuFlow systems will require appropriate Flow Cabling to connect to your Raven ControlConsole. Contact your local Raven dealer for assistance and information.Manual No. 016-0159-4035
Chapter 2To provide the most responsive control of anhydrous ammonia applications when using a multisection tool bar, a Check Valve Assembly (P/N 063-0173-030, ordered seperately) should beinstalled if the section on/off valves are mounted next to the distributor manifolds. Refer to thefollowing system diagrams for installation location. Contact your local Raven dealer for moreinformation.See Chapter 7, System Diagrams, for detailed diagrams and system connections.Parts for Fittings and Assemblies (P/N 063-0171-495, Boxed)The following plumbing components and fittings are included with each Raven AccuFlow system:Qty.1 Valve, Ball, Steel, 1-1/4”019-0159-24513 U-Bolt w/ Hardware107-0159-447121112124412211 Bracket, Mounting, Cooler Bracket, “Z”, NH3107-0171-063107-0171-068 Tubing, EVA, 3/8” (7 ft.)214-0001-035 Tubing, EVA, 3/4” (28 ft.)214-0001-036 Tube, Vapor214-0002-002 Gasket, Teflon, 1” Pipe Union 219-0000-076 Bolt, 3/8” x 1-1/4”311-0054-106 Nut, Hex, 3/8”312-1001-037 Washer, Lock, 3/8”313-1000-022 Chain Link, Quick, 3/16”319-1000-010 Fitting, Hose, Barb, 1/4” x 3/8” 333-0002-004 Fitting, Hose, Barb, 1/2” x 3/4” 333-0002-011 Fitting, Bushing,1-1/2” x 1-1/4” 333-0003-019 Fitting, Bushing, 1-1/2” x 1”333-0003-020 Fitting, Bushing, Reducing,333-0003-0941” x 1/2”11112113311111Components Fitting, Elbow, Reducing,1/2” x 1/4” Fitting, Elbow, Reducing,1” x 1/2” Fitting, Union, 1” Pipe, Nipple, 1/4” x 2” Pipe, Nipple, 1/2” x 1-1/2” Pipe, Nipple, 1/2” x 2” Pipe, Nipple, 1” x 2” Pipe, Nipple, 1” x 3” Pipe, Nipple, 1” x 5” Pipe, Nipple, 1” x 8” Pipe, Nipple, 1-1/4” x 2” Pipe, Nipple, 1-1/4” x 12” Fitting, Cap, 1” Strainer, Y-Type, 1-1/4” Valve, Bleed, 1/4” Gauge, Pressure, 0 - 150 PSI1 Gauge, Temperature1 Fitting, Tee, 1/4”333-0004-00121111 Fitting, Tee, 1” Fitting, Tee, 1/2” x 1/2” x 1/4” Fitting, Cross, 1” Fitting, Elbow, 90 05-0065611Note:6ComponentsP/NQty. Magnet, Ceramic(w/i Strainger Assembly) Cable Tie, Black Clamp, Hose Clamp, 435-3003-030Refer to Figure 2 on page 11 or Figure 3 on page 12 for a diagram of these fittings and parts.AccuFlow Installation & Operation Manual
IntroductionParts for Dual Cooler System Fittings and Assemblies(P/N y.211115Components Fitting, Bushing, 1/2” x 1/4” Fitting, Tee, 1/2” Fitting, Tee, 1-1/4” Fitting, Elbow, 90 1-1/4” Fitting, Union, 1-1/4” Pipe, Nipple, 1-1/4” x 5-006333-0006-005333-0008-038219-0000-0271 Pipe, Nipple, 1-1/4” x 6”333-0008-0422Components Valve, Ball, Steel, 1-1/4” U-Bolt w/ Hardware Bracket, Mounting, Cooler Tubing, EVA, 3/8” (7 ft.) Tubing, EVA, 3/4” (28 ft.) Tube, Vapor Gasket, Teflon, 1” Pipe UnionWasher Bolt, 3/8” x 1-1/4”311-0054-1061333-9000-0252 Nut, Hex, 3/8”312-1001-03722122 Washer, Lock, 3/8”313-1000-022 Chain Link, Quick, 3/16”319-1000-010 Fitting, Hose, Barb, 1/4” x 3/8” 333-0002-004 Fitting, Hose, Barb, 1/2” x 3/4” 333-0002-011342 Strainer, Y-Type, 1-1/4” Magnet, Ceramic(w/i Strainger Assembly) Cable Tie, Black Clamp, Hose Clamp, 3003-003The Single to Dual Cooler Kit (P/N 117-0171-151) also includes an additional AccuFlow SuperCooler (P/N 063-0172-877).Manual No. 016-0159-40372Dual Cooler Systems (P/N 117-0171-280 and 117-0171-281), as well as the Single to Dual Cooler Kit (P/N117-0171-151), include the following additional fittings and components:
Chapter 2Contacting Raven IndustriesUpdates for Raven manuals as well as software updates for Raven consoles are available at the Raven FlowControls Division web site:http://www.ravenprecision.comSign up for e-mail Alerts and we will notify you when updates for your Raven Flow Controls products areavailable on the Raven web site.For additional support, contact your local Raven dealer or the Raven Customer Support Center by any one ofthe following methods: Via phone: 1-800-243-5435 Via mail:Raven IndustriesFlow Controls Division205 E 6th StreetSioux Falls, SD 57104 Via e-mail: atdinfo@ravenind.com8AccuFlow Installation & Operation Manual
CHAPTER3InstallationChapter3The following sections are included to illustrate the proper procedure for mounting and plumbing the AccuFlowsystem.DANGERAnhydrous ammonia can cause severe burning,blindness, or death. Refer to the Dischargingthe AccuFlow System section on page 29 andfollow the procedure for bleeding the AccuFlowsystem before beginning maintenance.This manual assumes you have already read and followed instructions for installation of the Raven controlconsole which will be controlling the application of anhydrous ammonia through the AccuFlow system.Note:In addition to the Raven Control Console and associated cabling, a speed sensor and FlowCabling must also be installed with the Raven AccuFlow system. Refer to Chapter 7, SystemDiagrams, for examples of AccuFlow systems and cable connections. Contact your local Ravendealer for more information and assistance.Assembling the AccuFlow SystemRefer to the following figures when assembling the AccuFlow system (P/N 063-0172-991 or063-0171-157). All nuts and bolts required for assembly are included.Manual No. 016-0159-4039
Chapter 3FIGURE 1.Note:Typical AccuFlow System (Single Section, Two Valves)AccuFlow systems with a Fast Control Valve (P/N 063-0172-979) will only have a single controlvalve in place of the Control Valve and Master On/Off Valve as shown in the diagram above.A Space Saver Kit (P/N 117-0159-723) is also available. Contact your local Raven dealer for moreinformation.10AccuFlow Installation & Operation Manual
InstallationAccuFlow System DiagramsFIGURE 2.AccuFlow Two Valve System (30 GPM)330 GPM ACCU-FLOW 2 VALVE SYSTEMON/OFF CONTROL VALVE REPLACEMENT PARTS** High Pressure NH3 Plumbing Should Be Done With Schedule 80 Pipe And Fittings PTIONCooler Bracket3/8"-16 x 1 1/4" Bolt3/8" Lock Washer3/8"-16 Hex NutU-Bolt Assembly3/8" EVA HoseHose ClampSuper Cooler (30 GPM)Z-Bracket1/2" x 3/4" Hose Barb1 1/4" x 2" Pipe Nipple1 1/4" x 12" Pipe Nipple1 1/4" Elbow3/4" EVA Hose1/4" x 3/8" Hose Barb1 1/2" X 1 1/4" Bushing1 1/2" Muffler Clamp1" Pipe Union Gasket1" Pipe Union1" x 2" Pipe Nipple1" Pipe Cross1" x 5" Pipe Nipple1/2" x 1 1/2" Pipe NippleRAVEN PART 53637383940414243444546474849DESCRIPTION1/2" x 1/2" x 1/4" Pipe TeeTemperature Gauge1/4" x 2" Pipe Nipple1/4" Pipe Tee0-150 PSI Gauge1/4" Bleed Valve1" x 8" Pipe Nipple1" Pipe Cap1/2" x 1/4" Pipe Elbow1/2" x 2" Pipe Nipple1" x 1/2" Pipe Elbow1" Pipe TeeControl ValveOn/Off Valve1 1/4" Y-Strainer1 1/4" Steel Ball ValveCeramic MagnetsFlow Meter, 60S1" x 1/2" Reducing Bushing1" x 3" Pipe NippleVapor Tubes (Not Shown)1 1/2" x 1" BushingCheck Valve Assy Multi-SectionRelief ValveRAVEN PART 703/09 REV. ESHEET 1 0F 1Note:Install the provided teflon gasket (P/N 219-0000-076, Item # 19) to eliminate leaks from the 1”Union.Manual No. 016-0159-40311
Chapter 3FIGURE 3.AccuFlow Fast Valve System (30 GPM)30 GPM ACCU-FLOW SYSTEMFAST VALVE REPLACEMENT PARTS** High Pressure NH3 Plumbing Should Be Done With Schedule 80 Pipe And Fittings PTIONCooler Bracket3/8"-16 x 1 1/4" Bolt3/8" Lock Washer3/8"-16 Hex NutU-Bolt Assembly3/8" EVA HoseHose ClampSuper Cooler (30 GPM)Z-Bracket1/2" x 3/4" Hose Barb1 1/4" x 2" Pipe Nipple1 1/4" x 12" Pipe Nipple1 1/4" Elbow3/4" EVA Hose1/4" x 3/8" Hose Barb1 1/2" x 1 1/4" Bushing1 1/2" Muffler Clamp1" Pipe Union Gasket1" Pipe Union1" x 2" Pipe Nipple1" Pipe Cross1" x 5" Pipe Nipple1/2" x 1 1/2" Pipe NippleRAVEN PART 536373839414243444546474849DESCRIPTION1/2" x 1/2" x 1/4" Pipe TeeTemperature Gauge1/4" x 2" Pipe Nipple1/4" Pipe Tee0-150 PSI Gauge1/4" Bleed Valve1" x 8" Pipe Nipple1" Pipe Cap1/2" x 1/4" Pipe Elbow1/2" x 2" Pipe Nipple1" x 1/2" Pipe Elbow1" Pipe TeeFast Valve1 1/4" Y-Strainer1 1/4" Steel Ball ValveCeramic MagnetsFlow Meter, 60S1" x 1/2" Reducing Bushing1" x 3" Pipe NippleVapor Tubes (Not Shown)1 1/2" x 1" BushingCheck Valve Assy Multi-SectionRelief ValveRAVEN PART 020063-0173-030334-0002-005054-0159-11803/09 REV. ESHEET 1 0F 1Note:12Install the provided teflon gasket (P/N 219-0000-076, Item # 19) to eliminate leaks from the 1”Union.AccuFlow Installation & Operation Manual
InstallationOptional AccuFlow Space Saver Kit (P/N 117-0159-723)ITEMDESCRIPTIONRAVEN PART #1234567Fitting, Pipe Elbow 90 Degree, Malleable IronFitting, Pipe Nipple Blk. Iron Sch. 80, 1" NPT x 3"Fitting, Pipe Nipple Blk. Iron Sch. 80, 1" NPT x 6"U-Bolt, Space Saver, Anhydrous SystemBracket, Space Saver, Anhydrous SystemNut, Plain Hexagon, 3/8"-16 UNC-2BSplit Lock Washer, 3FIGURE 4.Use Rectorseal #5 on all pipe joints.Assemble fittings according to the diagram above. Item 3 should angle upward atapproximately 45 degrees.The hardware to mount the 1" pipe nipple to the bracket (item 5) is supplied with Accu-FlowSystem.Mounting the AccuFlow SystemUse the provided U-Bolts and hardware (P/N 107-0159-447) to mount the AccuFlow system directly to theframe of the tool bar or implement. The intake port of the AccuFlow Super Cooler should be pointing towardthe rear of implement and nurse tank.Manual No. 016-0159-40313
Chapter 3FIGURE 5.AccuFlow Mounting ExampleAccuFlow Intake Port14AccuFlow Installation & Operation Manual
InstallationEmergency Shut-off Rope InstallationUsing the provided Quick Link (P/N 319-1000-010), securely tie a length of rope to the Emergency Shut-offValve. Route the rope so that, when pulled, the Emergency Shut-off Valve closes.Wind DirectionSafety Rope3WARNINGAnhydrous ammonia can cause severe burning,blindness, or death. Always work upwind of animplement with the AccuFlow system. If theEmergency Shut-Off Rope cannot be routed tothe vehicle’s cab, make sure to orient thevehicle to allow the rope to be pulled from alocation upwind of the implement.Plumbing the AccuFlow SystemThe following steps will guide you through the final system connections for the AccuFlow Super Cooler andNH3 plumbing.Note:Schedule 80 pipe and fittings should be used to plumb high pressure NH3 systems.Control valves used with liquid systems cannot be used with the NH3. Specially designed ControlValve(s) must be used with the AccuFlow system to control application of NH3.This special NH3Control Valve can be used with all other chemicals; i.e. herbicides, insecticides, and liquidfertilizer.To complete installation of the AccuFlow system:1.Install Flow Meter (RFM 60S) and Control Valve.Note:The ON/OFF Valve will not be used if a Fast Control Valve is installed.2.Weld the provided Steel Vapor Tubes (P/N 214-0002-002) to the center applicator knives as shown inFigure 1 on page 10.3.From the roll of 3/4” EVA Tubing (P/N 214-0001-036), cut two hoses which will be used to connect the SteelVapor Tubes (installed in step 2) to the hose barbs located on the sides of the AccuFlow Super Cooler.Manual No. 016-0159-40315
Chapter 34.Connect the 3/8” EVA Tubing (P/N 214-0001-035) to the AccuFlow outlet (hose barb after valve(s)). Routethe tubing from the AccuFlow outlet to the inlet at the bottom of the Super Cooler Intake port.5.Verify that all of the applicator hoses are of equal length from each manifold hose barb to each liquidapplicator tube.6.Verify that all of the orifice openings in the liquid applicator tubes are unplugged and have the samediameter.7.For high flow systems (20 GPM or greater):a.Use 1-1/4” hose between the nurse tank and AccuFlow Emergency Shut-off Valve(P/N 019-0159-245). This hose should be as short as possible and must be no longer than 15 feet.b.Install a 1-1/4” break-away coupler to connect the nurse tank and the AccuFlow Intake Port. A highflow tank valve is also recommended.c.Do not use street elbows to avoid excessive pressure drop.Note:8.Consult your local NH3 supplier for appropriate hoses, break-away fittings, manifolds, and orifacesfor use with the AccuFlow system.Verify installation by referring to Figure 1 on page 10.Mounting the ManifoldThe following figure illustrates the various methods of connecting your existing NH3 manifold(s) (manifold notincluded with AccuFlow system). When installing your manifold, Raven recommends the following: Attach a 0-60 PSI gauge in one outlet of each NH3 manifold connected to the AccuFlow system. Verify that all manifold(s) hose barbs are the same orifice diameter. Verify all hoses from the flow divider are the same length. Verify all hoses to the manifolds are the same length.16AccuFlow Installation & Operation Manual
InstallationManifold Mounting Examples (Single Section Tool Bar)3FIGURE 6.Note:If more than two manifolds will be used with the AccuFlow system, a flow divider manifold will berequired.AccuFlow Multi-Section ControlNote:Adding a flow divider will decrease the pressure of anhydrous ammonia for application. Size theflow divider for minimal pressure drop to avoid reducing system capacity. Consult themanufacturor or dealer for specifications and sizing information.The following diagrams illustrate the required plumbing for a multi-section control system.Manual No. 016-0159-40317
Chapter 3FIGURE 7.Multi-Section Tool Bar with Two Valve SystemNote:Contact your local NH3 dealer for proper oriface diameter, flow dividers, and manifold selectionsfor your specific application.Note:Adding a flow divider will decrease the pressure of anhydrous ammonia for application. Size theflow divider for minimal pressure drop to avoid reducing system capacity. Consult themanufacturor or dealer for specifications and sizing information.18AccuFlow Installation & Operation Manual
InstallationMulti-Section Tool Bar with Fast Valve System3FIGURE 8.Note:Contact your local NH3 dealer for proper oriface diameter, flow dividers, and manifold selectionsfor your specific application.Dual Cooler InstallationThe following diagrams are provided to assist with mounting and connecting an AccuFlow Dual CoolerSystem.Manual No. 016-0159-40319
Chapter 3FIGURE 9.Dual Cooler with Fast Valve SystemSide ViewBottom View20AccuFlow Installation & Operation Manual
InstallationFIGURE 10.Dual Cooler with 2 Valve SystemSide View3Bottom ViewManual No. 016-0159-40321
Chapter 3Checking for System LeaksOnce the AccuFlow has been installed on your implement, check the system for leaks by charging thesystem with compressed air and applying
CHAPTER 1 Manual No. 016-0159-403 1 Chapter 1Important Safety Information Read this manual carefully before installing the AccuFlow system. Review procedures for safe handling and use of anhydrous ammonia (NH 3) with your NH3 supplier. If you are not trained to handle anhydrous ammonia, contact your NH 3 supplier or the appropriate agricultural department for information on training