Transcription
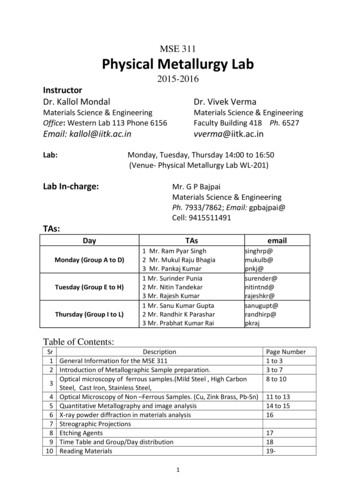
MSE 311Physical Metallurgy Lab2015-2016InstructorDr. Kallol MondalDr. Vivek VermaMaterials Science & EngineeringOffice: Western Lab 113 Phone 6156Materials Science & EngineeringFaculty Building 418 Ph. 6527Email: kallol@iitk.ac.invverma@iitk.ac.inLab:Monday, Tuesday, Thursday 14:00 to 16:50(Venue- Physical Metallurgy Lab WL-201)Lab In-charge:Mr. G P BajpaiMaterials Science & EngineeringPh. 7933/7862; Email: gpbajpai@Cell: 9415511491TAs:DayMonday (Group A to D)Tuesday (Group E to H)Thursday (Group I to L)TAs1 Mr. Ram Pyar Singh2 Mr. Mukul Raju Bhagia3 Mr. Pankaj Kumar1 Mr. Surinder Punia2 Mr. Nitin Tandekar3 Mr. Rajesh Kumar1 Mr. Sanu Kumar Gupta2 Mr. Randhir K Parashar3 Mr. Prabhat Kumar shkr@sanugupt@randhirp@pkrajTable of Contents:SrDescription1 General Information for the MSE 3112 Introduction of Metallographic Sample preparation.Optical microscopy of ferrous samples.(Mild Steel , High Carbon3Steel, Cast Iron, Stainless Steel,4 Optical Microscopy of Non –Ferrous Samples. (Cu, Zink Brass, Pb-Sn)5 Quantitative Metallography and image analysis6 X-ray powder diffraction in materials analysis7 Streographic Projections8 Etching Agents9 Time Table and Group/Day distribution10 Reading Materials1Page Number1 to 33 to 78 to 1011 to 1314 to 1516171819-
General InformationTotal Laboratory Turns: 12 [6 experiments in first session (before midsem) and6 experiments in next session (after midsem)Lab Exam/Lab Viva/Lab Quiz will be either after both sets of experiments orafter each set of experiment. Each day, viva will be taken on the experiment.Marks Distribution of Lab: Laboratory (Total 100 %)a) Daily Lab Report10%b) Daily Lab Viva10%c) Assignment15%d) Project25%e) Final Lab Exam/ Lab Viva 40%SAFETY: To avoid injury, the students must take the permission of the laboratory staffs beforehandling any machine. Careless handling of machines may result in serious injury. Students must ensure that their work areas are clean. At the end of each experiment, students must clear off all tools and materials fromthe work area.RULES: Follow the lab timing and come in proper attire. There will be two attendances:Initial attendance (at sharp 2 PM) to be taken by TAs at the beginning of lab sessionand final one after the experiments over. Late comers will not be allowed to enter. Do not use cell phone inside the lab during lab timing. Students must come to the laboratory wearing trousers and shoes. Half pants, looselyhanging garments and slippers are strictly prohibited. Every student should obtain a copy of Laboratory Manual. You are requested to bringyour lab manual on the day of experiment. The Lab report should contain: (1) Title of the experiment, (ii) Three to four linesstating the objectives, (iii) Name of all equipments/tools used along with a one linedescription of their use, and (iv) Observations and (v) Answer to questionsspecifically asked in the section “to report” The report should be short and nicelyprepared.RECOMMENDED READING: The Principles of Metallographic Laboratory Practice by George L. Khel Physical Metallurgy by V. Raghvan Engineering Physical Metallurgy by Yu. Lakhtin Material Science by S P Gupta2
Experiment 1Introduction of Metallographic Specimen PreparationObjective:1. Metallographic Sample Preparation.2. To study the importance of the various steps in sample preparation.3. To understand the need of mounting, polishing and etching.Introduction:Metallography is the study of the microstructure of metals and alloys by means ofmicroscopy. It is an art and science of preparing, interpreting, and analyzing microstructuresin materials, to better understand materials behavior and performance. The method isused for the evaluation of metallic materials in the various industries, including theaerospace industry, the automotive industry and parts of the construction industry. It is alsoused for process control including the examination of defects that appear in finished orpartly finished products, as well as the studies of parts that have failed during service. It isan important branch of the Metallurgical Engineering.A well prepared metallographic specimen is:a. A representative sampleb. Sectioned, ground and polished so as to minimize disturbed or flowed surface metalcaused by mechanical deformation, and thus to allow the true microstructure to berevealed by etching.c. Free from polishing scratches and pits and liquid stainingd. Flat enough to permit examination by optical microscope or SEMVarious steps involved in the specimen preparation, and the significance of each step:Many steps in the preparation of metallographic specimens described here are alsoapplicable in other types of metallographic studies, such as electron microscopy, microhardness testing, quantitative measurement of constituents of structures, and electronmicroprobe analysis. Preparation of metallographic specimens generally requires fivemajor operations:a. Sectioningb. Mounting (which is necessary when the sample cannot be held properly due to itsshape and/or size, while polishing)c. Grindingd. Polishinge. EtchingThese operations are listed below in the order they are performed SectioningSeparate test pieces or coupons attached to castings or forgings should be designed so thata minimum of sectioning is required for producing metallographic specimens. Sectioning3
becomes necessary when studying parts that have failed in service where specimen has tobe taken from a large block of material. Therefore, metallographic studies of suchsamples often involve more than one sectioning operation.Many metallographic studies require more than one specimen. For example, a study ofdeformation in wrought metals usually requires two sections- one perpendicular to, andthe other parallel to, the major axis of the direction of deformation. Failed parts may bestbe studied by selecting a specimen that intersects the origin of the failure, if the origin canbe identified on the surface. Depending on the type of failure, it may be necessary to takeseveral specimens from the area of failure and from adjacent areas. Mounting of SpecimensThe primary purpose of mounting is to make it convincement to handle specimens ofarbitrary shape and/or small sizes during various steps of metallographic samplepreparation and examination. A secondary purpose is to protect and preserve extremeedges or surface defects during metallographic preparation. Specimens may also requiremounting to accommodate various types of automatic devices used in metallographiclaboratories or to facilitate placement on the microscope stage. An additional benefit ofmounting is the identification of the sample (name, alloy number or laboratory codenumber) without damaging the specimen.Compression mounting: It is most common mounting method, which involves moldingaround the metallographic specimen by heat and pressure using the molding materials suchas Bakelite, Diallyl Phthalate resins, and acrylic resins. Bakelite and Diallyl phthalate arethermosetting, and acrylic resins are thermoplastic.Not all materials or specimens can be mounted in thermosetting or thermoplastic mounting.The heating cycle may cause changes in the microstructure, or the pressure may causedelicate specimens to collapse or deform. The size of the selected specimen may be too largeto be accepted by the available mold sizes. These difficulties are usually overcome by coldmounting.Cold Mounting requires no pressure and little heat, and is a mean of mounting largenumbers of specimens more rapidly than possible by compression mounting. Epoxy resinsare most widely used cold mounting materials. They are hard, and adhere tenaciously tomost metallurgical, mineral and ceramic specimens. GrindingGrinding is a most important operation in specimen preparation. During grinding, theoperator has the opportunity of minimizing mechanical surface damage, that can be removedby subsequent polishing operations. Even if sectioning is done in a careless manner resultinginto a severely damaged surface, the damage can be eliminated by prolonged grinding.However, prolonged grinding should be avoided since it might lead to excess heating orsurface damage.4
Grinding is accomplished by abrading the specimen surface through a sequence ofoperations using progressively finer abrasive grits. Grit sizes ranging from 6 0 mesh to 150mesh are usually regarded as coarse abrasives, and grit sizes r a n g i n g f r o m 1 8 0mesh to 600 mesh as fine abrasives. Grinding should commence with the coarse gritsize for making initial flat surface and remove the effects of sectioning. Hack-sawed,band-sawed, or other rough surfaces usually require abrasive grit sizes in the range of 80 to150 mesh. Grinding should be done sequentially starting from the coarser one to finerone. A satisfactory grinding sequence might involve grit sizes of 180, 240, 400 and 600mesh. The purpose of grinding is to remove the oxide layer or damaged layer or unevensurfaces that might have formed during last sectioning operation. However, the depth of coldworked metal is roughly inversely proportional to the hardness of the specimen and maybe 10 to 50 times the depth of penetration of the abrasive particle.To ensure the complete elimination of the previous grinding scratches found by visualinspection, the direction of grinding must be changed by 90o from the one stage ofgrinding to the next stage. In addition, microscopic examination of the various groundsurfaces during the grinding sequence may be worthwhile in evaluating the effect ofgrinding. Each ground surface should have scratches that are clean-cut and uniform in size,with no evidence of previous grinding scratches. Cleaning before going to next stage grindingis always helpful.Grinding MediumsGrinding media are silicon carbide (SiC), aluminium oxide (Al2O3), emery (Al2O3Fe3O4), and diamond particles. All except diamond are generally bonded to paper orcloth backing material of various weights in the form of sheets, disks, and belts of varioussizes. The abrasives may be used also in t h e powder form by charging the grindingsurfaces with loose abrasive particles.Automatic grinding, as the name implies, is done without hand assistance. Allautomatic grinding devices use lap surfaces on which paper-based disks are placed or5
abrasive powder is charged. The lap is either a rotating or a vibrating disk, where the useof the latter is described as vibratory grinding. PolishingPolishing is the final step in producing a surface that is flat, scratch free, and mirror-like inappearance. Such surface is necessary for subsequent accurate metallographicinterpretation, both the qualitative and quantitative. The polishing technique used shouldnot introduce extraneous structure, such as disturbed metal, pitting, dragging out ofinclusions, and staining.Mechanical PolishingMechanical polishing is frequently used to describe the various final polishingprocedures involving the use of cloth-covered laps and suitable polishing abrasivesbasically Al2O3 slurry. The laps have either a rotating or a vibrating motion, and thespecimens are held by hand, held mechanically, or merely confined within the polishingarea. Polishing should be done in a relatively dust-free area, preferably removed from thearea for sectioning, mounting and rough grinding. Any contamination of a polishing lap byabrasive particles carried over from preceding operations or by dust, dirt or other foreignmatter in the air cannot be tolerated. Carryover as a result of improper cleaning betweenfinal polishing steps is another prime source of contamination. It is just as important for theoperator to wash his/her hands meticulously as it is for him/her to remove all traces ofpolishing abrasive from the specimen before proceeding to the next finer polishingoperation.Electrolytic PolishingEven with the most careful mechanical polishing, some disturbed metal, even very smallthe amount, will remain after preparation of a metallographic specimen. This is no problemif the specimen is to be etched for structural investigation because etching is usuallysufficient to remove the slight layer of disturbed metal. However, if the specimen is to beexamined in the as polished condition, or if no surface disturbance can be tolerated, theneither electrolytic polishing or chemical polishing is preferred. The basic principle involvedin this technique is anodic dissolution of surface of the sample which results in a levelingand brightening of its surface.Electro polishing does not disturb any metal on the specimen surface, and therefore, ideallysuited for the metallographic preparation of soft metals, most single phase alloys, and alloysthat works harden readily. The disadvantages of electro polishing include preferential attackin multiphase alloys caused by differences in electrical potential between phases. Properchoice of electrolyte and operating conditions will minimize these disadvantages. EtchingMetallographic etching is used to reveal particular structural characteristics of a metal. Thisis essential since these structural characteristics are not visible in the as polished mirror likesurface in the metal. It can be used for phase identification, for dislocation densitycaculation (etch pitting), and for orientation studies. The principle of etching multiphasealloys is based on the preferential attack (different rates of electrochemical dissolution of6
phases in the etchant) or preferential staining of one or more phases, because ofdifferences in chemical composition and, because of differences in grain-orientation.Before being etched, a specimen should be inspected for polishing defects, such asscratches, pits, relief polish, comet tails, pulled out inclusions, and voids.Chemical EtchingChemical etching is accomplished by immersing the specimen in (or swabbing it with)a suitable etchant until the required structure is revealed. Etching is done in Petri-dishesor in othe
Lab Exam/Lab Viva/Lab Quiz will be either after both sets of experiments or after each set of experiment. Each day, viva will be taken on the experiment. Marks Distribution of Lab: Laboratory (Total 100 %) a) Daily Lab Report 10% b) Daily Lab Viva 10% c) Assignment 15% d) Project 25%
