Transcription
HTML and CSS TutorialThis work is licensed under a Creative Commons License: Attribution 3.0 Unported.You are free: to Share — to copy, distribute, and transmit the work to Remix — to adapt the workUnder the following conditions: Attribution. You must attribute the work in the manner specified by the author or licensor.For attribution purposes, the URL to be associated with the work ishttp://www.goer.org/HTML, and the Title and Author of this work are as follows: “ThePocket HTML Tutorial” Copyright 2012 by Evan Goer.For any reuse or distribution, you must make clear to others the license terms of this work. Any ofthese conditions can be waived if you get permission from the copyright holder.Your fair use and other rights are in no way affected by the above.This is a human-readable summary of the Legal Code (the full license).Chapter 1: Getting StartedWelcome to the world of HTML! If you have never written HTML code before, you should startwith this section. If you’ve written HTML before, you should feel free to skip ahead to Chapter 2,Markup Basics.When you’re done with this chapter, you should be able to: create and alter a simple web page explain what HTML elements and attributes are use your browser to help you view and reuse code from other websitesSection SummariesThe Getting Started chapter contains these sections:1. Diving In — Demonstrates basic HTML concepts by diving in and creating a simple webpage.2. Structure — Examines document structure: the html element, the head, the title, andthe body.3. Tinkering — Makes alterations to the “Simple Web Page”. We’ll add text, change thebackground color, and explore how HTML handles whitespace.4. Elements — Explores elements, which are the basic building blocks of a web page. What arethe components of a element? What happens if you misspell a element? And is there a gooduse for the blink element? The answer might surprise you!5. Attributes — Explores attributes, which modify the behavior of a element. We’ll look at thecomponents of an attribute and talk about attribute whitespace, attribute misspellings, andother issues.
6. Browser Tools — Explains how to use key browser features, such as viewing source,viewing page properties, and saving images.Diving InThe first thing we’re going to do is dive in and create a simple webpage. We’ll explore what’s goingon soon, but for now, just follow the directions as best you can.To create your web page, you need: A browser (you’re using one right now) A plain text editor (you already have one on your machine)Step 1: Open a Text EditorA text editor is a program that edits plain text files. When authoring HTML, do not use Word,Wordpad, Pages, or any other program that does not save files as plain text. Windows users: open Notepad ( Start Programs Accessories Notepad ) Mac OS X users: open vi or TextEdit ( Applications TextEdit ) Linux and other UNIX users: open vi or emacsUnfortunately, Notepad and TextEdit are not very good text editors. By default, Notepad alwaystries to save and open files with a .txt extension. You must constantly fight with it to make it saveand open webpages (files with a .htm or .html extension). Be strong, and ye shall overcome.Likewise, TextEdit does not use plain text by default. Before using TextEdit to edit HTML, go intoPreferences and set the Format for new documents to be Plain Text. For good measure, you mighthave to convert your existing document to plain text ( Format Make Plain Text ).Using Notepad to write HTML is kind of like using a butter knife to cut a birthday cake — it’s thewrong tool for the job. A better choice would be a more advanced text editor, such as: Crimson Editor (Windows, free) Smultron (Mac OS X, free) TextMate (Mac OS X, not free, but well worth the money) jEdit (Cross-platform, free)All of these editors avoid the problems with file extensions and plain text described above, and havenumerous extra features for advanced users. You don’t have to download one of these editors rightnow, but if you continue with web development, you’ll need to upgrade your tools.Step 2: Create and Save the Web PageCopy-and-paste the text in Example 1.1, “A Simple Webpage” into your text editor, starting with thetext, " html ".Example 1.1. A Simple Webpageview htmlview plainprint?1. html 2. head
3.4.5.6.7.8. title A Simple Webpage /title /head body This is a simple webpage. /body /html To see what this HTML code sample looks like as a web page, click the view html link above thecode sample.The words that are surrounded with angle brackets ( ) are called elements. We will talk aboutwhat a element is soon, but first let’s finish creating and displaying your webpage.Once you have copied the text over to your text editor, save the file in your home directory orDesktop as the file simple.html.NoteNotepad will try to append a .txt extension to your file name. Don’t let this happen. In the SaveAs dialog box, set File name to simple.html and change Save as type from Text Documents toAll Files (*.*).Step 3: Display the Webpage in Your BrowserOpen the file simple.html by typing Ctrl-O (Cmd-O for Mac users) and selecting the file.Internet Explorer users should select Browse to find the file.After selecting simple.html, click Open. Your webpage should appear in the browser window.Compare it to Example 1.1. Does it match? (To compare results, click the view html link aboveExample 1.1.)If it does, congratulations! Let’s move on to the next section, where we’ll try to answer the question,what the heck is going on?StructureThe previous section demonstrates how to create a simple web page. If you haven’t saved thisexample on your computer as the file simple.html, do so now.Example 1.2. A Simple Webpageview htmlview plainprint?1.2.3.4.5.6.7.8. html head title A Simple Webpage /title /head body This is a simple webpage. /body /html If you view simple.html in your browser, you will see the words “This is a simple webpage” ona white or grey background. Where did everything else go? And what are those words with the
angle brackets, anyway?A Brief Introduction to ElementsThe web page simple.html uses these elements: html, head, title, and body. Elements are delineated by angle brackets ( ). Elements are “invisible”; they don’t directly appear in the web page. Instead, they serve asinstructions to your browser. They can change your text’s appearance, create a link, insert animage, and much more. An element starts with an opening tag ( element ) and ends with a closing tag( /element ). Some elements do not require closing tags.We’ll discuss the general properties of elements in some detail in Elements. For now, let’s focus onthe particular elements in the “Simple Webpage” example.Structure of the Simple WebpageAlthough the “Simple Webpage” doesn’t look like much, its elements (html, head, title, andbody) are fundamental to the structure of all HTML documents. Here’s what these elements mean: html : “Here begins an HTML document.”The html element helps identify a file as an HTML document. head : “Here begins the header.”The header contains elements that apply to the overall document. For example, it mightcontain elements that are designed for search engines to process or elements that change theoverall appearance of the webpage. However, elements in the header do not display directlyas normal webpage content.The reasons you would be concerned about the header are a bit abstract at this stage, so wewon’t worry about it much until later. title : “Here begins the document title.” (Must be in the header)If you view the file simple.html in your browser, along the top of your browser windowyou should see the words, “A Simple Webpage”. These words appear because of the titleelement.As an exercise, change the title of the simple.html webpage to, “My First Webpage”.Save your changes and view them by clicking the browser’s Refresh or Reload button.Titles might not seem important at first glance, but they’re actually quite useful. Forexample, if a search engine displays your page in a list of search results, it will probablydisplay the title as your page’s title. If you omit the title element, the search enginewill make up one for you. This is Not a Good Thing.NoteYou might have noticed that the title element is contained within the head element. Isthis kosher? Absolutely! In fact, many elements are designed to contain other elements, andyou will be nesting elements within other elements quite frequently as you continue. body : “Here begins the body.”
The body is where you put text and elements to be displayed in the main browser window.The reason that the words “This is a simple webpage” appear when you displaysimple.html is becaused you placed them in the body.So why do we only see “This is a simple webpage” when we display simple.html in a browser?The answer is, after you remove all the elements that are not designed to display in the browserwindow, the sentence “This is a simple webpage” is the only thing left.In the next section, we’ll tinker with our example webpage, just to see what happens. After that,we’ll provide a more formal definition of elements and element properties.TinkeringLet’s make a few alterations to our “Simple Webpage” from “Diving In”.Example 1.3. Adding Textview htmlview plainprint?1.2.3.4.5.6.7.8.9. html head title A Simple Webpage /title /head body This is a simple webpage.And I mean really simple. /body /html To view this alteration:1. Add the text in bold to your simple.html file.2. Save the file as adding.html.3. Open the adding.html file in your browser.HTML and WhitespaceWhat happened here? Why are the two sentences on the same line?HTML ignores whitespace (spaces, tabs, or carriage returns) in the source. It replaces all continuouschunks of whitespace with a single space: ” “. Although it might take you a while to get used to thisbehavior, the advantage is that that you can use whitespace to make your code more readable, andthe browser can freely adjust line breaks for each user’s window size and font size.Example 1.4, “Scattered Text” displays in the browser identically to Example 1.3, “Adding Text”.Try it out.Example 1.4. Scattered Textview htmlview plainprint?1.2.3.4. html head title A Simple Webpage /title /head
5. body 6. This is a7. simple webpage.8. And I9. mean10.11. really simple.12. /body 13. /html NoteFor brevity, subsequent examples will leave out the html, head, title, and body elements,since we’re just changing the body content. If the head content becomes important again, we’lladd it back.Of course, HTML provides many ways to control whitespace. For a couple of simple examples,refer to “Paragraph Breaks”.Emphasizing TextNow change the text of your simple web page to:Example 1.5. Emphasized Textview htmlview plainprint?1. This is a simple webpage.2. And I mean em really /em simple.Save your changes and view the file in your browser.As you can see, the text becomes italic, starting at the em and ending at the /em . The emelement represents emphasized text — text that you would stress when speaking. The em element isour first example of an element that can affect the physical appearance of the text.For more examples of elements that can affect the appearance of text, refer to “Font Styles”.Changing the Background ColorLet’s do something a little more dramatic:Example 1.6. Background Colorview htmlview plainprint?1.2.3.4.5.6.7.8.9. html head title A Simple Webpage /title /head body style "background: yellow" This is a simple webpage.And I mean em really /em simple. /body /html
A bit garish but things could be worse. Try background: red, for example.This is our first example of an attribute, a component of an element that modifies that element’sbehavior. For some elements, like the body element, attributes are optional. For other elements,attributes are essential. We’ll discuss attributes at some length later, in “Attributes”.Try some other color words: blue, teal, limegreen, papayawhip What works? Whatdoesn’t? (If you’re interested, feel free to skip ahead to the section called “Colors”.)ElementsAfter all this experimenting with our example webpage, it’s time to define elements more formally.Elements have three main components:view htmlview plainprint?1. name attribute1 "value1" attribute2 "value2". 2. .(text or more elements go here).3. /name name: Identifies the type of the element, such as body or em element. The name of anelement can be upper case, lower case, or anything in between. Upper case makes it easier todifferentiate elements and text when examining HTML source, while lower case is a moremodern style and is easier to type. Either way, it’s a matter of taste: BODY , body , andeven bODy are all the same element. attribute: Changes the behavior of an element. For example, the style attributeenables you to change the appearance of an element and its content. value: Enables particular attributes to vary. For example, background: yellow,when present in an element’s style attribute, changes the background of the element toyellow.Some elements do not require a closing element to work properly. For example, the br elementcreates a line break, and should not enclose anything. We’ll discuss br further in “ParagraphBreaks”.Some elements do not require any attributes. In “Example 1.6, Background Color”, the bodyelement had a style attribute, but the body element works just fine without without it. Bycontrast, the a element, which creates a hyperlink, has an href attribute that defines the link’sdestination. If you don’t include the href attribute, the link won’t point anywhere.Misspellings and MisunderstandingsVastly simplified, a browser processes an HTML page something like this:1. Identify anything that is between angle brackets ( ) as a “element”2. Determine whether the browser has any instructions for using the element: If yes, the element is real — follow the instructions If no, the element is garbage — ignore itWhen a browser ignores a element, that means one of two things: The element is misspelled or does not exist. For example, mxyzptlk, for example, is notan HTML element.
The element means something, but that particular browser does not support it. For example,the blink element works in Firefox, but not in Internet Explorer or Safari.Example 1.7. Blinking Textview htmlview plainprint?1. Warning: blink For external use only /blink .2. Avoid contact with eyes.If you are using Firefox, the text in the “view html” box should be blinking. If you are usingInternet Explorer or Safari, the text will not be blinking. This is actually a common situation whencomposing web pages — one browser won’t support a particular feature, or supports it incorrectly.CautionMost people find the blink element distracting and irritating, and in fact blink is not part of theofficial HTML standard. In fact, I am aware of only one example of a good use of blink on theentire Web. Well, maybe two.A Digression: What’s a “Tag”?You’ll often hear people refer to “tags,” as in, “The markup tags tell the Web browser how todisplay the page.” Almost always, they really meant to say “elements.” Tags are not elements, theydefine the boundaries of an element. The p element begins with a p open tag and ends with a /p closing tag, but it is not a tag itself. Incorrect: “You can make a new HTML paragraph with a p tag!” Correct: “It’s a good idea to close that open p tag.”Sometimes you’ll hear people say “alt tag,” which is even worse. An “alt tag” is really an altattribute. This important attribute provides alternative text for images, in case the user can’t see theimage for some other reason. We’ll talk more about this attribute later.The element vs. tag confusion is sort of understandable: it’s a common mistake even amongprofessionals, and they both look like angle-brackety things, after all. But attributes are not tags, noteven close. If you hear someone say “alt tag,” this is a key indication that the speaker does notunderstand HTML very well. (You probably shouldn’t invite them to your next birthday party.)AttributesAttributes modify the behavior of a element. Attributes allow you to change sizes, colors, specifylink locations, and much more. They have two main components:view htmlview plainprint?1. name attribute1 "value1" attribute2 "value2" . 2. .(text or more elements go here).3. /name attribute: Defines the attribute that you’re using. As with elements, case is irrelevant forthe attribute name. STYLE, style, and sTyLE all do the same thing. value: Selects a particular kind of behavior for the attribute. Case sometimes matters forthe values inside of the attribute, so be careful here.
“Changing the Background Color” includes an example of using the style attribute to control thebackground color of the entire webpage. Here’s a second example, the href attribute:Example 1.8. A Link to The New York Timesview htmlview plainprint?1. a href "http://www.nytimes.com" go to nytimes.com! /a The a element (or, “anchor” element) creates a link to another web page. The href attributespecifies the location, which we set to the value http://www.nytimes.com. If you view theresults and select the link “go to nytimes.com!”, you will indeed go to the New York Times.NoteThe style and href attributes are very different beasts. The style attribute is optional, andmay be applied to nearly any HTML element in the body. The href attribute is essential forspecifying a link location, and only applies to a narrow set of elements.Attribute PropertiesAttributes follow these rules: Elements may have multiple attributes. The order of the attributes is irrelevant. Each element has a list of permitted attributes. Some attributes may be assigned to most (oreven all) elements. But in general, you cannot freely add any attribute to any element. Whitespace between attributes is irrelevant. You may freely insert spaces, tabs, or evencarriage returns between attributes, as long as you don’t forget the closing angle bracket atthe end of the element ( ). For example:view htmlview plainprint?1. a href "http://www.gutenberg.org"2. style "background: yellow"3. Books in the public domain /a is perfectly acceptable. For elements with many attributes, adding whitespace can sometimesmake your code more readable. Although upper case and lower case is irrelevant for attribute names, the case can beimportant for attribute values. For example,view htmlview plainprint?1. a href "http://www.cnn.com/index.html" Go to CNN /a creates a link that takes you to the CNN.com home page, whileview htmlview plainprint?1. a href "HTTP://WWW.CNN.COM/INDEX.HTML" Go to CNN /a is a broken link. It is good practice to quote attribute values, although often this is optional. That is,href http://www.yahoo.com is the same ashref "http://www.yahoo.com". If the attribute value contains a special charactersuch as a space or an angle bracket ( ), you must use quotes, or the browser will interpretthe special character as the end of the attribute or element.
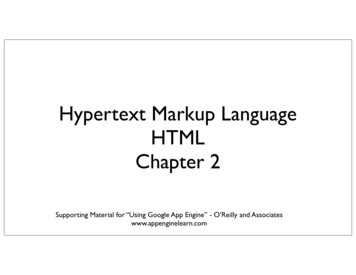
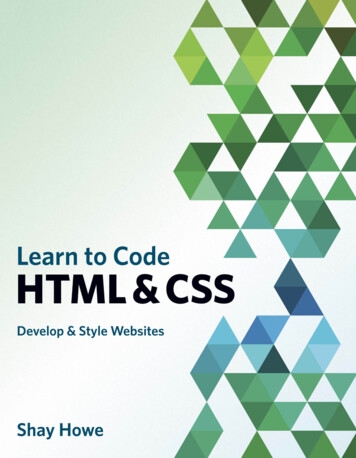
CautionTake care to close any open quotes you start. Otherwise, your attribute value will “continue”until the next quote mark, which will badly garble your page. As with elements, browsers attempt to ignore incorrect attributes. Misspelled attributes andattribute values, such as hhref and backgrounde: yellow, have no effect.Misspelling background means that your background won’t turn yellow. Misspellinghref means that your link won’t function. However, if you misspellhttp://www.yahoo.com, your link will function, but it won’t take you to the rightplace.Browser ToolsA browser’s primary function is to display web pages. However, for a web developer, browsers aremuch more useful than that. Whenever you visit a web page, your browser fetches a tremendousamount of valuable information, such as the HTML source of the page, image files that appear onthe page, and other associated files. This section describes how to use your browser to retrieve thatinformation.NoteSince browser makers love to change the names and locations of these functions from version toversion, the instructions below might not apply if you’re using a different browser version than theone tested at the time this section was written.View SourceBy far the most valuable browser tool is View Source, which displays the HTML source of thepage. Viewing source is one of the fastest ways to learn how to code. If you’re not sure how somefeature of HTML works, you can view the source of a site that uses the feature, copy and pastesections of code, make alterations, and see what happens. To view source: Internet Explorer, Firefox: Right-click on the window and select View Source. Safari: Ctrl-click on the window and select View Source. Opera: Right-click on the window and select Source.Figure 1.1. View Source (Firefox)Although viewing the source is incredibly useful, keep in mind these two caveats: It’s okay to copy and alter a site’s source for learning purposes on your home machine, butdon’t post any such material on your public website. This goes for both the text on the siteand the underlying code or design. Most sites on the web have terrible underlying code. Learning how to code by randomlyviewing websites is like learning how to compose verse by randomly reading poetry writtenby kids. You might encounter some brilliant stuff but the odds are pretty low. Neverassume that just because BigFamousWebsite.com coded their home page a certain way,that this was the best way to do it.
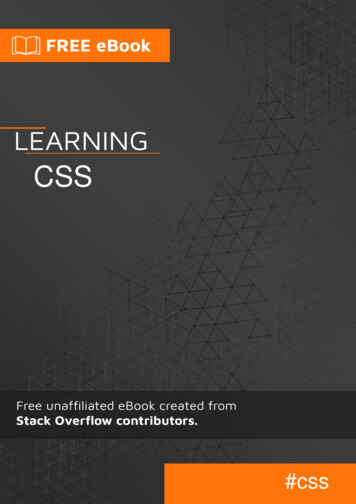
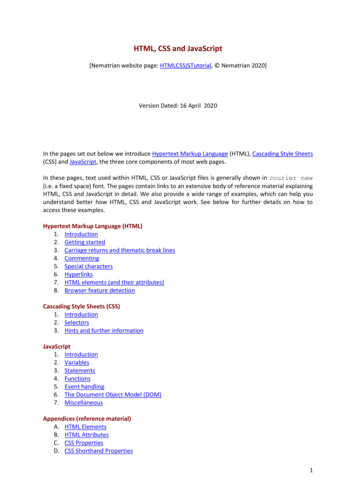
Save ImagesAnother invaluable browser function is the ability to save image files. Every time your browservisits a web page, it also downloads all the images that display on the page. You can save these filesand reuse them for educational purposes. To save an image: Internet Explorer: Right-click on the window and select Save Picture As Firefox: Right-click on the image and select Save Image As to save the image as a file,View Image to view the image by itself in the browser, or Properties to view the image’s filesize and other properties. Safari: Ctrl-click on the image and select Save Image to the Desktop to save the image as afile or Open Image in New Window to view the image by itself in the browser. Opera: Right-click on the image and select Save Image to save the image as a file, OpenImage to view the image by itself in the browser, or Image properties to view the image’sfile size and other properties.As with View Source, you should never take someone else’s images, altered or unaltered, and postthem on a public site unless you have permission. There are numerous free image repositories allover the web, where you can get clip art, backgrounds, and photos that are either in the publicdomain or offered under reasonably liberal licenses.View Page InfoThe View Page Info function provides secondary technical information about the page, such as thepage size in bytes and the text encoding. This information might not seem all that useful whenyou’re first starting out, but it’s invaluable for more advanced coders. To view page info: Internet Explorer: Right-click on the window and select Properties. Firefox: Right-click on the window and select View Page Info. Opera: Select Tools Appearance Panels, check the Info checkbox, and click OK.Figure 1.2. View Page Info (Firefox)The information displayed varies from browser to browser. Firefox provides more usefulinformation than Internet Explorer, including a full list of all images on the page (with height,width, and size in bytes). Opera takes an interesting approach: if you activate the Info panel, youcan view this information alongside each page you browse to. Opera also provides a shortcut (CtrlJ) for displaying all the links on the page.Webdev ToolbarsSeveral browsers offer some sort of “webdev toolbar”: a downloadable set of menus and options foryour browser that are specifically designed to help understand the structure of a webpage. Toolbarscan offer a dizzying array of useful functions, but as with View Page Info, they are probably moreuseful for experienced web developers.Toolbars Internet Explorer
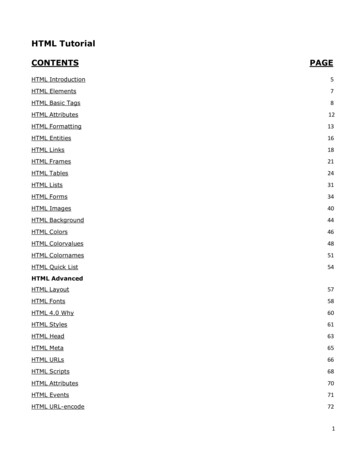
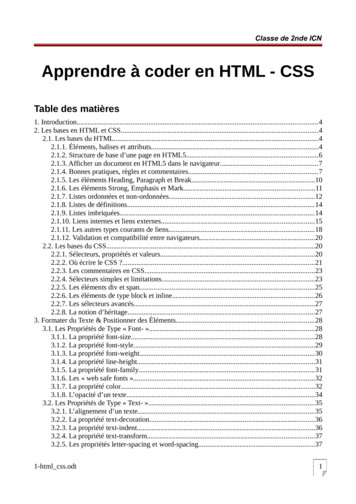
Firefox OperaChapter 2: Markup BasicsThis chapter, covers some of the basic HTML elements and attributes in a systematic way. Eachsection displays one or more short webpages, which we will alter several times to demonstrate howvarious elements work. Before proceeding, you should be comfortable with the idea of savingHTML to a file, altering it with a plain text editor, and viewing the results in your browser. If not,please read Chapter 1, Getting Started and work through the examples until you are comfortablewith these concepts.When you’re done with this section, you should be able to: create a document with headings, paragraphs, and line breaks change the text color and background color use physical styles and logical styles to change the appearance of your text display images and create links to other web pages understand more complex HTML elements that require nesting, such as listsSection SummariesThe Markup Basics chapter contains these sections:1. Paragraph Breaks — Describes the paragraph element and the line break element, includinga discussion of correct and incorrect usage.2. Headings — Describes the heading elements. In this section, we’ll discover why it’s reallyimportant to close your open tags properly.3. Font Styles — Explores elements that help control the font. We’ll touch on the differencebetween inline and block elements, and compare physical style elements versus logical styleelements.4. Colors — Explains how to change the background and foreground color of an entire page, aparagraph, or even a single word. We’ll see examples of color names and hex codes, andwe’ll discuss which method is preferable.5. Links — Breaks down a URL into its constituent parts, explains relative links versusabsolute links, and provides examples of how to use IDs to link within pages.6. Images — Describes what images are, how to embed them in a web page, how to stretch andsquash them, and how to “float” them with respect to the other content on the page.7. Lists — Describes ordered lists, unordered lists, and definition lists. This is our first exampleof elements that require nesting to function properly.
Figure 1.3. Webdev Toolbar (Firefox)Paragraph BreaksIn Chapter 1, Getting Started, we covered some basic HTML concepts, including the fact thatHTML ignores whitespace. This seems a little crazy, doesn’t it? How can we do we compose areadable webpage without everything collapsing into a single giant glob of text?Let’s say we want our website to display some lines from an obscure playwright:Example 2.1. Unformatted Textview htmlview plainprint?1. html 2. head 3. title Macbeth: 1, Reckless Youngsters: 0 /title 4. /head 5. body 6. MACBETH: My name's Macbeth.7.8. YOUNG SIWARD: The devil himself could not pronounce a title9. More hateful to mine ear.10.11. MACBETH: No, nor more fearful.12.13. YOUNG SIWARD: Thou liest, abhorred tyrant; with my sword14. I'll prove the lie thou speak'st.15.16. [They fight, and young Seward is slain.]17.18. MACBETH: Thou wast born of woman.-19. But swords I smile at, weapons laugh to scorn,20. Brandish'd by man that's of a woman born.21. /body 22. /html
Now, this is a perfectly acceptable web page. The html, head, title, and body elements are allin the right places. In fact, this example is just like the “Simple Web Page” from Diving In, exceptthat the text is a little different.There is one small problem, however. HTML collapses whitespace, which means that all our textwill collapse into a single paragraph and look something like this:MACBETH: My name’s Macbeth. YOUNG SIWARD: The devil himself could notpronounce a title More hateful to mine ear. MACBETH: No, nor more fearful. YOUNGSIWARD: Thou liest, abhorred tyrant; with my sword I’ll prove the lie thou speak’st.[They fight, and young Seward is slain.] MACBETH: Thou wast born of woman.– Butswords I smile at, weapons laugh to scorn, Brandish’d by man that’s of a woman born.This is terrible! Let’s try to make this page more readable.The p ElementThe p element breaks text into paragraphs. Any text that you surround with a p and a closing /p becomes a separate block. Let’s see how this works. For brevity, we will start to leave off thestructural elements: html, head, and body.Example 2.2. Paragraphsview htmlview plainprint?1. p 2. MACBETH: My name's Macbeth.3. /p 4. p 5. YOUNG SIWARD: The devil himself could not pronounce a title6. More hateful to mine ear.7. /p 8. p 9. MACBETH: No, nor more fearful.10. /p 11. p 12. YOUNG SIWARD: Thou liest, abhorred tyrant; with my sword13. I'll prove the lie thou speak'st.14. /p 15. p 16. [They fight, and young Seward is slain.]17. /p 18. p 19. MACBETH: Thou wast born of woman.-20. But swords I smile at, weapons laugh to scorn,21. Brandish'd by man that's of a woman born.22. /p Each block is followed by two line breaks. This is a good start!Each paragraph is surrounded by an opening tag, p , and a closing tag, /p . The p element is ablock element; it “does something” to a block of text. The browser must identify where the blockends, so the p open tag needs a closing tag, /p .Unfortunately, many people take the p element to mean “make a new paragraph here” or “put two
line breaks here,” rather than “enclose this text and make it a paragraph.” And thus, you see a lot ofcode that looks like this:Example 2.3. Incorrect p Usageview htmlview plainprint?1. Text Block 1: Blah blah blah. p 2.3. Text Block 2: Blah blah blah. p 4.5. Text Block 3: Blah blah blah.What happens? (Try it.) Text Block 2 and 3 are paragraphs (the browser “inserts” a closing /p element right before each p element). Text Block 1 is not actually a HTML paragraph. However,the page displays with two line breaks between each text block, which appear
HTML and CSS Tutorial This work is licensed under a Creative Commons License: Attribution 3.0 Unported. You are free: to Share — to copy, distribute, and transmit the work to Remix — to adapt the work Under the following conditions: Attribution. You must attribute the work in the manner specified by the author or licensor.