Transcription
Academic ProgramQLIKVIEW SERVER INSTALLATION GUIDEJune 20131
Academic ProgramQLIKVIEW SERVER INSTALLATION GUIDEFollow the instructions below to install QlikView Server or watch this video brief video that walks you throughthe steps.If you have questions or are unable to successfully install QlikView, please contactQoncierge Service2
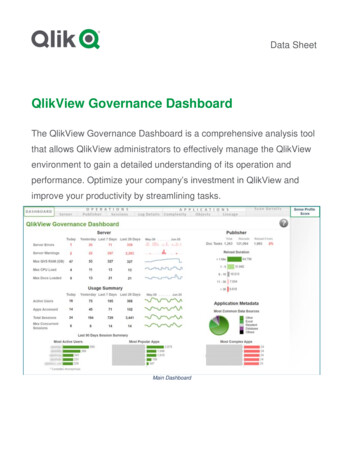
Academic ProgramCreate a QlikView Account1. Go to www.qlik.com to create a QlikView account2. Click on Login, Get a QlikView Account3.Create the new user information. After completion, a username and password will be emailed to you. This is theaccount that you will use to download QlikView.In Company Field:* Must enter Institution Name asreferenced in the Academic Program welcome emailIn Job Title:* Enter Academic Program- Professor ORAcademic Program- StudentIn Work Email:* Professor and student must useEmail affiliated with Academic Institution.Ex: ity.eduNOTE! Professors and students accounts must have the same company name. The company name will reflectthe university name listed in your application, unless otherwise suggested by Qlik. Using any other name thanwhat Qlik assigns will prohibit your download.3
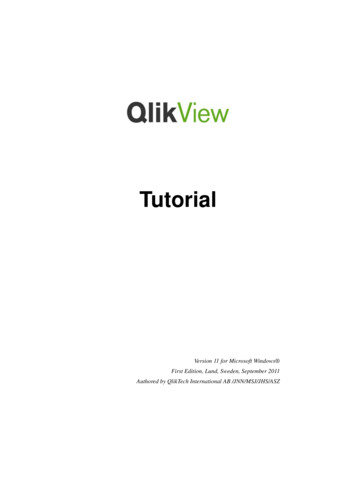
Academic ProgramDownload QlikView.1. Go to www.qlik.com2. Go to Login: Log in to QlikView3. Enter your login credentials in the single sign-on box4. Go to Support: Download
Academic Program5. You will be presented with two options:a. Bookmarked Downloads: a pre-filtered selection of the most common downloadsb. Filter Your Options: manual selection6. Select your download product (Tab)a. QlikView - QlikView Desktop or Server/Publisher *
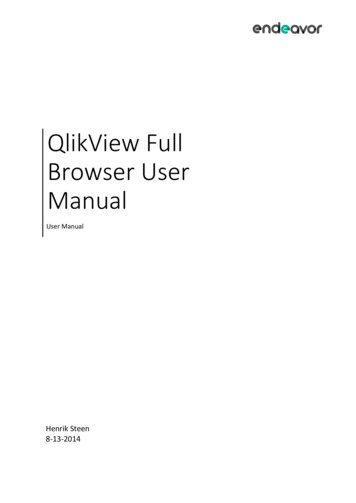
Academic Program7. Select your preferred language8. Select QlikView Type (Desktop or Server /Publisher)9.10.11.12.13.Select Version Number and Release NumberSelect File Function Installation ProgramSelect your Operating SystemSelect Release Stage latest SR(X) - Public Release (GA)Click on the download link for your installation file and begin download
Academic ProgramINSTALLING QLIKVIEWIf Microsoft IIS is to be used as web server, it must be installed prior to QlikView Server.Note: If the required Microsoft .NET 4.0 Framework is not installed on the target system, it isdownloaded from the Internet and included as part of the QlikView Server installation process.It is recommended not to move folder locations after the QlikView Server installation is complete,since many settings depend on the initial file locations. If the location of QlikView Server has to bechanged after the installation, proceed as follows:1. Run QlikViewServer x86Setup.exe or QlikViewServer x64Setup.exe. If the User AccountControl dialog is displayed, click Yes to allow the program to make changes on this computer.2. Click Next in the Welcome dialog.3. Select the region for the location of the server. Click Next to continue.4. Read the license agreement, select “I accept the terms in the license agreement,” and clickNext to continue.5. Enter the customer information for QlikView Server. Click Next to continue.6. All files are installed in the specified folder. To change the root folder for the installed files,click Change to specify the preferred location. Finally, click Next to continue.7. Select the type of installation you want to perform: Full installation, Single machine with QlikView Webserver: Used to run allcomponents on a single machine with QlikView Web Server as web server. Full installation, Single machine with Microsoft IIS: Used to run all components on asingle machine with Microsoft IIS as web server. This option is only available if IIS isinstalled on the target machine. Custom installation, select profiles: If this option is selected, select the profiles youwant to be included in the installation from the Profiles section in the dialog:o QlikView Server: Installs QlikView Server, Directory Service Connector,and the QlikView Server example documents.o Reload/ Distribute Engine: Installs the Reload Engine and the QlikViewDistribution Service.o Management Console: Installs the QlikView Management Service together with theQlikView Management Console (QMC).o Webserver: Installs the QlikView Web Server.To make further configuration of features to be installed, click Config. When done, click Next.
Academic ProgramTo use pre-defined configuration of features, click Next.8. Set the account that the QlikView Server and Publisher services are to run under. Click Next tocontinue.Note: If using a local administrator account on Windows XP Professional x64 SP2 that is not part of adomain, the installation program cannot resolve the account. This means that the account for theservices in Computer Manager has to be set manually.You can also select I want to specify the account to be used for the services later.9. Select the IIS Website from the drop-down list and click Next.Note: This step is only applicable if Full installation, Single machine with Microsoft IIS, was selected inStep 7. If not, proceed directly to the next step.10. Select the Service Authentication method: Use digital certificates: Authenticate communication between QlikView servers using digitalcertificates and SSL. This alternative is recommended in environments where not all servershave access to a common Windows Active Directory or when the security provided bycertificate authentication is required. Note that digital certificates are only supported byWindows Server 2008 R2.Use QlikView Administrators Group: Authenticate communication between QlikViewservices based on membership in the local Windows group QlikView Administrators. Thisalternative can be used in environments where all servers that are part of the QlikViewinstallation can authenticate using a common Windows Active Directory.Click Next to continue.11. Click Install to start the installation.This may take several minutes to complete.12. Click Finish when the installation is complete.13. Log off from Windows and then log on again, so that group memberships added during theinstallation are updated.Note: It may be sufficient to log off from Windows and then log on again. However, it is recommendedto restart the machine to enable the QlikView Server functionality.
Academic ProgramLOGGING THE INSTALLATIONThe setup procedure is logged when Setup.exe is executed. The log files, QlikViewServerx86.wil for thex86 version and QlikViewServerx64.wil for the x64 version, are stored in the Temp folder of the user (forexample, %UserProfile%\AppData\Local\Temp). Each time an installation is executed, a new file isgenerated, over-writing the previous log file.OBTAINING THE MSI PACKAGEIf the MSI package is needed for the installation, proceed as follows to extract it from the .exe file:1. Start the installation from the .exe file and wait until the first dialog opens.2. Locate the MSI file (often stored with a random name, for example, ed34g.msi) in the Tempfolder in %UserProfile%\AppData\Local (C:\Documents and Settings\username\Local Settings onpre-Windows Vista systems).3. Copy the .msi file to another location.4. Exit the .exe installation.5. Install QlikView Server using the .msi file. See Silent Installation (page 95) for information onhow to perform a silent installation. For additional information, see Deploying MSI Packageswith Group Policies (page 129).COMPLETING THE INSTALLATIONAfter successfully installing QlikView Server, a license must be registered in QlikView ManagementConsole (QMC) to activate the installed software.Note: If access is denied when starting QMC, log off from Windows and then log on again, so that groupmemberships added during the installation are updated.Note: Running real-time anti-virus protection on the server degrades the performance of QlikViewServer. It is recommended that the user documents, source documents, log directories, and .pgo filesare excluded from the anti-virus scanning.RUNNING MICROSOFT IISIf Microsoft IIS is used as web server in a Windows Server 2003 (or later) environment, enable ASP.NETto ensure proper operation of the QlikView Server sample pages and the extended functions (forexample, QlikView Server tunnel).Note: To optimize the performance when running Microsoft IIS and AJAX, turn on compression in theweb server. For information on how to configure IIS 6, see %28WS.10%29.aspx. For information on how to configure IIS 7, 2942%28WS.10%29.aspx.
Academic ProgramLICENSINGThe licensing is used to authenticate QlikView Server and allow it to run on a specific machine.Go to System Licenses in QMC, select a QlikView Server or Publisher, and fill in the license key andControl fields on the QlikView Server License or QlikView Publisher License tab (depending on whetherQlikView Server or Publisher was chosen). If you are unable to locate your license key and controlnumber, please contact Qoncierge.QLIKVIEW SERVER/PUBLISHER LICENSE TAB IN QMCThe License Enabler File (LEF), lef.txt, for QlikView Server is automatically saved in%ProgramData%\QlikTech (C:\Documents and Settings\All Users\Application Data\QlikTech on preWindows Vista systems).The PubLef.txt file for QlikView Publisher is saved er LEF (C:\Documents and Settings\AllUsers\Application Data\QlikTech\ManagementService\Publisher LEF on pre-Windows Vista systems).Click Update License from Server to download a new lef.txt file from the QlikView LEF server. This isprimarily used when updating the number of Client Access Licenses (CALs).If a box appears informing you that QlikView cannot contact the QlikView License Enable Server, thenplease manually enter your License Enabling Information. If you are unable to locate your LicenseEnabling Information (LEF), please contact Qoncierge Service for assistance.Academic Program SettingsThe Academic Program Server does not come with authentication or security so it must run anonymous.The QVS resource Security tab settings should be set to Always Anonymous.
Academic Program 2013 QlikTech International AB. All rights reserved. QlikTech, QlikView, Qlik, Q, Simplifying Analysisfor Everyone, Power of Simplicity, New Rules, The Uncontrollable Smile and other QlikTech products andservices as well as their respective logos are trademarks or registered trademarks of QlikTechInternational AB. All other company names, products and services used herein are trademarks orregistered trademarks of their respective owners. The information published herein is subject to changewithout notice. This publication is for informational purposes only, without representation or warrantyof any kind, and QlikTech shall not be liable for errors or omissions with respect to this publication. Theonly warranties for QlikTech products and services are those that are set forth in the express warrantystatements accompanying such products and services, if any. Nothing herein should be construed asconstituting any additional warranty.
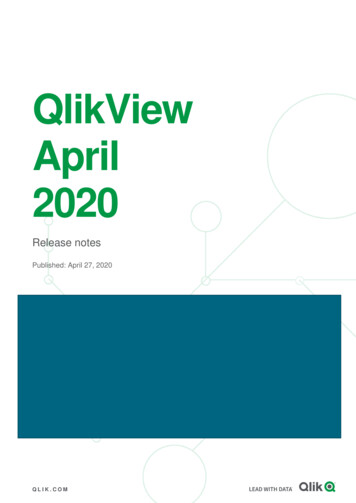
Academic ProgramENTERING YOUR QLIKVIEW LICENCEKEY1. Open QlikView Developer2. 2. Select Settings - User Preferences3. Select License Tab
Academic Program4. Click the Change buttona. Enter your 16-digit license keyb. Enter your five-digit control number. If you are unable to locate your 16-digit license key orfive-digit control number, please contact Qoncierge Servicec. Enter a user named. Enter your organization namee. Click Next
Academic Program5. Select your region, and click OK6. Read the license agreement, and click “I Agree” to accept itIf you have successfully entered your license key, please proceed to Step 9.If a box appears informing you that QlikView cannot contact the QlikView License Enable Server, thenproceed with step 7 to manually enter your license information.7. Select Enter my license information manually and click Continue.
Academic Program8. Enter your License Enabling Information (LEF)If you are unable to locate your License Enabling Information (LEF), please contact Qoncierge forassistance.a. Click Next9. Click Continue
Academic Program10. Click OK11. You are now on the home screen. You should see confirmation that QlikView is now using thelicense key you just entered.Please contact Qoncierge Service if you were unable to successfully enter your license key. If youpurchased QlikView from one of our partners, please contact your partner representative directly. 2014 QlikTech International AB. All rights reserved. Qlik , QlikView , QlikTech , and the QlikTech logos are trademarks of QlikTech International AB which have been registered inmultiple countries. Other marks and logos mentioned herein are trademarks or registered trademarks of their respective owners.
If Microsoft IIS is used as web server in a Windows Server 2003 (or later) environment, enable ASP.NET to ensure proper operation of the QlikView Server sample pages and the extended functions (for example, QlikView Server tunnel). Note: To optimize the performance when running Microsoft IIS and AJAX, turn on compression in the web server.