Transcription
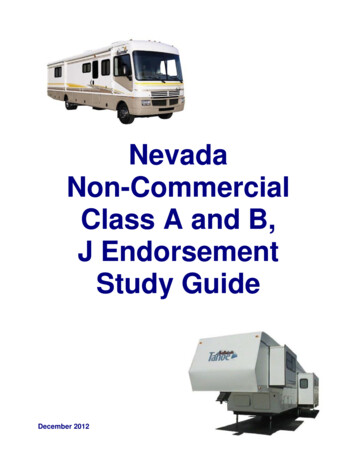
NevadaNon-CommercialClass A and B,J EndorsementStudy GuideDecember 2012
Table of ContentsForeword. 4General Information . 4Non-Commercial Vehicle Classifications . 4What You Need To Know . 5Section 1 - Driving Safely . 6Basic Control of Your Vehicle . 6Accelerating . 6Shifting Gears . 6Controlling Speed. 7Steering. 11Braking . 14Be Aware of Your Surroundings. 16Looking Ahead . 16Use Your Mirrors . 16Signal Your Intentions . 17Communicate Your Presence . 18Managing Space . 20Space ahead . 20Space behind . 20Space to the sides. 21Space overhead . 22Space needed to cross or enter traffic . 23Driving at Night . 24Driver Factors. 24Roadway Factors . 24Vehicle Factors . 25Driving in Winter. 25Driving in Very Hot Weather. 26Seeing Hazards . 28Importance of Seeing Hazards. 28Hazardous Roads . 28Drivers Who Are Hazards . 28Emergencies . 29Tire Failure . 29Skid Control and Recovery . 30Accident Procedures .32Fires . 32Staying Alert and Fit to Drive . 34Section 2 - Transporting Cargo Safely . 38Inspecting and Securing Cargo. 38Inspecting your cargo . 38Weight and balance .38Section 3 - Air Brakes . 40The Parts of an Air Brake System. 40Dual Air Brakes . 44Walk-Around Inspection . 45Final Air Brake Check .45Page 2 of 75Revised 12/2012
Using Air Brakes . 47Section 4 - Combination Vehicles . 50Rollover risks . 50Brake early . 51Prevent trailer skids . 51Recognizing the skid . 51Stop using the brake . 52Section 5 – Securing a Trailer . 53Section 6 - Pre-Trip Vehicle Inspection Test: Non-Commercial A/B . 55All Vehicles . 55Engine Compartment Only . 55Cab Check/Engine Start. 56Air Brake Check (if equipped) . 56Light/Reflectors . 57Wheels . 57Tractor/Coupling. 57Trailer . 58Section 7 - Basic Vehicle Control Skills Test: Non-Commercial A/B . 59Scoring . 59Exercises . 59Section 8 - On-Road Driving Test: Non-Commercial A/B . 61Exercises . 61Clutch Usage (manual transmission) . 61Gear Usage (manual transmission) . 61Brake Usage . 61Lane Usage. 61How You Will Be Tested . 62Turns . 62Intersections. 62Curve. 64Upgrade . 64Downgrade . 64Section 9 – Pre-Trip Vehicle Inspection Test: J Endorsement . 65Section 10 – Basic Vehicle Control Skills Test: J Endorsement . 69Section 11 – On-Road Driving Test: J Endorsement . 71Page 3 of 75Revised 12/2012
ForewordGeneral InformationThe vehicles in the non-commercial classification are generally vehicles that are used forrecreational purposes, or may include certain rental vehicles that meet the criteria of the belowlicense classifications. However, trucks, buses, and vehicles operating at heavier weights aresubject to certain laws, regulations, and restrictions that can vary from place to place.You do not need a commercial driver’s license to operate some vehicles that fall within theGross Vehicle Weight Rating (GVWR) descriptions. The following are exempt from Nevadacommercial driver’s licensing requirements: Farmers transporting equipment, supplies, or products to or from a farm as long as thevehicle is:ooooControlled and operated by a farmer, his family members, or employees;Used within 150 miles of the farm;Not being used as a common or contract motor carrier; orNot transporting placarded amounts of hazardous materials. Active duty military personnel driving a military vehicle Firefighters operating emergency equipmentIf you qualify for this exemption, you may apply for an “F” endorsement on your Nevada driver’slicense.Non-Commercial Vehicle ClassificationsClass AMay drive any combination of vehicles with a gross combination weight rating(GCWR) of 26,001 or more pounds, provided the vehicle being towed has agross vehicle weight rating (GVWR) of more than 10,000 pounds; orAny combination of vehicles not exceeding 70 feet in length with a grosscombination weight rating of 26,000 pounds or less so long as the grosscombination weight rating of the towed vehicles does not exceed the grossvehicle weight rating of the towing vehicle.Class BMay drive any single vehicle with a gross vehicle weight rating of 26,001 or morepounds, or any vehicle which is towing another vehicle which does not have agross vehicle weight rating of more than 10,000 pounds.Class CMay drive any single vehicle or combination of vehicles, that does not meet thedefinition of a vehicle for which a Class A or B driver’s license is required. Maytow a combination of vehicles not to exceed 70 feet in length and not to exceed acombined weight rating or a combined weight of more than 10,000 poundswithout any additional testing or endorsements.Page 4 of 75Revised 12/2012
J Endorsement: TowingMay tow a vehicle (GVWR) or a combination of vehicles (GCWR) of more than10,000 pounds. The combination of vehicles may not exceed 70 feet in length orhave a combined weight rating or a combined weight that exceeds 26,000pounds. If the combination of the towing vehicle and the towed vehicle(s) exceed26,000 lbs., a Class A license is required.What You Need To Know If You Are Applying For ThisClass A LicenseClass B LicenseJ Endorsement: TowingAny vehicle equipped with air brakesStudy ThisSection 1, Driving SafelySection 2, Transporting Cargo SafelySection 4, Combination VehiclesSection 5, Securing a TrailerSection 6, Pre-Trip Inspection; A & BSection 7, Basic Control Skills Test; A & BSection 8, On-Road Driving Test; A & BSection 1, Driving SafelySection 2, Transporting CargoSection 6, Pre-Trip InspectionSection 7, Basic Control SkillsSection 8, On-Road Driving Test; A & BSection 1, Driving SafelySection 2, Transporting Cargo SafelySection 4, Combination VehiclesSection 5, Securing a TrailerSection 9, Pre-Trip InspectionSection 10, Basic Control SkillsSection 11, On-Road Driving TestSection 3, Air brakesWritten tests can be taken at all offices.Drive tests are administered at the following offices:555 Wright Way, Carson City3920 East Idaho Street, Elko4110 Donovan Way, North Las Vegas890 Trademark Drive, Reno3505 Construction Way, WinnemuccaPage 5 of 75Revised 12/2012
Section 1 - Driving SafelyBasic Control of Your VehicleTo drive a vehicle safely, you must be able to control its speed and direction. Safe operation ofa vehicle requires skill in: AcceleratingShifting GearsControlling SpeedSteeringBrakingYou should wear your seat belt in a moving vehicle at all times and apply your parking brakewhen you leave your vehicle.AcceleratingRough acceleration can cause mechanical damage. When pulling a trailer, rough accelerationcan also damage the coupling. Start out smoothly and speed up gradually so the vehicle doesnot jerk. If you are starting your vehicle in motion from a stop and you apply power to the drivewheels and they begin to spin, take your foot off the accelerator.If the vehicle has a manual transmission, don’t roll back when you start. You may hit someoneor something behind you. Partly engage the clutch before you take your right foot off of thebrake. If you have to stop on an uphill grade, use the parking brake to hold the vehicle until theclutch engages. Release the parking brake only when you have applied enough engine powerto keep from rolling back.Shifting GearsIt is important to shift gears correctly to keep control of the vehicle. If you can’t get your vehicleinto the right gear while driving, you will have less control.Manual TransmissionBasic method for shifting up – Most heavy vehicles with manual transmissions require doubleclutching to change gears. This is the basic method:1. Release accelerator, push in clutch and shift to neutral at the same time.2. Release clutch.3. Let engine and gears slow down to the RPM required for the next gear (this takespractice).4. Push in clutch and shift to the higher gear at the same time.5. Release clutch and press accelerator at the same time.Shifting gears using double clutching requires practice. If you remain too long in neutral, youmay have difficulty putting the vehicle into the next gear. If so, don’t try to force it. Return toneutral, release clutch, increase engine speed to match road speed, and try again.Page 6 of 75Revised 12/2012
Knowing when to shift – There are two ways of knowing when to shift:1. Engine speed (Revolutions Per Minute or RPM). Study the driver’s manual for yourvehicle and learn the operating RPM range. Watch your tachometer, and shift up whenyour engine reaches the top of the range.2. Road speed (Miles Per Hour or MPH). Learn what speeds each gear is good for. Byusing the speedometer, you’ll know when to shift up.With either method, you may learn to use engine sounds to know when to shift.Basic method for shifting down1. Release accelerator, push in clutch and shift to neutral at the same time.2. Release clutch.3. Press accelerator, increase engine and gear speed to the RPM required in the lowergear.4. Push in clutch and shift to lower gear at the same time.5. Release clutch and press accelerator at the same time.Downshifting, like upshifting requires knowing when to shift. Use either the tachometer or thespeedometer and downshift at the right RPM or road speed.Special conditions where you should downshift are: Starting down a hill – Slow down and shift down to a speed that you can controlwithout using the brakes hard. Otherwise, the brakes can overheat and lose theirbraking power. Entering a curve – When you downshift for a curve, you should do so before you enterthe curve. Slow down to a safe speed and shift down to the correct gear. This letsyou use some power through the curve to help the vehicle be more stable whileturning. It also lets you speed up as soon as you are out of the curve.Multi-Speed Rear AxlesMulti-speed rear axles and auxiliary transmissions are used on many vehicles to provide extragears. They are generally controlled by a selector knob or switch on the gearshift lever of themain transmission. There are many different shift patterns. Learn the right way to shift gears inthe vehicle you will drive.Automatic TransmissionsSome vehicles have automatic transmissions. You can select a low range to get greater enginebraking when going down grades. The lower ranges prevent the transmission from shifting upbeyond the selected gear (unless the governor RPM is exceeded). It is very important to usethis braking effect when going down grades.Controlling SpeedStopping distanceThe primary cause of fatal crashes is driving too fast. The speed at which you drive should bedetermined by your visibility and other driving conditions. These include traction, curves, traffic,and hills.Page 7 of 75Revised 12/2012
There are three things that add up to total stopping distance: Perception DistanceReaction DistanceBraking Distance Total Stopping DistancePerception Distance is the distance your vehicle travels from the time your eyes see ahazard until your brain recognizes it. The perception time for an alert driver is about¾ second. You will travel 60 feet in ¾ second at 55 mph.Reaction Distance is the distance traveled from the time your brain tells your foot tomove from the accelerator until your foot is actually pushing the brake pedal. Thereaction time of an average driver is about ¾ second. You will travel an additional 60feet in ¾ second at 55 mph.Braking Distance is the distance it takes to stop once the brakes are applied. Thebraking time for a heavy vehicle with good brakes is about 4 ½ seconds. You will travelabout 170 feet in 4 ½ seconds at 55 mph.Total Stopping Distance is the distance you will need to bring a vehicle to a stop. At 55mph on dry pavement, the total stopping distance is the length of a football field. It willtake about 6 seconds (60 60 170 290 feet).The effect of speed on stopping distanceWhenever you double your speed, it takes about four times as much distance to stop, and yourvehicle will have four times the destructive power if it crashes. High speeds greatly increasestopping distances. Slowing down a little might help prevent an accident.The effect of vehicle weight on stopping distanceThe heavier the vehicle or the faster it is moving, the more work the brakes must do to stop itand the more heat they absorb. But the brakes, tires, springs, and shock absorbers on heavyvehicles are designed to work best when the vehicle is fully loaded. Actually empty trucksrequire greater stopping distances, because they have less traction. Also, an empty truck canbounce and lock up its wheels, giving poorer braking. (This is not usually the case with buses.)You can’t steer or brake your vehicle without traction. Traction is friction between the tires andthe road. There are some road conditions that reduce traction and call for lower speeds.Speed and CurvesDrivers must adjust their speed for curves in the road. If you take a curve too fast, two thingscan happen. The wheels can lose their traction and continue straight ahead, so you skid off theroad. Or, the wheels may keep their traction and the vehicle rolls over. Tests have shown thattrucks with a high center of gravity can roll over at the posted speed limit for the curve.Page 8 of 75Revised 12/2012
Slow to a safe speed before you enter a curve. Braking in a curve is dangerous because it iseasier to lock the wheels and cause a skid. Slow down as needed. Don’t ever exceed theposted speed limit for the curve. Be in a gear that will let you accelerate slightly in the curve.This will help you keep control.Speed and distance aheadYou should choose a speed that lets you stop within the distance you can see ahead. Fog, rain,or other conditions may require that you slow down to be able to stop in the distance you cansee. At night, you can’t see as far with low beams as you can with high beams. Slow downwhen you must use low beams.Speed and traffic flowWhen you’re driving in heavy traffic, the safest speed is the speed of other vehicles. Vehiclesgoing the same direction at the same speed are not likely to run into one another. If traffic isheavy and moving at 35 mph though the speed limit is 55 mph, the safest speed for your vehicleis most likely 35 mph. Also keep a safe following distance.The main reason drivers exceed the speed limit is to save time. But anyone trying to drivefaster than the speed of traffic will not be able to save much time. The risks involved are notworth it. If you go faster than the speed of other traffic, you have to keep passing othervehicles. This increases the chance of a crash. It is also more tiring. Fatigue increases thechance of a crash.Going with the flow of traffic is safer and easier.Speed on DowngradesIn mountain driving, gravity plays a major role. On any upgrade, gravity slows you down. Thesteeper the grade, the longer the grade, and/or the heavier the load, the more you will have touse lower gears to climb hills or mountains. In coming down long, steep downgrades, gravitycauses the speed of your vehicle to increase.Use a low gear and use proper brakingtechniques. The best way to choose a safe speed is based on your vehicle and its cargo.Select a safe speed that is within the posted speed. If a speed limit is posted or there is a signindicating “Maximum Safe Speed,” never exceed the speed shown. Look for and heed warningsigns indicating the length and steepness of the grade.The principal way you should control your speed going down long and/or steep downgrades isthe braking effect of the engine. The braking effect of the engine is greatest when it is near thegoverned RPMs and the transmission is in the lower gears. If you are driving a new truck with amanual transmission and are taking a long, steep downhill grade, you will probably have to usea lower gear than you would use to climb the hill. Save your brakes so you will be able to slowor stop as required by road and traffic conditions.Shift the transmission to a low gear before starting down the grade. Do not try to downshift afteryour speed has already built up. You will not be able to shift into a lower gear. Forcing anautomatic transmission into a lower gear at high speed could damage the transmission and leadto loss of all engine braking effect.Page 9 of 75Revised 12/2012
You must go slowly enough so your brakes can hold you back, if needed, without getting toohot. If the brakes become too hot, they may start to “fade.” This means you have to apply themharder and harder to get the same stopping power. If you continue to use the brakes hard, theycan keep fading until you cannot slow down or stop at all.It is always important for the brakes to be adjusted right. However, it is especially importantwhen going down steep grades. If you have a brake modulator, the brake system should bebalanced to give about the same braking at each set of wheels. Otherwise, some brakes will domore work than others. They will heat up and lose some of their stopping power.Escape RampsEscape ramps have been built on many steep mountain grades. Escape ramps are made tostop runaway vehicles safely without injuring drivers and passengers and to help avoid damageto vehicles. Escape ramps use a long bed of loose soft material (pea gravel) to slow a runawayvehicle, sometimes in combination with an upgrade.Know escape ramp locations on your route. Signs show drivers where ramps are located.Escape ramps save lives, equipment, and cargo. Use them if you lose your brakes.Slippery SurfacesIt will take longer to stop and it will be harder to turn without skidding when the road is slippery.You must drive slower to be able to stop in the same distance as on a dry road. Wet roads candouble stopping distance. On a wet road, you should reduce your speed by about one-third(e.g., slow from 55 mph to about 35 mph). On packed snow, reduce speed by a half or more. Ifthe surface is icy, reduce speed to a crawl. If the road you are driving on becomes very slipperydue to glare ice, stop driving as soon as you can safely do so.The following are some safety guidelines: Start gently and slowly – When first starting, get the feel of the road. Don’t hurry. Ifyou use too much power, the drive wheels may spin and you could lose control. Adjust turning and braking to conditions – Make turns as gently as possible. Don’tbrake any harder than necessary and don’t use the engine brake or speed retarder.(They can cause the driving wheels to skid on slippery surfaces.) Adjust speed to conditions – Don’t pass slower vehicles unless necessary. Go slowand watch far enough ahead to keep a steady speed. Avoid having to slow down andspeed up. Take curves at slower speeds and don’t brake while in curves. Be awarethat as the temperature rises to the point where ice begins to melt, the road becomeseven more slippery. Slow down more. Adjust space to conditions – Don’t drive alongside other vehicles. Keep a longerfollowing distance. When you see a traffic jam ahead, slow down or stop to wait for itto clear. Try hard to anticipate stops early and slow down gradually. Wet brakes – When driving in heavy rain or deep standing water, your brakes will getwet. Water in the brakes can cause the brakes to be weak, to apply unevenly, or tograb. This can cause lack of braking power, wheel lockups, pulling to one side or theother and jackknife if you pull a trailer. Avoid driving through deep puddles or flowing water if possible. If not, you should:o Slow down.Page 10 of 75Revised 12/2012
oooooPlace transmission in a low gear.Gently put on the brakes. This presses the linings against the brake drums ordiscs and keeps mud, silt, sand, and water out of your brakes, keeping yourbrakes working.Increase engine RPM and cross the water while keeping light pressure on thebrakes.When out of the water maintain light pressure on the brakes for a short distanceto heat them up and dry them out.Make a test stop when safe to do so. Make sure no one is following, and thenapply the brakes to be sure they work right. If not, dry out further as describedabove. (CAUTION: Do not apply too much brake pressure and accelerator at thesame time or you can overheat brake drums and linings.)Identifying Slippery SurfacesSometimes it’s hard to know if the road is slippery. Here are some signs of slippery roads. Shady areas – Shady parts of the road will remain icy and slippery long after openareas have melted. Bridges – When the temperature drops, bridges will freeze before the road will. Beespecially careful when the temperature is close to 32 F. Melting Ice – Slight melting will make ice wet. Wet ice is much more slippery than icethat is not wet. Black Ice – Black ice is a thin layer that is clear enough that you can see the roadunderneath it. It makes the road look wet. Any time the temperature is below freezingand the road looks wet, watch out for black ice. Vehicle Icing – An easy way to check for ice is to open the window and feel the front ofthe mirror, mirror support, or antenna. If there’s ice on these, the road surface isprobably starting to ice up. Just after rain begins – Right after it starts to rain, the water mixes with oil left on theroad by vehicles. This makes the road very slippery. If the rain continues, it will washthe oil away. Hydroplaning – In some weather, water or slush collects on the road. When thishappens, your vehicle can hydroplane. It’s like water skiing. The tires lose theircontact with the road and have little or no traction. You may not be able to steer orbrake. If the vehicle is hydroplaning, do not use the brakes to slow down, release theaccelerator. This will slow your vehicle and let the wheels turn freely. If the drivewheels start to skid and you have a manual transmission, push in the clutch to letthem turn freely. It does not take a lot of water to cause hydroplaning. Hydroplaningcan occur at speeds as low as 30 mph if there is a lot of water. Hydroplaning is morelikely if tire pressure is low or the tread is worn. The grooves in a tire can carry
Section 8, On-Road Driving Test; A & B . J Endorsement: Towing : Section 1, Driving Safely Section 2, Transporting Cargo Safely . Section 4, Combination Vehicles Section 5, Securing a Trailer : Section 9, Pre-Trip Inspection Section 10, Basic Control Skills . Section 11, On-Road Driving Test . Any vehicle equipped with air brakes . Section 3 .

