Transcription
The Ultimate Guideto Easily MakeInstructional Videos1
When you need to learn something new, what do you do? Youprobably look for a video. And you’re not alone.Regardless of your industry, if you’re serious about teaching others, growing your business, orbuilding an online course, instructional videos are the best delivery method.Research shows that when people look for answers to their questions, they prefer to consult avideo. In fact: 83% of people prefer watching videos to accessing instructional or informational content viatext or audio.More than half of online shoppers say they use video to help make purchase decisions.Two out of three employees complete tasks better when instructions are provided visuallyand absorb information 7% faster.More than 70% of YouTube viewers turn to the platform for help solving problems.You may be wondering, “How do I create online training videos?”It can be a challenge for many small businesses, educators, and entrepreneurs to find the time tocreate video content.That’s why we’re here to help! It’s much easier than you might think.This guide will share the secrets to easily creating high-quality training and tutorial videos.We know what works (and what doesn’t), and we’ll show you exactly what to do to make how-to andinstructional videos.Make your own instructional videos today!Download Camtasia and FREE templates to quickly and easily make your own tutorial andtraining videos.Download Free TrialHere’s what you’ll learn in this free guide to creating great instructional videos: The most popular types of instructional videos Common mistakes people make when creating instructional videos The best software for making instructional videos How to make an instructional video in 7 steps The actual cost of making tutorial, training, and explainer videos2
What is an instructional video?An instructional video is any video that demonstrates a process, transfers knowledge, explains aconcept, or shows someone how to do something.Creating instructional videos isn’t limited to instructional design professionals. Anyone in anyindustry can (and probably should) create instructional videos.Here are some of the most common types of instructional videos you can create: Microvideos are short instructional videos that focus on teaching a single, narrow topic.Tutorial videos are the go-to instructional method for teaching a process or giving step-bystep instructions and are sometimes referred to as “how-to” videos.Training videos are designed to improve employees’ workplace skills and often use footageof real people to connect the trainer to the trainee.Explainer videos explain a business concept or product in an entertaining, visual way.They’re usually short and help simplify complex ideas.Recording a lecture or presentation can make that instructional content available for anaudience to consume or review after the fact. These videos tend to be longer than tutorialvideos and require a higher level of investment from your audience.Screencasts are quick, informal videos composed primarily of screen recordings designed toteach someone to perform a task or share knowledge.As you can see, instructional videos go by various names, but the goal is the same.Unlike other forms of video, an instructional video instructs. While you don’t want your videos to beboring, your main goal is for your viewers to comprehend and learn what you are teaching them.Common mistakes people make when creating videosWhen making instructional videos, people make a few common mistakes. Here are a few you caneasily avoid:Mistake #1: Not knowing your audienceIf you don’t know your audience, it’s all but impossible to make a helpful video. Understanding whoyou are trying to help will guide critical decisions about your videos.General information is helpful, but thinking about a specific individual who represents your audience– what their problems are, why they will be watching your video, what they like and don’t like – willhelp you make a more focused and detailed video.We’ll go over more ways to get to know your audience later in this guide.3
“[Y]our audience for your videos is the same people that you’re targetingfor your product in the first place. [I]f people are buying your product, thenpeople are looking for how to use that product, how to get better at thatproduct. Things about that product that they might not know initially whenthey take it out of the box. They’re looking for that kind of information.”Nick Nimmin, YouTube content creator and educatorMistake #2: Trying to make your video perfectToo often, people worry about making their videos perfect. It’s good to remember that perfect is anillusion. If you start with perfection in mind, it can paralyze your creative process, and you’ll struggleto get started.Remember, the goal of creating an instructional video is to teach someone something, not create aperfect video.“Punch perfectionism in the face. Punch fear in the face, and just hit publish,because you just got to put out your first videos, and the reality is your firstvideos are going to be your worst videos. We all start horrible, and I thinkthat’s the fear. We’re afraid of putting out some bad videos just accept thefact they’re going to be bad, and get those ones out there.”Sean Cannell, THiNKmediaTVMistake #3: Worrying too much about equipmentIt’s easy to get overwhelmed and feel like you don’t have the right tools to create quality videos.Having the latest and greatest gear is fun, but it’s not a necessity. Learn the basics, then start toupgrade your tools.You do not need fancy equipment to make professional-looking videos, and we’ll prove it later inthis guide when we show you the equipment we use to make great videos.“So many people focus on ‘I don’t have the right gear’ and ‘I don’t have theright camera,’ but they don’t really think about, well, what is my message?What am I trying to get across with my brand? They don’t want to just betold, buy my product. If you can make someone feel something, if you canmake them relate to what you’re doing, that’s more important than any pieceof gear.Andrew Kan, YouTube video creator4
The best software for making instructional videosFinding the right tool for capturing your screen and editing your videos can be intimidating,especially if you’ve never made an instructional video before. There are a lot of options out there!If you’re looking for a screen capture and video editing tool that is quick to learn and doesn’t requirefancy video editing skills, we recommend TechSmith Camtasia.Camtasia is great for making any type of instructional video. Plus, we offer a ton of helpful tutorialsto get you started. Download a free trial of Camtasia and hop right in!How to make an instructional videoThe secret to making a great instructional video is a well-thought-out plan. Taking the time up frontto develop a plan for your instructional video is critical to its success.Here are the essential steps to making a great instructional video: Step 1: Determine and get to know your audience Step 2: Write a storyboard and script Step 3: Record your narration Step 4: Record your screen or capture video Step 5: Edit the video Step 6: Add a video intro Step 7: Share your videoRECOMMENDED VIEWINGHow to Make Tutorial VideosLearn how to create great tutorial videos as wetake you through the entire process.Step 1: Determine and get to know your target audienceBefore you even think about hitting the record button, you need to know your target audience andunderstand why they need help.If you have a product or service, talk to your customers about how they use your product and wherethey struggle.If you’re teaching a class, find out what knowledge or skills your students hope to gain.5
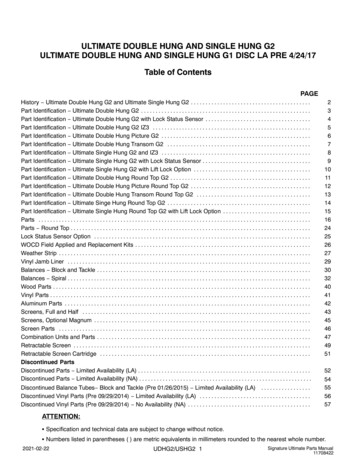
Are you training a new hire? Ask yourself what questions they might have and the information theyneed to succeed.Then, use that information to choose tutorial topics that will help the most people.WARNING: As tempting as it may be, DO NOT skip this first step. Even if you know your audiencelike the back of your hand, it’s still vital to put that information into an outline.Before you move on to the next step, make sure you can answer these questions: What is your topic? Pick only one subject to cover per video, and your instructional videowill be more focused and easier to create.Who is your audience? Start by determining demographic information, like education, age,professional organizations, etc. and then consider their interests, concerns, and goals.Why does your audience care about this topic? If you understand why your audience wouldwatch the video, you can more easily address their concerns.What is the learning objective of your video? A clear learning objective helps you providemore straightforward instruction with a more achievable outcome.How will your video benefit your audience? What value will they take away if someoneinvests their time in watching your video?RECOMMENDED VIEWINGYou Need to Do These Things BeforeYou Hit RecordIn this episode of our Video Workflow series, learnwhat’s involved in the video making process beforeyou hit record.Step 2: Write a storyboard and scriptOnce you have a topic and know your audience, create a storyboard to outline and visualize whatyou plan to show.Creating a storyboard ahead of timewill help you make an instructionalvideo that is clear, concise, andinteresting to your audience.Some people get creative and drawdetailed pictures, but you don’t haveto be an artist. Your storyboard can beas simple as the image to the right.6
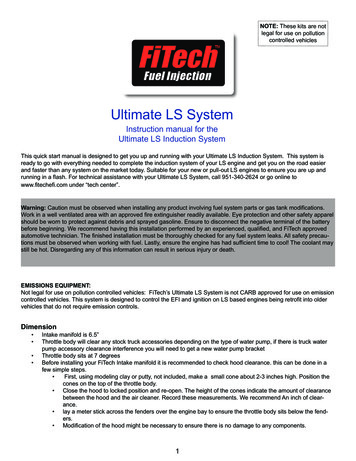
Quick sketches and stick figures are perfectlyfine for live video. If you’ll be recording yourscreen to demonstrate a process, use a seriesof simple screenshots to show what you planto display with the narration.After storyboarding is done, it’s time to writea script.Even a simple script will help you be moreefficient, saving both yourself and yourviewers time. Plus, you’ll also be far less likelyto forget something.It’s helpful to match your narration to what willbe happening on-screen during your video.If you were creating an instructional videoabout using the default calculator on a Mac,your script might look like the image to theright.You don’t need to start with a blank page. Using a general script template can help you write asuccessful script in less than 10 minutes.Here are a few more scriptwriting tips to help you get started: Avoid jargon. Using simple language as if you’re explaining the process to a friend will helpmake your script easier to follow.Show AND tell. Instead of simply giving a play-by-play of your onscreen actions, take time toexplain both what you’re doing and why you’re doing it.Practice, practice, and then practice some more. Read your script aloud before you record.If you get tripped up, go back and make sure you’re using natural language.Get feedback. It might seem scary at first, but getting feedback during the scripting processwill improve your instructional video and save you time later.RECOMMENDED VIEWINGScript Writing Basics (Examples Templates)In this episode of our Video Workflow series, learnhow templates can help you create high-qualityvideos.7
Step 3: Record your narrationWith your script in hand, it’s time to record the narration. Camtasia comes with a built-in, easy-touse voice recording feature that is a great option. Still, you can take your voiceover and narrationrecording to the next level with TechSmithAudiate.Audiate transcribes your voice in real time–as you record. This means you can edit your audio justas you edit the text in a document.With Audiate, you don’t have to stare at a waveform all day to figure out exactly what you said andwhere. Audiate even automatically finds and deletes all of your “ums,” uhs,” and other hesitations foryou.Already have a voiceover recorded? Import it into Audiate, and the program will transcribe it for you.You can save your edited audio file and import it right into Camtasia. You can even export the editedtext as a transcript or SRT file for captions.Even if you’re comfortable using professional audio recording software like Adobe Audition, Audiateis the best (and easiest) way to record voiceovers.Next, get your hands on the best microphone you can find. Even a middle-of-the-road mic (like theone connected to your headphones) will provide much better sound quality than the one built intoyour computer.RECOMMENDED VIEWINGWhich Microphone?In this episode of our Video Workflow series, learnhow to get the most bang for your buck whenchoosing the right microphone.Then, find a quiet place to record. TechSmith has a recording studio with sound dampening foam,but that isn’t feasible for everyone. A broom closet or small office can sometimes get you a prettysimilar sound if you want a low-cost solution.8
When you’re ready to hit record, make sure you speak slowly and clearly. If you make a mistake,don’t start over. Pause, then start again right before you made the mistake. You can remove anymistakes when you’re finished recording.Step 4: Record your VideoDepending on your instructional video’s topic, you might need to capture a recording of a processhappening on your screen, demonstrate something in real life, or both.Recording your screen for an instructional videoFirst, clean up your computer screen and close any unnecessary applications. Turn off notificationsthat might pop up before you start recording. Follow these directions to get a crisp, clear screenvideo.Then, open the application you want to record and conduct a few practice walkthroughs of exactlywhat you want to show your viewers. This practice will help you get smooth cursor motions, andyou’ll have less editing to do in the end.After a few run-throughs, open the Camtasia recorder and capture your screen just as youpracticed. Remember, if you make a mistake, pause and start again from that point. You’ll be able tosmooth things out when editing later on.TIP: When you choose a screen capture or screencasting software, pick a tool with built-inrecording, editing, and sharing features. It will save you time and let you do all your work inone tool.If you want a simple way to increase engagement and help viewers connect with your content, tryadding a webcam recording to your screencast.Recording an instructional video with a cameraThere are a lot of similarities between recording your screen and creating a training video with acamera. You still need a plan, a script, and the right tools, but stepping in front of the camera bringsnew challenges.RECOMMENDED VIEWINGHow to Make a Training VideoIn this tutorial, we take you through the entireprocess to create online training videos.9
Here are a few things to consider when creating an instructional video that includes cameravideo: Don’t get overwhelmed by equipment. In the video above, we only used five tools: a tripod,smartphone, phone clip, a clean backdrop, and lights.Make sure your recording space is well-lit. You’ll either want to record in an area with a lot ofnatural light or add some video lighting to your equipment list.Place your camera on a tripod, and position it as close to your subject as possible while stillgetting everything you need in the shot. Being close to the subject will help you get the bestpossible audio when recording with a smartphone camera.Step 5: Edit the videoMost people feel like they need to be a professional video editor to make a nice-looking video, butthe truth is that you don’t need expensive editing tools or a lot of knowledge to get started.In Camtasia, you can cut out mistakes by selecting them with the playhead, then clicking cut. To trimextra footage from the ends of your recording, drag the end of the clip in.Add your audio narration to the timeline when you finish editing your video. You can use clip speedand extend frame to sync the audio and video in your project.RECOMMENDED VIEWINGEditing in Depth: Part 1In this tutorial, we cover techniques that will helpyou edit video more efficiently.Here are some simple video editing tips to improve your instructional videos: If you need more time explaining a concept, split the clip and use extend frame to freeze thevideo.To speed up a boring part of your recording, add clip speed, then drag the handles to speedit up.Add interactive elements like callouts, arrows, shapes, lower thirds, or sketch motions tohighlight key points in your video.Adding music to your video isn’t required, but can take a good video to the next level.Choose something upbeat. You want your viewers to feel good as they’re learning.10
Step 6: Add a video introUse a video intro to lead viewers into your content, but don’t get too crazy. Keep your openingsimple and to the point.Viewers want to get to the substance of your video. They don’t care about anything other than whatyou promised to teach them.A good intro clearly lays out the topic and quickly explains what viewers can expect to learn.To create your own video intro in Camtasia, you will need to add some space at the beginning ofyour video. Hold the shift key on your keyboard and drag the playhead to the right.Then, open the media bin and select the Library tab. From the “Motion Graphics – Intro Clips” folder,drag the intro you like onto the timeline.TIP: Camtasia comes with built-in templates, but you can access even more professionalroyalty-free options with TechSmith Assets for Camtasia.You can customize your intro clip by selecting it on the timeline and then editing the text and shapesin the properties panel. Enter text, choose a font, and change any colors or other settings for theshapes and text.Step 7: Share your videoFinally, think about where your video will live. There are many video hosting options to choose fromthese days.You can share your video directly to online video platforms like YouTube, Vimeo, or Screencast inCamtasia or save the video as a local file to upload on social media.11
There are many reasons to share your education and learning videos on YouTube. Plus, we have afree guide with tips and tricks on how to make a YouTube video.Before sending your video out into the world, share it with a few people to get some videofeedback. This input helps ensure your message is clear, and that your video accomplishes yourgoals.The actual cost of making tutorial, training, and explainer videosBefore you roll up your sleeves DIY style or hand off your project to a professional video company,let’s take a step back and make sure the right people are making your video.Budget often plays a significant role in this decision. Start by considering the impact you want thevideo to have.Here are a few questions to ask when weighing the options: How many videos do I need?How much money am I willing to spend?Is this video going to lead the marketing efforts for a campaign?Will this video live in a prominent place, such as on a website landing page?Hire an outside companyIf a lot depends on this video, you might want to consider hiring an external company to produce a“knock their socks off” level video.PROSVideo production companies have thetalent, skills, and experience to create thebest explainer videos. Good companieswork with you to make your video exactlyhow you want it.CONSThe average cost for a custom 60-secondexplainer video is roughly 8,000, and justone professionally-made tutorial video cancost 10,000 or more.But buyer beware. This option will cost you a lot of time and money. Furthermore, if you want to editthe video further for use in other places, you’ll have to pay extra for that.Make your own videosCreating your videos in-house gives you more control over the budget and complete creativefreedom. A screencast tool like Camtasia is perfect if you’re looking for a DIY option.PROSYou have complete creative freedom andmore control over the budget.CONSYou can be limited by your skills, time, andresources when going the DIY route.12
While you may never reach the level of a full-time video producer, you’ll be amazed at the quality ofthe videos you can create with just a little bit of practice.What’s next?Whether you’re just getting started or a video pro, you’ve learned some of the key tools andstrategies to create successful videos. Take this guide, download a free trial of Camtasia, and getstarted.Do you want to learn even more about creating videos? Head over to the TechSmith Academy. It’s afree resource designed to level-up new video creators.Frequently asked questionsHow long should instructional videos be?According to TechSmith research, most viewers prefer videos of 1-6 minutes in length. However,there is also an appetite for longer videos of up to 20 minutes. It all depends on your topic andaudience. In some cases, a longer video may be more successful.How do you make a training video?You can make a training video with a camera, screen recorder, and video editor. Just make sure youplan out your content first and know exactly who the audience is for your video.What is the best software for making video tutorials?TechSmith Camtasia is the best software for making tutorial videos. It’s simple to use, but flexibleenough to take on larger projects down the road.What are video tutorials?Video tutorials are the go-to instructional method for demonstrating a process or providing step-bystep instructions. They’re usually between 2-10 minutes long and may leverage multiple instructionalmethods.Can a streaming video be recorded?Absolutely! You can easily capture or record live streaming video, share it with your friends andcoworkers, or save it for later viewing. It’s fast, easy, and will bring order to a chaotic medialandscape.Try Camtasia FREE for 30 DaysEnjoy Camtasia free with no restricted features orrecording limitations and see what makes it the #1choice for creating professional-looking videos.techsmith.com/video-editor13
"Punch perfectionism in the face. Punch fear in the face, and just hit publish, because you just got to put out your first videos, and the reality is your first videos are going to be your worst videos. We all start horrible, and I think that's the fear. We're afraid of putting out some bad videos just accept the