Transcription
ars
Complete Service Manuals published by Robert Bentley, Inc.Volkswagen Beetle and Karmann Ghia Official Service Manual Type 1, Model Years1966-1969. Volkswagen of America, Inc.Volkswagen Super Beetle, Beetle and Karmann Ghia Official Service Manual Type 1,Model Years 1970-1976. Volkswagen of America, Inc.Volkswagen Station WagonIBus Official Service Manual Type 2, Model Years 1968-1976.Volkswagen of America, Inc.Volkswagen Fastback and Squareback Official Service Manual Type 3, Model Years1968-1973. Volkswagen of America, Inc.Capri Complete Service Manual, Model Years 1970- 1974. Robert Bentley, Inc.Complete Official Triumph TR2 & TR3,1953- 1961-includesand Service Instruction Manual. British Leyland MotorsDriver's Instruction BookComplete Official Triumph TR4 & TR4A, 1961- 1968-includes Driver's Handbook,Workshop Manual, Competition Preparation Manual. British Leyland Motors Complete Official Triumph GT6, GT6 Mk 111, 1967-1973-includesbook and Workshop Manual. British Leyland MotorsComplete Official Triumph TR6 & TR250,1967- 1975-includesWorkshop Manual. British Leyland MotorsDriver's Hand-Driver's Handbook andComplete Official Triumph Spitfire Mk 111, Mk IV & 1500,1968 - 1976-includes Driver'sHandbook and Workshop Manual. British Leyland MotorsMG Workshop Manual: Complete Tuning and Maintenance Por All Models from "M"Type to TF 1500. W.E. BlowerComplete Official MGB, Model Years 1962-1974-includes Driver's Handbook, Workshop Manual, Special Tuning Manual. British Leyland MotorsComplete Official Jaguar "E-includes Driver's Handbook, Workshop Manual, SpecialTuning Manual. British Leyland MotorsComplete Official 948cc & 1098cc SpriteIMidget-includes Driver's Handbook, Workshop Manual, Special Tuning Manual. British Motor Corp.Complete Official 1275cc SpriteIMidget, 1967- 1974-includes Driver's Handbook,Workshop Manual, Emission Control Supplement. British Leyland Motors
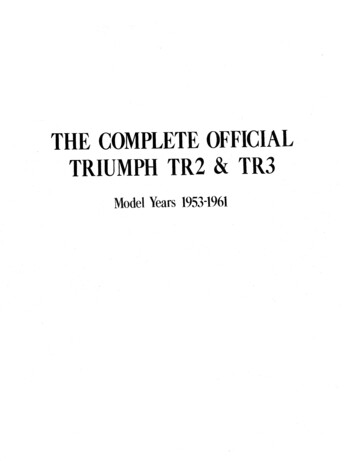
del YearsComprising the officialdriver's i n s t r u c t ion books e r v i c e i n s t r u c t ion manualRobert Bentley, Inc.872 Massachusetts AvenueC a m bridge, Mass. 02139
Library of Congress Catalog Card Number 75-42893ISBN 0-8376-0125-8Manufactured in the United States of AmericaCopyright 1976 Robert Bentley, Inc.All rights in this book are reserved.QN o responsibility accepted for the accuracy of the contents.
Taken as a whole, the Triumph TR2s and TR3s representone of the most successful sports car designs in history; so successful that, by the early nineteen-sixties, they had helped tomake Standard Triumph the second-best selling imported carmarque in the United States. During the late nineteen-fiftiesand early nineteen-sixties, countless fledgling race driversgained their early experience in these machines. Among themwas three-time World Champion Jim Clark, who owned one ofthe first-if not the very first-TR3 in Scotland.Today, in the nineteen-seventies, TR2s and TR3s are aseagerly sought after as they were twenty years ago when thecars were in production. This should not be surprising sincethere has never been a time during those twenty years whenTR2s and TR3s were not proving their worth. In 1965, fully tenyears after the TR2 was discontinued and almost five yearsafter the last TR3 had been built, the cars remained highlycompetitive in racing. In that year, the Sports Car Club ofAmerica's U.S. F-Production Championship was won byBrian Fuerstenau in a TR3-with Lee Midgely's TR2 solidly insecond place.Wise collectors began to acquire TR2s and TR3s even beforetheir long and successful history had been written on the racetrack. (As recently as 1975 a TR3 made the field for The Chamn event that deterpion Spark Plug Road a c i Classic-anmines the ultimate standings in U.S. amateur road racing.) In1970, at a time when the newest TR3 was on the verge ofbecoming a ten-year-old relic, well-maintained examples of itspredecessor, the TR2, were already being purchased by collectors for more than the cars had cost when new. The prices offully restored TR3s have since begun to follow suit and will undoubtedly continue to rise as fewer examples of the typebecome available on the open market.This is as it should be; the TIP2 and TR3 are landmarks inthe evolution of the sports car. Before the TR2 arrived on theautomotive scene, enthusiasts of limited means had very fewcars from which to choose. The TR3 was a windfall particularly to sports car-starved Americans who, in buying a Triumph,could acquire 100-mph capability at a cost little greater thanthat required to obtain an 80-mph MG.TF.Because the value of TR2 and TR3 sports cars is increasing,it is impossible to overstate the importance of correctmaintenance and repair. Unfortunately, original workshopmanuals and owner's manuals have, since the assimilation ofStandard Triumph by British Leyland Motors, become virtually. impossibleto obtain. Indeed, original books are now collec.tor's items in their own right. N o vintage Triumph enthusiastwould choose to risk one by placing it on an oil-stainedworkbench or on a garage floor! A new, readily available andeasily replaceable manual that duplicates the orginal manuals'contents is clearly needed.This Manual has been compiled in order to meet that need,thereby supplying complete, accurate, and comprehensivemaintenance and repair data to both car owners and professional mechanics. The Driver's Instruction Book, which comprises the first part of this Manual, is similar to the handbookprovided with every new TR3. The Service Instruction Manual,which comprises the second-andlargest-portionof thisManual, is the official factory manual and was originally intended for use by dealer service departments. Owners of TR3sand the so-called TR3A or TR3B model will find it informativeto read the Foreword to the TR3 Supplement, which appearson page 419.Assembly work on small, highly-tuned machines such as theTriumph sports cars must be carried out with greater precisionthan is commonly practiced on large American cars. Particularemphasis must be given to the proper use of torque wrenchesand to strict adherence to the tightening torque specificationswhich are given in this Manual. A fastener that is too tight canbe worse than one that is too loose-especially on a lightweightsports car. Stretched or broken bolts and distorted parts, whichresult from overtightening by musclebound mechanics, becomea serious concern where the precision fitting of light alloy andthin-wall iron castings is involved.The importance of cleanliness cannot be overemphasized.Under no circumstances should an engine or gearbox berepaired on the ground or on a garage floor. Thoroughly cleanthe exteriors of major components prior to disassembly inorder to keep road dirt and other grime out of the workingparts. N o more than a pinch of abrasive dust in a gearbox cancause rapid failure of the synchronizers and bearings.During the final assembly of an engine or gearbox, thecleaned parts should be laid out on a clean workbench that hasbeen covered with clean sheets of new cardboard or wrappingpaper. The engine or gearbox itself, if not mounted on a specialstand, should likewise be placed on a clean workbench. Sandpapering, valve grinding, or the use of bench grinders shouldnot be permitted near the area where final assembly is takingplace. If assembly cannot be completed in a day, enclose thepartially-assembled engine or gearbox in a large plasticbag-such as a new trash bag or a dry cleaner's garment returnbag-so that dust and dirt will be excluded until assemblywork resumes.By observing these precautions during the maintenance,repair, or restoration of your TR2 or TR3, you will be preserving the value and the life of a car that is rapidly becoming oneof the classics among post-World War I1 sports cars. If at anytime you lack the skills, special equipment, tools, or workshopfacilities for making repairs as they are described in thisManual, we suggest you leave such repairs to an AuthorizedDealer or other qualified shop.
Note on the Table of ContentsBoth the Driver's Instruction Book and the Service Instruction Manual are presented here exactly as originallypublished by the Standard Motor Co.-including theoriginal page numbers. (The small numbers in the centerat the bottom of each page are the original pagenumbers.) We have added the large, bold page numbersat the lower outside margin of each page. It is these largenumbers that are referred to in the Table of Contentsstarting on the next page.
ContentsPreface .15OFFICIAL TRIUMPH TR2 & TR3 DRIVER'S INSTRUCTION BOOKGENERAL DATA . 12Spare parts service, Licence data, General specification,Road speed dataR U N N I N G ADJUSTMENTS . 35Engine (decarbonizing and valve grinding, cylinder headnuts, valve-rocker clearances, ignition timing, valve timing, sparking plugs, carburetors, fuel pump), Clutch,Brakes (adjustment of brake shoes-lockheed brakes,Girling brakes, handbrake adjustment, bleeding thebrake and clutch hydraulic system), Propeller shaft,Hydraulic dampers, Loose bolts and nutsELECTRICAL SYSTEM . 46Ignition, Battery, Dynamo (belt tightness), Starter motor(cleaning and lubrication), Control box, Fuses, Lamps(head lamps-bulbreplacement, lamp alignment, tocheck and adjust alignment, parking lamps (front) anddirection indicator flashing lamps, tail and dnection mdicator flashing lamps, number plate illuminator andbrake lamp, ignition warning light, direction indicatorwarning light, high beam warning light, instrument panellights), Windscreen (windshield) wiper, Direction indicators, Windtone horns, Electrical componentspecification chartOPTIONAL EXTRAS . 52Radio, Heater, Overdrive (operation, lubrication, draining),-, Wire wheelsRECOMMENDED LUBRICANTS . . 57Recommended lubricants chart-overseas, British IslesMANAGEMENT O F T H E CAR . 16Controls, switches and instruments (clutch, bonnet locks,choke control, gear lever, handbrake, radio controls,overdrive control, petrol tap, seat adjustment, screenwasher, scuttle ventilator, brake light, direction indicators, head, tail and parking lamps, horn, ignition,panel lights, starter motor, windscreen (windshield)wiper, heater switch, ammeter, fuel gauge, oil pressuregauge, speedometer, tachometer, ignition warning light,water temperature gauge), Driving the car (to start theengine, driv ng,new engines)GENERAL UPKEEP . 21Regular inspection, Cooling system (filling, draining,anti-freeze mixtures), Lubrication (engine, gearbox, rearaxle, brake and clutch operation, road wheel hubs, frontsuspension and steering, propeller shaft, rear roadsprings, hydraulic dampers, hinges, controls, door Locks),Tires (front wheel alignment, the jack)BODYWORK . 33Door adjustment, Soft top stowage, Soft top fasteners,Spare wheel and tool stowageOFFICIAL TRIUMPH TR2 & TR3 SERVICE INSTRUCTION MANUALGENERAL DATA . 63Chassis specification, Body dimensions, Car we ght,Tiresizes and pressure, Water capacity, Oil capacity, Petrol,Body specification, Spire speed nuts (general notes,description, tightening torques), Commission number,Body number, Engine number, Gearbox number, Rearaxle number, Recommended lubricants (British Isles,overseas countries), Lubrication chart, Nut tighteningtorques, Fractional and metrical equivalents chart, Standard measure and metric equivalentsENGINE . 81Dimensions and tolerances, General description (engine,cylinder block, cyl ndersleeves, connecting rods, aeroflexcompensating pistons, crankshaft, valves, camshaft,cooling system, fuel system, Hobourn-Eaton doublerotor oil pump, coil ignition, engine mountings, flywheel,to fit replacement starter ring gear, crankcase ventllation), Engine lubrication, Oil pump, Crankshaft andmain bearings (main bearing clearance, crankshaft endfloat), Connecting rod bearings, Piston assembly andcylinder sleeves, Figure of eight joints, Camshaft andtiming gears, T o remove camshaft, Refitting camshaft,T o set valve clearances, T o set valve timing in theabsence of timing wheel markings, Ignition and distributor timing, T o decarbonize, Valve grinding,Removal of carbon, Low compression Kit-part No.502227, "Purolator Micronic" oil filter-type,l7F.5102,Removal of engine and gearbox as a unit, D smantlingC.D.engine, Re-assembly of engme, Ignition system (notes onsparking plugs), List of distributors being serviced,Engine noises (main bearing knock, crankshaft end float,big end bearing knock, small end knocks, piston knock,noisy valve rockers or tappets, ignition knock (pinking),back firing into carburetor, excessive oil consumption,low oil pressure, high oil pressure), Fault location chartCOOLING SYSTEM .141Description, T o drain cooling system, Fan belt adjustment, Thermostat, T o remove thermostat housing, T oreplace thermostat housing, T o remove thermostat only,T o replace thermostat, Testing thermostat, Watertemperature gauge, T o test water temperature gauge,Radiator, T o remove radiator, T o replace radiator, Flexible hose connections, Water pump assembly, T o removewater pump bearing housing, T o replace water pumpbearing housing, T o dismantle bearing housing assembly, T o assemble bearing housing assembly, Recutting water pump sealing face, T o remove water pumpbody, T o replace water pump body, Fan assembly, T oremove fan assembly from engine unit, T o fit fan assembly to engine unit, T o assemble fan for balancing,Anti-freeze precautions, Service diagnosis chartCLUTCH .155General data, Tool data, Clutch operation, Twin boremaster cylinder, Clutch slave cylinder, Clutch operatingshaft, Release bearing, Cover assembly, Driven plate assembly, Maintenance, Bleeding hydraulic system, Greas-
ing clutch operating shaft, Adjusting clutch, Adjustingmaster cylinder, Adjusting slave cylinder, T o removeflexible hose, T o fit flexible hose, Removal of slavecylinder (with fork-rod assembly), To replace slavecylinder, Dismantling slave cylinder, Assembly of slavecylinder, T o remove release bearing and clutch operatingshaft, To replace clutch operating shaft and release bearing, Removal of clutch from flywheel with gearboxremoved, Replacement of clutch to flywheel, Dismantling cover assembly using Churchill fixture No. 99A, Assembly of cover plate assembly using Churchill fixtureNo. 99A, Dismantling cover assembly without Churchillfixture, T o assemble cover assembly without Churchillfixture, Inspection of cover assembly, Adjusting releaselevers, Condition of clutch facings, Reconditioning ofdriven plate assembly, Service diagnosis chartGEARBOX . 173Dimensions and tolerances, Operation, Ratios, Bearings,Mounting, Oil capacity, Nut and bolt data and tightening torques, T o remove gearbox leaving engine in position, To replace gearbox, To dismantle, T o assemble, T odismantle top cover assembly, T o assemble, Installationof overdrive (dismantling, assembly of gearbox, fittingoverdrive unit, valve checking, valve adjustment, fittingisolator switch, operating switch), Supplementary instructions for incorporating overdrive on "second" and"third" gears (overdrive unit, gearbox top cover assembly)205REAR AXLE .General discription, To remove hubs, T o replace hubs,To remove hubs (center lock type), T o replace hubs(center lock type), To remove axle shaft, T o replace axleshaft, T o remove axle, T o replace axle, T o dismantle, T ore-assemble, Service diagnosisFRONT SUSPENSION A N D STEERING .225Front suspension data, Description, Maintenance, Frontwheel alignment, T o adjust front wheel alignment, Steering lock stops, To set steering lock stops, T o removefront hub and stub axle, T o replace front hub and stubaxle, T o remove front shock absorber, T o fit shock absorber, T o remove front road spring, T o fit road spring,T o remove and dismantle front suspension unit, T o assemble and replace front suspension unit, Steering, Typeand description, Maintenance, Adjustment of steeringbox, To remove control head from steering wheel, T o fitcontrol head and stator tube to steering wheel, T oremove steering wheel, T o fit steering wheel, T o removesteering unit, T o fit steering unit, To dismantle steeringunit, T o assemble steering unit, Removal and replacement of drop arm, T o remove idler unit, T o fit idler unit,Steering column bracing, Telescopic (adjustable) steeringunit (description, steering unit, steering wheel, controlhead), T o fit telescopic steering unit and steering wheel,T o remove telescopic steering wheel and steering unit, T oremove control head from center of telescopic steeringwheel, To fit control head and stator tube to telescopicsteering wheel, Steering stiffness, Assessment of accidental damageROAD SPRINGS A N D SHOCK ABSORBERS .255Front spring (description, maintenance, to remove orreplace), Rear road springs (description, maintenance, toremove rear road spring, t o fit, rear road springoverhaul, to dismantle, to assemble), Front shock absorber (description, maintenance, operation of telescopicshock absorber, to remove or replace front shock absorber), Rear shock absorber (description, maintenance,valve operation, to remove rear shock absorber, to fitrear shock absorber)265FRAME UNIT .Description, Assessment of accidental damage, preparation of car, Checking side members for twist, Checkingside members for cradling, Checking side members forsquareness, Checking side members for bowingPROPELLER SHAFT . 275Description, Lubrication, Maintenance instructions,Removal of propeller shaft, T o dismantle propeller shaft,To examine and check for wear, T o assemble, T o fitpropeller shaftL.N.WHEELS A N D TIRES .281Construction of tire, Tire pressures, Repair of injuries,Factors affecting tire life and performance (inflationpressures, effect of temperature, speed, braking, climaticconditions, road surface, impact fractures), Special typesof irregular tread wear ("heel and toe" or "saw tooth"wear, "spotty" wear), Wheel alignment and its association with road camber (precautions when measuringwheel alignment), Camber, castor and king pin inclination, Tire and wheel balance (static balance, dynamicbalance), Changing position of tires, Pressed steel wheels,Wire wheels (to remove, to replace, examination, wheelbuilding)ELECTRICAL EQUIPMENT . .297Batteries-modelsGTW7A/2, GTW9A12, GT9A/2,and GTZ9A/2 (routing maintenance, service data, servicing, preparing new unfilled, uncharged batteries forservice, preparing G T Z "dry-charged" batteries for service, battery cable connectors), Generator-model C.39PV/2 (general, routine maintenance, performance data,M418G (outboardservicing), Starting motor-modeldrive) (general, routine maintenance, performance data,servicing, fault diagnosis chart), Starting motor drive(general, routine maintenance, construction, dismantling, re-assembly), Distributor-modelDM2 Headlamps-model F700 MK/VI (general description,bulb replacement, setting, renewal of light unit), Controlbox-model RB106-1 (general, setting data, servicing),Windscreen (windshield) wiper CRT15 (general, flashinglight direction indicators), Electric windtone horns-models WT614 and WT618 (general-adjustment, internal faults, both horns fail to operate, one horn fails tooperate), Wiring diagram, Control box-model RB106-2(general, setting data, servicing)BODY . .339Body mounting points, T o remove body, T o fit body,Battery box drain, T o remove and dismantle frontbumper, T o fit front bumpers, T o remove rear overriders and brackets, T o fit rear over-riders, To removefront wing, T o fit front wing, To remove rear wing, T o fitrear wing, T o remove bonnet lid, T o fit bonnet lid, T oremove front apron, To fit front apron, Adjustment ofbonnet locks, T o remove windscreen (windshield), To fitwindscreen (windshield), T o fit aero-windscreen, Toremove door, T o fit door, Front door water sealing, Toremove door lock, T o fit door lock, Removal of gearboxtunnel, T o fit gearbox tunnel, To remove hood and fittings, T o fit hood and fittings, Water sealing of hoodseams, Adjustment of side curtains, To prepare car forfiberglass hard top canopy, To fit fiberglass hard topcanopy, T o remove fiberglass hard top canopy, T oremove luggage boot lid, To fit luggage boot lid, To dismantle spare wheel lid, T o assemble spare wheel lid, Tofit Smiths circular heater C.H.S. 92014357FUEL SYSTEM .Data and description (tank capacity, petrol stop tap,petrol pump, carburetors, air cleaners), T o remove petroltank, To fit petrol tank, Petrol gauge, Precaution whencarrying out tests, T o test dash meter, T o test tank unit,Fuel gauge fault location chart, To remove flexible petrolfeed pipe, T o fit flexible petrol feed hose, Petrol stop tap,To remove petrol stop tap, To fit petrol stop tap, Servicing petrol stop tap, T o dismantle petrol stop tap, T o assemble petrol stop tap, AC fuel pump type " U P , Petrolpump oil seal, T o clean pump filter, Testing while onengine, T o remove petrol pump from engine, T o fitpetrol pump to engine, To dismantle petrol pump, To assemble petrol pump, Inspection of parts, AC air cleaners,T o remove air cleaners, To fit air cleaners to carburetors,Servicing air cleaners, Disconnection of carburetor controls, T o remove accelerator pedal, right hand side, T o fitaccelerator pedal, right hand side, T o remove acceleratorpedal, left hand side, T o fit accelerator pedal, left handside, T o remove carburetor from manifold, T o fit carburetors to manifold, S.U. carburetor (description, construction), Throttle and mixture control interconnection,Effect of altitude and climatic extremes on standard tuning, Carburetor jet needles, To remove jet needle, T o fit
Q.R.needle, Centralization of jet, T o assemble carburetor(s),To adjust fuel level in float chamber, Carburetor tuning,Carburetor defects (pistons sticking, eccentricity of jetand needle, flooding from float chamber or mouth of jet,leakage from bottom of jet adjacent to adjustment nut,dirt in carburetor, failure of fuel supply to float chamber,sticking jet)SPECIALIZED TOOLS . 385Policy, Particulars of tools, Tool listBRAKES .389Description, Routine maintenance, Brake lining identifications, Data, Front brake shoe adjustment, Rearbrake shoe adjustment, Handbrake adjustment, T o bleedhydraulic system, Leakage of fluid from master cylinder,Brake and clutch pedal adjustment, Adjusting brakepedal, T o remove front left-hand flexible hose, T o fitfront left-hand flexible hose, To remove front right-handflexible hose, T o fit front right-hand flexible hose, T oremove rear flexible hose, T o fit rear flexible hose, Twinbore master cylinder (description), T o remove mastercylinder, T o fit master cylinder, T o dismantle mastercylinder, T o assemble master cylinder, Front wheelcylinders, T o remove front wheel cylinders, T o fit frontwheel cylinders, T o dismantle front wheel cylinders, T oassemble front wheel cylinders, Rear wheel cylinder, T oremove rear wheel cylinder, T o fit rear wheel cylinder, T odismantle rear wheel cylinder, To assemble rear wheelcylinder, T o remove hydraulic pipe line from rear axle,T o fit hydraulic pipe line to rear axle, Fitting replacement brake shoes, T o remove pedal assembly, T o fitpedal assembly, T o dismantle pedal assembly, T o assemble pedals, T o remove handbrake lever, T o fit handbrakelever, T o dismantle handbrake assembly, T o assemblehandbrake assembly, T o remove handbrake cables, T ofit handbrake cablesS.EXHAUST SYSTEM . .411Description, Maintenance, T o remove and dismantle exhaust system, T o fit exhaust system, T o removemanifolds. T o fit manifoldsSUPPLEMENT FOR TR3 MODELS .417Foreword, General data, Engine (cylinder block,aluminum pedestals for rocker shaft, pistons, combustion head, engine oil filter, sump), Clutch (clutch drivenplate assembly, hydraulic operating mechanism), Rearaxle (general, lubrication of rear hub bearings, axle shaft,wheel bearings and oil seals, differential and pinion assemblies, high speed and competition work), Frontsuspension and steering (nylon bearings, lower innerwishbone attachment), Body (specification, revealmolding and grille, stainless steel wing beading, passenger seat, occasional rear seat, to remove revealmolding and grille, to refit reveal molding and grille, toremove or fit wing beading, to remove passenger seatsquab, to fit passenger seat squab, to fit occasional seats,to remove occasional seat, TR2 & TR3 "hard top" installation-carpreparation, hard top preparation,windscreen (windshield) attachment brackets, bridgepieces, rear cappings, drip channels, sealing rubbers, tofit hard top, rear window light), Fuel system (petrol tank,flexible fuel pipes, carburetors, air cleaners, inletmanifold, to remove flexible fuel hose assembly, to fitflexible fuel hose assembly, carburetor details, aircleaners, inlet manifold), Brakes (Girling brakes andhydraulic clutch-fromchassis No. TS.13101, frontbrakes, discs, rear brakes, running adjustments,hydraulic clutch operation, clutch slave cylinder, generalmaintenance, general advice on hydraulic components),Exhaust system
Issued byS T A N D A R D - T R I U M P H SALES LTD.
THE TRIUMPH TR3 SPORTS CAR
FOREWORDThe vehicle has been designed so that a minimum of attention is required tokeep it in satisfactory running order. There are, however, certain maintenanceoperations which must be undertaken regularly, and the object of this instructionbook is to assist even the non-technical owner to understand the variousoperations required, and so ensure that the vehicle receives regular and correctattention.If in any doubt about the vehicle's performance the owner should at onceconsult a Triumph dealer, preferably the one from whom the car was purchased.Triumph dealers are very carefully selected and are suitably equipped to givesatisfactory and expert after sales service.There is a Service School at the factory at which our dealers' representativesacquire a first hand knowledge of up-to-date service procedure. Valuableinformation is given regarding special methods and equipment which greatlyassists in getting the various operations performed more expeditiously.SPARE PARTS SERVICETo ensure the best possible service on replacement parts it is important tonote the following points :(a) The policy of the Triumph Motor Company is not to supply spareparts direct to the general public, but all supplies are directed throughDistributors who, in turn, will supply their Dealers. The name andaddress of the Distributors and Dealers can be obtained from theService and Spares Directory included with each motor vehicle.(b) It is recommended that only C6Stanparts" (i.e., genuine Standard/Triumph spare parts) are used, only these carry a guarantee.Experience gained by the manufacturers ensures that only highestquality material is used and the strictest accuracy maintained inmanufacture.(c) If in doubt about a particular part required, it is always advisable togive the vehicle commission number and engine number, in additionto the fullest description possible.THE STANDARD CAR REVIEW is a journal published monthly whichgives authentic information regarding the activities and products of TheStandard & Triumph Motor Co. Ltd. It is obtainable from most Triumphdealers. Please write to the Publicity Department for a free specimenCOPY.Owners of this model who wish to be kept informed of modifications andcompetition tuning hints should register as a member of the Triumph SportsOwners' Association ; details are given in the booklet enclosed with thisliterature, or apply to the Publicity Dept., Triumph Motor Co. (1945) Ltd.,Canley, Coventry, for a copy of the book, together with enrolment form.The Company reserves the right, on the sale of any vehicle, to make beforedelivery, without notice, alterations to or departures from the specification,design or equipment, detailed, described or illustrated in this or otherCompany publications.3SPORTS CAR
LICENCE DATA.Car number (Commission number).Engine number.Plate on dashOn cylinder block(Both numbers are to be seen by lifting the bonnet).Cnbic capacity.121.5 cu, in. (1991 CL.)GENERAL SPECIFICATION.Number of cylinders.Bore of cylinders . . . . . . . . . . . .Stroke of crank.Compression ratio .Firing order.Brake H.P. (Road Setting).,,.From Dry (see page 13).Drain and Refill .,.43.268 in. (83 mm.). 3.622 in. (92 mm.).8.5.1, 3, 4, 2. TR2 90 at 4,800 r.p.m.TR3 100 at 5,000 r
Capri Complete Service Manual, Model Years 1970- 1974. Robert Bentley, Inc. Complete Official Triumph TR2 & TR3,1953- 196 1-includes Driver's Instruction Book and Service Instruction Manual. British Leyland Motors Complete Official Triumph TR4 & TR4A, 196 1 - 1968-includes Driver's Handbook, Workshop Manual