Transcription
Neotrellis M4 Live LauncherCreated by Collin ve-launcherLast updated on 2021-11-15 07:28:42 PM EST Adafruit IndustriesPage 1 of 11
Table of ContentsOverview3 What you'll need Ableton Live & Max for Live34NeoTrellis Setup5 5558Assemble the NeoTrellis M4Install the Adafruit NeoTrellis M4 libraryCreate the Live Launcher sketchUpload the codeLive Setup9 Open a Live set Add the Live Launcher Connect Live to NeoTrellis91010Use it11 Adafruit IndustriesPage 2 of 11
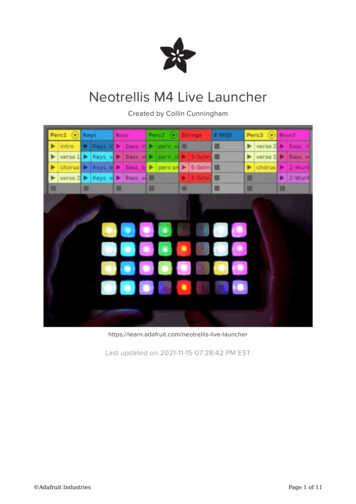
OverviewThis project turns your NeoTrellis M4 into a control surface for Ableton Live (https://adafru.it/C-f) similar to functionality found on a Novation Launchpad (https://adafru.it/Dsq) or Ableton Push (https://adafru.it/Dsr) device. It allows you to start and stop 32individual audio or MIDI clips with the touch of a button and each clip is coloredaccording to values sent from Live's UI.What you'll needAdafruit NeoTrellis M4 with Enclosure andButtons Kit PackSo you've got a cool/witty name for yourband, a Soundcloud account, a 3D-printedDaft Punk.https://www.adafruit.com/product/4020 Adafruit IndustriesPage 3 of 11
USB cable - USB A to Micro-BThis here is your standard A to micro-BUSB cable, for USB 1.1 or 2.0. Perfect forconnecting a PC to your Metro, Feather,Raspberry Pi or other dev-board or.https://www.adafruit.com/product/592Ableton Live & Max for LiveThis project has only been tested with Ableton Live 10 for MacOS.Of course, you'll also need an installation of Ableton Live. The Live Launcher plugindevice is written in MaxMSP, so you'll need either Live 10 Suite (which includes Maxfor Live) or Ableton Live 10 the Max for Live add-on (https://adafru.it/Dss). The LiveLauncher is likely compatible with Live 9, but has not been tested at the time of thiswriting. Adafruit IndustriesPage 4 of 11
NeoTrellis SetupThe Live Launcher consists of two pieces of software: Neotrellis firmware written in the Arduino IDE Live Launcher device plugin for Ableton LiveDownload & install (https://adafru.it/Cto) the Arduino IDE if you haven't already andadd support for Adafruit boards via instructions here (https://adafru.it/jDQ).Assemble the NeoTrellis M4Follow the instructions in this guide (https://adafru.it/D0j) to assemble and testyour NeoTrellis M4. Once you've got it up and running, you can move on toprogramming.Install the Adafruit NeoTrellis M4 libraryOpen Arduino, go to Sketch - Include Library - Manage Libraries and type NeoTrellis in the search field of the window that appears. Install the Adafruit NeoTrellis M4Library that appears in the search results.Create the Live Launcher sketchCreate a new sketch and delete the default template code which appears within it. Copy the code below, paste it into that new sketch, and save it as Live Launcher (orwhatever name you see fit)./* Live Launcher - Ableton Live controller for Adafruit Neotrellis M4by Collin Cunningham for Adafruit include Adafruit NeoTrellisM4.h Adafruit IndustriesPage 5 of 11
#define WIDTH8#define HEIGHT4#define N BUTTONS WIDTH*HEIGHT#define NEO PIN 10#define NUM KEYS 32#define SERIAL TIMEOUT 1000 //time before giving up on incoming serial data#define COLOR DATA LENGTH 98//number of total bytes to expect in incoming colordata//4 bytes per color * 32 buttons 128 bytes 2 header bytes 130 bytes total#define BUTTON DATA LENGTH 5 //clip playing status message for each button#define PULSE DURATION 350 //length of 'now playing' pulseunsigned long readTime; //time we start reading serial bufferunsigned long lastPulseTime;bool pulseOn false;uint8 t packetbuffer[COLOR DATA LENGTH]; //store incoming serial datauint8 t colors[96];Adafruit NeoTrellisM4 trellis Adafruit NeoTrellisM4();const byte ROWS HEIGHT; // four rowsconst byte COLS WIDTH; // eight columnsbyte trellisKeys[ROWS][COLS] { //define the symbols on the buttons of the keypads{1, 2, 3, 4, 5, 6, 7, 8},{9, 10, 11, 12, 13, 14, 15, 16},{17, 18, 19, 20, 21, 22, 23, 24},{25, 26, 27, 28, 29, 30, 31, 32}};byte rowPins[ROWS] {14, 15, 16, 17}; //connect to the row pinouts of the keypadbyte colPins[COLS] {2, 3, 4, 5, 6, 7, 8, 9}; //connect to the column pinouts ofthe keypadAdafruit Keypad customKeypad Adafruit Keypad( makeKeymap(trellisKeys), rowPins,colPins, ROWS, COLS); //initialize keypadextern const uint8 t gamma8[];boolean pressed[N BUTTONS] {false};uint8 t playing[N BUTTONS] {0};// Pressed state for each button// Playing state for each buttonvoid setup() {Serial.begin(57600);// while (!Serial) is.fill(0);}void loop() {unsigned long startTime millis();if (Serial.available() BUTTON DATA LENGTH) {parseData();}//send press events to Live via serialtrellis.tick();while (trellis.available()) {keypadEvent e trellis.read();uint8 t i e.bit.KEY;if (e.bit.EVENT KEY JUST PRESSED) {pressed[i] true;Serial.write(i);}else if (e.bit.EVENT KEY JUST RELEASED) {pressed[i] false;}} Adafruit IndustriesPage 6 of 11
if ((startTime - lastPulseTime) PULSE DURATION) {//flash any clip which is playingif (pulseOn) {for (uint8 t i 0; i N BUTTONS; i ) {setPixelWithColorsIndex(i, false);}}else {for (uint8 t i 0; i N BUTTONS; i ) {if (playing[i]) {setPixelWithColorsIndex(i, true);}else setPixelWithColorsIndex(i, false);}}pulseOn !pulseOn;lastPulseTime millis();}}void parseData() {//check for ! start charif (Serial.read() '!') {uint8 t id Serial.read();//check for Color dataif (id 'C') {for (int i 0; i 96; i ) {colors[i] Serial.read();}//color button ledsfor (int i 0; i N BUTTONS; i ) {setPixelWithColorsIndex(i, false);}}//check for clip status dataelse if (id 'B') {uint8 t x Serial.read();uint8 t state Serial.read();uint8 t y Serial.read();if (state 0) { //if state is 0, all clips in track are stoppedfor (int i 0; i HEIGHT; i ) {uint8 t index i * WIDTH x;playing[index] state;}}else { //all other clips in track should stopfor (int i 0; i HEIGHT; i ) {uint8 t index i * WIDTH x;playing[index] 0;}//save playing stateuint8 t index y * WIDTH x;playing[index] state;}}}}void setPixelWithColorsIndex(int i, bool dimmed) {uint8 t red colors[i * 3];uint8 t green colors[i * 3 1]; Adafruit IndustriesPage 7 of 11
uint8 t blue colors[i * 3 2];if (dimmed) {setPixelWithGamma(i, red / 2, green / 2, blue / 2);}else {setPixelWithGamma(i, red, green, blue);}}void setPixelWithGamma(int pixelNumber, uint8 t red, uint8 t green, uint8 t blue) {uint32 t color trellis.Color(pgm read byte(&gamma8[red]),pgm read byte(&gamma8[green]),pgm read mber, color);}const uint8 t PROGMEM0, 0, 0, 0, 0,0, 0, 0, 0, 0,1, 1, 1, 1, 1,2, 3, 3, 3, 3,5, 6, 6, 6, 6,10, 10, 11, 11, 11,17, 17, 18, 18, 19,25, 26, 27, 27, 28,37, 38, 39, 39, 40,51, 52, 54, 55, 56,69, 70, 72, 73, 74,90, 92, 93, 95, 96,115, 117, 119, 120,144, 146, 148, 150,177, 180, 182, 184,215, 218, 220, 223,};gamma8[] {0, 0, 0, 0, 0, 0, 0, 0, 0, 0, 0,0, 0, 0, 0, 0, 0, 0, 1, 1, 1, 1,1, 1, 1, 1, 2, 2, 2, 2, 2, 2, 2,3, 3, 3, 4, 4, 4, 4, 4, 5, 5, 5,7, 7, 7, 7, 8, 8, 8, 9, 9, 9, 10,12, 12, 13, 13, 13, 14, 14, 15, 15, 16, 16,19, 20, 20, 21, 21, 22, 22, 23, 24, 24, 25,29, 29, 30, 31, 32, 32, 33, 34, 35, 35, 36,41, 42, 43, 44, 45, 46, 47, 48, 49, 50, 50,57, 58, 59, 60, 61, 62, 63, 64, 66, 67, 68,75, 77, 78, 79, 81, 82, 83, 85, 86, 87, 89,98, 99, 101, 102, 104, 105, 107, 109, 110, 112, 114,122, 124, 126, 127, 129, 131, 133, 135, 137, 138, 140,152, 154, 156, 158, 160, 162, 164, 167, 169, 171, 173,186, 189, 191, 193, 196, 198, 200, 203, 205, 208, 210,225, 228, 231, 233, 236, 239, 241, 244, 247, 249, 252,142,175,213,255Upload the code Adafruit IndustriesPage 8 of 11
Now, just a few more steps in the Arduino IDE and you'll have the NeoTrellis ready forcommunication with Ableton Live:1. Reset your NeoTrellis by double-clicking the recessed reset button on the back.NeoTrellis is ready to be programmed when the rear LED turns green.2. Go to Tools - Board and select Adafruit Trellis M4 (SAMD51) from the list.3. Go to Tools - Port and select the port which name contains Adafruit Trellis M4 inthe name.4. Upload the sketch by clicking Sketch - Upload.Live SetupDownload the Live Launcher device for Ableton Live by clicking the button below:Neotrellis M4.amxd.ziphttps://adafru.it/DstUnzip the downloaded file and store the resulting Neotrellis M4.amxd file somewheresafe.Open a Live setIn Ableton Live, create a new Live set and add some audio and/or MIDI clips to the first four slots of tracks 1-8 in Session view - or use an existing set that has a variety ofclips loaded into Session view. Adafruit IndustriesPage 9 of 11
Add the Live LauncherLocate the Neotrellis M4.amxd file in the folder you saved it, drag it into the Livewindow, and drop it onto any track - just be sure to only add one instance of theplugin device.Connect Live to NeoTrellisEnsure your NeoTrellis is connected to your computer via USB and click the rescanbutton in the NeoTrellis M4 Live device to update the list of available serial devices.Click the serial port pulldown menu to see a list of available serial devices, andchoose the serial port that corresponds to your NeoTrellis M4.As seen above, my NeoTrellis appeared as usbmodemMID1. If your NeoTrellis doesnot appear, click the rescan button and trying again.Click the sync colors button to send clip color data over to your NeoTrellis. Once yousee your NeoTrellis light up with colors corresponding to tracks 1 - 8 in Live, you'reready to roll. Adafruit IndustriesPage 10 of 11
Use itThe Live Launcher allows you to control the top four clip slots of tracks 1 through 8.Usage is simple: Press a Neotrellis button to toggle the playing state of a corresponding Live clip Neotrellis buttons will flash to indicate when a clip is playing Click the sync colors button after moving or recoloring clips in LiveKeep in mind that a clip may take some time to start playing after being triggered this is determined by each clip's launch settings & tempo in Live.Here's a quick demo, showing basic control with a simple track layout:Enjoy making music. Adafruit IndustriesPage 11 of 11
Download the Live Launcher device for Ableton Live by clicking the button below: Neotrellis_M4.amxd.zip https://adafru.it/Dst Unzip the downloaded file and store the resulting Neotrellis_M4.amxd file somewhere safe. Open a Live set In Ableton Live, create a new Live

