Transcription
Node.js Embedded Development on theRaspberry PiCreated by Todd elopmentLast updated on 2021-11-15 06:22:05 PM EST Adafruit IndustriesPage 1 of 19
Table of ContentsWhy node.js?3 npm Events Streams344Connecting via SSH4 Hardware Connections Finding Your Raspberry Pi's IP Address Connecting via SSH556Installing node.js8 Adding the Package Repository8Events & Callbacks9 Callbacks Arduino & node.js Examples911Streams13 Unix Pipeline Node.js Streams Chunked Transfer Stream131416Wrapping Things Up17 17181819package.jsonDependenciesExample PackagePublishing Packages Adafruit IndustriesPage 2 of 19
Why node.js?Why is it worth exploring node.js (https://adafru.it/dIP) development in an embeddedenvironment? JavaScript is a widely known language that was designed to deal withuser interaction in a browser. Thanks to node.js, we can now use JavaScript outsideof the browser, and even interact with hardware on devices such as the Raspberry Pi.Here's a brief overview of some of the features that make node.js great for embeddeddevelopment.npmnpm (https://adafru.it/eht) is one of the best things to happen to node.js. npm is thepackage manager for node. It makes managing third-party node dependencies abreeze, and makes it easy for mere mortals like myself to publish node.js packages.Why is this important? Community. Because npm is so great at managingdependencies, you can include open source libraries in your project hassle-free.Since it's easy to include community libraries, the community has grown exponentially,and the number of available packages is mesmerizing. Have you ever tried to installan Arduino library? No offense to Arduino, but it's not the most user friendlyexperience. Thankfully, they are working on adding a package manager (https://adafru.it/ehu) to the Arduino IDE. Adafruit IndustriesPage 3 of 19
EventsEvents are a great way to deal with user interaction. What's an event? Maybe itwould be easiest to give you a few examples of events. Toggling a switch, clicking amouse, and pressing a key on your keyboard are all examples of events.The great thing about using event listeners is that you can write a chunk of code thatwill be called whenever an event happens. No longer do you have to constantlycheck the state of a button to see if the state has changed in a loop. Instead, thebutton will let you know when it was pressed!StreamsThe node.js stream API combines the power of events, with the power of the Unixpipeline (https://adafru.it/ehv). If you know how to pipe commands in Unixenvironments, you know it's a game changer. We'll dig deeper into streams aftertaking a look at how to setup the node.js environment on a Raspberry Pi.Connecting via SSHThe Raspberry Pi was designed to make it very easy to get started by connecting amonitor, keyboard, and mouse. But, what if you don't have access to the necessaryperipherals or don't want to disconnect them from your main workstation? Theanswer? Secure Shell (https://adafru.it/ehw) (SSH). SSH is a network protocol that canbe used for secure remote command-line login, and thankfully it's enabled by defaultif you are using the Raspbian Distro (https://adafru.it/d6i). Adafruit IndustriesPage 4 of 19
Hardware ConnectionsTo connect via SSH, you only need connect your Raspberry Pi to power & to yournetwork via an ethernet cable. For this guide, I have loaded a fresh install of the 2014-09-09 release of Raspbian on my SD card, but if you have an older release ofRaspbian already installed, it should work as well.Finding Your Raspberry Pi's IP AddressYou can plug in an Ethernet cable and the Pi will automagically DHCP and connect tothe internet. Then you have to actually connect to the Pi. To find the IP address ofyour Raspberry Pi, there's a lot of options. If you have an HDMI monitor, connect it to the Pi, on boot it will print out it's IPaddress right before the console login: prompt If you have a console cable, you can use our tutorial to watch the Pi boot andprint out the IP address (https://adafru.it/kgF)If you have neither, you can find the device using your router's control panel, or youcan use nmap (https://adafru.it/ehy) to search for devices that are acceptingconnections on TCP port 22, which is the port SSH uses. I am not going to assumethat you have access to your router's control panel, so I will show you how to use nmap to locate your Raspberry Pi's IP address.If you are running Windows, head over to nmap.org for their Windows installationinstructions (https://adafru.it/ehz). If you are running Mac OS X, you can install usingthe executable installer (https://adafru.it/ehA), or by using a package manager like homebrew (https://adafru.it/df3). Adafruit IndustriesPage 5 of 19
brew install nmapIf you are running a Linux distribution on your workstation, use your favorite packagemanager to install nmap, or visit the nmap.org downloads page (https://adafru.it/ehB) for instructions on installing from source.sudo apt-get install nmapOnce you have nmap installed, you are now ready to search for the IP address. Usingthe terminal on Linux & Mac OS, or the command prompt on Windows, enter thefollowing command.nmap -p 22 --open -sV 10.0.1.*If your local network is setup to use 192.168.1.* addresses, modify the command tomatch your network setup.nmap -p 22 --open -sV 192.168.1.*The output of nmap might seem intimidating, but here are a couple hints that shouldmake it easier to identify your Raspberry Pi. Look for a line that contains somethinglike "OpenSSH 6.0p1 Debian". Once you find that, navigate your way up a few lines toa line that starts with "Nmap scan report for.". The IP address that follows thatstatement should be the IP of your Raspberry Pi! In the example below, you can seethat the IP address I'm looking for is 10.0.1.10. nmap -p 22 --open -sV 10.0.1.*Starting Nmap 6.47 ( http://nmap.org ) at 2014-12-17 11:47 ESTNmap scan report for 10.0.1.10Host is up (0.0056s latency).PORTSTATE SERVICE VERSION22/tcp open sshOpenSSH 6.0p1 Debian 4 deb7u2 (protocol 2.0)Service Info: OS: Linux; CPE: cpe:/o:linux:linux kernelService detection performed. Please report any incorrect results at http://nmap.org/submit/ .Nmap done: 255 IP addresses (3 hosts up) scanned in 3.39 secondsConnecting via SSHIf you are using Windows, you will need to install a SSH client like PuTTY (https://adafru.it/aUb) to connect to your Raspberry Pi, but if you use Linux or Mac OS X, youare ready to connect. The default user for logging into a fresh Raspbian install is pi, Adafruit IndustriesPage 6 of 19
and the default password is raspberry. If you are using PuTTY on Windows, enter theconnection details into the session configuration window.Replace the 10.0.1.10 address with the IPaddress of your Raspberry Pi.Under the Connection - Data menu,enter pi into the Auto-login usernamefield, and click the Open button at thebottom of the window.If you are using Linux or Mac OS X, enter the following command into your terminal.ssh pi@10.0.1.10You will then be prompted to verify that you want to connect to the host. Type yes toconfirm, and hit the Enter/Return key on your keyboard. You should only be promptedto confirm that you want to connect the first time you try connecting. ssh pi@10.0.1.10The authenticity of host '10.0.1.10 (10.0.1.10)' can't be established.RSA key fingerprint is e you sure you want to continue connecting (yes/no)? yesWarning: Permanently added '10.0.1.10' (RSA) to the list of known hosts.After that, you will be prompted for the password for the pi user. Enter the defaultpassword of raspberry and hit the Enter/Return key. If you have entered everythingcorrectly, you should be logged into your Raspberry Pi via SSH! Adafruit IndustriesPage 7 of 19
pi@10.0.1.10's password:Linux raspberrypi 3.12.28 #709 PREEMPT Mon Sep 8 15:28:00 BST 2014 armv6lThe programs included with the Debian GNU/Linux system are free software;the exact distribution terms for each program are described in theindividual files in /usr/share/doc/*/copyright.Debian GNU/Linux comes with ABSOLUTELY NO WARRANTY, to the extentpermitted by applicable law.Last login: Wed Dec 17 14:01:23 2014 from 10.0.1.7pi@raspberrypi Once you get this all working and you can connect to the Pi, its a good idea to installZeroconf/Bonjour (https://adafru.it/lPE)so you can just ssh to raspberrypi.localInstalling node.jsNow that you are connected to your Pi via SSH, you can move on to installing thelatest stable version of node.js.Adding the Package RepositoryThe first step will be to add the NodeSource package repository to your Pi's /etc/apt/sources.list file. You can do this by running the following command.curl -sL https://deb.nodesource.com/setup 10.x > nodesetup.sh# It's a good idea to inspect scripts before you run them:nano nodesetup.shsudo bash nodesetup.shsudo apt-get install -y nodejsNext, we will install the latest version of node.js using apt-get.sudo apt-get install -y nodejsIf everything went as expected, we can check the installed version of node.js byrunning node -v. At the time of this writing, the latest stable version of node.js was v10.11.0.pi@raspberrypi node -vv10.11.0Now that we have node.js installed, we can look at the strengths of node.jsdevelopment on a Raspberry Pi. Adafruit IndustriesPage 8 of 19
Events & CallbacksIf you are used to programming hardware in an Arduino environment, this sectionmight seem a bit foreign to you. Unless you are using interrupts, code executionhappens in logical order. When dealing with events & callbacks, specific chunks ofcode gets called as events happen. If you are used to developing with Javascript,then you should feel right at home.CallbacksWe've already discussed events earlier in the guide, but what's a callback? A callbackis a function that is passed as a parameter to another function so it can be used atany point in the future.What on earth does this have to do with events & event listeners? When dealing withasynchronous events, your callback function defines the actions that happen inresponse to events. If you want a LED to light up when a button press happens, thenyou would write the code that turns on the LED inside of a callback. Let's take a lookat an example using the Adafruit T-Cobbler to connect the button and LED.We will show you how to download and run the example code in the last section ofthe guide, but if you would like to follow along and create the example files yourself,you will need to install the onoff (https://adafru.it/elV) npm package.npm install onoffNext, you can use nano text editor to create the test file. If you need help gettingstarted with nano, check out this handy guide (https://adafru.it/obp).nano test.jsNext, paste the following example into nano, and save the file. Adafruit IndustriesPage 9 of 19
// button is attached to pin 17, led to 18var GPIO require('onoff').Gpio,led new GPIO(18, 'out'),button new GPIO(17, 'in', 'both');// define the callback functionfunction light(err, state) {// check the state of the button// 1 pressed, 0 not pressedif(state 1) {// turn LED onled.writeSync(1);} else {// turn LED offled.writeSync(0);}}// pass the callback function to the// as the first argument to watch()button.watch(light);From there, you can run the example file using the node command. Go ahead run thetest file and press the button to make sure that your LED lights up.node test.jsLet's break down what is happening in the example code. button.watch(callback) is afunction that you can call if you would like to watch a button for changes in state.When a change event happens, the watch() function calls the callback function thatwas passed to it as its only parameter. In this case, the watch function will call the light() function when the button changes state.When watch() notices that the button state changed, the light() function is called withtwo parameters. The first parameter has any errors that may have occurred, and thesecond parameter gives the current button state. When I wrote the function definitionfor the light method, I called the first parameter err, and the second parameter state,but you could name them whatever you would like. It's best to name them after whatthey represent if possible.How did I know that the callback would be called with those two parameters? The documentation for the onoff GPIO library's watch() function (https://adafru.it/ehI) demonstrates that it will call the callback with errors as the first parameter and the buttonvalue/state as the second.Callbacks don't have to be defined separately, and then passed to the functions thatwill call them. You can define the callback and pass it to the watch function all in thesame step. The only drawback to this method is that your callback can't be used by Adafruit IndustriesPage 10 of 19
any other buttons. Here's an example of defining your callback & passing it to watch()in the same step.// button is attached to pin 17, LED to 18var GPIO require('onoff').Gpio,led new GPIO(18, 'out'),button new GPIO(17, 'in', 'both');// pass the callback function to the// as the first argument to watch() and define// it all in one stepbutton.watch(function(err, state) {// check the state of the button// 1 pressed, 0 not pressedif(state 1) {// turn LED onled.writeSync(1);} else {// turn LED offled.writeSync(0);}});Now that you have a handle on events & callbacks, let's compare how you wouldapproach things in node.js vs how you would approach things in Arduino.Arduino & node.js ExamplesLet's take a look at how you would approach a couple simple tasks in Arduino, andthen compare that with how you would tackle the same tasks using node.js.Let's start with a classic example. Blinking a LED! First up, Arduino.// LED pinint led 13;void setup() {// initialize the LED pin as an outputpinMode(led, OUTPUT);}void loop() {// turn the LED ondigitalWrite(led, HIGH);// delay for one seconddelay(1000);// turn the LED offdigitalWrite(led, LOW);// delay for one seconddelay(1000);} Adafruit IndustriesPage 11 of 19
What's going on here? As the sketch runs the main loop, it flips the LED on and offseparated by delays of one second. Now, let's look at the same example usingnode.js on a Raspberry PI.// export GPIO 18 as an output.var GPIO require('onoff').Gpio,led new GPIO(18, 'out');// start a timer that runs the callback// function every second (1000 ms)setInterval(function() {// get the current state of the LEDvar state led.readSync();// write the opposite of the current state to the LED pinled.writeSync(Number(!state));}, 1000);What's going on here? The same thing, but the difference is that the Arduino delay (https://adafru.it/ehJ) function blocks all other code from executing for one second foreach call to delay(1000), and the node.js setInterval (https://adafru.it/ehK) timer doesnot.Why does this matter? Let's say you wanted to blink a green LED on and off everysecond, and you wanted to control the state of a red LED with a momentarybutton. Let's take a look at another Arduino example sketch.const int buttonPin 2;const int redPin 10;const int greenPin 11;void setup() {// initialize the LED pins as outputspinMode(redPin, OUTPUT);pinMode(greenPin, OUTPUT);// initialize the button pin as an input:pinMode(buttonPin, INPUT);}void loop() {// read the state of the pushbutton valueint buttonState digitalRead(buttonPin);// turn the red LED on or off depending on// the button state.digitalWrite(redPin, buttonState);// turn the green LED ondigitalWrite(greenPin, HIGH);// delay for one seconddelay(1000);// turn the green LED offdigitalWrite(greenPin, LOW);// delay for one seconddelay(1000);} Adafruit IndustriesPage 12 of 19
Since we are using Arduino's delay function, the button presses could be missedbecause the loop has to make it through both calls to delay(1000) before checkingthe button state.Note: I know some of the more experienced Arduino users can think of a ways toavoid using delay(), and solve this problem with interrupts or by checking the currentmillis() against previous millis() 1000. This is just a simple example designed tohighlight how things can easily get a lot more complicated when you don't have a wayto call code asynchronously.Now let's look at the same thing on a Raspberry Pi using node.js.// export GPIO 17 as the red LED output, GPIO 18 as// the button input, and GPIO green as the button input.var GPIO require('onoff').Gpio,green new GPIO(21, 'out'),red new GPIO(17, 'out'),button new GPIO(18, 'in', 'both');// watch the button for changes, and pass// the button state (1 or 0) to the red LEDbutton.watch(function(err, state) {red.writeSync(state);});// start a timer that runs the callback every secondsetInterval(function() {// get the current state of the LEDvar state green.readSync();// write the opposite of the current// green LED state to the green LED pingreen.writeSync(Number(!state));}, 1000);Next, let's look at how to make things even simpler with node.js streams!StreamsNow that we know how to use events, we can dig into one of my favorite parts of thenode.js core: readable & writeable streams.First, we'll walk through some examples of piping in Unix-like environments, since itwould be good to know what node.js streams are emulating.Unix PipelineLet's look at the contexts of an example text file by using the cat (https://adafru.it/ehL)command to output the contents of the file to stdout (https://adafru.it/ehM). Adafruit IndustriesPage 13 of 19
cat ndyBenJennyTylerPeteChrisRobDaveJeffErikPaulNow, let's assume we want to reduce the list of names to names with less than fourcharacters. We can pipe the output of cat to sed (https://adafru.it/ehN) (with a simple regex (https://adafru.it/ehO)) to accomplish this. cat names.txt sed '/.\{4\}/d'JoeBenRobNow that we have filtered the list to get the names we were looking for, let's sort thenames in reverse dictonary order by piping the output of sed to sort (https://adafru.it/ehP). cat names.txt sed '/.\{4\}/d' sort --dictionary-order --reverseRobJoeBenPretty neat, huh? By piping the output of one simple program to the input of anothersimple program, you can accomplish complex tasks easily & quickly without having tohave one behemoth program that reads files, filters, sorts, etc. If you'd like to learnmore specifically about piping in Unix environments, check out the standard IOsection (https://adafru.it/ehQ) of Brennen Bearnes' userland book (https://adafru.it/ehR).Node.js StreamsNow that you have an idea what inspired the stream API, let's try something similarusing the node.js stream pipe() command. Adafruit IndustriesPage 14 of 19
Let's say we want to view the state of the button from our SSH connection. Since stdout (https://adafru.it/ehM) is a writable stream, we can pipe the output of the buttondirectly to stdout. Let's assume we have a tactile button attached to pin 17 on ourRaspberry Pi.First, install the gpio-stream package with npm : npm install gpio-streamNext, save the following code in a file called stdout.js :var GpioStream require('gpio-stream'),button GpioStream.readable(17);// pipe the button presses to stdoutbutton.pipe(process.stdout);That was pretty simple. What if we wanted to redirect the output of our button to lightup a LED on pin 18?var GpioStream require('gpio-stream'),button GpioStream.readable(17),led GpioStream.writable(18);// pipe the button presses to the LEDbutton.pipe(led); Adafruit IndustriesPage 15 of 19
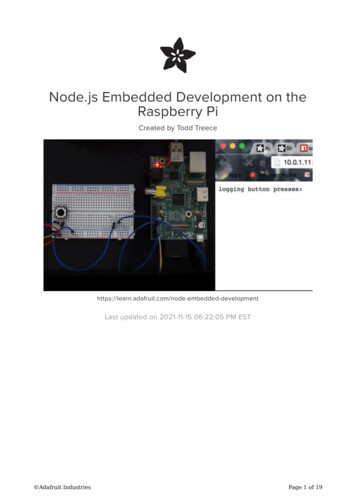
Chunked Transfer StreamNow that you have a couple simple examples under your belt, let's try something a bitmore interesting. What if we wanted to output our button presses to the LED & a webbrowser? Since the node.js HTTP server response is a writable stream, we can pipethe button presses to the LED, and then to the HTTP response object. Your browsercan receive the presses on the fly using chunked transfer encoding (https://adafru.it/ehS). All of that with 10 lines of code!var GpioStream require('gpio-stream'),http require('http'),button GpioStream.readable(17),led GpioStream.writable(18);var stream button.pipe(led);http.createServer(function (req, res) {res.setHeader('Content-Type', 'text/html');res.write('<pre>logging button presses:\n');stream.pipe(res);}).listen(8080); Adafruit IndustriesPage 16 of 19
You could pipe the button presses to a file, a web service, or pretty much anythingyou can think of thanks to the endless number of stream packages available in npm (https://adafru.it/ehT). The button example is a simple one, but this same concept canbe applied to a wide range of sensors.Speaking of npm, let's examine how to use npm to manage third party packages. We'lleven look at how you can create your own npm package and publish it for everyoneto use!Wrapping Things UpAs I described earlier, npm (https://adafru.it/ehT) is one of the best things aboutdeveloping in a node.js environment. Because we used a few thirdparty dependencies in the examples, let's take a look at how you would wrap up allof the dependencies and include them in your project by creating a package.json file.package.jsonThe package.json file is what npm uses as a guide when downloading and installingdependencies for your project. The project title, description, version, authors, andthird party dependencies are all pieces of information you would find in a standardpackage file.Let's start by creating a folder for our project.mkdir /pi streams example && cd /pi streams exampleNow, we can use npm init to create our package.json file.pi@raspberrypi /pi streams example npm initThis utility will walk you through creating a package.json file.It only covers the most common items, and tries to guess sane defaults.See npm help json for definitive documentation on these fieldsand exactly what they do.Use npm install <pkg> --save afterwards to install a package andsave it as a dependency in the package.json file.Press C at any time to quit.name: (pi streams example)version: (1.0.0)description: An example that demonstrates how to use streams with GPIO on aRaspberry Pientry point: (index.js)test command:git repository: Adafruit IndustriesPage 17 of 19
keywords: raspberry, pi, streams, gpioauthor: Todd Treece <todd@uniontownlabs.org>license: (ISC)About to write to /home/pi/pi streams example/package.json:{"name": "pi streams example","version": "1.0.0","description": "An example that demonstrates how to use streams with GPIO on aRaspberry Pi","main": "index.js","scripts": {"test": "echo \"Error: no test specified\" && exit 1"},"keywords": ["raspberry","pi","streams","gpio"],"author": "Todd Treece <todd@uniontownlabs.org>","license": "ISC"}Is this ok? (yes) yesDependenciesThat took care of creating the basics, but what about adding dependencies? We havea couple of third party dependencies to add to our package: onoff and gpio-stream.npm install --save onoff gpio-streamBy using npm install with the --save flag, npm will automatically install & save thedependencies to the package.json file that we just created. All of your dependencieswill now be installed in a folder called node modules inside your project folder. Thebest part is that you do not have to worry about including dependencies when youshare your code. All someone has to has to do is run npm install, and all of thedependencies you listed in your package.json file will automatically be installed vianpm for them!Example PackageNow that we have looked at how to create a package, let's look at an examplepackage. I have created a git repository (https://adafru.it/eia)that contains examplesfrom this guide. Run the following command to clone the repo to your Pi.git clone https://github.com/adafruit/Pi Node Example.git /pi examples &&cd /pi examples Adafruit IndustriesPage 18 of 19
Now, to install the dependencies, all you have to do is run npm install.npm installTo run the examples, you can type node followed by the name of the example file.node stream stdout.jsPublishing PackagesWhen you create your own package, and decide you want to publish your package tonpm, it's as simple as running npm publish, and your code will be available for theworld to enjoy!npm publish Adafruit IndustriesPage 19 of 19
If everything went as expected, we can check the installed version of node.js by running node -v. At the time of this writing, the latest stable version of node.js was v1 0.11.0. pi@raspberrypi node -v v10.11.0 Now that we have node.js installed, we can look at the strengths o