Transcription
Introduction toPagemaker 6.5INTRODUCTIONAdobe PageMaker 6.5 is the “world’s leading cross- platform professional pagelayout software”. PageMaker is primarily used for designing and producing publication thatrequires a combination of text and graphics. PageMaker 6.5 has a rich array of facilities toimport text and artwork from other computer application packages, as well as allowing you togenerate these directly form within PageMaker itself. PageMaker can handle text better thanIllustrator and PhotoShop and also give you the flexibility of graphic control not available inworld processorsNEW FEATURES IN PAGEMAKER 6.5DOCUMENT LAYERSLayers allow you to place elements on over the other. It can be thought of assheets stacked up one on top of the other. You can place elements on these layers or temporarilyhide the layers. These layers can be used for adding imitations, floating or background images.EASIER LAYOUTThere is a new concept of frames in PageMaker 6.5, which can hold any type oftext or images. PageMaker’s freeform layout capabilities have become even more flexible withits frame and text controls.BETTER INTERGRATIONPageMaker can work seamlessly with PhotoShop, Illustrator etc. It also builds theability to drag and drop images and elements directly from one of these applications to the otherCOLOR CONTROLSPageMaker 6.5 introduces new color technologies, which helps in reproducinghigh fidelity colors in you publications. A new desktop color separation tool is also included.The Kodak color management system now supports the international Consortium of Standardfor sharing device profiles.INTERNET READY1
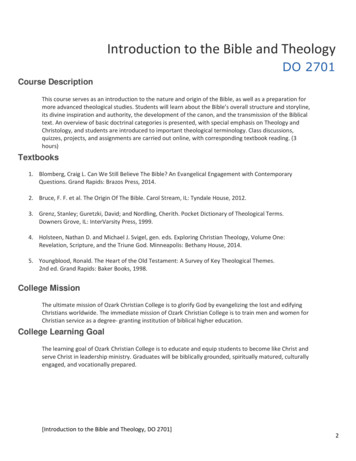
The current release of PageMaker (i.e. Version 6.5) includes an option to exportyour PageMaker documents to Internet ready HTML (Hyper Text Markup Language) files withthe links preserved. The document images are converted to GIF or JPEG format required by theBasic of PagemakerPAPER ORIENTATIONYou can set paper in two ways, portrait is one in which the paper is used with thelonger size in the vertical direction. If we interchange the directions, we get the Landscapeorientation.Lands capeSTARTING PAGEMAKER Click the Start button. Select Programs. From the Programs Menu select Adobe. In the Adobe Menu select PageMaker 6.5. Click adobe PageMaker 6.5. The PageMaker window is displayed.PAGEMAKER ENVIRONMENTMenu Bar:2
The standard menu bar contains all the main menus for File, Layout, Element andother utilities.Ruler:The top and left ruler bars helps you to precisely position the cursor, text, andgraphics in the page. The Current Cursor location is shown by two dotted lines in the rulers. Theview the rulers select View Show Rulers.Master Page Icon:The Master Page icon showed the position of the master Pages. Clicking it willdisplay the Master Page. Master Pages contain text, graphics, layout and settings, which arecommon, thought the publication.Page Icon:The Page icon shows the list of pages in the publication with the currently selectedpages in black. Clicking a particular page icon will display the selected page.Plasterboard:Surrounding the page is an area of white space called the Plasterboard. It is used tostore graphics and texts as you work. Items you place on the plasterboard are visible from anypage and can be selected and moved regardless of the page you are currently working on.3
FILE MENUNew: New command is used to create a new publication. This command givesrise to a dialog box where you define the various options before opening a new page of thepublication.Open: Open allow you to open an existing PageMaker file.Save: Save command saves the current publication. To save all the open files,press the shift key while choosing the Save option.Revert: Revert command rolls back all the changes made since the last save. It isthe same as closing the publishing without saving and opening it again.Place: Place command is used to place text and graphics into the publication.Acquire: The Acquire command is used to scan an image into your publication.Export: Export command lets you export you publications into the format youselect.EDIT MENUPaste Multiple: Paste Multiple lets you paste multiple copies of text orgraphics.Paste Special: Paste Special is used to specify the format to use when you pastean object into your publication.4
Insert Object: Insert Object is used to specify the format to be used to insert anOLE embedded object within a PageMaker publication.Edit Story: Edit Story is used to toggle between the word processing mode andthe layout mode.LAYOUT MENUSort Pages: When you select Sort Page command, a dialog box appears with allthe pages of the publication. You can rearrange the pages in the publication graphically.Column Guides: Column Guides lets you divide the pages of the publicationinto different column of equal size.Auto Flow: Auto Flow is used to flow the text onto the pages of the publicationon its own from a loaded text icon. It flows the text into pages from columns to columns andalso adds pages on its own depending on the availability of text.5
TYPE MENUDefine Styles: This option will present you a dialog box with the list of stylesused in the publication. You can add, modify and delete styles from this dialog box.ELEMENT MENUFrame: Frame has options for frame alignment, position and margins.Align Objects: Align Objects lets you align multiple objects relative to eachother.Link Options: Link Options is used to define whether the linked text or graphicis to be updated along with the publication in use and also its frequency.UTILTIES MENU6
Plug-ins: Plug-ins has a list of sub commands, which lists out the various plugins, which have been included with PageMaker as additions.VIEW MENUDisplay Master Items: Display Master Items toggle the display of items fromthe master pages to be reflected in the current page of the publication.Display Non-Printing Items: Display Non-Printing items toggle the displayof non-printing items.WINDOW MENUShow Tools: Hide/Show tools toggles the display of PageMaker toolbar.Show Control Palette: Show/Hide Control Panel toggles the display ofcontrol panel on the screen.Show Colors: Show/Hide Colors Toggles the display of the Color Palette on thescreen.7
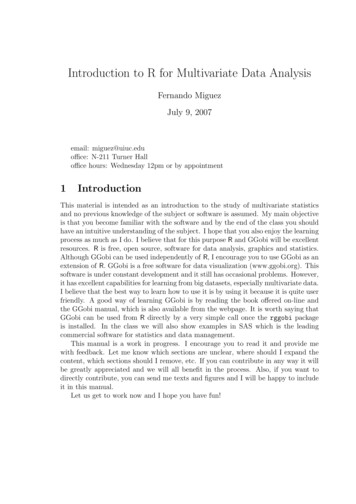
Show Style: Show/Hide Styles toggles the display of the Styles Palette on thescreen.Show Layers: Show/Hide Layers toggles the display of the Layers Palette on thescreen.Show Master Pages: Show/Hide Master Pages toggle the display of the MasterPages Palette on the screen.Show Hyperlinks: Show/Hide Hyperlinks toggles the display of the HyperlinkPalette on the screenUNDERSTANDING PAGEMAKER TOOLSTOOL BOXToolbox contains all the tools used to create a publication in PageMaker. ChooseWindow and select Show Tools to display the toolbox. The individual tools will be explained indetail later in this session.8
ZERO POSITIONZero Position allows you to set the zero position on the screen. Zero position is theposition, where both the top and the left side rules are at zero. By Zero positioning allmeasurements in the pages are made relative to this point. Click it and drag it to anywhere onthe workspace to set it as the Zero Point.POINTER TOOLPointer tool is used to pick, drag and drop graphics and text.TEXT TOOLText Tool is used to edit and select text and insert text frames. Click the text tooland click anywhere in the document and start entering text. The text tool creating a free flowingtext box.ROTATE TOOLRotate too is used to rotate text and graphic objects. Click the rotate tool. Thenclick on the object reference point and drag to rotate the object.9
CROP TOOLThe Crop tool is used to crop imported graphic images to the required size. Thecrop tool only works on TIFF type of images. Click on the toll and, drag the image handles, tocrop the image.OBLIQUE LINE TOOLOblique Line is used to draw slanting lines. To draw a line, click the oblique linetool, click and drag to draw a line in any direction.10
CONSTRAINED LINE TOOLConstrained Line tool will draw lines at 45 degree intervals, i.e., horizontally,vertically or diagonally.BOX TOOLBox tool is used to draw a box.11
RESTANGLE FRAMERectangle Frame is used to type text inside a box. First select the toll and draw thearea to be enclosed by the rectangular frame, then select the text tool and click inside the drawnframe to enter text. The text will be constrained to the rectangular frame.CIRCLE TOOLCircle tool is used to draw a circle or elliptical graphic. To draw a circle or anellipse, select the tool, click and drag to draw a circle on the document.12
CIRCULAR FRAMECircular Frame is used to type text inside a circle or an oval. Use the Circularframe tool to draw the frame and then click inside with the text tool to start entering text. Theentered text will be constrained to the circular frame.POLYGON TOOLPolygon tool is used to draw a shape with more than four sides. You can modifythe polygon by selecting Element and selecting Polygon Settings.13
POLYGON FRAMEPolygon frame puts the text inside the polygon. Select the polygon frame tool,draw a polygon then select the text tool and click inside the frame to enter the text inside theframe to enter the text inside the polygon frame.HAND TOOLHand tool is used to move the screen. This tool is very useful when you areworking with large documents. It helps you to easily navigate in a large page. To move a screen,just select the hand tool and click and drag the page to view different parts of the page.14
ZOOM TOOLZoom tool allows you to zoom in and out of the document view. By default thezoom tool will be in the Zoom-in mode. To zoom out of page select the zoom tool and presscontrol and click in the document window with the zoom tool.OENING A NEW PUBLICATION Click File. Select New.15
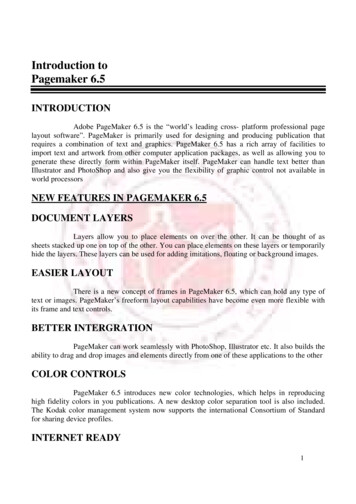
The Document Setup dialog box appears. Enter 2 in the number of pages text boxand press the TAB key. Enter 1 inch as the inside margin and press the TAB key. Select the printer “HP Deskjet on LPT1” Click OK.A new document is opened with the required margins and the first page of theselected document is display16
PAGE SIZE AND PAPER SIZEPaper size is the actual size of the paper and Page Size is the printable area of thepage. The Page size is the area enclosed by the page margins.CONTROL PALETTEThe control Palette displays the properties for the selected paragraph, character orobject. It is a sort of shortcut to the object, text, and paragraph properties. Choose Window andselect Show Control Palette to display the Control palette.Control Palette in Object ModeThe control Palette when it has an object selected displays the object propertiessuch as the reference point, position, size, scaling. Cropping, printer resolution, rotating,skewing and horizontal and vertical reflection.Horizontal/vertical mirror: Mirrors the currently selected object along the xor y-axis.Height/width: sets the height and width of the currently selected object, eithernumerically in inches or in percentage of the current size.Rotate: Rotate, is used to rotate the selected object around an axis. The center ofrotation is set as the object’s center and exact measurements can be used.Skew: This skews. The currently selected object, in degrees.XY position: sets the horizontal and vertical position of the upper-left comer ofthe currently selected object.Control Palette in Character ModeThe Character Palette is displayed when the text tool is selected. It has options forchanging text styles, size, leading, tracking, width and Deming. There is a toggle button to shiftbetween paragraph view and character view.17
Kerning: Text Kerning adjusts the spacing between characters in text. It isselective, so you can adjust just one or two characters, or whole sections of text, Negativenumbers move characters closer together, whereas Positive numbers space them out.Leading: Text Leading adjusts the spacing between lines of text. This isapplicable on line-by-line basis. Positive and Negative number have the same effect as they haveon Kerning, except that the spacing is between the lines of text.Tracking: Text Tracking adjusts how closely characters follow each other. Verytight tracking brings text closer together, very loose spreads it out a bit.Size: Text Size adjusts point size of text.Position: Text Position adjusts the placement of the text on a given line. PositiveNumbers move the text into a super text position (above the line), and Negative numbers moveit into a subtext position (below the line).Width: Text Width adjusts the character width and does not affect height. Thelarger the percentage, the wider the word. Percentages over 100% make it proportionate largerthan standard sizing, fewer than 100% make it proportionate smaller.Control Palette In Paragraph modeThe control palette displays options for the paragraph style, alignment, indents,spacing, grid spacing and grid alignment.COLOR PALETTEThe Color Palette is used to apply colors or view the name or kind of color appliedto the selected text or object. The buttons stroke, fill or both, can be used to change the color ofthe graphic object and Object level. Tints allow you to have variations of the same color. Toapply a color to a text or object and select the color from the color Palette. Choose Window andselect Show Colors, to display the Colors palette.18
STYLES PALETTEThe Styles Palette is used to apply styles or to view or edit styles defined for thepublication. To apply a style, just click a paragraph with the text tool and then click a style namein the palette. Choose Window and select Show Styles to display the Styles palette.LAYERS PALETTEThe Layers Palette is used where a multiple layers document structure is required.Layers allow you to separ4ate the different elements that make up your document. You can hide,display, add or delete layers as required. Choose Window and select Show Layers to display theLayers Palette.19
MASTER PAGES PALETTEThe Masters. It displays a list of available master and apply masters pages for aparticular document. The master page icon at the bottom of the window is used when you wantto go to a master page for editing. Choose Window and select Show Master Pages to display themaster Page paletteHYPERLINK PALETTEA hyperlink has two parts: a source, which is the hyper linked text, or graphic thatyou click, and a destination, which is where the source jumps. Inside a PageMaker Publication,destinations are called anchors. You can also give a valid web hyperlink. Choose Window andselect Show Hyperlinks to display the Hyperlinks palette.SETTING A MEASUREMENT SYSTEM Click File Select Preference.In the Preferences menu select general.20
GRIDS, RULERS AND GUIDESGUIDESMargin Guides: Margins are defined in the Document Setup dialog box, whenyou first create a publication, and are applied to the Document Master page. These arerepresented by pink lines on the top and bottom and by blue lines on the left and right.Column Guides: Column guides serve as boundaries for text you place withinthem. You can have as many as 20 column per page. Column guides control the flow of text andrepresented by dark blue lines.Ruler Guides: Ruler Guides are also nonprinting guidelines which primarilyused to align. Objects in the publication and are represented on the screen by Light blue lines.21
VIEWING PAGESZoom In: Zoom in Magnifies the Document to the next levelZoom Out: Zoom out Shrinks the Document view the previous levelActual Size: Actual size Displays the entire page or a two page spread withinthe publication window.Fit in Window: Fit in window will display the current page in its entiretywithin the publication window. This view is especially useful to check the layout of the page.Entire pasteboard: Entire pasteboard displays the page with the entirepasteboard so that you can find or view objects.INSERTING PAGES Click Layout. Choose Insert Pages.22
SORTING PAGES To change the page order Click Layout. Select Sort Pages.A dialog box with the page icons appears. Click on the fourth page, and place itbefore the first page. Click OK to close the dialog box. The Page is rearranged and the page numbers are changed accordingly.CREATING NEW DOCUMENTMASTER PAGESMaster Pages are a sort of a template for all of the pages in a publication. TheMaster pages can contain text, Graphics and guides. These are reflected in all the pages of thepublication. They generally contain logos and volume title, which are to be repeated in everypage of the publication and also guides, which help to maintain uniformity throughout thepublication.23
CREATING A NEW MASTER Click Window. Select the Show Master Pages Palette from the window menu.In the Master Pages Pallet Click on the Top right arrow to display the PaletteMenu.Working with TextTEXT BASICS24
ENTERING TEXTIn Page Maker, text is typed in text blocks or frames. Text blocks are defined bythe amount of text and the margins of the page. To open a text block First click the Text tool. Click anywhere on the page within the margin guides. Press the mouse button and drag the insertion point to the right. Release themouse when you have opened the box to the correct size.25
PLACING TEXT Click on Edit menu. Select Edit Story. Type “Demo for Placing Tex “. Click on Story. Select Close Story.Page Maker displays an alert message that says, “The story has not been placed.”Click the place button to place the story.Page Maker displays a loaded text icon. Click the icon to flow text into the frameor column you click on.TEXT OBJECTS, STORIES AND EDITORS26
Understanding test objects and stories: Text in PageMaker is part of astory. A story can be a single letter or several page of text and can be contained in a single textobject or threaded through many different objects.Layout Editors and Story Editors: Text blocks that are threaded togetherin the Layout Editor comprise the same story in the Story Editor. A text block may be splitamong several pages in the Layout Editor, but it appears as a continuous story in the StoryEditor.FORMATTING TEXTChanging Font Sizes: In PageMaker, by default the type size is 12 points butyou can change the size as often as you like using the Control Palette. The Control Palette canbe activated or deactivated from the Window menu.Changing Typeface Styles: There are ten different styles for any typeface.They are Normal, Bold, Italic, and Underline, Reverse, and Strikethrough, Small caps, All caps,Super script and Sub script.Changing Character Specifications: The Character Specifications dialogbox allows you to choose several type attributes in one step. This dialog box can be opened bydouble clicking the Text tool.KERNING AND TRACKINGPageMaker provides three types of kerning.27
Automatic pair kerning: Automatic pair kerning adjusts the space betweencertain character pairs, based on the kerning information that’s built into the font.Manual kerning Manual: Kerning lets you kern any range of text, from onecharacter pair to a whole story, using cursor keys or by using the Control palette.Expert kerning: Expert kerning calculates a manual kerning value for everycharacter pair in a selected range of text.TRACKINGTracking is similar to kerning in that it deals with the horizontal space betweenletters. PageMaker includes five built-in tracks from Very Loose to Very Tight. To set therequired track, first select the text.PARAGRAPH SETTINGParagraph formatting includes setting indent values, paragraph spacing, textalignment, dictionary, etc. in this exercise we shall see how to draw a line below a paragraph.Click on the Text tool. Select the Text paragraph. Click on the Type menu. Select Paragraph OptionsSETTING TABSIn this exercise we shall see how to set tabs. Select the Text tool.28
Click on the Type menu. Select Indents/Tabs.Drag the first half of the left indent to 1 inch.Drag the right indent by 1 inch.29
Click OK.Thus the paragraph has been aligned according to the Indents set.BULLETS AND NUMBERINGTHE Bullets and numbering option automatically adds bullets or numbers to theparagraph in the text block. To edit bullets or to add numbers you can click the Edit or Numbersbutton respectively.30
HYPHENATION SETTINGPageMaker hyphenates words to reduce the spacing between them in a justifiedtext. Hyphenation is controlled with the hyphenation dialog box.The Manual only option hyphenates only the wor4ds that you have marked tohyphenate by inserting a discretionary hyphen in the word where it would normally break.Manual plus dictionary option hyphenates the words to which you have addeddiscretionary hyphens, as well as words hyphenated in the PageMaker dictionary.In addition to using the dictionary, Manual plus algorithm option, uses amathematical algorithm and your manually inserted hyphens to break words.31
Hyphenation Setting Let use see how to add a word to the user dictionary. Click on the Type menu. Select Hyphenation. Click the Add button in the Hyphenation dialog box. In the Add to User Dictionary dialog box type Lay out Galaxy. In this word,h\the most favorable break is marked by a single tilde ( ) and the second most favorable break ismarked by a double tilde. Click OK to close the Add to User Dictionary dialog box. Click OK to close the Hyphenation dialog box. The word “LayoutGalaxy” has been added to the Dictionary.SET STYLESIn this demo we shall see how set style Select the Text tool. Click the insertion point anywhere in the text.CREATING STYLES To create a new style click on the Type menu. Select Define Styles. In the Define Styles dialog box, Click New button.Style Options dialog box opens. In the Name text box type “MyStyle”.32
ROTATING TEXTLet us see how to rotate a text frame. Click the arrow tool. Select the text Type 45 degrees and press Enter.The frame has been rotated by 45 degrees.ADDING COLOR TO TEXTIn this Exercise, we shall see how to change the color of a text. Select the text. Click on the Window menu.33
Select Show Colors. Select blue from the Colors Palette. The Text Color has been changed to blue.ADVANCED TOPICSCREATING HYPERLINKSLet us create a hyperlink. Click on the File menu. Select New.34
Document Setup dialog box opens. Click the Page Size Pop-up menu.THREADINGWhen a story in a text block extends to the next or subsequent pages, it is brokenup into individual page text blocks. A small Red triangle in the lower window shade handleindicates that there is more text that can be currently displayed in the text box. Click on the Redtriangle to display the second block of the text.The pointer will turn into a loaded text icon. Click to place the second block. Thesmall symbol in the top window shade indicates that the story has been continued form a35
previous block text. An empty handle in the bottom window shade indicates the end of theStory.SPELL CHECKPageMaker helps you in proof-reading your text by providing a ‘SpellingChecker’, which can be used to check the spelling for a selected range of text or for all the textin the active story or all stories in all open publications. PageMaker will warn you of any wordsit cannot locate in its dictionary. If any word is misspelled then you have the choice to re-enter itor choose form a selection of closest matches in the dictionary. The spelling dialog box can beactivated from the Utilities menu.WORKING WITH COLUMNS36
PageMaker allows you to divide any page into columns. In this exercise we shallsplit a page into Columns. Click on the Layout menu. Select Column Guides.A Columns Guide dialog box appears. In the Number of columns dialog box, type2. Click OK to close the dialog box.We can now see the pages split into columns.INDEXES AND PAGINATIONTo create an Index, Click on the Edit menu. Select Edit Story.37
Click the loaded text icon anywhere on the page. Now you have added, “adjustlayout” to your Index. Similarly you can add other words.INDEXES AND PAGINATIONThe Sort Page feature can be activated from the Layout menu. This feature allowsyou to re-order the pages in your document. This can be easily done by dragging the pagethumbnail images around, within the window. Changing the order of pages does not alter thetext in a story. The story remains intact even though text objects may have moved to differentpages.38
USING THE FIND FEATUREUsing the find and change feature, you can search for specific occurrences of awont or group of words. Once you find what you’re looking for, then PageMaker automaticallychanges it to the selected option. The find and the change dialog boxes can be activated from theUtilities menu.Working with Graphics and LayerGRAPHICSLINE TOOLIn this exercise, you will learn to use the Line Tool.Select the Line Tool from the Tool Box.Pointer the Cursor on “A” and hold down the mouse Button and drag it to Point“B” and the release the mouse Button.39
Now you can see a line drawn on the Screen.BOX TOOLBox tool is used to draw both rectangles and squares. In this exercise you willlearn to use the Box Tool. Select the Box Tool.40
Point the Cursor on A and hold down the mouse Button and drag it to Point B andrelease the mouse button to draw a Rectangle.Now Draw a Square using the Box Tool. Point the Cursor on C and hold down theShift Key and drag the mouse button down to Point D to draw a Square.41
ELLIPSE TOOLEllipse tool is used to draw both Ovals and Circles. In this exercise, you will learnto use Ellipse Tool. Select Ellipse Tool.Point the Cursor on A and hold the mouse button down. Drag it to Point B to drawan Oval.42
Now draw a Circle using an Ellipse Tool Point the Cursor on C and hold down theShift key and drag the mouse button down to Point D to draw a Circle.POLYGON TOOLIn this exercise, you will learn to use the Polygon Tool Select the Polygon Tool.Point the Cursor on A and hold down the mouse Button and drag it to Point B andrelease the mouse button to draw a Polygon Tool.43
Click Element menu.Select Polygon Settings.44
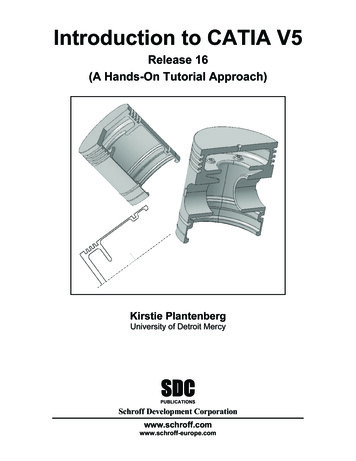
In the Polygon Setting dialog box, enter 40 for the number of Sides and press theTab Key.Enter 30% for star inset and Press the Tab Key .Click OK.In this way you can modify a Polygon in to a star having 40 Sides and 30% Starinset.ROUNDED COLORSIn this exercise you will learn how to round the corner of a rectangle using“Rounded Corners” option. Select the Pointer Tool. Click the Rectangle to select it Click Element menu.45
Select Rounded Corners.The Rounded Corners dialog box appears on the Screen. From this dialog boxselect the last Option. Click OK.Click anywhere outside the rectangle on the screenYou can now see the change in the corners of the rectangle. You can also modify asquare in the same way.FILLThe Fill command is used to fill the box or circle with the options available underthis command, which consists of various types of lines along with the options like paper and46
solid. If you choose the paper option, the object fill changes to the background paper color andwhen the solid option is chosen, the object gets completely filledSTROKEYou can use the stroke command to select the lines of different sizes and styles orchoose the option called custom to create the line of your own style. Besides these, you havetwo more options called. Transparent and Reverse. Use Transparent Background option if youwant the objects placed behind a patterned stroke to be shown through the spaces in the patternotherwise the spaces in the pattern are opaque. Reverse Stroke option is used to draw a papercolored stroke or outline of a shape on a contrasting black, shaded, or colored background.47
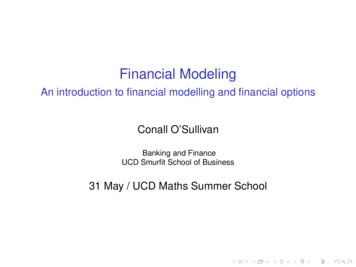
FILL AND STROKEThis is the combination of the above two commands. Instead of selecting them oneby one, you can select them together with this command.PLACING GRAPHICSThe Place command is used to Import Graphics. In this exercise you will learnplacing a Graphic. To do this you first click the File menu. Select Place from the drop down menu.The Place Dialog Box opens up. Double Click “Bouquet.tif”.48
You can now see the imported image on your screen.TRANSFORMING OBJECTSTRANSFORMING A RECTANGLEIn this exercise you will learn to transform a rectangle. Select the Pointer Tool. Click the Rectangle to select it.Now you can see the change in Control Palette at the bottom of the work areausing which you can transform the rectangle. In the Control Palette change the Rotation to 25degrees and press the Tab Key.Change the Skew angle to 25 degrees and Press the Tab Key. Click the widthcolumn49
Change the width to 5 inches and press the Tab Key.Change the height to 5 inches and press the Tab Key. Click the Apply button.You can now see the transformation in the rectangle. In the same way you cantransform any object using the control palette.RESIZING AN ELLIPSEIn the exercise you will learn how to resize and ellipse. Select the Pointer Tool.Click the ellipse drawn with the Pointer Tool and select it to display the sizinghandles.50
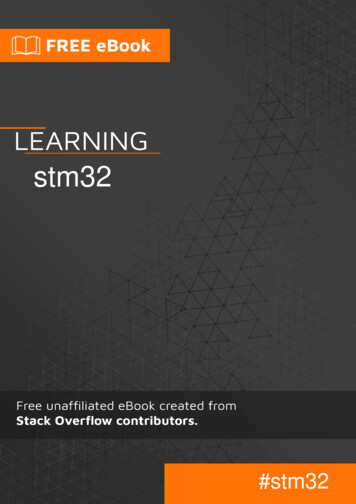
Click and drag handle shown to increase the height of the ellipse.CROPPING AN IMAGECropping trims away a portion of the graphic, rather than reducing the size of thegraphic. In this exercise you will learn to Crop a Graphic. Select the Cropping tool.Click the Graphic to select it and display the Sizing Handles.Click the handle shown and drag towards the center to crop the graphic.Now click on the center of the graphic, notice that the cropping tool changes to ahand tool. Hold down the mouse button and move the graphic downwards.WORKING WITH COLOURSADDING COLOR TO A GRAPHIC SHAPEIn this exercise you will learn to add Color to a Graphic Shape. Select the Pointer Tool.Click the Polygon drawn on the Work area using the Pointer Tool to select it.51
Click Window menu. Select Show Colors to open the Colors Palette.While the Outline of the Polygon is still selected, click the stroke Button. Click Green color in the colors palette.
Illustrator and PhotoShop and also give you the flexibility of graphic control not available in world processors NEW FEATURES IN PAGEMAKER 6.5 DOCUMENT LAYERS Layers allow you to place elements on over the other. It can be thought of as sheets stacked up one on top of the other. You can place