Transcription
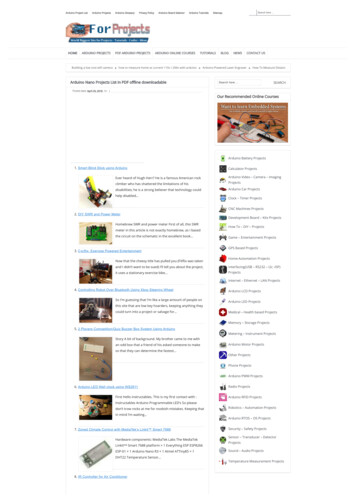
Arduino is the open source electronics prototyping platform thathas taken the Maker Movement by storm. This thoroughintroduction, updated for the latest Arduino release, helps youstart prototyping right away. From obtaining the requiredcomponents to putting the final touches on your project, all theinformation you need is here!Join hundreds of thousands of hobbyists who have discoveredthis incredible (and educational) platform.»»»»»»»Interaction design and physical computingThe Arduino board and its software environmentBasics of electricity and electronicsPrototyping on a solderless breadboardDrawing a schematic diagramTalking to a computer—and the cloud—from ArduinoBuilding a custom plant-watering systemWritten by Massimo Banzi, the co-founder of Arduinoand Michael Shiloh, Arduino’s educational lead.US 19.99 CAN 20.99ISBN: 978-1-4493-6333-8Make:makezine.comBanzi and ShilohIn Getting Started with Arduino, you’ll learn about:GettingStarted withArduinoest s e ll e r3rd Edition3rd EditionGetting started with Arduino is a snap. To use the introductoryexamples in this guide, all you need is an Arduino Uno orLeonardo, along with a USB cable and an LED. The easy-to-use,free Arduino development environment runs on Mac, Windows,and Linux.Make:B3rd EditionGetting Started with ArduinoMake: Getting Startedwith Arduinonce 20Si09Make:Hardware/ProgrammingJA’CThe Open Source ElectronicsPrototyping PlatformMassimo Banzi co-founder of Arduino& Michael Shiloh
THIRD EDITIONGettingStarted withArduinoMassimo Banzi andMichael Shiloh
Getting Started with Arduinoby Massimo Banzi and Michael ShilohCopyright 2015 Massimo Banzi and Michael Shiloh. All rights reserved.Printed in the United States of America.Published by Maker Media, Inc., 1005 Gravenstein Highway North, Sebastopol, CA95472.Maker Media books may be purchased for educational, business, or sales promotional use. Online editions are also available for most titles (http://www.safaribooksonline.com). For more information, contact our corporate/institutional sales department: 800-998-9938 or corporate@oreilly.com.Editor: Brian JepsonProduction Editor: Nicole ShelbyCopyeditor: Kim CoferProofreader: Sharon WilkeyIndexer: WordCo Indexing ServicesInterior Designer: David FutatoCover Designer: Brian JepsonIllustrator: Judy Aime’ CastroDecember 2014:Third EditionRevision History for the Third Edition2014-12-09: First Release2014-12-19: Second ReleaseSee http://oreilly.com/catalog/errata.csp?isbn 9781449363338 for release details.Make:, Maker Shed, and Maker Faire are registered trademarks of Maker Media, Inc.The Maker Media logo is a trademark of Maker Media, Inc. Getting Started with Arduino and related trade dress are trademarks of Maker Media, Inc.Many of the designations used by manufacturers and sellers to distinguish theirproducts are claimed as trademarks. Where those designations appear in this book,and Maker Media, Inc. was aware of a trademark claim, the designations have beenprinted in caps or initial caps.While every precaution has been taken in the preparation of this book, the publisherand authors assume no responsibility for errors or omissions, or for damages resulting from the use of the information contained herein.978-1-449-36333-8[LSI]
ContentsPreface. . . . . . . . . . . . . . . . . . . . . . . . . . . . . . . . . . . . . . . . . . . . . . . . . . . . . . . . . . . vii1/Introduction. . . . . . . . . . . . . . . . . . . . . . . . . . . . . . . . . . . . . . . . . . . . . . . . . . . . . . 1Intended Audience. . . . . . . . . . . . . . . . . . . . . . . . . . . . . . . . . . . . . . . . . . . . . . . . . 2What Is Interaction Design?. . . . . . . . . . . . . . . . . . . . . . . . . . . . . . . . . . . . . . . . . . 3What Is Physical Computing?. . . . . . . . . . . . . . . . . . . . . . . . . . . . . . . . . . . . . . . .32/The Arduino Way. . . . . . . . . . . . . . . . . . . . . . . . . . . . . . . . . . . . . . . . . . . . . . . . . . 5Prototyping. . . . . . . . . . . . . . . . . . . . . . . . . . . . . . . . . . . . . . . . . . . . . . . . . . . . . . . 5Tinkering. . . . . . . . . . . . . . . . . . . . . . . . . . . . . . . . . . . . . . . . . . . . . . . . . . . . . . . . . 6Patching. . . . . . . . . . . . . . . . . . . . . . . . . . . . . . . . . . . . . . . . . . . . . . . . . . . . . . . . . . 7Circuit Bending. . . . . . . . . . . . . . . . . . . . . . . . . . . . . . . . . . . . . . . . . . . . . . . . . . . . 9Keyboard Hacks. . . . . . . . . . . . . . . . . . . . . . . . . . . . . . . . . . . . . . . . . . . . . . . . . . 11We Love Junk!. . . . . . . . . . . . . . . . . . . . . . . . . . . . . . . . . . . . . . . . . . . . . . . . . . . . 12Hacking Toys. . . . . . . . . . . . . . . . . . . . . . . . . . . . . . . . . . . . . . . . . . . . . . . . . . . . . 13Collaboration. . . . . . . . . . . . . . . . . . . . . . . . . . . . . . . . . . . . . . . . . . . . . . . . . . . . . 143/The Arduino Platform. . . . . . . . . . . . . . . . . . . . . . . . . . . . . . . . . . . . . . . . . . . . . 15The Arduino Hardware. . . . . . . . . . . . . . . . . . . . . . . . . . . . . . . . . . . . . . . . . . . . . 15The Software Integrated Development Environment (IDE). . . . . . . . . . . . . . . . 18Installing Arduino on Your Computer. . . . . . . . . . . . . . . . . . . . . . . . . . . . . . . . . 19Installing the IDE: Macintosh. . . . . . . . . . . . . . . . . . . . . . . . . . . . . . . . . . . . . . . . 19Configuring the Drivers: Macintosh. . . . . . . . . . . . . . . . . . . . . . . . . . . . . . . . 19Port Identification: Macintosh. . . . . . . . . . . . . . . . . . . . . . . . . . . . . . . . . . . . 20Installing the IDE: Windows. . . . . . . . . . . . . . . . . . . . . . . . . . . . . . . . . . . . . . . . . 21Configuring the Drivers: Windows. . . . . . . . . . . . . . . . . . . . . . . . . . . . . . . . . 21Port Identification: Windows. . . . . . . . . . . . . . . . . . . . . . . . . . . . . . . . . . . . . 224/Really Getting Started with Arduino. . . . . . . . . . . . . . . . . . . . . . . . . . . . . . . . 25Anatomy of an Interactive Device. . . . . . . . . . . . . . . . . . . . . . . . . . . . . . . . . . . . 25Sensors and Actuators. . . . . . . . . . . . . . . . . . . . . . . . . . . . . . . . . . . . . . . . . . . . . 25Blinking an LED. . . . . . . . . . . . . . . . . . . . . . . . . . . . . . . . . . . . . . . . . . . . . . . . . . . 26Pass Me the Parmesan. . . . . . . . . . . . . . . . . . . . . . . . . . . . . . . . . . . . . . . . . . . .31iii
Arduino Is Not for Quitters. . . . . . . . . . . . . . . . . . . . . . . . . . . . . . . . . . . . . . . . .31Real Tinkerers Write Comments. . . . . . . . . . . . . . . . . . . . . . . . . . . . . . . . . . . . . 32The Code, Step by Step. . . . . . . . . . . . . . . . . . . . . . . . . . . . . . . . . . . . . . . . . . . . 32What We Will Be Building. . . . . . . . . . . . . . . . . . . . . . . . . . . . . . . . . . . . . . . . . . . 36What Is Electricity?. . . . . . . . . . . . . . . . . . . . . . . . . . . . . . . . . . . . . . . . . . . . . . . . 37Using a Pushbutton to Control the LED. . . . . . . . . . . . . . . . . . . . . . . . . . . . . . . 40How Does This Work?. . . . . . . . . . . . . . . . . . . . . . . . . . . . . . . . . . . . . . . . . . . . .44One Circuit, a Thousand Behaviours. . . . . . . . . . . . . . . . . . . . . . . . . . . . . . . . . . 455/Advanced Input and Output. . . . . . . . . . . . . . . . . . . . . . . . . . . . . . . . . . . . . . . . 53Trying Out Other On/Off Sensors. . . . . . . . . . . . . . . . . . . . . . . . . . . . . . . . . . . . 53Homemade (DIY) Switches. . . . . . . . . . . . . . . . . . . . . . . . . . . . . . . . . . . . . . . 56Controlling Light with PWM. . . . . . . . . . . . . . . . . . . . . . . . . . . . . . . . . . . . . . . . . 56Use a Light Sensor Instead of the Pushbutton. . . . . . . . . . . . . . . . . . . . . . . . .64Analogue Input. . . . . . . . . . . . . . . . . . . . . . . . . . . . . . . . . . . . . . . . . . . . . . . . . . . 66Try Other Analogue Sensors. . . . . . . . . . . . . . . . . . . . . . . . . . . . . . . . . . . . . . . . 69Serial Communication. . . . . . . . . . . . . . . . . . . . . . . . . . . . . . . . . . . . . . . . . . . . .70Driving Bigger Loads (Motors, Lamps, and the Like). . . . . . . . . . . . . . . . . . . .72Complex Sensors. . . . . . . . . . . . . . . . . . . . . . . . . . . . . . . . . . . . . . . . . . . . . . . . . 746/The Arduino Leonardo. . . . . . . . . . . . . . . . . . . . . . . . . . . . . . . . . . . . . . . . . . . .77How Is This Arduino Different from All Other Arduinos?. . . . . . . . . . . . . . . . . . 77Other Differences Between the Arduino Leonardo and the Arduino Uno. . . .78Leonardo Keyboard Message Example. . . . . . . . . . . . . . . . . . . . . . . . . . . . . . . . 80How Does This Work?. . . . . . . . . . . . . . . . . . . . . . . . . . . . . . . . . . . . . . . . . . . .82Leonardo Button Mouse Control Example. . . . . . . . . . . . . . . . . . . . . . . . . . . . . 83How Does This Work?. . . . . . . . . . . . . . . . . . . . . . . . . . . . . . . . . . . . . . . . . .86More Leonardo Differences. . . . . . . . . . . . . . . . . . . . . . . . . . . . . . . . . . . . . . . . . 877/Talking to the Cloud. . . . . . . . . . . . . . . . . . . . . . . . . . . . . . . . . . . . . . . . . . . . . .91Planning. . . . . . . . . . . . . . . . . . . . . . . . . . . . . . . . . . . . . . . . . . . . . . . . . . . . . . . . . 93Coding. . . . . . . . . . . . . . . . . . . . . . . . . . . . . . . . . . . . . . . . . . . . . . . . . . . . . . . . . . 94Assembling the Circuit. . . . . . . . . . . . . . . . . . . . . . . . . . . . . . . . . . . . . . . . . . . . 101Here’s How to Assemble It. . . . . . . . . . . . . . . . . . . . . . . . . . . . . . . . . . . . . . . .1038/Automatic Garden-Irrigation System. . . . . . . . . . . . . . . . . . . . . . . . . . . . . . . 105Planning. . . . . . . . . . . . . . . . . . . . . . . . . . . . . . . . . . . . . . . . . . . . . . . . . . . . . . . . 107Testing the Real Time Clock (RTC). . . . . . . . . . . . . . . . . . . . . . . . . . . . . . . . . . 110Testing the Relays. . . . . . . . . . . . . . . . . . . . . . . . . . . . . . . . . . . . . . . . . . . . . . .116Electronic Schematic Diagrams. . . . . . . . . . . . . . . . . . . . . . . . . . . . . . . . . . . . . 119Testing the Temperature and Humidity Sensor. . . . . . . . . . . . . . . . . . . . . . . . 132ivContents
Coding. . . . . . . . . . . . . . . . . . . . . . . . . . . . . . . . . . . . . . . . . . . . . . . . . . . . . . . . . 137Setting the On and Off Times. . . . . . . . . . . . . . . . . . . . . . . . . . . . . . . . . . . . .Checking Whether It’s Time to Turn a Valve On or Off. . . . . . . . . . . . . . . . .Checking for Rain. . . . . . . . . . . . . . . . . . . . . . . . . . . . . . . . . . . . . . . . . . . . . . .Putting It All Together. . . . . . . . . . . . . . . . . . . . . . . . . . . . . . . . . . . . . . . . . . .137143148149Assembling the Circuit. . . . . . . . . . . . . . . . . . . . . . . . . . . . . . . . . . . . . . . . . . . . 158The Proto Shield. . . . . . . . . . . . . . . . . . . . . . . . . . . . . . . . . . . . . . . . . . . . . . . .Laying Out Your Project on the Proto Shield. . . . . . . . . . . . . . . . . . . . . . . . .Soldering Your Project on the Proto Shield. . . . . . . . . . . . . . . . . . . . . . . . . .Testing Your Assembled Proto Shield. . . . . . . . . . . . . . . . . . . . . . . . . . . . . . .Assembling Your Project into a Case. . . . . . . . . . . . . . . . . . . . . . . . . . . . . . .Testing the Finished Automatic Garden Irrigation System. . . . . . . . . . . . . .162164170184186190Things to Try on Your Own. . . . . . . . . . . . . . . . . . . . . . . . . . . . . . . . . . . . . . . . 191Irrigation Project Shopping List. . . . . . . . . . . . . . . . . . . . . . . . . . . . . . . . . . . . . 1919/Troubleshooting. . . . . . . . . . . . . . . . . . . . . . . . . . . . . . . . . . . . . . . . . . . . . . . . . 193Understanding. . . . . . . . . . . . . . . . . . . . . . . . . . . . . . . . . . . . . . . . . . . . . . . . . . . 193Simplification and Segmentation. . . . . . . . . . . . . . . . . . . . . . . . . . . . . . . . . . . . 194Exclusion and Certainty. . . . . . . . . . . . . . . . . . . . . . . . . . . . . . . . . . . . . . . . . . . 194Testing the Arduino Board. . . . . . . . . . . . . . . . . . . . . . . . . . . . . . . . . . . . . . . . . 194Testing Your Breadboarded Circuit. . . . . . . . . . . . . . . . . . . . . . . . . . . . . . . . . . 196Isolating Problems. . . . . . . . . . . . . . . . . . . . . . . . . . . . . . . . . . . . . . . . . . . . . . .198Problems Installing Drivers on Windows. . . . . . . . . . . . . . . . . . . . . . . . . . . . . . 199Problems with the IDE on Windows. . . . . . . . . . . . . . . . . . . . . . . . . . . . . . . . .199Identifying the Arduino COM Port on Windows. . . . . . . . . . . . . . . . . . . . . . . . 200Other Debugging Techniques. . . . . . . . . . . . . . . . . . . . . . . . . . . . . . . . . . . . . .201How to Get Help Online. . . . . . . . . . . . . . . . . . . . . . . . . . . . . . . . . . . . . . . . . . . 203A/The Breadboard. . . . . . . . . . . . . . . . . . . . . . . . . . . . . . . . . . . . . . . . . . . . . . . . . 207B/Reading Resistors and Capacitors. . . . . . . . . . . . . . . . . . . . . . . . . . . . . . . . .211C/Arduino Quick Reference. . . . . . . . . . . . . . . . . . . . . . . . . . . . . . . . . . . . . . . . . 215D/Reading Schematic Diagrams. . . . . . . . . . . . . . . . . . . . . . . . . . . . . . . . . . . . . 233Index. . . . . . . . . . . . . . . . . . . . . . . . . . . . . . . . . . . . . . . . . . . . . . . . . . . . . . . . . . . . 237Contentsv
PrefaceThe third edition of Getting Started with Arduino adds two newchapters: Chapter 8 is an ambitious project, which illustrates amore complex circuit and program. This chapter also talksabout project design, testing, and construction, and makes useof schematic diagrams, which were (and still are) described inAppendix D.The second chapter, Chapter 6, introduces the Arduino Leonardo. The Leonardo is a different sort of Arduino, because theUSB controller is implemented in software, and not in a separatechip as had been the case prior to the Leonardo. This allows theUSB behaviour of the board to be modified.Apart from these new chapters, other updates have taken place:The Third Edition is written for version 1.0.5 of the IDE. In anticipation of the imminent release of version 1.5, differencesbetween 1.0.5 and 1.5 have been noted.Numerous suggestions from students and readers have beenincorporated.In keeping with the spirit of the original text, British spelling isused throughout.—MichaelPreface to the Second EditionA few years ago I was given a very interesting challenge: teachdesigners the bare minimum in electronics so that they couldbuild interactive prototypes of the objects they were designing.I started following a subconscious instinct to teach electronicsthe same way I was taught in school. Later on I realised that itsimply wasn’t working as well as I would like, and started toremember sitting in a class, bored like hell, listening to all thatvii
theory being thrown at me without any practical applicationfor it.In reality, when I was in school I already knew electronics in avery empirical way: very little theory, but a lot of hands-on experience.I started thinking about the process by which I really learnedelectronics: I took apart any electronic device I could put my hands on. I slowly learned what all those components were. I began to tinker with them, changing some of the connections inside of them and seeing what happened to thedevice: usually something between an explosion and a puffof smoke. I started building some kits sold by electronics magazines. I combined devices I had hacked, and repurposed kits andother circuits that I found in magazines to make them donew things.As a little kid, I was always fascinated by discovering how thingswork; therefore, I used to take them apart. This passion grew asI targeted any unused object in the house and then took it apartinto small bits. Eventually, people brought all sorts of devices forme to dissect. My biggest projects at the time were a dishwasher and an early computer that came from an insuranceoffice, which had a huge printer, electronics cards, magneticcard readers, and many other parts that proved very interestingand challenging to completely take apart.After quite a lot of this dissecting, I knew what electronic components were and roughly what they did. On top of that, myhouse was full of old electronics magazines that my father musthave bought at the beginning of the 1970s. I spent hours readingthe articles and looking at the circuit diagrams without understanding very much.This process of reading the articles over and over, with the benefit of knowledge acquired while taking apart circuits, created aslow, virtuous circle.viii Preface
A great breakthrough came one Christmas, when my dad gaveme a kit that allowed teenagers to learn about electronics. Everycomponent was housed in a plastic cube that would magnetically snap together with other cubes, establishing a connection;the electronic symbol was written on top. Little did I know thatthe toy was also a landmark of German design, because DieterRams designed it back in the 1960s.With this new tool, I could quickly put together circuits and trythem out to see what happened. The prototyping cycle was getting shorter and shorter.After that, I built radios, amplifiers, circuits that would producehorrible noises and nice sounds, rain sensors, and tiny robots.I’ve spent a long time looking for an English word that wouldsum up that way of working without a specific plan, starting withone idea and ending up with a completely unexpected result.Finally, tinkering came along. I recognised how this word hasbeen used in many other fields to describe a way of operatingand to portray people who set out on a path of exploration. Forexample, the generation of French directors who gave birth tothe Nouvelle Vague were called the tinkerers. The best definitionof tinkering that I’ve ever found comes from an exhibition held atthe Exploratorium in San Francisco:Tinkering is what happens when you try something you don’t quite know how to do, guided bywhim, imagination, and curiosity. When youtinker, there are no instructions—but there arealso no failures, no right or wrong ways of doingthings. It’s about figuring out how things workand reworking them.Contraptions, machines, wildly mismatchedobjects working in harmony—this is the stuff oftinkering.Tinkering is, at its most basic, a process thatmarries play and inquiry.From my early experiments I knew how much experience youwould need in order to be able to create a circuit that would dowhat you wanted, starting from the basic components.Prefaceix
Another breakthrough came in the summer of 1982, when Iwent to London with my parents and spent many hours visitingthe Science Museum. They had just opened a new wing dedicated to computers, and by following a series of guided experiments, I learned the basics of binary math and programming.There I realised that in many applications, engineers were nolonger building circuits from basic components, but wereinstead implementing a lot of the intelligence in their productsusing microprocessors. Software was replacing many hours ofelectronic design, and would allow a shorter tinkering cycle.When I came back, I started to save money, because I wanted tobuy a computer and learn how to program.My first and most important project after that was using mybrand-new ZX81 computer to control a welding machine. I knowit doesn’t sound like a very exciting project, but there was aneed for it and it was a great challenge for me, because I hadjust learned how to program. At this point, it became clear thatwriting lines of code would take less time than modifying complex circuits.Twenty-odd years later, I’d like to think that this experienceallows me to teach people who don’t even remember taking anymath class and to infuse them with the same enthusiasm andability to tinker that I had in my youth and have kept ever since.—MassimoAcknowledgments for MassimoBanziThis book is dedicated to Ombretta.Acknowledgments for MichaelShilohThis book is dedicated to my brother and my parents.First of all I’d like to thank Massimo for inviting me to work onthe Third Edition of this book, and for inviting me to join ArduinoxPreface
in general. It’s been a real privilege and joy to participate in thisproject.Brian Jepson for guidance, oversight, encouragement, and support. Frank Teng for keeping me on track. Kim Cofer and NicoleShelby for doing a wonderful job of copyediting and productionediting, respectively.My daughter Yasmine for thinking so highly of me, for her neverending support and encouragement of my pursuing my interests, and for still thinking that I’m kinda cool in spite of being herdad. I could not have done this without her support.Last but not least, my partner Judy Aime’ Castro for the endlesshours she spent turning my scribbles into fine illustrations, fordiscussing various aspects of the book, and for her endlesspatience with me. I could not have done this without her supporteither.Conventions Used in This BookThe following typographical conventions are used in this book:ItalicIndicates new terms, URLs, email addresses, filenames, andfile extensions.Constant widthUsed for program listings, as well as within paragraphs torefer to program elements such as variable or functionnames, databases, data types, environment variables, statements, and keywords.Constant width boldShows commands or other text that should be typed literallyby the user.Constant width italicShows text that should be replaced with user-supplied values or by values determined by context.This icon signifies a tip, suggestion, or general note.Prefacexi
This icon indicates a warning or caution.Using Code ExamplesThis book is here to help you get your job done. In general, youmay use the code in this book in your programs and documentation. You do not need to contact us for permission unlessyou’re reproducing a significant portion of the code. For example, writing a program that uses several chunks of code fromthis book does not require permission. Selling or distributing aCD-ROM of examples from Make: books does require permission. Answering a question by citing this book and quotingexample code does not require permission. Incorporating a significant amount of example code from this book into your product’s documentation does require permission.We appreciate, but do not require, attribution. An attributionusually includes the title, author, publisher, and ISBN. For example: “Getting Started With Arduino, Third Edition, by MassimoBanzi and Michael Shiloh (Maker Media). Copyright 2015 Massimo Banzi and Michael Shiloh, 978-1-4493-6333-8.”If you feel your use of code examples falls outside fair use or thepermission given here, feel free to contact us at bookpermissions@makermedia.com.Safari Books Online Safari Books Online is an on-demand digital library that deliversexpert content in both book and video form from the world’sleading authors in technology and business.Technology professionals, software developers, web designers,and business and creative professionals use Safari Books Onlineas their primary resource for research, problem solving, learning, and certification training.Safari Books Online offers a range of plans and pricing for enterprise, government, education, and individuals.xiiPreface
Members have access to thousands of books, training videos,and prepublication manuscripts in one fully searchable database from publishers like Maker Media, O’Reilly Media, PrenticeHall Professional, Addison-Wesley Professional, Microsoft Press,Sams, Que, Peachpit Press, Focal Press, Cisco Press, John Wiley& Sons, Syngress, Morgan Kaufmann, IBM Redbooks, Packt,Adobe Press, FT Press, Apress, Manning, New Riders, McGrawHill, Jones & Bartlett, Course Technology, and hundreds more.For more information about Safari Books Online, please visit usonline.How to Contact UsPlease address comments and questions concerning this bookto the publisher:Make:1005 Gravenstein Highway NorthSebastopol, CA 95472800-998-9938 (in the United States or Canada)707-829-0515 (international or local)707-829-0104 (fax)Make: unites, inspires, informs, and entertains a growing community of resourceful people who undertake amazing projects intheir backyards, basements, and garages. Make: celebrates yourright to tweak, hack, and bend any technology to your will. TheMake: audience continues to be a growing culture and community that believes in bettering ourselves, our environment, oureducational system—our entire world. This is much more thanan audience, it’s a worldwide movement that Make is leading—we call it the Maker Movement.Prefacexiii
For more information about Make:, visit us online:Make: magazine: http://makezine.com/magazineMaker Faire: http://makerfaire.comMakezine.com: http://makezine.comMaker Shed: http://makershed.comWe have a kit with the components needed to try most of theexamples (through the end of Chapter 7) available from theMaker Shed.We also have a web page for this book, where we list errata,examples, corrections to the code, and any additional information. You can access this page at http://bit.ly/start arduino 3e.For more information about Arduino, including discussionforums and further documentation, see http://www.arduino.cc.To comment or ask technical questions about this book, sendemail to: bookquestions@oreilly.com.xivPreface
1/IntroductionArduino is an open source physical computing platform for creating interactive objects that stand alone or collaborate withsoftware on your computer. Arduino was designed for artists,designers, and others who want to incorporate physical computing into their designs without having to first become electrical engineers.The Arduino hardware and software is open source. The opensource philosophy fosters a community that shares its knowledge generously. This is great for beginners as help is oftenavailable geographically nearby and always online, at many different skill levels, and on a bewildering array of topics. Exampleprojects are presented not just as pictures of the finishedproject, but include instructions for making your own or as astarting point for incorporation into your derivative or relatedprojects.The Arduino software, known as the Integrated DevelopmentEnvironment (IDE), is free. You can download it from www.arduino.cc. The Arduino IDE is based on the Processing language,which was developed to help artists create computer art withouthaving to first become software engineers. The Arduino IDE canrun on Windows, Macintosh, and Linux.The Arduino board is inexpensive (about 30) and quite tolerantof common novice mistakes. If you do somehow manage todamage the main component on the Arduino Uno, it can bereplaced for as little as 4.The Arduino project was developed in an educational environment and is a very popular educational tool. The same opensource philosophy that created the community which generously shares information, answers, and projects also sharesteaching methods, curricula, and other information. Arduinohas a special mailing list to facilitate discussion among anyoneinterested in teaching with or about Arduino.1
Because the Arduino hardware and software are open source,you can download the Arduino hardware design and build yourown, or use it as a starting point for your own project, based on(or incorporating) Arduino within its design, or simply to understand how Arduino works. You can do the same things with thesoftware.This book is designed to help beginners with no prior experienceget started with Arduino.Intended AudienceThis book was written for the “original” Arduino users: designers and artists. Therefore, it tries to explain things in a way thatmight drive some engineers crazy. Actually, one of them calledthe introductory chapters of the first draft “fluff”. That’s precisely the point. Let’s face it: most engineers aren’t able toexplain what they do to another engineer, let alone a regularhuman being. Let’s now delve deep into the fluff.This book is not meant to be a textbook for teaching electronicsor programming, but you will learn something about electronicsand programming while reading this book.After Arduino started to become popular, I realised how experimenters, hobbyists, and hackersof all sorts were starting to use it to create beautiful and crazy objects. I realised that you’re allartists and designers in your own right, so thisbook is for you as well.—MassimoArduino builds upon the thesis work Hernando Barragan did on the Wiring platform while studyingunder Casey Reas and me (Massimo) at InteractionDesign Institute Ivrea (IDII).2Getting Started with Arduino
What Is Interaction Design?Arduino was born to teach Interaction Design, a design discipline that puts prototyping at the centre of its methodology.There are many definitions of Interaction Design, but the onethat we prefer is this:Interaction Design is the design of any interactive experience.In today’s world, Interaction Design is concerned with the creation of meaningful experiences between us (humans) andobjects. It is a good way to explore the creation of beautiful—and maybe even controversial—experiences between us andtechnology. Interaction Design encourages design through aniterative process based on prototypes of ever-increasing fidelity.This approach—also part of some types of conventional design—can be extended to include prototyping with technology; inparticular, prototyping with electronics.The specific field of Interaction Design involve
Getting started with Arduino is a snap. To use the introductory examples in this guide, all you need is an Arduino Uno or Leonardo, along with a USB cable and an LED. The easy-to-use, free Arduino development environment runs on Mac, Windows, and Linux. Jo