Transcription
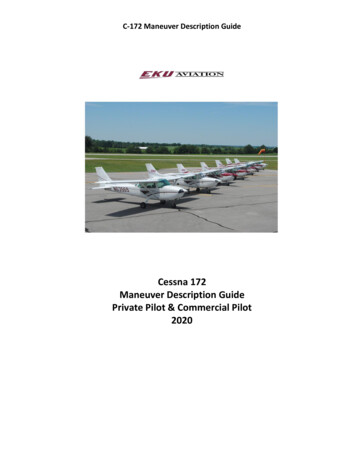
C-172 Maneuver Description GuideCessna 172Maneuver Description GuidePrivate Pilot & Commercial Pilot2020
C-172 Maneuver Description GuidePreface This C-172 Maneuver Description Guide (MDG) should be considered supplemental to the informationcontained in FAA Publication FAA-H-8083-3B, Airplane Flying Handbook (AFH). While the AFH providesdetailed information regarding flight maneuvers, it does not provide specific procedures for use in the Cessna172. For this reason, the MDG and AFH should be seen as complementary documents.Instructors and students should also be mindful of how maneuvers will be evaluated on the Practical Exam.This information is clearly laid out in the Airman Certification Standards (ACS) for the Private Pilot orCommercial Pilot Practical Examination. It will be helpful to consult the ACS during training to gain a clearunderstanding of what the Designated Pilot Examiner will be observing during the Practical Examination.The Cessna Pilot Training courses are also an excellent reference and should be consulted. The videosembedded in each module provide helpful techniques and pointers for all the flight maneuvers in yoursyllabus.The concept of basic attitude flying (AFH, Ch 3) is critical for Private Pilots and must be emphasized from thevery first flight. Every maneuver performed in this MDG is based on an aircraft attitude, that is, an angularrelationship between the airplane and the horizon. For example, understanding the attitude you should seewhen turning from base to final in the landing pattern will ensure you never get slow or have to worry aboutan approach stall.Additionally, every flight profile (straight and level, turn, climb, descent, etc.) in the airplane is a combinationof a power setting, nose attitude, and elevator trim. You should always think “Power, Attitude, Trim” whenperforming every maneuver.This MDG does not include procedures for the 172RG; the Cessna 172RG POH should be consulted for furtherenumeration of operating procedures when flying these aircraft.
C-172 Maneuver Description GuideI. Normal Takeoff, Traffic Pattern, LandingNormal Takeoff and ClimbSet-Up Before Takeoff Checklist complete Runway and final approach areas clear, announce intentions Centerline, nose wheel straight, verify runway you are on and compass heading Reference point straight ahead for maintaining centerline Heels on the floor of airplaneProcedure Full power (in 3-5 sec. to max), Right rudder as needed,o ! Keep hand on throttle to reject if necessary! “T’s and P’s in the green” Check engine gauges “Airspeed alive”- announce Rotate and smoothly pitch slightly up at liftoff speed: 55 KIAS (normal takeoff) Check coordination by looking down the runway Pitch for VY (based on sight picture - basic attitude flying!) Takeoff trim position is a starting point and may need to be adjusted Maintain straight track over centerline and upwind lego (Look for a safe emergency landing site) If staying in the pattern, begin crosswind turn at 700’ AGL At 1000 feet AGL: Pitch for 90 KIAS cruise climb Trim and scan for traffic, monitor changing altitude Complete climb checklist Proceed to working area at 3,000 MSL or aboveKey Reminders At 55 knots, rotate to climb attitude; this is one of the fundamental sight pictures to learn Add ½ of gust spread or more to all airspeeds in gusty conditions Pick downrange reference point to maintain the upwind track Reject the takeoff if centerline cannot be maintained Hand stays on throttle until 1000ft AGL
C-172 Maneuver Description GuideCrosswind Takeoff and ClimbSet Up Same as normal takeoff procedure Note wind direction/velocity & displace yoke fully into windProcedure Full power (in 3-5 sec. to max), Right Rudder as needed,o ! Keep hand on throttle to reject if necessary! “T’s and P’s in the green”, Check engine gauges “Airspeed alive”-announce Begin to slightly reduce aileron input as speed increases Rotate and smoothly pitch slightly up at liftoff speed: 55 KIAS (normal takeoff) Maintain crosswind slip and centerline upon liftoff (Windward side wing will dip down on rotate into the forward slip) Pitch for VY, based on sight picture (basic attitude flying!) Maintain straight track and return to coordinated flight by crabbing into the wind once out of ground effect If staying in the pattern, begin crosswind turn at 700’ AGL At 1000 feet AGL: Pitch for 90 KIAS cruise climb Trim and scan for traffic Complete climb checklistKey Reminders: Aileron into wind to control drift The “airspeed alive” call is done early in the takeoff roll and allows you to abort the takeoff if your airspeed indicator isinoperative Wind conditions may require sustained aileron input into the wind to maintain runway centerline Pick downrange reference point to maintain the upwind track Add ½ of gust spread or more to all airspeeds in gusty conditions Hand stays on throttle until 1000ft AGL
C-172 Maneuver Description GuideNormal/ Crosswind Approach and Landing10 Miles Out Listen to AWOS Make initial radio call Proceed inbound at 2,500’ MSLPattern Entry Weather information received, appropriate runway chosen Pattern entry: On the 45 degree bearing to the downwind, at pattern altitude Brief: Traffic awareness, wind planning, any special precautions, Descend to 2000’ MSL Enter the traffic pattern at 90 KIAS ( 2200 RPM) Fly a rectangular course appropriate for the winds/ type of approach and other trafficDownwind Runway should be about ½ to ¾ up the wing spar for normal spacing 2,000’ MSL, 90 knots Bank angles no greater than 30 in the pattern At the abeam position, complete pre-landing checklist Abeam the intended point of landingo Pre-landing checklist completeo Power set to 1500 RPMo First notch of flapso Pitch and trim for 80 KIASo Ensure you memorize this sight pictureAt 45 degree bearing beyond the intended point of landing Confirm 800 AGL Radio call Adjust power if necessary Turn toward base Lower second notch of flaps (during turn to base)On the base leg (90 degrees of turn) Pitch and trim for 70-75 KIAS (note the sight picture) Adjust power if necessary Make radio call Check final approach course is clear Confirm 500-600’ AGL. Turn toward the Final Approach course Lower third notch of flaps (during turn to final)On final Pitch and trim for 65-70 KIAS (sight picture, aiming point) Adjust power if necessary Note PAPI lights (if available)Short Final Cross wind correction entered (wing down, top rudder) Confirm on runway centerline Maintain aiming point until numbers go under nose of aircraft
C-172 Maneuver Description GuideCrossing Threshold As runway numbers disappear under nose of airplane, shift scan long (to end of runway)In ground effect Momentary level off (nose to horizon) to arrest rate of descent Smoothly reduce power is idle Maintain centerline, 100% of scan is outside As airplane slows, more aft pressure on yoke is required As airplane begins to settle, slowly increase pitch attitude Touch-down attitude should be approximately the same as climb out nose attitude Touch down on the runway centerline, no lateral drift, nose in line with runwayFor touch-n-go Carb heat in Flaps up Stabilized on the runway centerline Hand on throttle, eyes outside Throttle full openFull stop landings Roll to a stop and exit runway, using brakes sparingly. Complete after landing checklist after crossing the hold short lines.Key Reminders A good landing begins with flying a good, stable pattern and approach Understanding the sight picture during each phase of the pattern will greatly improve your ability to consistently fly a safeapproach and landing Do not use more than 30 angle of bank in the pattern Adhere to the Stabilized Approach concept on finalo Fully configured for landing by the time you are wings level on finalo Aligned with the runwayo No greater than 500 feet per minute descento Airspeed stabilized at 65-70 knots (unless short field landing)o If unable to maintain these parameters below 300’ AGL, execute a go around/rejected landingo Additionally, it you roll out on final and your altitude requires a power adjustment to idle, execute a goaround/rejected landingGo-Arounds / Rejected LandingProcedure Full Power, carb heat off (as required) Flaps 20 Eyes outside – pitch to horizon, positive rate of climb Flaps 10 Accelerate to VY (or Vx if required for obstacles) Flaps 0 (after clear of any obstacles) Resume normal climb outKey Reminders Power FIRST, control pitch/rudder to maintain coordination airspeed and a proper attitude, re trim when able Retracting flaps too much/too quickly may cause an excessive loss of lift and altitude, keep the airplane stabilized. If going around while low, slow and in high drag configuration: after applying full power consider staying in ground effect toaid acceleration (like a soft field take off) while slowly retracting flaps. Around 35% of accidents occur during the landing phase, if something isn’t right, GO-AROUND.
C-172 Maneuver Description GuideNormal VFR Landing PatternSight Picture – Short Final This is the sight picture you will see on finalNote the relationship between the runway numbers and nose of the airplaneThis relationship (attitude) will be constant until the airplane enters ground effectIf the nose is allowed to rise, your airspeed will decreaseIf the nose is allowed to drop, your airspeed will increase
C-172 Maneuver Description GuidePerformance Takeoffs and LandingsShort Field Takeoff and ClimbSet-Up Flaps 10 Before Takeoff Checklist complete Runway and final approach areas clear, announce intentions Position aircraft to use all available runway Hold the brakes; apply full power, slight back pressure on the yoke. Apply cross wind correction if necessary Check engine gauges for proper and full power indicationsProcedure Release brakes and depress right rudder as needed, heels on the floor “Airspeed alive”- announce Rotate off at recommended speed: 51 KIAS Pitch for Vx (60 KIAS) until obstacle is cleared Gradually pitch down at 50 feet or when clear of obstacle Accelerate to VY; flaps up Check Coordination Maintain straight track over centerline and upwind leg At 1000 feet AGL: Pitch for 90 KIAS cruise climb Trim and scan for traffic Complete climb checklistKey Reminders High AOA High P-factor Maintain balanced flight Normal Climb out after obstacle Hand stays on throttle until 1000ft AGL power changeShort Field Approach and LandingSet-Up Downwind, runway ½ to ¾ up wing spar, 2200RPM, 90KIAS Normal to slightly close pattern (for power-off approach) Determine how current wind and conditions may require a change to the short field pattern and power settings. Pick a touch down point, determine appropriate aiming point.Procedure The short field landing procedure is the same as a normal landing until established on the final approach course Pitch for 60-65 KIAS on final, use power to maintain the descent rate and glide path (based on the aiming point) Maintain a stabilized, on center-line approach to land on or within 200’ of intended landing point When entering ground effect, shift scan to end of runway Slowly level the nose, reduce power to Idle Initiate flare as airplane settles to the ground As slow as possible, lower the nose gear Flaps retract and simulate maximum braking Maintain centerline
C-172 Maneuver Description GuideSoft/Rough Field TakeoffSet-up Flaps 10 Before Takeoff Checklist complete Runway and Final Approach areas clear, Announce intentions Full back elevator pressure beginning at hold line Crosswind deflection if applicableProcedure Continue moving; don’t stop when turning on runway Full power, “Heels on the floor” Hold full aft on controls until airspeed alive- relieve some pressure to prevent a tail strike. Announce “airspeed alive” Maintain centerline as nose raises Once airborne stay in ground effect accelerate to 60 KIAS Climb out of ground effect and accelerate to Vy Flaps upSoft Field LandingSet-Up Normal downwind Complete pre-landing checklist at abeam position Determine how current wind and conditions may require a change to the soft pattern and power settings Pick a touch down area, determine appropriate aiming pointProcedure The soft field landing procedure is the same as a normal landing until established on the final approach course Maintain a stabilized, on center-line approach When entering ground effect, shift scan to end of runway, slowly level the nose Allow the airplane to settle lower ‘Flare’ upon deceleration and wheels are low to the ground Prior to touchdown have enough power to hold pitch to control and cushion the landing Land on the main gear Power to Idle Keep the nose high as long as possible, full back pressure; Maintain centerline. Continue to taxi with back pressure and power, keeping weight on the main gear.Power Off 180 Approach and LandingSet-Up Normal downwind Complete pre-landing checklist at abeam position Determine how current wind and conditions may require a change to the normal pattern and power settings. Pick a touch down point, determine appropriate aiming point.Procedure Abeam aiming point, Power to Idle Pitch and trim to maintain 65-70 KIAS and current altitude Turn base near 850 AGL, when aim point is 45 off your shoulder Wind will dictate when you turn base and final Evaluate approach and increase to 10 flaps when able on base and maintain 65-70 KIAS Turn final around 500 AGL, establish and hold centerline Add second notch of flaps on short final, based on altitude and distance to runway If a go-around is needed, be ready to react When entering ground effect, shift scan to end of runway
C-172 Maneuver Description Guide Slowly level the noseAllow the airplane to settle lower to the groundFlare upon decelerationMaintain centerline, gently lower nose wheel
C-172 Maneuver Description GuideIII. High WorkNote: High work is generally performed in one of the working areas away from KRGA at altitudes between 3,000 and5,000 feet. Traffic avoidance and the availability of emergency landing areas should be kept in mind during theperformance of maneuvers. Traffic calls should also be made at intervals to alert other airplanes of your location.Remember to always transit to the working area at 3,000’ MSL or above and maintain 2,500’ MSL when inbound tothe field.Clearing TurnsProcedures: Clear the airspace above, below and in front of other traffic, obstacles or hazards Done prior to each maneuver set Can be two turns with medium bank in the opposite direction or any combination of turns to clear the operating areaTurns Around a PointSet Up 1,000 AGL at 90-100 KIAS Visually clear the area, make a radio call if necessary Fly downwind heading with suitable landing fields available Pick a reference point (left or right) ahead and ½ mile off to the sideProcedure Abeam reference point begin turning with the relative steepest bank, maintain constant radius form the point Pick additional reference points ahead that ‘draw’ the desired ground track around the point Reduce the bank as necessary as the groundspeed decrease, increase the bank as groundspeed increases Crosscheck to maintain airspeed and altitude Roll out on the entry headingReminders: Visualize the ground track required Higher groundspeed higher radius of turn at constant bank Higher bank angle decrease radius of turn Stronger the wind greater bank varianceS-TurnsSet Up 1,000 AGL, VA, Clear the Area Fly downwind toward a road perpendicular to the flight pathProcedure Upon crossing the road, begin the relative steepest bank Semicircular turn back toward the road Cross the road, flying into the wind with a perpendicular flight path (to the road) Begin a turn in the opposite direction with the shallowest bank Make the semicircles uniform from one side to the other Roll out on the entry headingReminders: Visualize the ground track Higher groundspeed higher radius of turn at constant bank Higher bank angle decrease radius of turn Stronger the wind greater bank variance
C-172 Maneuver Description GuideSimulated Landing PatternNote: The Simulated Landing Pattern is not a maneuver found in the AFH or ACS, but is a common sense idea that allows thestudent to see how the airplane reacts to power changes and the addition/subtraction of flaps during every part of the landingpattern (at altitude), several times before actually practicing landings.Set Up No lower than 3,000’ MSL Airplane is oriented along a straight stretch of road or other feature to simulate a runway Maneuver is begun in the downwind at 90 KIASProcedure The procedure is essentially the same as the normal landing patter, except it is flown in one of the working areas at a higheraltitude Simulated radio calls can also be made Airplane is flown to an abeam position in the simulated downwind Pre landing checklist completed Reduce power to 1500 RPM, lower 10 of flaps 45 past the intended point of landing, begin turn to simulated base Lower 20 of flaps Begin turn to final and lower 30 of flaps Orient airplane on final with simulated runway off the nose, stable 65 KIAS approach profile While on final, with the airplane trimmed, make small pitch adjustments and note airspeed change; then note how airplanewill return to initial trimmed position Make power adjustments and note how rate of descent changes When directed by your instructor, execute a Go Around (full power, carb heat in, nose on the horizon, right rudder, flaps) The pattern can be repeated as many times as required by climbing back up to initial altitudeSteep TurnsSet Up No lower than 1500 AGL VA appropriate for weight Clear the Area Align with a visual reference point off nose, note heading and set heading bugProcedure Roll into 45 bank Add rudder to combat adverse yaw Add power, 200 RPM Trim off pressure Look outside to verify the correct sight picture If nose low, reduce angle of bank, increase pitch and then re-establish correct bank angle If nose high, increase bank angle and allow nose to fall to correct position 90% of scan should be outside, 10% inside; altimeter and VSI are primary instruments to scan Begin roll out about 25 ahead of turn Lower the pitch attitude back to starting attitude and roll out on original heading Steep turns are normally performed in sets of two; one 360 turn in each direction In Private Pilot training, the student pauses after the first turn, then begins turn in the opposite direction In Commercial Pilot training, the student will roll out of the first turn and immediately turn in the opposite direction Exit at entry point at same altitude/airspeed at which maneuver started, reduce power, retrim
C-172 Maneuver Description GuideSlow FlightSet Up Perform no lower than 1500 AGL Start from stable straight and level flight, with visual reference Clear the Area Pre landing checklist completedProcedure Reduce power to 1500 RPM to slow down Lower 10 of flaps when airspeed is below 110 KIAS Slowly pitch up to maintain altitude as airspeed slows Lower flaps to 20 , then 30 (when in white range on airspeed indicator) Continue pitching up and trim out control pressure As airspeed reaches 50 KIAS, which is the nearly the same sight picture as Vy, increase power to stabilize airplane (no climb ordescent) Trim out any control pressures and ensure the ball is centered Slow flight is performed at an angle of attack that is consistent with the following: Any increase in AOA, increase in loadfactor, or decrease in power will initiate a stall warning. (Note: This information is taken from the Private ACS.) For most of our 172’s, this is 48-50 KIAS, but focus should be on angle of attack, not maintaining a specific airspeed Change headings, using less than 10 bankReminders: High power, high AOA and low speed strong left tuning tendencies Awareness of operating on the ‘back side of power curve’ Slow Flight is normally performed prior to the Power Off Stall maneuverPower Off Stall and RecoveryNote: When first learning the Power Off Stall, it should be performed with the wings level with the simulated landing area directlyin line with the nose of the airplane. As you gain experience, the airplane may be banked (less than 30 angle of bank) to simulateentering the stall when turning from base to final.Set Up Recover no lower than 1500’ AGL Clear the area Student will have just completed Slow Flight maneuver and airplane will still be configured for Slow FlightProcedure Airplane will be in landing configuration (pre landing checklist, full flaps) and stable at 48-50 KIAS Look and visualize a simulated landing area such as a road or power line break off the nose Maintain alignment with that simulated landing area and lower the nose to assume final approach course profile, 65-70 KIAS Reduce power to 1500 RPM and allow airplane to stabilize in a 300-400 FPM descent When directed by your instructor, smoothly raise the nose slightly above the horizon and reduce the power to idle Recognize and announce symptoms of approaching stall Hold this nose attitude until the airplane stalls Recovery: Lower pitch/AOA; full power; level wings: carb heat off, right pedal Pitch nose back to the horizon, flaps to 20 Upon observing positive rate of climb, retract flaps to 10 , then fully retracted Climb to initial altitude; level off; set aircraft for cruiseKey Concepts: Practice both variations: Maintaining heading (before and during) or maintaining bank prior to stall Maintaining coordination will avoid a spin More elevator deflection is required as aircraft slow to maintain the stalling attitude
C-172 Maneuver Description GuidePower On Stall and RecoveryNote: Both the AFH and ACS state that the Power On Stall may be performed using a power setting that is less thanfull power to avoid an excessive nose high attitude during this maneuver. The only requirement is to use at least 65%of available power. For this reason, a power setting of 2200 RPM will be used in the Power On Stall. Additionally,the most plausible scenario for entering a Power On Stall is by over-rotating during the short field takeoff maneuver,so this maneuver should be practiced using a clean configuration as well as with 10 flaps, as it would be during ashort field takeoff.Set Up No lower than 1500 AGL (recovery included)Clear the areaPick a visual reference point if maintaining heading (High in windscreen or to the side of the window) or choose an angle ofbank to maintain.Maneuver may be flown in a clean configuration or with 10 flaps, such as when the short field takeoff is performedProcedure Reduce power to 1500RPM, Slow to VR 51 KIAS (short field takeoff)Announce rotation speed and intention to induce stallApply power to 2200 RPM, apply right rudder to maintain coordinationPitch up to maintain a slow, constant rate of decelerationRecognize and announce the signs of the approaching stallStay coordinated, maintaining bank or headingIf a cloud is available, use this outside reference to assist in maintaining coordinationFully stall aircraft and announce the breakRecover: Lower pitch/AOA and apply full powerLevel wings; pitch for VX or VY; accelerate to normal cruise speedRaise flaps, if requiredReminders: Maintaining coordination will avoid a spinMore elevator deflection is required as aircraft slow to maintain the stalling attitude
C-172 Maneuver Description GuideCommercial ManeuversLazy EightsSet Up Cruise configuration at Va Clear the area Choose 90 reference point off wing tip in direction of turn Maneuver can also be performed by flying perpendicular to a road or power line breakProcedure 0-45o: Gradually pitch up; begin banking slowly; maximum pitch up at the 45 point 45-90o: Gradually reduce pitch and stay coordinated; level pitch and 30 bank at 90 reference point 90-135o: Slowly begin roll out and reduce rudder pressure; max pitch down at 135 ; bank 15 135-18o: Continue to roll out bank, increase pitch to nose level by the 180 Roll out bank to reach wings level at 180. Repeat in opposite directionKey Points: Reference point picked before start Maneuver should be performed slowly and smoothly Control/ Rate Trends i.e. Effective when fast less rudder Ineffective when slow Lots of rudder, P-factor increasing/decreasingChandelleSet Up Clear Area Cruise configuration, Va Pick a 90 reference point, set heading bug off the reference pointProcedure0 to 90 Point Roll 30 bank, add full power, begin pitching up Maximum pitch up (about 12 ) at 90 point Maintain coordinated flight with rudder inputs throughout Maintain 30 bank90-180 Point Stop changing pitch; start reducing bank Wings level by the 180 point Roll out at 180 point, “just above stall speed” (ACS)180 Point Return to cruise flight with minimal loss of altitudeKey Concepts: Reduction in ASI/Climb power increase left turning tendency Most common errors are ball control and inadequate pitch, causing airspeed to be too high upon roll out
C-172 Maneuver Description GuideSteep SpiralSet Up Position airplane over specific point at 4000 AGL Clear the areaProcedure Power to idle Establish airplane in best glide profile (65-70 KIAS) and trim Maintain constant radius around selected point by varying bank according to groundspeed Maneuver requires three (3) full rotations Clear engine every 30 seconds by increasing throttle to 1700 RPMKey Concepts: Increasing GS Increasing bank Decreasing GS Decreasing bank Airspeed control is critical to maintain orientation around selected pointEights-On-PylonsSet-Up Cruise configuration, Va Establish estimated pivotal altitude Clear Area Fly downwind heading, pick 2 pylons ½ mile to left and right of nose perpendicular to flight path Have suitable emergency landing fields upwind of pylonsProcedure When close and perpendicular to pylon, make a 45 cut to one pylon When abeam the pylon, roll to visually line up the pylon and the wing tip reference point Use pitch to control pivotal altitude as ground speed changes and keep the wing reference on the pylon As ground speed decreases pivotal altitude decreases Stay ahead of the changing ground speeds Look ahead for the 2nd pylon Roll straight and level 30 past 2nd pylon, maintain S L until abeam Repeat on second pylon, keep an eye out for the 1st pylon Exit on entry headingKey Reminders: Maintain awareness of suitable emergency fields Division of attention and thinking ahead of the turn and required change in altitude Stronger the wind greater altitude variance
Instructors and students should also be mindful of how maneuvers will be evaluated on the Practical Exam. This information is clearly laid out in the Airman Certification Standards (ACS) for the Private Pilot or Commercial Pilot Practical Examination. It will be h
