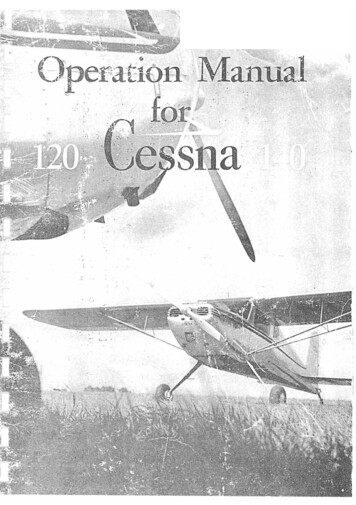
Transcription
i
CESSNA AIRCRAFT COMPANYP123-13-RPC-200-7/79iiPRINTED IN U.S.A.
PREFACEThis book has been prepared for you as an owner andoperator of Cessna 140 and Cessna 120 airplanes. It is writtenspecifically for you - to help you get the best out of yourairplane - for the longest period of time.Your Cessna is a product of the best in aircraft engineeringand production skill. The maintenance of the quality that is builtinto it will be assured by simple but necessary upkeep on yourpart. The purpose of this book is to acquaint you with thethings you should know - both in operation and care of theairplane.The book is divided into four basic sections. The firstconcern of the owner of any product is the operation of hisequipment. The first section, therefore, sets forth in Pilot„sCheck List form the basic data that have been developed asthe best operational methods for flying your Cessna. It is not acheck list in its true form as it is considerably longer, but itdoes cover briefly all of the points that you would want to orshould know concerning the operation of your airplane.Section two of the book sets forth the operation limitationsand performance data and should be of useful interest to thosedesiring the most in performance from their airplane.In the third section are set forth details and explanationsthat are necessary to avoid complicating the check list to thepoint where it loses its purpose. The fourth section is devotedto care of the airplane itself and covers your responsibilities tohelp it perform faithfully and economically the many hours offine flying that are built into it.1
2
SECTION I - OPERATING CHECK LISTThe flight and operational characteristics of the Model 120 and140 Cessna are normal in all respects. There are no “unconventional” characteristics or operations that need to be mastered. Allcontrols respond in the normal way in the entire range of operation ofthe airplane.A. BEFORE ENTERING THE AIRPLANE(1) Check oil level.(2) Make a visual check of the airplane.(3) Remove control locks, if installed.(4) On first flight of the day, drain a small (one-ounce) quantity offuel from fuel strainer drain to insure that no free water is in thefuel line.B. BEFORE STARTING THE ENGINE(1) Operate controls and make a rapid visual check for properoperation.(2) Make sure windshield is clean for maximum visibility.(3) Check brakes and set parking brake.(4) Adjust seat for comfort and distance to rudder pedals.(5) Fasten and check safety belt.(6) Check quantity of fuel (two gauges).C. STARTING THE ENGINE(1) Set carburetor heat to “cold“.(2) Set mixture control (if any) to “full rich“.(3) Set fuel tank selector to fullest tank. (Do not take off on lessthan 1/4 tank.)(4) If engine is cold (50 F or below), prime the engine as follows:Turn master switch “on“ (when using starter).Clear propeller.Make certain magneto switch is “off“ and throttle “closed“ thengive engine three or four strokes with the primer, as the engineis turned over by hand or by engaging the starter. (Ordinarilynot required except at winter temperatures.)3
OPERATING CHECK LIST(5) Turn magneto switches “on“.(6) Open throttle 1/8 (to idle position) and start engine by pullingstarter control or having propeller pulled through by hand.Note: In extremely cold weather a few strokes of the primer asthe engine fires will enable the engine to keep running. (Avoidover-priming.) After priming push primer all the way in and turnto locked position to avoid possibility of engine drawing fuelthrough the primer. Do not pull out on starter for a secondstarting attempt until engine has come to a complete stop fromthe first attempt. Failure to do this may result in damage to thestarting gear.D. WARM-UP AND GROUND TEST(1) Do not allow engine to operate at more than 800 r.p.m. for first60 seconds after starting. (Especially important in cold weatheras lubricating oil will be slow in circulating.) If oil gauge doesnot show pressure within 30 seconds after starting, stop engineand investigate. (Lack of oil pressure may cause seriousengine damage.)(2) Apply full carburetor heat.(3) After two to three minutes running at 800 r.p.m., open thethrottle gradually to 1200-1500 r.p.m. and allow to run for threeto five minutes or until engine is sufficiently warm for take-off.Warm-up may be accomplished during taxiing. Do not overheatthe engine by running engine at high speed while on theground. It is not necessary to run the engine until oil is “hot“; ifengine runs properly at full throttle and oil pressure is normal,you are ready for take-off.E. BEFORE TAKE-OFF(1) Apply toe brakes.(2) Set altimeter.(3) Set trim tab to “take-off“ position.(4) Check oil pressure - should show 30 to 40 Ibs. sq. in.(Minimum idling oil pressure - 10 Ibs. sq. in.)4
OPERATING CHECK LIST(5) Check engine magnetos at 1800 r.p.m. by opening the throttleand switching off separately each magneto momentarily. Dropof r.p.m. from 1800 r.p.m. should not exceed 50 r.p.m. on theright magneto or 75 r.p.m. on the left magneto. Switch to bothmagnetos before continuing.(6) Full throttle r.p.m. check is optional. Engine should runsmoothly and turn, with carburetor heat off, 1900 r.p.m. ormore with wood prop, and 2100 r.p.m. or more with metal prop.Engine should idle between 500 and 550 r.p.m.F. TAKE-OFF(1) Release brake.(2) For take-off use full throttle.(3) Turn carburetor heat “off.“(4) Heels on the floor.(5) Climb at full throttle. Best rate of climb airspeed 73 m.p.h.indicated. The engine will turn 2250 to 2380 r.p.m.G. CRUISING(1) Cruising r.p.m. 2400. (Do not exceed 2575 r.p.m.)(2) Trim airplane by adjusting elevator tab.(3) Oil pressure - 30-40 Ibs. sq. in.(4) Oil temperature - maximum 220 F.(5) Above 5000 ft. lean mixture as required to obtain maximumr.p.m. (If mixture control installed.)H. BEFORE LANDING(1) Set fuel valve to fullest tank.(2) Set mixture control full rich (if installed).(3) Apply full carburetor heat before closing throttle.(4) Suggested glide speed 65-70 m.p.h.(5) Use tab to relieve control wheel pressure when establishingglide.(6) Lower flaps as desired (do not lower flaps when indicatedairspeed is above 82 m.p.h.)5
OPERATING CHECK LISTI.AFTER LANDING(1) Raise flaps.(2) Normal glide and taxiing should cool engine sufficiently;however, if excessive amount of taxiing is necessary, allowengine to cool before cutting ignition by allowing to idle slowlytwo to three minutes.(3) Turn magneto switches “off.“ (Open throttle to avoid preignition when hot.)(4) Turn radio switch “off.“(5) Turn master switch “off.“ Be sure — otherwise your battery willrun down overnight.6
SECTION II - OPERATION LIMITATIONS*AND PERFORMANCE DATAOPERATIONS AUTHORIZED:Your Cessna 120 or 140, licensed under CAA type certificateNo. 768, is authorized for the following flight operations:Contact flight (day)- Model 120 and 140Contact flight (night) - Model 140 (Model 120 when equippedwith electrical system includingnavigation lights.)Instrument (night)(not for hire)- Model 140, equipped with two-wayradio, sensitive altimeter, turn and bankindicator, rate of climb indicator andclock with sweep second hand.The Model 120 or 140 may be operated for hire, beyond thethree mile radius from the airport, in the above categories whenequipped with one landing light and certificated flare installation.OPERATION LIMITATIONS:Engine Limitations: The Continental C-85-12 or C-85-12F engineis limited to a maximum engine speed of 2575 r.p.m.MANEUVERS:The Cessna Model 140 and 120 are designed to the Civil AirRegulations Part 04A set forth by the United States Government forairworthiness of aircraft of this type. The limit load factors for thisairplane are:LIMIT LOADS:Gross Weight 1450 lbs.CONDITION I OR IIICONDITION VHigh or Low Angle of Attack Inverted Flight 4.57-2.26CONDITION VIIFlaps Down 40 1.97The design load factors are 150% of the above and in all casesthe structure meets or exceeds design loads.*Your airplane must be operated in accordance with the CAA approved Airplane FlightManual. If there is any information in this section which contradicts die CAA approvedmanual, it is to be disregarded.7
OPERATION AND PERFORMANCE DATAAIRSPEED LIMITATIONS:The following are the certificated airspeed limits:LANDPLANESEAPLANE140 m.p.h.(red line)140 m.p.h.(red line)Level Flight or Climb115 m.p.h.(normal range marked withgreen arc, caution range markedwith yellow arc, 115 to 140 m.p.h.)105 m.p.h.Flap Extension and Operation(flap operating range markedby a white arc)82 m.p.h.Glide or Dive (smooth air)82 m.p.h.All airspeeds are true indicatedThe airplane is not designed for purely acrobatic flight. However,in the acquisition of various certificates by the pilot owner such asprivate pilot, commercial pilot, instrument pilot and flight instructor,certain maneuvers are required by the CAA. All of these maneuversare permitted in the Cessna 140 and 120.In connection with the above the following maneuvers may beperformed:Recommended Entry Speed(1) Steep Turns(2) Spins(3) Stalls (except whip-stalls)90Use power to enter-(4) Lazy Eights100(5) Chandelles100Spins with flaps down are prohibited due to the fact that recoverycannot be made without exceeding flap design speeds. Acrobaticsthat may impose high inverted loads should not be attempted. Theimportant thing to bear in mind in flight maneuvers is that the Cessna140 and 120 Models are exceptionally clean in aerodynamic designand will build up speed quickly with the nose down. Proper speedcontrol is an essential requirement for execution of any maneuverand care should always be exercised to avoid excessive speed whichin turn can impose excessive loads. In the execution of allmaneuvers avoid abrupt use of controls.8
OPERATION AND PERFORMANCE DATAWEIGHT AND BALANCE:The safety of an airplane is directly affected by its weight andbalance simply because the airplane was designed for a certain limitload and balance condition. The weight and balance limitations forthe 140 and 120 are as follows:GROSS WEIGHTLIMITCENTER OFGRAVITY LIMITSLandplane1450 Ibs.Seaplane1556 Ibs.Landplane 13.5 aft of datum to 17.7 aft of datumSeaplane 13.7 aft of datum to 17.5 aft of datumThe horizontal datum is the leading edge of the wing withmeasurements considered (aft) and - (forward) of this line.To level the airplane during weighing, use the top edge of thefuselage skin sheet aft of the door.A weight and balance report is furnished with each airplanewhich gives the weight and balance of that particular airplane. Also,an equipment list is furnished with the airplane which shows weightsand arms for various equipment and accessory items.The installation of any combination of these accessory items asoriginal equipment has been approved by the CAA. Calculationsshow that a 120 or 140 having an empty weight center of gravitybetween the limits of 12.2“ to 14.5“ (the empty weight e.g. of yourairplane appears on the weight and balance form with your airplane),the following equipment may be added or removed withoutexceeding the permissible gross weight center of gravity limits:9
OPERATION AND PERFORMANCE DATAACCESSORY ITEMSFixed pitch metal propeller (McCauley 1A90)22 lbs.Landing light (Grimes G-3602 or D-3040A)6 Ibs.Maguire radio receiver5 Ibs.Cabin heater4 Ibs.Loudspeaker installation3 Ibs.Co-pilot brake pedals2 lbs.Carburetor mixture control1 Ib.Radio shielding2 lbs.Fixed antenna1 Ib.Electrical System (Model 120)53 Ibs.General Electric AS1B radio13 lbs.Sensitive altimeter1 lb.Turn and bank indicator2 Ibs.Rate of climb indicator1 Ib.Clock1 Ib.(Installations must be equivalent to approved installations.)As the above outlined alterations do not affect the basic loadingconditions of the airplane; as their effect on structure, powerplantoperation, airworthiness and flight characteristics have been checkedand approved by the CAA; and as they are accomplished byelementary installation or removal operations, they can beconsidered minor alterations. As such, a suitable entry should bemade in the appropriate log book signed by the installing mechanic,and no formal CAA approval is necessary.Equipment changes other than those listed above will require acheck of weight and balance. Your Cessna distributor or dealer hasexperienced personnel to assist in the calculation or preparation ofweight and balance data.The actual loading of the airplane is up to the pilot. 1450 lbs.gross weight is not to be exceeded — and the useful load in theairplane can be distributed in any way the pilot desires, that is, inbaggage (up to the baggage compartment placard limit), gasoline, orpassenger load. These are all variables including the pilot„s weight,and of course, baggage may be carried in the passenger‟s locationinstead of a passenger. It is the responsibility of the pilot andoperator to see that the weight and balance are within limitations.10
OPERATION AND PERFORMANCE DATAOPERATIONAL DATA:PERFORMANCE INFORMATIONThe following operational data are compiled from actual testswith airplane and engine in good condition and using average pilotingtechnique. Data are based upon a gross weight of 1450 Ibs. withstandard Sensenich 74FK-49 propeller installed, and apply to both120 and 140 models. Performance figures are for zero wind velocityand hard surface level runway. Speeds arc true indicated airspeeds.AirspeedCalibrationIndicatedTrue Indicated404660658083100100120116140133OUTSIDE AIR TEMPERATURE0 F 20 F 40 F 60 F 80 F 100 FTake 0ff DistanceSea Level 465 530 594 663 728795(Ground Run in Feet)2000 Ft.600 689 761 842 923 1004Airspeed 50 MPH Takeoff 4000 Ft.760 857 956 1054 1152 1250Full Throttle, Flaps Up6000 Ft.980 1101 1222 1243 1464 1585Take Off Correction: Reduce above distances 10% for each 5 MPHWind Velocity.ITEMALTITUDELanding Distance(Ground Run in Feet)Approach at 70 MPHFlaps UpSea Level2000 Ft.4000 Ft.6000 2365422500569398460542616Normal Rate Climb(Feet Per Minute)Flaps UpFull ThrottleStalling SpeedM.P.H. T.I.A.S.AIRSPEED302 332362Landing DistanceSea Level 212 242 272252 286 320354 388422(Ground Run in Feet)2000 Ft.Approach at 70 MPH302 341 380419 4584974000 Ft.Flaps Down352 396 439483 5275706000 Ft.Landing Correction: Reduce above distances 10% for each 5 MPH WindVelocity.81797674Sea Level2000 Ft.4000 Ft.6000 Ft.740660555455ConditionPower 0ff; Flaps UpPower 0ff; Flaps DownPower On; Flaps UpPower On; Flaps 30570495395300Angle of Bank Degrees0 20 40 60 4950566945465265404146573738435211
OPERATION AND PERFORMANCE DATACLIMB:The rate of climb and speed for best climb at various altitudes forgross weight of 1450 Ibs. and equipped with wooden Sensenich74FK-49 propeller is given in the table below:SeaAttitude (ft.)LevelBest Climb Speed(T.I.A.S.)81Rate of Climb(ft./min)6402500‟5000‟7500‟10,000‟ 12,500‟ 15,000‟78757269645755045036026017070(1) Density altitude.(2) Gross weight 1450 with 74FK-49 propeller.The above table is for standard conditions.CRUISING:The following approximate cruising information is applicable ataltitudes from sea level to 10,000 ft. It is based on total usable fuelwith no allowance for reserve:R.P.M.Max. ecommended r.5.95.34.84.54.24.0NOTE Cruising performance is dependent upon carburetor metering characteristics,engine and propeller condition, and turbulence of the atmosphere in addition to thecontrollable variables r.p.m., altitude, gross weight, etc. These undeterminate variablesmay account for variations of 10 per cent or more in the maximum range. The variationin range due to normal changes in gross weight and altitude is within this 10 per centvariation and in order to make the cruising data as readily usable as possible it ispresented in this simplified form, using average values for altitude, gross weight, drag,carburetor and engine characteristics.12
SECTION III — OPERATING DETAILSThe following paragraphs cover in somewhat greater detail theitems entered as a Check List in Section I. Every item in the list is notincluded.CLEARING THE PROPELLER:“Clearing“ the propeller should become a habit with every pilot.Making sure no one is near the propeller before the engine is startedshould be a positive action. Yelling “clear“ in loud tones is best. Ananswering “clear“ from ground crew personnel is the response that isrequired.ENGINEOil Level: The oil capacity on the Continental C-85 is four andone-half quarts. The quantity can be checked easily by raising thehood on the right side and reading the quantity in the sump directlyon the stick attached to the oil tank cap. In replacing the cap, makesure that it is on firmly and turned all the way to the stop at the rightto prevent loss of oil through the filler neck.Figure 1 — Continental 85 Engine Installation13
OPERATING DETAILSFuel Strainer Dram: The fuel strainer drain is a valuableaccessory. It provides a quick simple method of draining any waterthat might have collected in the fuel line. It is located just ahead ofthe firewall and is easily accessible by reaching in the bottom rearopening of the cowl. A quarter turn is all that is necessary. Make surethat the valve is closed before leaving it. The valve is spring loaded;allow it to snap closed to insure seating.Figure 2 — Seat Back Adjustment — TopFigure 3 — Seat Back Adjustment — Bottom14
OPERATING DETAILSCABINSeat Adjustment: The seat back hinges at the bottom to provideeasy access to the baggage compartment. The seat back also offersfour fore and aft points of adjustment both at the bottom and top.Normally, while one person operates the airplane the correct seatadjustment can be determined at the outset and no furtheradjustment is necessary. Adjustment is accomplished on the bottomby pulling in the spring loaded pin on the seat, the fixed pin can thenbe placed in the desired hole and die spring loaded pin inserted inthe hole on the other side. The top adjustment is accomplished in theslotted recesses using the same handle that is used to open the seatback for access to the baggage compartment.PARKING BRAKE:The parking brake control is operated in conjunction with the toebrake and is a part of the master brake cylinder. In setting theparking brake, first press the toe brake to the desired brake pressurethen pull the control out to engage locking lever and release the toebrake pressure. To release the brake press parking brake control in,apply pressure to the brake pedals and then release them.FUEL SYSTEM:The quantity of fuel should be checked before each flight. Thereare two 12½ gallon tanks, one in each wing with direct reading gasgauges in the cabin at the wing root. A good precaution is tophysically check the fuel quantity in die tank and security of tankcaps before entering the airplane. The fuel system is showndiagrammatically in Figure 4. The fuel is brought to the engine bygravity flow through aluminum alloy tubing which runs aft of the cabindoor post beneath the doorsill and across to the center of the shipwhere the two lines connect to the tank selector valve. A single fuelline runs forward from the selector valve to the fuel strainer on thefirewall and thence to the carburetor. Fuel may be drained at the fuelstrainer. The fuel tank selector valve provides fuel flow from eitherthe right tank or the left tank and provides a shut-off for both tanks.The selector valve cannot be set to provide fuel flow from both tankssimultaneously. Important — The fuel valve handle indicates thesetting of the valve by its position above the valve dial.15
16Figure 4 — Fuel System
Figure 5 — Fuel Tank Selector ValveMIXTURE CONTROL:If installed as optional equipment, the mixture control is to bealways set at “full rich“ for starting and take-off purposes. Pulling outon the control leans the fuel mixture. The mixture control is not adevice for cutting down fuel consumption but rather a device forobtaining better engine operation and performance at altitudes above5000 feet. The mixture control should be used cautiously to leanmixtures to give maximum engine r.p.m. when flying above 5000 feetpressure altitude. Too lean a mixture will cause excessive engineheating and result in damage.THE PRIMER:The primer ordinarily is not required except at wintertemperatures. It is used to supply an initial charge of raw fuel to thecylinders to aid in starting the engine. To operate, first unlock theplunger by pressing in and at the same time turning the knob to theleft, then slowly pull the plunger all the way out and then push theplunger all the way in. This action is termed “one stroke of theprimer.“ Make sure that the magneto switch is “off“ and throttle“closed,“ then give the engine three or four strokes with the primer asthe engine is turned over by hand or by engaging the starter.17
OPERATING DETAILSCARBURETOR AIR HEAT:The carburetor air heat control is located on the instrumentpanel. The push-pull control operates the butterfly valve in thecarburetor air intake which proportions the hot and cold air enteringthe carburetor. To provide heated air for the carburetor, pull out thecontrol; to provide only cold air for the carburetor, push the control inall the way. Carburetor ice can form on the ground with the engineidling, therefore, just before take-off when you run the engine andtest the magnetos be sure and have the carburetor heat in the “on“position. Leave it in that position until you open the throttle for thetake-off run. Then move carburetor heat to the cold air position. Thisgives maximum power for the take-off. Then watch engine for anyindications of ice (roughness or loss of r.p.m.) during climb and applyfull carburetor heat if engine begins to ice. The correct way to usecarburetor heat is to first use full heat to remove any ice that isforming. By trial and error determine the minimum amount of heatrequired to prevent ice forming each time removing any ice that isformed by applying full heat. On each subsequent trial, increase theamount of heat applied until no ice forms. On approach glide justbefore reducing power apply full carburetor heat and leave in full hotair position.CABIN AIR HEAT:The cabin air heater (and cold air intake) control, if installed asoptional equipment, is located on the instrument panel. The push-pullcontrol operates to open the heater valve allowing fresh warm air (orcold air if the heater muff is not installed) to enter the cabin when thecontrol is pulled out. Intermediate positions of the control may beused as desired.MASTER SWITCH:The master switch operates the solenoid switch located at thebattery turning on all electrical power at the battery. In the event of ashort or a malfunctioning of the airplane electrical system, the masterswitch may be turned off and the engine will continue to run on themagneto ignition system.MAGNETO SWITCHES:The two magneto switches are either toggle switches located onthe panel or are operated with a key. The panel placards indicate theright and left magnetos. The switches operate to ground out theindicated magneto when the switch is turned off.18
Figure 6 — Instrument Panel, Pilot‘s SideTURN AND BANK:The turn and bank indicator, if installed as optional equipment, isan electrically operated unit which operates when its switch on theinstrument panel is placed in the “on“ position.NAVIGATION LIGHTS:The navigation light switch is located on the instrument panel andcontrols the wing lights, rudder light, and the instrument panel lightsin the Model 140. The later model of the 140 has an independentrheostat switch for the panel lights located on the bottom edge of theinstrument panel just right of center. A word of precaution isworthwhile here. Prior to installation of the rheostat the instrumentpanel light bulbs used were Grimes T 3¼-3 CP having a rating of .33amperes each. The bulbs used with the rheostat are G. E. No. 1826having a .12 ampere rating. The earlier model bulbs have highenough ampere capacity to allow the rheostat to get too hot withpossible burning out of the unit. Make sure when replacing19
OPERATING DETAILSinstrument panel bulbs that the correct bulb is used as they will bothgo into the same socket. The model number of the bulb is marked onthe base. The electrical System is available as optional equipment onthe Model 120, but does not include the instrument panel lights.LANDING LIGHTS:The landing light switch or switches are located on the instrumentpanel if a landing light or landing lights are installed as optionalequipment. The landing light switch controls both the extension andretraction of the light and also the turning off and on of the light, itself.When the switch is on, the lights will extend to the proper positionand then turn on. If it is desired to turn off the light it is onlynecessary to place the switch in the “up“ position and partially retractit. The light may then be turned back on by, placing the switch in the“on“ position again. When desired to retract the lights, the switch isplaced in the “up“ position which turns off the light and retracts it.FUSES:Fuses for the various electrical devices are located beneath theelectrical switches under the edge of the instrument panel. The fusecircuit and fuse capacity is indicated above the respective fuseretainers. Fuses may be removed by unscrewing the fuse retainersand lifting out the fuse. Spare fuses are located in a clip on the insideof the glove compartment door on the 140 and beneath right handside of panel for 120.CIGAR LIGHTER:The cigar lighter, if installed as optional equipment, is located onthe instrument panel. Push the lighter all the way in to heat theelement and release. The lighter will pop part way out whensufficiently heated. When replacing lighter in holder press only partway in.ELEVATOR TRIM TAB:The elevator trim tab is an auxiliary movable control surfacelocated on the trailing edge of the elevator. It is used to relievecontrol wheel pressures during flight. The tab is controlled by rotatingthe tab control wheel located vertically just at the edge of the seatbetween the pilot and passenger. The tab indicator adjacent to thewheel shows the relative position of the tab.20
Figure 7 — Fuse Retainer, Method of Fuse ReplacementFigure 8 — Cabin, interior, Flap Handle Raised21
OPERATING DETAILSForward movement of the wheel trims nose down and vice versa.This allows the airplane to be trimmed to fly level for a wide selectionof load and speed conditions.FLAPS:Flaps installed only on the 140 are raised or lowered with the flaphandle located between the pilot and the passenger. Flaps may belowered or raised during normal flying whenever the airspeed is lessthan 82 m.p.h. Intentional spinning with “flaps down“ is prohibited.The flaps supply some added lift and considerable drag; the resultingaction steepens the glide of the airplane enabling the pilot to bringthe airplane in over an obstruction and land shorter than could bedone without flaps. Forward speed of the airplane is only slightlyaffected by the action of the flaps.For unusually short fled take-offs the application of full flapsFigure 9 — Wheel and Brake Installation22
OPERATING DETAILSwill be of assistance, applied just before the airplane is ready to leavethe ground. The flaps should not be released until an altitude of atleast 100 feet above the highest obstacle has been obtained.BRAKES:The hydraulic brakes are individually operated. The rudderpedals are pivoted so that braking action is applied by pressure withthe toe on the rudder pedal to either or both wheels.TAXIING:Taxiing is facilitated by the use of a steerable tail wheel which iscable connected to the rudder. The steerable tailwheel is standardequipment on the Model 140 and optional on the Model 120. Thetailwheel is steerable through approximately 66 to either side of thestraight rearward trailing position and automatically becomes fullswiveling when turned to a greater angle. The airplane may thus beturned about in its own length, if desired, yet is fully steerable whiletaxiing. By using the steerable tailwheel and by keeping the heels onthe floor, excessive heat and unnecessary wear of the brakes can beavoided. The heels on the floor precaution applies also to take-offand landing procedure.TAKE-OFF:The shortest take-off run can be obtained by keeping the tail lowduring the whole procedure. The tab can be set to assist in this. Withthe tail just a little off the ground the wings begin to provide liftquickly. The airplane “breaks ground“ at 40 m.p.h. and acceleratesrapidly with complete control. From this point the best rate of climbcan be easily established at 73 m.p.h. For a long climb at full throttle80 to 90 m.p.h. is recommended.GROUND HANDLING:Proper tie down and ground handling (for instance, pushing andpulling the airplane around on the ground) are necessary if theairplane is to remain always airworthy.Sufficiently strong (700 Ibs. tensile strength) ropes fastened tosuitably set tie down rings in the ground are required as shown inFigure 11 to properly fasten the airplane and prevent strong gustywinds from damaging the airplane. Also as mentioned in the fore partof the book, adequate measures must be taken to insure that the23
Figure 10 — Use of Seat Belt as a Control LockFigure 11 — Suggested Tie Down Procedure24
OPERATING DETAILSflaps, ailerons and empennage will not be damaged in a high wind.Install the control lock.Flaps are held in the up or “closed“ position by springs. Toprevent damage to surfaces, a surface control lock should beinstalled between the flap and the aileron on both right and left wingpanels when the airplane is tied out in strong, gusty winds.When moving the airplane about push at the root front edge ofthe stabilizer at the fuselage and at the landing gear or the strut rootfitting. Do not lift the empennage by the tip of the stabilizer; likewise,do not shove sidewise on the
in the acquisition of various certificates by the pilot owner such as private pilot, commercial pilot, instrument pilot and flight instructor, certain maneuvers are required by the CAA. All of these maneuvers are permitted in the Cessna 140 and 120. In connection with the above the foll