Transcription
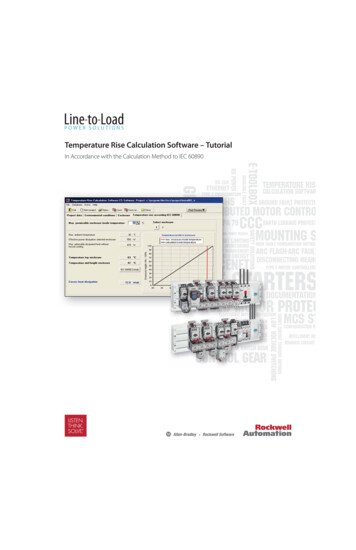
Temperature Rise Calculation Software – TutorialIn Accordance with the Calculation Method to IEC 60890
Temperature Rise Calculation Software (TRCS)Rockwell AutomationAll rights reserved. No parts of this work may be reproduced in any form or by any means – graphic, electronic or mechanical,including photocopying, recording, taping or information storage and retrieval systems – without the written permission ofthe publisher. Products that are referred to in this document may be either trademarks and/or registered trademarks of therespective owners. The publisher and the author make no claim to these trademarks. While every precaution has been taken inthe preparation of this document, the publisher and the author assume no responsibility for errors or omissions, or for damagesresulting from the use of information contained in this document or from the use of programs and source code that mayaccompany it. In no event shall the publisher and the author be liable for any loss of profit or any other commercial damagecaused or alleged to have been caused directly or indirectly by this document.
Table of ContentsPageChapter 1Temperature Rise Calculation Software (TRCS) – Tutorial1.1Chapter 2The Tutorial Project . . . . . . . . . . . . . . . . . . . . . . . . . . . . . . . . . . . . . .2Start with Your First TRCS Project2.1“Environmental Conditions” Tab . . . . . . . . . . . . . . . . . . . . . . . . . . .62.2“Enclosure” Tab. . . . . . . . . . . . . . . . . . . . . . . . . . . . . . . . . . . . . . . . .82.3Evaluation of Power Loss . . . . . . . . . . . . . . . . . . . . . . . . . . . . . . . . .92.3.1Import a Components List Generated with MCS Star. . . . . . . . . . 102.3.2Add Additional Components . . . . . . . . . . . . . . . . . . . . . . . . . . . . . 122.3.3Add Power Conductors . . . . . . . . . . . . . . . . . . . . . . . . . . . . . . . . . 142.3.4Review the List of Components . . . . . . . . . . . . . . . . . . . . . . . . . . . 152.42.4.12.52.5.12.6“Temperature Rise According to IEC 60890” Tab . . . . . . . . . . . . . 16Measures to Take in Case of Heat Dissipation Excess . . . . . . . . . . 18“Result Cooling Heater” Tab . . . . . . . . . . . . . . . . . . . . . . . . . . . . 19Enclosures Made from Different Materials, k-value . . . . . . . . . . . . 19Viewing and Printing Reports . . . . . . . . . . . . . . . . . . . . . . . . . . . .20Conclusion . . . . . . . . . . . . . . . . . . . . . . . . . . . . . . . . . . . . . . . . . . . . . . . . . 21
Chapter 1Temperature Rise Calculation Software (TRCS) – TutorialThis tutorial will help you become familiar with the TRCS Temperature Rise CalculationSoftware. It will lead you through a sample project.Please consider this document as complementary information to the Help file and theUser Manual, where you will find detailed information about particular topics.1.1 The Tutorial ProjectIt is strongly recommended to work through the MCS Star Tutorial first. By completing theMCS Star tutorial, you will generate a small, versatile busbar assembly project with variousstarters types and loadfeeders.MCS Star provides an “Export” function which generates a kind of “reduced” Bill of Material,containing only components which will contribute to the temperature rise in the panel,including their operating current. The component’s power loss data for a wide range ofRockwell Automation products are provided in a database within TRCS.For more information about the temperature rise calculation model consult the Help file,User Manual and the standard IEC 60890.We will use the data exported from MCS Star in this Tutorial.2
Chapter 2Start with Your First TRCS ProjectStart the Temperature Rise Calculation Software (TRCS).In the startup window, select the [ New Project ] button.Enter the name of the project, then select the [ OK ] button.Select the menu item “Databases/Person in charge”.3
Start withYour First ProjectIn the following window, select the [ Add Dataset ] button, then enter your personal datainto the new row.(continued)In the “Project data” tab, enter the customer data per the example below.Select the4button in the “Person in charge” section.
Start withYour First ProjectIf the data for “Customer” and “Person in charge” is already entered, it can be retrieved from thedatabase by selecting thebutton in the corresponding area.(continued)Newly entered or amended data can be stored in the database by selecting thebutton.The data entry in the “Project data” tab is now complete. Please save your work before you goforward to the next tab.Notes: If you want to save intermediate steps or multiple versions of a project, select the[Save as.] button and save it under a new filename. The program creates the sample project file name “Example” every time you start TRCS.If you want to save changes on the “Example” project, select [Save as.] and enter anew file name.5
2.1“EnvironmentalConditions” TabBefore you enter the environmental conditions, you may want to change some program settings,like units of measure or temperature. Select the menu option “Extra /Settings.”Make your changes and select the [ OK ] button.Notes:Rockwell Automation provides enclosure databases from multiple suppliers with the software. However,if your preferred supplier is not included or if you have some custom enclosure sizes, you can create yourown enclosure database.The component database provided with the software contains nearly 1,900 records, representing morethan 15,000 individual Rockwell Automation components with their power loss data. If you regularlyneed some additional products, just create your own User Components Database.6
2.1“EnvironmentalConditions” TabNow enter the data in the “Environmental conditions” tab as shown below.Note: Calculations in accordance with IEC 60890 assume that the enclosures are not aff ected by anysources of radiation (ovens, sun).(continued)Maximum ambient temperatureThe maximum ambient temperature is required for the calculation of the inside temperature,which is the product of the ambient temperature and the temperature rise caused by the powerdissipation of the installed devices, conductors and busbars.Altitude of the locationIf the altitude of the location it is more than 1000 m above sea level, it needs to be considered forfilter fan sizing.The efficiency of a filter fan is inversely proportional to the air density. Assuming a heatdissipation in excess of 60 W (as in our tutorial project), the required air flow changes,depending on the altitude as follows:AltitudeRequired Air flowSea Level7.9 m31,500 m8.9 m33,000 m10.0 m3Enclosure stands outsideIf the enclosure is installed outside, the radiation’s effect is higher, because of increased airmovement on the surface. Approximately, a factor of 2 is used for calculations.7
2.2“Enclosure” TabAlthough we don’t use all the options in this Tutorial Project, the following illustration providesa short explanation of all the options in this tab. For more detailed information, refer to theUser Manual or the Help file.The enclosure dimensions are required for calculating the temperature rise.Choose “Select from database” and select the [ Select Enclosure ] button. Then pick thefitting enclosure from there. Select the manufacturer, the enclosure line and then the modelnumber/size, then select the [ OK ] button. To sort the enclosures in a particular order, clickon the column title.8
2.2“Enclosure” TabIn our Tutorial Project, we want to enter the dimensions manually. Configure your enclosure asin the screen shot below:(continued) Number of enclosures: 1 Enter the dimensions manually: W 1,000, H 1,400, D 400 mm Configure the type of installation: rear face covered, all other surfaces freeNote: The term “covered” means the enclosure surface is against another structure such as the wall ofthe building or another enclosure.2.3 Evaluation ofPower LossThere are three possibilities to enter or to calculate the power loss:1. If known, enter the power loss manually. Example: There is only one big drive in one panel.2. From temperature measurements. Example: There is an existing panel and tests show thatthe inside temperature exceeds the limits. TRCS can help to evaluate the required measuresto be taken (e.g. openings, ventilation or cooling fans) to meet the requirements.3. Evaluation by use of the power loss data of the individual components and conductors.In this Tutorial Project, we want to use method 3. Usually, this can be time consuming if apanel contains a lot of different components with different operating currents. But with thismethod, the software provides the capability to import component lists we have generatedwith MCS Star. Of course, some additional components and the power conductors still needto be entered or selected manually.9
2.3.1Import aComponents ListGenerated withMCS StarNext, select the [ Evaluate ] button. In the window “Evaluate Dissipation for Enclosure 1” select [ Import MCS Star ] Enter or select the filename of the DBF file you have exported before from MCS Star Select the [ Import ] buttonNote:TRCS does a look-up in the Rockwell Automation Components database. The power-lossdata for all components are stored there as follows: P0 Constant losses (e.g. power supply, contactor coils) P1 Losses proportional to the current ( I; e.g. power semi-conductors) P2 Losses proportional to the square of the current ( I2; e.g. conductors, fuses,contact systems) Iref Reference current for P1 and P2 (current where P1 or P2 occur)10
2.3.1Import aComponents ListGenerated withMCS Star(continued)If one or more components are not found in the “Components database”, the particularrows appear highlighted in yellow. This will make the user aware of a need to enter thedata manually.Determine the constant losses and the losses proportional to the current and enter them in thecorresponding fields below the table (previous picture).For more information about the temperature rise calculation model consult the Help file,User Manual and the Standard IEC 60890.Select the [ Add to Project ] button.The list of components will now populate in the in the “Evaluate Dissipation.” window.Note: By default, TRCS calculates with a reduction factor of 80% for all loads imported fromMCS Star. For more information about the Reduction Factor consult the Help file or theUser Manual.11
2.3.2Add AdditionalComponentsNow we want to add a 400VA control transformer. This product is not in theRockwell Automation Components database, so we have to add it as a specificcomponent manually.Note: If it is considered to be a recurring product, it would make sense to save it in theUser Component database. For more information about the User Component database seeUser Manual or Help file.Select [ Specific components ], then select “Add new dataset”. Fill in at least the Englishdescription and the value of 45 W for Constant losses. Select the [ OK ] button.From the Components database, we want to add a fuse holder and a busbar module toprotect the control transformer supply. Expand the “Rockwell Automation” folder, expandthe “Miniature Circuit Breakers, Fuse Bases” folder and select 140F Fuse Bases.The next picture shows the selection of the fuse holder. Highlight the desired fuse holder andselect [ Add selected component to project ] or just double-click on the desired component.Select in the same way a 141A-GS45RR25 busbar adapter from the “Mounting System”product group.12
2.3.2Add AdditionalComponentsNow select again [ Specific components ], then select “Add New Dataset” and add two CCfuses, 3 A. Enter the parameters as shown in the picture below and select the [ OK ] button.(continued)The newly added components appear at the end of the components table. Now enter thequantities and the operating current as shown in the next picture.The transformer is considered to run at constant power loss, so the Operating Current isnot required.Because we considered constant power loss and a Service Factor of 100 %, we do not apply aReduction Factor to the transformer and its supply circuit.13
2.3.3Add PowerConductorsNow we need to add the power conductors for the supply line and all the loads to the list.Consider an average conductor length of 1.5 m (just the length internal to the panel is to beconsidered) and select the wire sizes according to the required standard.The size of the supply line is 350 MCM (this information is provided from MCS Star as well).Select the [ Busbars/Conductors ] button and select “Add new dataset”.Select the “Conductor” option under “North America”. Select 350 MCM and a length of1.5 m. Then select the [ OK ] button.Add all the other power conductors according to the picture below as you did the supplyconductors above. Enter quantities, operating currents and the standard reduction factor of 80%.It is recommended to consolidate the conductors for identical loads, as shown in the picture.Note: The busbars, their operating currents and lengths were provided by MCS Star.14
2.3.4Review the Listof ComponentsThe number of components and conductors, as well as the operating current (if it does notcorrespond to the reference current displayed) and a reduction factor, if any, must be entered intothis list.The components imported from MCS Star usually don’t need to be changed, except when moreaccurate information about the Reduction Factor is known.The component’s total power loss, taking into account the quantity, the operating current andthe reduction factor, is shown in the right-hand column of the row.In this Tutorial Project, let’s assume that the components imported from MCS Star and theirassigned data are correct, so you just have to review the manually added components andconductors according the list below:The total power loss of all components in the active enclosure is displayed in the bottom lefthand corner of the window. Selecting the [ OK ] button will accept this value as the activeenclosure’s effec
Enclosure stands outside If the enclosure is installed outside, the radiation’s eff ect is higher, because of increased air movement on the surface. Approximately, a factor of 2 is used for calculations. “Environmental Conditions” Tab (continued) Altitude Required Air fl ow Sea Level 7.9 m3 1,500 m 8.9 m3 3,000 m 10.0 m3
