Transcription
Patch ManagementGetting Started GuideMarch 23, 2022Verity Confidential
Copyright 2018-2022 by Qualys, Inc. All Rights Reserved.Qualys and the Qualys logo are registered trademarks of Qualys, Inc. All other trademarksare the property of their respective owners.Qualys, Inc.919 E Hillsdale Blvd4th FloorFoster City, CA 944041 (650) 801 6100
Table of ContentsAbout this Guide .4About Qualys . 4Qualys Support . 4Patch Management Overview. 5Patch Management Process Workflow . 5Patch Management features . 6User Roles and Permissions . 6Installing Cloud Agents on Assets. 8Downloading Installer . 9Activating your agents for PM . 12Enabling PM in a CA configuration profile . 12Managing PM Licenses . 13Using Tags to Grant Access to Assets. 14Creating Assessment Profiles for Windows Assets. 16Reviewing Missing and Installed Windows Patches.17Downloading Patches from the Vendor Site . 19Deploying Patches Jobs on Windows Assets. 20User Scenario: Deploying security patch jobs for Microsoft . 20Using QQL to Automate Patch Selection for Windows Jobs .25User scenario: Installing critical patches for Chrome and Internet Explorer . 25Uninstalling Patches from Windows Assets .28User Scenario: Uninstalling older version of Internet Explorer browser . 28Deploying Patches Jobs on Linux Assets .33User Scenario: Deploying security patches for RHEL assets . 33Reviewing Job Results.37Exporting Patch Data for Windows Assets .39How to Export Patch Data? . 39Verity Confidential
About this GuideAbout QualysAbout this GuideWelcome to Qualys Patch Management! We’ll help you get acquainted with the Qualyssolutions for patching your systems using the Qualys Cloud Security Platform.About QualysQualys, Inc. (NASDAQ: QLYS) is a pioneer and leading provider of cloud-based security andcompliance solutions. The Qualys Cloud Platform and its integrated apps help businessessimplify security operations and lower the cost of compliance by delivering criticalsecurity intelligence on demand and automating the full spectrum of auditing,compliance and protection for IT systems and web applications.Founded in 1999, Qualys has established strategic partnerships with leading managedservice providers and consulting organizations including Accenture, BT, CognizantTechnology Solutions, Deutsche Telekom, Fujitsu, HCL, HP Enterprise, IBM, Infosys, NTT,Optiv, SecureWorks, Tata Communications, Verizon and Wipro. The company is alsofounding member of the Cloud Security Alliance (CSA). For more information, please visitwww.qualys.comQualys SupportQualys is committed to providing you with the most thorough support. Through onlinedocumentation, telephone help, and direct email support, Qualys ensures that yourquestions will be answered in the fastest time possible. We support you 7 days a week,24 hours a day. Access online support information at www.qualys.com/support/.4
Patch Management OverviewPatch Management Process WorkflowPatch Management OverviewQualys Patch Management provides a comprehensive solution to manage vulnerabilitiesin your system and deploy patches to secure these vulnerabilities as well as keep yourassets upgraded. The Qualys Vulnerability Management, Detection, and Response (VMDR)module enables you to discover, assess, prioritize, and identify patches for criticalvulnerabilities. The Patch Management module helps you save time and effort byautomating patch management on Windows and Linux assets using a single patchmanagement application. It provides instant visibility on patches available for your assetand allows you to automatically deploy new patches as and when they are available.The Windows Cloud Agent downloads the required patches from external sources.However, patches that require authentication cannot be downloaded by the agent. Youcan manually download and install such patches on the assets. Qualys PatchManagement will then identify these patches as installed. The Linux Cloud Agent accessthe patches from the YUM repository and deploys the patches to the Linux assets in PatchManagement.Note: Qualys Patch Management 1.5 supports Linux assets for Patch Management.Qualys Subscription and Modules requiredYou would require Patch Management (PM) module enabled for your account.System supportPatch Management supports installing patches on Windows and *Linux systems.Note: * Currently, you can deploy patch jobs only on Linux assets for RHEL version 6, 7, 8,CentOS 6 and 7, Oracle Linux 6, 7, 8, Amazon Linux, and Amazon Linux 2.Patch Management Process WorkflowFollow these steps to get started with Patch Management.Agent Installation and ConfigurationInstall Cloud Agents (using the CA app)Enable PM in a CA configuration Profile (using the CA app)User Roles and PermissionsDeploy PatchesCreate a custom assessment profile (Optional)5
Patch Management OverviewPatch Management featuresReview missing and installed patchesDeploying Patches Jobs on Windows AssetsDeploying Patches Jobs on Linux AssetsReview patch deployment results (success / failure)Create a custom assessment profile (Optional)Review missing and installed patchesUninstalling Patches from Windows AssetsReview patch uninstall results (success / failure)Patch Management featuresQualys Patch Management provides a comprehensive solution for patching assets with thefollowing features:- Deploy patches for Windows and Linux assets- Schedule run-once or recurring jobs for Windows and Linux assets- Clone and edit Windows and Linux jobs- View patches, assets, and job details for Windows and Linux systems- Review missing and installed patches for Windows assets- Download Windows patches from the vendor site- Create custom Assessment Profile for Windows assets- Use QQL to automate patch selection for Windows deployment job- Export patch data for Windows assets- Uninstall patches from Window assets- Create custom dashboards and widgets for Windows assetsUser Roles and PermissionsRole-Based Access Control (RBAC) gives you the flexibility to control access to PatchManagement features based on the roles of the individual users.Each user is assigned a pre-defined user role which determines what actions the user cantake. These roles are exclusive to the Patch Management module only. The roles defined inother modules have NO correlation with that defined in Patch Management.6
Patch Management OverviewUser Roles and PermissionsWe have the following five out-of-the-box (OOTB) roles for PM users. Each role, exceptPatch Security, is an incremental role to the previous one. Let’s understand the user rolesand permissions.RolesDescriptionPatch ReaderDefault role that allows users to view:- Assigned jobs- Assessment profiles- DashboardsPatch Dashboard Author- Includes the Patch Reader permissions- Allows a user to develop dashboards- Does not allow the user to manage patching jobsPatch User- Includes the Patch Dashboard Author permissions- Allows users to manage patching activities- Build dashboards for reporting informationPatch Manager- Includes all permissions except create job advisoryPatch Security- This role is mutually exclusive from the other roles.- Meant for Security experts or Security operations (SecOps)- Allows the user to select patches and create a partially configuredjob which needs to be assigned to a Patch User or Patch Manager toadd a job owner- Cannot edit any jobNote: We do not recommend that you create custom roles for the Patch Managementusers by assigning or removing permissions available through the default roles. Suchcustomization of roles or change of permissions might cause the user roles to not work asper the design.For Patch Management, we refer to the Global Dashboard Permissions to determine whatoperations a user can perform on the Unified Dashboard. The Global DashboardPermissions will only allow the Patch Manager, Patch User, and Patch Dashboard Author tocreate, edit, and delete their own dashboards. For permissions to edit, delete other users'dashboard and print or download a dashboard, contact SuperUser or Administrator.Fallback to free versionPatch Management will revert to the Free version after your Trial or Full subscriptionexpires. Existing scan intervals of less than 24 hours will get converted to intervals of 24hours. Your existing jobs will be disabled and you can re-enable them once you renewyour subscription.The free version allows you to create assessment profiles with a minimum scan interval of24 hours and see a list of missing and installed patches on the assets in your environment.It doesn’t allow creating deployment/uninstall jobs.7
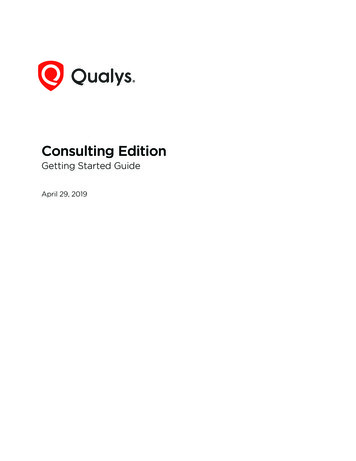
Installing Cloud Agents on AssetsInstalling Cloud Agents on AssetsPatch Management allows you to manage your Windows and Linux assets. You mustinstall and configure Cloud Agents to enable Patch Management to deploy patches jobs.Agent installations are managed on the Cloud Agent (CA) app.Let's get started!Choose CA (Cloud Agent) from the app picker.As a first time user, you’ll land directly on the Getting Started page.What are the steps?Create an activation key. Go to Activation Keys, click the New Key button. Give it a title,provision for the PM application and click Generate.8
Installing Cloud Agents on AssetsDownloading InstallerAs you can see, you can provision the same key for any of the other applications in youraccount.Downloading InstallerClick Install instructions next to Windows (.exe) or Linux (.rpm).9
Installing Cloud Agents on AssetsDownloading InstallerReview the installation requirements and click Download.You'll run the installer on each system from an elevated command prompt, or use asystems management tool or Windows group policy. Your agents should start connectingto our cloud platformFor Windows agent:For Linux agent, to enable patch installation on Linux assets, note the following:- Supported YUM file version 3.2.29.- YUM file must be configured with debugloglevel 2 Default is 2.- (Optional) The YUM file is configured with correct proxy settings.- The endpoint is subscribed for active Red Hat subscriptions.- The Agent must be running with root user or as sudo user. You can configure users byusing the Agent configuration tool.10
Installing Cloud Agents on AssetsDownloading InstallerYour host must be able to reach your Qualys Cloud Platform (or the Qualys Private CloudPlatform) over HTTPS port 443. On the Qualys Cloud Platform, go to Help About to seethe URL your host needs to access. For more information about connectivityrequirements/proxy settings refer to the platform specific Cloud Agent Installation Guidesavailable on https://www.qualys.com/documentation/.Note: Ensure that you whitelist the required URLs to allow the Cloud Agent to downloadthe Windows patches on your host. Click here to view the list of URLs.11
Installing Cloud Agents on AssetsActivating your agents for PMActivating your agents for PMGo to the Agents tab, and from theQuick Actions menu of an agent,click Activate for FIM or EDR orPM or SA. (Bulk activation issupported using the Actionsmenu).Enabling PM in a CA configuration profileYou can create a new profile or edit an existing one. The PM module is enabled by default.The Cache size setting determines how much space the agent should allocate to storedownloaded patches on the asset. The default allocated size is 2048 MB. If you areplanning on using the opportunistic download, where an agent downloads patches beforedeployment, it is recommended to increase the cache size, or to allow for Unlimited Cachesize. Note that the agent will clear the cached files after deployment.You're ready!Select PM from the application picker and then create a deployment job to start installingpatches on your assets.12
Installing Cloud Agents on AssetsManaging PM LicensesManaging PM LicensesThe Licenses tab, enabled only for paid subscribers, shows the number of licensesconsumed by Patch Management (PM). You can include asset tags to allow patch installingand uninstalling on the assets contained in those asset tags. The Total Consumptioncounter may exceed 100% if the number of assets activated for PM are more than thenumber of PM licenses you have. Assets in the excluded asset tags are not considered forpatch management and you cannot deploy patches on those assets.Note: In case the Total Consumption counter exceeds 100%, licenses will be consumedbased on the asset activation time stamp in ascending order.Only admin and super users can manage licenses. Sub-users can only view the licenseinformation.13
Using Tags to Grant Access to AssetsUsing Tags to Grant Access to AssetsAn asset tag is a tag assigned to one or more assets. Tag scopes define what assets the usercan view when creating a job or when user go to Assets tab in patch management.Assigning a tag to an asset enables you to grant users access to that asset by assigning thesame tag to the users scope. Want to define tags? It's easy - just go to the AssetManagement (AM) application.To assign asset tags to the user,1) Go to the Administration module and then from the User Management tab search orselect the user.2) From the Quick Actions menu, click Edit.3) On the User Edit screen, go to the Roles and Scopes tab.4) In the Edit Scope section, select one or more asset tags that you want to assign to theuser. Then click Save.14
Using Tags to Grant Access to Assets15
Creating Assessment Profiles for Windows AssetsCreating Assessment Profiles for WindowsAssetsYou can create custom assessment profiles to add assets with specific tags and configurescan interval at which you want the cloud agent to collect patch information from theassets. This is an optional step.By default, your cloud agents scan for patches (missing and installed) at a specificinterval, as defined in the default Assessment Profile.For Linux jobs, the patch scan is currently not supported and the installed and missingpatches information is also not collected. Because of this reason, the assessment profilesare not applicable for Linux assets.What is the default assessment profile?At first, a default assessment profile is applied to all agents, which scans the assets at aninterval of 24 hours for free subscription and 4 hours for trial/paid subscription.Adding a custom assessment profileSimply go to Configuration Create Profile, provide a profile name, select asset tags toapply this custom profile to, and then select the scan interval (minimum 24 hours for freesubscription and 4 hours for trial/paid subscription). Multiple assessment profiles can becreated with different intervals.Note: Only admin users can create/modify/delete the assessment profiles. Non-adminusers can only view assessment profiles.Scan interval of less than 24 hours will be automatically changed to an interval of 24hours, when a Paid or Trial subscription expires and the app gets converted into a freeversion.Good to Know - Asset tags once applied to one custom profile, cannot be applied toanother custom profile. When you select an asset tag, corresponding child tags areautomatically selected. Assets falling under more than one profile because of differenttags will be assigned the default assessment profile.16
Reviewing Missing and Installed Windows PatchesReviewing Missing and Installed WindowsPatchesThe patch list under Patch Management patch catalog for Windows assets are the onesmissing on the host which were detected using the Patch Management scan. You can viewmissing and installed patches on the Patches and Assets tab. The Patches tab show a keyicon for patches that cannot be downloaded via the Qualys Cloud Agent. A key shapedicon indicates that the patch must be acquired from the vendor.On the Patches tab, we list two types of patches:1) Qualys Patchable2) AcquireFromVendorQualys PatchableQualys Patchable are the patches that can be installed using Patch Management. Most ofthe patches listed on the Patches tab are Qualys Patchable.AcquireFromVendorWe have certain patches which are listed under Patches tab but cannot be installed usingPatch Management. These patch are marked as “AcquireFromVendor” which means youneed to manually download the patch from vendor website and install them on the host.See Downloading Patches from the Vendor Site.Patches which are not marked as “AcquireFromVendor” are defined as “Qualys Patchable”which mean they can be added to a patch job.Default or custom assessment profile scans the assets for missing and installed patches atregular intervals. This information is then displayed on the Patches tab in the form ofmissing or installed patches.17
Reviewing Missing and Installed Windows PatchesNote that patches are linked to QIDs using CVE IDs. The QID for a patch is not shown if theQID is not linked to a CVE ID. CVE ID is the common point of linking and required to linkthe patch with the QID.Alternatively, you can go to the Assets tab to view missing and installed patches onparticular assets.18
Reviewing Missing and Installed Windows PatchesDownloading Patches from the Vendor SiteDownloading Patches from the Vendor SiteThe Patches tab show a key icon for patches that can not be downloaded via the QualysCloud Security Agent. This “key” shaped icon indicates that the patch must be acquiredfrom the vendor.If you try to add such a patch to a patch job, then the system will show a messageinforming you that these patches will be not be added to said job as they are no longersupported for download via the Cloud Agent.For such patches, the patch details page displays the Download Method as“AcquireFromVendor” and known patch URL in the Patch Information section. Use theURL to download the patch.Download methods for patch are:- Automatic - Patch downloadable using the Cloud Agent (Qualys Patchable: Yes)- AcquireFromVendor - Patch must be acquired from the vendor and installed manually(Qualys Patchable: No)- Unavailable - Patch download information is not available (Qualys Patchable: No)19
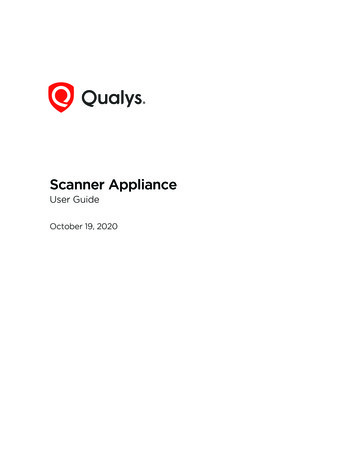
Deploying Patches Jobs on Windows AssetsUser Scenario: Deploying security patch jobs for MicrosoftDeploying Patches Jobs on Windows AssetsYou can create a deployment job to install missing patches on assets. You have threeoptions to create the deployment job from the following tabs:1) Jobs2) Assets3) PatchesRefer to the Managing Patch Jobs for Windows Assets topic in the online help.You can check the workflow to deploy jobs on Windows assets.User Scenario: Deploying security patch jobs for MicrosoftMicrosoft releases crucial security patches on a regular basis. To automate the jobdeployment for these patches, you can create a job to run on the 2nd Tuesday of everymonth.To automate the patch installation, create a monthly recurring deployment job with thefollowing parameters:1. Navigate to Jobs Windows Create Job, and click Deployment Job.2. Enter the job title as Microsoft Security Patches and click Next.3. Select assets or asset tags on which you want to apply the patches.4. (Optional) Select Add Exclusion Asset Tags to exclude the assets from the deploymentjob that have All/Any of the selected asset tags.20
Deploying Patches Jobs on Windows AssetsUser Scenario: Deploying security patch jobs for Microsoft5. To select patches to apply to the assets, choose the Select Patch option, and then clickthe Take me to patch selector link to select patches.6. On the Patch Selector page, in the search query, enter appfamily:windows andisSecurity: True and select the patches from the search results.Note: You can add maximum 2000 patches to a single job.7. Click Add to Job and then click Close.8. On the Select Patches page, click Next.9. On the Schedule Deployment page, click Schedule.10. Select the start date and time, and select the Recurring Job.11. Set Repeats as Monthly, select day of a week, and 2nd Tuesday of the month at 9:00PM.12. (Optional) Set the Patching window if you want to restrict the agent to start the jobwithin the specified patch window (e.g., start time 6 hours). The job gets timed out if itdoes not start within this window.21
Deploying Patches Jobs on Windows AssetsUser Scenario: Deploying security patch jobs for Microsoft13. Based on your preference, configure how to notify the users about the patchdeployment. Configure the pre-deployment messages, deferring the patch deploymentcertain number of times.We recommend that you fill out both the message and description fields for these options.14. Finally based on the permissions assigned to other users, choose Co-Authors who canedit this job.22
Deploying Patches Jobs on Windows AssetsUser Scenario: Deploying security patch jobs for Microsoft15. Next, review the configuration.Job can either be created in ENABLED state by using the Save & Enable option or inDISABLED state by using the default Save button.Note: The Patch Manager user can change the job status (enable/disable), delete and editthe job.23
Deploying Patches Jobs on Windows AssetsUser Scenario: Deploying security patch jobs for Microsoft24
Using QQL to Automate Patch Selection for Windows JobsUser scenario: Installing critical patches for Chrome and Internet ExplorerUsing QQL to Automate Patch Selection forWindows JobsYou can use Qualys Query Language (QQL) to provide the criteria that associates selectivepatches to a deployment job. QQL ensures that all the latest patches that qualify based onthe criteria are automatically associated to a job without a manual intervention. Thissaves time and ensures that the critical patch updates are installed regularly.Although, you can use QQL for a run-once job, QQL is optimally utilized for recurring jobs.QQL is available only for the deployment jobs and not for the uninstall jobs. Sinceuninstall patch jobs are executed for selective patches and rarely used, the QQL option isnot provided for the uninstall job.User scenario: Installing critical patches for Chrome and InternetExplorerTo ensure that the browsers receive the critical updates, you can create a daily recurringjob to ensure critical patches are deployed.1. Navigate to Jobs Windows Create Job, and click Deployment Job.2. Enter the job title as Browser Security Patches and click Next.3. Select assets or asset tags on which you want to apply the patches.4. (Optional) Select Add Exclusion Asset Tags to exclude the assets from the deploymentjob that have ALL/ANY of the selected asset tags.25
Using QQL to Automate Patch Selection for Windows JobsUser scenario: Installing critical patches for Chrome and Internet Explorer5. To select patches to apply to the assets, choose Create a Query for Patches. EnterappFamily:Chrome or appFamily:“Internet Explorer”.6. Create the following job schedule:7. (Optional) Set the Patching window if you want to restrict the agent to start the jobwithin the specified patch window (e.g., start time 6 hours). The job will time out if itdoes not start within this window.8. Based on your preference, configure how to notify the users about the patchdeployment. Configure the pre-deployment messages, deferring the patch deploymentcertain number of times.26
Using QQL to Automate Patch Selection for Windows JobsUser scenario: Installing critical patches for Chrome and Internet Explorer9. Finally based on the permissions assigned to other users, choose Co-Authors who canedit this job.10. Next, review the configuration.Job can either be created in ENABLED state by using the Save & Enable option or inDISABLED state by using the default Save button.Note: The Patch Manager super user can change the job status (enable/disable), deleteand edit the job.27
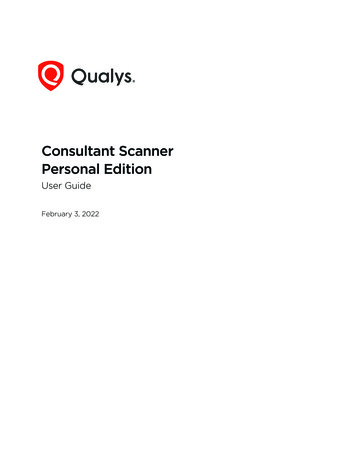
Uninstalling Patches from Windows AssetsUser Scenario: Uninstalling older version of Internet Explorer browserUninstalling Patches from Windows AssetsYou can create a patch uninstall job to uninstall patches from Windows assets. Uninstalljob is rare and should be used with caution because it can uninstall patches that youmight not have wanted to uninstall. We recommend that you use the run-once option forthe uninstall Windows job. We don’t uninstall software applications by default, however ifa patch is rolled back, sometimes the software application might get uninstalled. Beextremely precise while selecting the patches that you want to uninstall.User Scenario: Uninstalling older version of Internet ExplorerbrowserUsing an older version of the web browser can cause security issues. You can uninstall anolder version of Internet Explorer browser that might have released before 2016.1. Navigate to Jobs Windows Create Job, and click Uninstall Job.2. Provide a job title, and then select assets or asset tags uninstall the patches from.28
Uninstalling Patches from Windows AssetsUser Scenario: Uninstalling older version of Internet Explorer browser3. Select patches to uninstall from the assets. Use the patch selector link to select patches.4. On the Uninstallable Patches page, in the search query, enter appfamily: InternetExplorer and publishedDate: [2015-12-31].Note: You can add maximum 2000 patches to a single job.7. Click Add to Job and then click Close.8. On the Select Patches page, click Next.9. On the Schedule Deployment page, click On Demand.29
Uninstalling Patches from Windows AssetsUser Scenario: Uninstalling older version of Internet Explorer browser10. Based on your preference, configure how to notify the users about the patchdeployment. Configure the pre-deployment messages, deferring the patch deploymentcertain number of times.11. Finally, you can prompt the user or choose suppress reboot when asset reboot isrequired post patch installation.30
Uninstalling Patches from Windows AssetsUser Scenario: Uninstalling older version of Internet Explorer browser12. Finally based on the permissions assigned to other users, choose Co-Authors who canedit this job.13. Next, review the configuration. Job can either be created in ENABLED state by using theSave & Enable option or in DISABLED state by using the default Save button.You must enable the disabled job in order to run it. To enable a disabled job, simply go tothe Jobs tab, then from the Quick Actions menu of a job, click Enable. The Save & Enableoption should be chosen only when you are confident that job is correctly configured,because this job will begin executing as soon as you “Save” the job.Note that the Patch Manager user can change the job status (enable/disable), delete andedit the job.31
Uninstalling Patches from Windows AssetsUser Scenario: Uninstalling older version of Internet Explorer browser32
Deploying Patches Jobs on Linux AssetsUser Scenario: Deploying security patches for RHEL assetsDeploying Patches Jobs on Linux AssetsYou can create a deployment job to install patches on Linux assets. You have three optionsto create the deployment job from the following tabs:1) Jobs2) Assets3) PatchesRefer to the Managing Patch Jobs for Linux Assets topic in the online help.User Scenario: Deploying security patches for RHEL assetsRedHat releases security patches on a frequent basis. To automate the patch installation,create a deployment job with the following parameters:1. Navigate to Jobs Linux Create Job.2. Enter the job title as RHEL Security Patches and click Next.3. Select assets or asset tags on which you want to apply the patches.4. (Optional) Select Add Exclusion Asset Tags to exclude the assets from the deploymentjob that have All/Any of the selected asset tags.5. To select patches to apply to the assets, choose the Select Patch option and then clickTake me to patch selector link to select patches.33
Deploying Patches Jobs on Linux AssetsUser Scenario: Deploying security patches for RHEL assets6. On the Patch Selector page, in the search query, enter category: security and selectthe patches.Note: You can add maximum 2000 patches to a single job.7. Click Add to Job and then click Close.8. On the Select Patches page, click Next.9. On the Schedule Deployment page, click Schedule.10. Select the start date and time, and select Recurring Job.34
Deploying Patches Jobs on Linux AssetsUser Scenario: Deploying security patches for RHEL assets11. Set Repeats as Monthly, select day of a week, and 1st Monday of the month at 9:00 PM.12. (Optional) Set the Patching win
Patch Management Overview User Roles and Permissions 7 We have the following five out-of-the-box (OOTB) roles for PM users. Each