Transcription
Dell 1909W Flat Panel Monitor User's GuideDell 1909W Flat Panel Monitor User's GuideAbout Your MonitorSetting Up the MonitorOperating the MonitorTroubleshootingAppendixNotes, Cautions, and WarningsNOTE: A NOTE indicates important information that helps you make better use of your computer.CAUTION: A CAUTION indicates potential damage to hardware or loss of data if instructions are not followed.WARNING: A WARNING indicates a potential for property damage, personal injury, or death.Information in this document is subject to change without notice. 2008-2010 Dell Inc. All rights reserved.Reproduction of these materials in any manner whatsoever without the written permission of Dell Inc. is strictly forbidden.Trademarks used in this text: Dell and the DELL logo are trademarks of Dell Inc; Microsoft and Windows are either trademarks or registeredtrademarks of Microsoft Corporation in the United States and/or other countries; Adobe is a trademark of Adobe Systems Incorporated, which maybe registered in certain jurisdictions. ENERGY STAR is a registered trademark of the U.S. Environmental Protection Agency. As an ENERGY STARpartner, Dell Inc. has determined that this product meets the ENERGY STAR guidelines for energy efficiency.Other trademarks and trade names may be used in this document to refer to either the entities claiming the marks and names or their products.Dell Inc. disclaims any proprietary interest in trademarks and trade names other than its own.Model 1909Wf 1909WbJanuary 2010 Rev. A02file:///T /htdocs/monitors/1909W/en/ug/index.htm[11/8/2012 2:52:57 PM]
Dell 1909W Flat Panel Monitor User's GuideBack to Contents PageAbout Your MonitorDell 1909W Flat Panel Monitor User's GuidePackage ContentsProduct FeaturesIdentifying Parts and ControlsMonitor SpecificationsPlug and Play CapabilityUniversal Serial Bus (USB) InterfaceMaintenance GuidelinesPackage ContentsYour monitor ships with the components shown below. Ensure that you have received all the components and contact Dell if something is missing.NOTE: Some items may be optional and may not ship with your Monitor. Some features or media may not be available in certain countries.NOTE: Stand and cables are not included when purchased with OptiPlexTM USFF 780/ OptiPlexTM SFF 980 AIO Stands.NOTE: To set up with the respective AIO stand, please refer to the respective AIO stand guide for setup instructions.MonitorStandfile:///T /htdocs/monitors/1909W/en/ug/about.htm[11/8/2012 2:53:29 PM]
Dell 1909W Flat Panel Monitor User's GuidePower CableVGA Cable (attached to the monitor)DVI CableUSB up stream cable (enables the USB ports on the monitor)file:///T /htdocs/monitors/1909W/en/ug/about.htm[11/8/2012 2:53:29 PM]
Dell 1909W Flat Panel Monitor User's GuideDrivers and Documentation mediaQuick Setup GuideSafety InformationProduct FeaturesThe 1909W flat panel display has an active matrix, thin-film transistor (TFT), liquid crystal display (LCD). The monitor features include: 19-inch (482.6 mm) viewable area display (Measured diagonally) . 1440x900 resolution, plus full-screen support for lower resolutions. Wide viewing angle to allow viewing from a sitting or standing position, or while moving from side-to-side. Tilt, Swivel, Vertical Extension and rotate adjustment capabilities. Removable pedestal and Video Electronics Standards Association (VESA) 100 mm mounting holes for flexible mounting solutions. Plug and play capability if supported by your system. On-Screen Display (OSD) adjustments for ease of set-up and screen optimization. Software and documentation media which includes an information file (INF), Image color Matching File (ICM), and product documentation. Energy Saver feature for Energy Star compliance. Security lock slot. Asset Management Capable. EPEAT GOLD compliant.Identifying Parts and ControlsFront Viewfile:///T /htdocs/monitors/1909W/en/ug/about.htm[11/8/2012 2:53:29 PM]
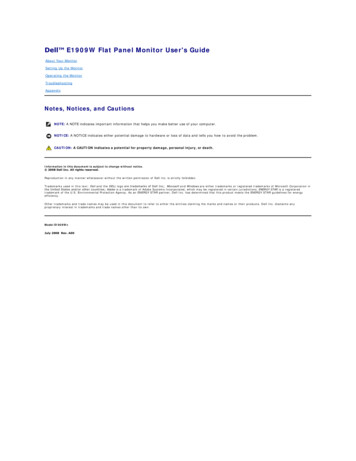
Dell 1909W Flat Panel Monitor User's GuideFront ViewLabel Description1Brightness & Contrast2Automatic adjust3Input source Select4Menu5Power (with power light indicator)Back Viewfile:///T /htdocs/monitors/1909W/en/ug/about.htm[11/8/2012 2:53:29 PM]Front panel controls
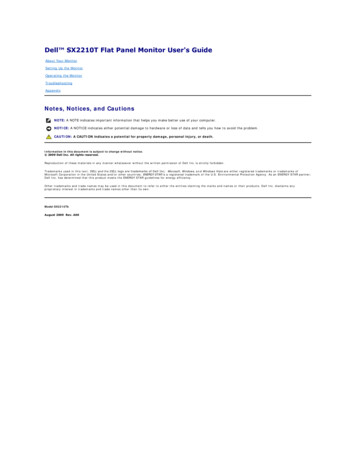
Dell 1909W Flat Panel Monitor User's GuideBack viewLabelBack View with monitor standDescriptionUse1VESA mounting holes (100mm)(Behind attached base plate)To mount the monitor.2Security lock slotTo help secure your monitor.3Dell Soundbar mounting bracketsTo attach the optional Dell Soundbar.4Stand Release ButtonTo press to release the stand.5Cable management slotTo organize cables by placing them through the slot.6label compartmentTo pull out to view labelsNote: The regulatory rating label and barcode serial number label is revealed when plate is pulled out from USB compartment.Label ViewMonitor front view with pull-out card extended to reveal barcode serial number marks.file:///T /htdocs/monitors/1909W/en/ug/about.htm[11/8/2012 2:53:29 PM]
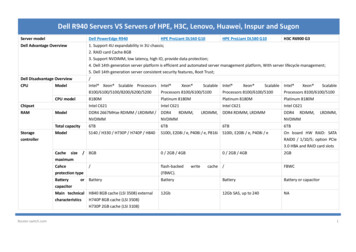
Dell 1909W Flat Panel Monitor User's GuideMonitor rear view with pull-out card extended to reveal regulatory marks.Monitor rear view with pull-out card inserted back to provide a clean back view.LabelDescriptionUse1Barcode serial number labelTo contact Dell for technical support.2Regulatory labelLists the regulatory approvals.Note: The regulatory rating label and barcode serial number label is revealed when plate is pulled out from USB compartment.Side Viewfile:///T /htdocs/monitors/1909W/en/ug/about.htm[11/8/2012 2:53:29 PM]
Dell 1909W Flat Panel Monitor User's GuideLeft viewLabel Description1USB downstream portsBottom Viewfile:///T /htdocs/monitors/1909W/en/ug/about.htm[11/8/2012 2:53:29 PM]Right view
Dell 1909W Flat Panel Monitor User's GuideBottom viewLabel Description1AC power cord connector2Dell Soundbar power connector3DVI connector4VGA connector5USB upstream port6USB downstream portsMonitor SpecificationsFlat Panel SpecificationsScreen typeActive matrix - TFT LCDPanel typeTNScreen dimensions19 inches (19-inch viewable image size)Preset display area:408.24(H)X255.15(V)Horizontal408.24 mm (16.08 inches)Vertical255.15 mm (10.05 inches)Pixel pitch0.2835 mmfile:///T /htdocs/monitors/1909W/en/ug/about.htm[11/8/2012 2:53:29 PM]
Dell 1909W Flat Panel Monitor User's GuideViewing angle160 (vertical) typical, 160 (horizontal) typicalLuminance output300 CD/m²(typical)Contrast ratio1000 to 1 (typical)Faceplate coatingAntiglare with hard-coating 3HBacklightCCFL (2) edgelight systemResponse Time5 ms typicalColor Gamut83%**[1909W] color gamut (typical) is based on CIE1976 (83%) and CIE1931 (72%) test standards.file:///T /htdocs/monitors/1909W/en/ug/about.htm[11/8/2012 2:53:29 PM]
Dell 1909W Flat Panel Monitor User's Guidefile:///T /htdocs/monitors/1909W/en/ug/about.htm[11/8/2012 2:53:29 PM]
Dell 1909W Flat Panel Monitor User's Guidefile:///T /htdocs/monitors/1909W/en/ug/about.htm[11/8/2012 2:53:29 PM]
Dell 1909W Flat Panel Monitor User's Guidefile:///T /htdocs/monitors/1909W/en/ug/about.htm[11/8/2012 2:53:29 PM]
Dell 1909W Flat Panel Monitor User's Guidefile:///T /htdocs/monitors/1909W/en/ug/about.htm[11/8/2012 2:53:29 PM]
Dell 1909W Flat Panel Monitor User's GuideResolution SpecificationsHorizontal scan range30 kHz to 83 kHz (automatic)Vertical scan range56 Hz to 75 Hz (automatic)Optimal preset resolution1440 X 900 at 60 HzHighest preset resolution1440 x 900 at 60 HzSupported Video ModesVideo display capabilities (DVI playback)file:///T /htdocs/monitors/1909W/en/ug/about.htm[11/8/2012 2:53:29 PM]480i/480p/576i/576p/720p/1080i/1080P (SupportsHDCP)
Dell 1909W Flat Panel Monitor User's Guidefile:///T /htdocs/monitors/1909W/en/ug/about.htm[11/8/2012 2:53:29 PM]
Dell 1909W Flat Panel Monitor User's Guidefile:///T /htdocs/monitors/1909W/en/ug/about.htm[11/8/2012 2:53:29 PM]
Dell 1909W Flat Panel Monitor User's Guidefile:///T /htdocs/monitors/1909W/en/ug/about.htm[11/8/2012 2:53:29 PM]
Dell 1909W Flat Panel Monitor User's Guidefile:///T /htdocs/monitors/1909W/en/ug/about.htm[11/8/2012 2:53:29 PM]
Dell 1909W Flat Panel Monitor User's GuidePreset Display ModesDisplay ModeHorizontal Frequency (kHz) Vertical Frequency (Hz)VESA, 720 x 40031.570.028.3Sync Polarity(Horizontal/Vertical)-/ VESA, 640 x 48031.560.025.2-/-VESA, 640 x 48037.575.031.5-/-VESA, 800 x 60037.960.340 / VESA, 800 x 60046.975.040 / VESA, 1024 x 76848.460.065.0-/-VESA, 1024 x 76860.075.078.8 / VESA, 1152 x 86467.575.0108.0 / VESA, 1280 x 80061.660.083.5 /-VESA, 1280 x 102464.060.0108.0 / VESA, 1280 x 102480.075.0135.0 / VESA, 1440 x 90056.060.0106.0-/ file:///T /htdocs/monitors/1909W/en/ug/about.htm[11/8/2012 2:53:29 PM]Pixel Clock (MHz)
Dell 1909W Flat Panel Monitor User's Guidefile:///T /htdocs/monitors/1909W/en/ug/about.htm[11/8/2012 2:53:29 PM]
Dell 1909W Flat Panel Monitor User's GuideElectrical SpecificationsVideo input signalsAnalog RGB, 0.7 Volts /- 5%, positive polarity at 75 ohm inputimpedanceDigital DVI-D TMDS, 600mV for each differential line, positive polarity at50 ohm input impedanceSynchronization input signalsSeparate horizontal and vertical synchronizations, polarity-free TTL level,SOG (Composite SYNC on green)AC input voltage/frequency/current100 to 240 VAC/50 or 60 Hz 3 Hz/1.5A (Max.)Inrush current120 V: 30 A (Max.)240 V: 60 A (Max.)file:///T /htdocs/monitors/1909W/en/ug/about.htm[11/8/2012 2:53:29 PM]
Dell 1909W Flat Panel Monitor User's Guidefile:///T /htdocs/monitors/1909W/en/ug/about.htm[11/8/2012 2:53:29 PM]
Dell 1909W Flat Panel Monitor User's GuidePhysical CharacteristicsConnector typeSignal cable typefile:///T /htdocs/monitors/1909W/en/ug/about.htm[11/8/2012 2:53:29 PM]15-pin D-subminiature, blue connector; DVI-D, white connectorDigital: Detachable, DVI-D, Solid pins, shipped detached from the monitor
Dell 1909W Flat Panel Monitor User's GuideAnalog:Detachable, D-Sub, 15pins, shipped attached to the monitorDimensions (with stand)Height (Compressed)12.39 inches (314.68 mm)Height (Extended)17.13 inches (434.68 mm)Width17.45 inches (442.87 mm)Depth6.92 inches (175.64 mm)Dimensions (without stand)Height11.42 inches (289.77 mm)Width17.45 inches (442.87 mm)Depth2.32 inches (59.00 mm)Stand dimensionsHeight (Compressed)9.48 inches (240.80 mm)Height (Extended)14.22 inches (360.80 mm)Width9.85 inches (249.92 mm)Depth6.92 inches (175.64 mm)WeightWeight with packaging14.09 lbs (6.40 kg)Weight with stand assembly and cables12.34 lbs (5.60 kg)Weight without stand assembly(For wall mount or VESA mount considerations no cables)8.25 lbs (3.74 kg)Weight of stand assembly3.18 lbs (1.44 kg)file:///T /htdocs/monitors/1909W/en/ug/about.htm[11/8/2012 2:53:29 PM]
Dell 1909W Flat Panel Monitor User's Guidefile:///T /htdocs/monitors/1909W/en/ug/about.htm[11/8/2012 2:53:29 PM]
Dell 1909W Flat Panel Monitor User's Guidefile:///T /htdocs/monitors/1909W/en/ug/about.htm[11/8/2012 2:53:29 PM]
Dell 1909W Flat Panel Monitor User's Guidefile:///T /htdocs/monitors/1909W/en/ug/about.htm[11/8/2012 2:53:29 PM]
Dell 1909W Flat Panel Monitor User's Guidefile:///T /htdocs/monitors/1909W/en/ug/about.htm[11/8/2012 2:53:29 PM]
Dell 1909W Flat Panel Monitor User's Guidefile:///T /htdocs/monitors/1909W/en/ug/about.htm[11/8/2012 2:53:29 PM]
Dell 1909W Flat Panel Monitor User's Guidefile:///T /htdocs/monitors/1909W/en/ug/about.htm[11/8/2012 2:53:29 PM]
Dell 1909W Flat Panel Monitor User's GuideEnvironmental CharacteristicsTemperatureOperating5 to 35 C (41 to 95 F)Non-operatingStorage: -20 to 60 C (-4 to 140 F)Shipping: -20 to 60 C (-4 to 140 F)HumidityOperating10% to 80% (non-condensing)Non-operatingStorage: 5% to 90% (non-condensing)Shipping: 5% to 90% (non-condensing)AltitudeOperating3,657.60 m (12,000 ft) maxNon-operating12,192 m (40,000 ft) maxThermal dissipationfile:///T /htdocs/monitors/1909W/en/ug/about.htm[11/8/2012 2:53:29 PM]256.08 BTU/hour (maximum)
Dell 1909W Flat Panel Monitor User's Guide119.50 BTU/hour (typical)file:///T /htdocs/monitors/1909W/en/ug/about.htm[11/8/2012 2:53:29 PM]
Dell 1909W Flat Panel Monitor User's Guidefile:///T /htdocs/monitors/1909W/en/ug/about.htm[11/8/2012 2:53:29 PM]
Dell 1909W Flat Panel Monitor User's Guidefile:///T /htdocs/monitors/1909W/en/ug/about.htm[11/8/2012 2:53:29 PM]
Dell 1909W Flat Panel Monitor User's GuidePower Management ModesIf you have VESA's DPM compliance display card or software installed in your PC, the monitor can automatically reduce its power consumption when not in use. This is referred to as Power SaveMode*. If the computer detects input from keyboard, mouse, or other input devices, the monitor automatically resumes functioning. The following table shows the power consumption and signaling ofthis automatic power saving feature:VESA ModesNormal operationHorizontal SyncActiveVertical SyncActiveVideoActivePower IndicatorBluePower Consumption25 W (typical)Active-off modeInactiveInactiveBlankedAmberLess than 1 WSwitch off---OffLess than 1 WThe OSD will only function in the normal operation mode. When the menu or plus buttons are pressed in Active-off mode, one of the following messages will be displayed:Analog Input In Power Save Mode. Press Computer Power Button or Any Key on Keyboard or Move MouseORDigital Input In Power Save Mode. Press Computer Power Button or Any Key on Keyboard or Move MouseActivate the computer and the monitor to gain access to the OSD.NOTE: This monitor is ENERGY STAR -compliant as well as TCO '03 power management compatible.* Zero power consumption in OFF mode can only be achieved by disconnecting the main cable from the monitor.file:///T /htdocs/monitors/1909W/en/ug/about.htm[11/8/2012 2:53:29 PM]
Dell 1909W Flat Panel Monitor User's Guidefile:///T /htdocs/monitors/1909W/en/ug/about.htm[11/8/2012 2:53:29 PM]
Dell 1909W Flat Panel Monitor User's Guidefile:///T /htdocs/monitors/1909W/en/ug/about.htm[11/8/2012 2:53:29 PM]
Dell 1909W Flat Panel Monitor User's Guidefile:///T /htdocs/monitors/1909W/en/ug/about.htm[11/8/2012 2:53:29 PM]
Dell 1909W Flat Panel Monitor User's GuidePin AssignmentsVGA Connectorfile:///T /htdocs/monitors/1909W/en/ug/about.htm[11/8/2012 2:53:29 PM]
Dell 1909W Flat Panel Monitor User's GuidePin15-pin Side of the Connected Signal elf-test6GND-R7GND-G8GND-B9Computer 5V/3.3V10GND-sync11GND12DDC data13H-sync14V-sync15DDC clockDVI ConnectorPinNumber24-pin Side of the Connected SignalCable1TMDS RX2-2TMDS RX2 3TMDS Groundfile:///T /htdocs/monitors/1909W/en/ug/about.htm[11/8/2012 2:53:29 PM]
Dell 1909W Flat Panel Monitor User's Guide4Floating5Floating6DDC Clock7DDC Data8Floating9TMDS RX1-10TMDS RX1 11TMDS Ground12Floating13Floating14 5V/ 3.3V power15Self test16Hot Plug Detect17TMDS RX0-18TMDS RX0 19TMDS Ground20Floating21Floating22TMDS Ground23TMDS Clock 24TMDS Clock-file:///T /htdocs/monitors/1909W/en/ug/about.htm[11/8/2012 2:53:29 PM]
Dell 1909W Flat Panel Monitor User's Guidefile:///T /htdocs/monitors/1909W/en/ug/about.htm[11/8/2012 2:53:29 PM]
Dell 1909W Flat Panel Monitor User's Guidefile:///T /htdocs/monitors/1909W/en/ug/about.htm[11/8/2012 2:53:29 PM]
Dell 1909W Flat Panel Monitor User's Guidefile:///T /htdocs/monitors/1909W/en/ug/about.htm[11/8/2012 2:53:29 PM]
Dell 1909W Flat Panel Monitor User's Guidefile:///T /htdocs/monitors/1909W/en/ug/about.htm[11/8/2012 2:53:29 PM]
Dell 1909W Flat Panel Monitor User's Guidefile:///T /htdocs/monitors/1909W/en/ug/about.htm[11/8/2012 2:53:29 PM]
Dell 1909W Flat Panel Monitor User's Guidefile:///T /htdocs/monitors/1909W/en/ug/about.htm[11/8/2012 2:53:29 PM]
Dell 1909W Flat Panel Monitor User's Guidefile:///T /htdocs/monitors/1909W/en/ug/about.htm[11/8/2012 2:53:29 PM]
Dell 1909W Flat Panel Monitor User's Guidefile:///T /htdocs/monitors/1909W/en/ug/about.htm[11/8/2012 2:53:29 PM]
Dell 1909W Flat Panel Monitor User's Guidefile:///T /htdocs/monitors/1909W/en/ug/about.htm[11/8/2012 2:53:29 PM]
Dell 1909W Flat Panel Monitor User's Guidefile:///T /htdocs/monitors/1909W/en/ug/about.htm[11/8/2012 2:53:29 PM]
Dell 1909W Flat Panel Monitor User's Guidefile:///T /htdocs/monitors/1909W/en/ug/about.htm[11/8/2012 2:53:29 PM]
Dell 1909W Flat Panel Monitor User's Guidefile:///T /htdocs/monitors/1909W/en/ug/about.htm[11/8/2012 2:53:29 PM]
Dell 1909W Flat Panel Monitor User's Guidefile:///T /htdocs/monitors/1909W/en/ug/about.htm[11/8/2012 2:53:29 PM]
Dell 1909W Flat Panel Monitor User's Guidefile:///T /htdocs/monitors/1909W/en/ug/about.htm[11/8/2012 2:53:29 PM]
Dell 1909W Flat Panel Monitor User's GuidePlug and Play CapabilityYou can install the monitor in any Plug and Play-compatible system. The monitor automatically provides the computer system with its Extended Display Identification Data (EDID) using Display DataChannel (DDC) protocols so the system can configure itself and optimize the monitor settings. Most monitor installations are automatic; you can select different settings if desired. For moreinformation about changing the monitor settings, see Operating the Monitor.file:///T /htdocs/monitors/1909W/en/ug/about.htm[11/8/2012 2:53:29 PM]
Dell 1909W Flat Panel Monitor User's Guidefile:///T /htdocs/monitors/1909W/en/ug/about.htm[11/8/2012 2:53:29 PM]
Dell 1909W Flat Panel Monitor User's GuideUniversal Serial Bus (USB) InterfaceThis section gives you information about the USB ports that are available on the left side of your monitor.NOTE: This monitor supports High-Speed Certified USB 2.0 interfaceTransfer speedDataRatePower ConsumptionHigh speed480 Mbps2.5W (Max., each port)Full speed12 Mbps2.5W (Max., each port)Low speed1.5 Mbps2.5W (Max., each port)USB Upstream ConnectorPin Number4-pin Side of the Connector1DMU2VCC3DPU4GNDUSB Downstream ConnectorPin Number4-Pin Side of the Signal Cable1VCC2DMD3DPD4GNDUSB Portsfile:///T /htdocs/monitors/1909W/en/ug/about.htm[11/8/2012 2:53:29 PM]
Dell 1909W Flat Panel Monitor User's Guide1 upstream - back4 downstream - 2 on back; 2 on left sideNOTE: USB 2.0 functionality requires a USB 2.0-capable computerNOTE: The monitor's USB interface works only when the monitor is on or in power save mode. If you turn off the monitor and then turn it on, the attached peripherals may take a few seconds toresume normal functionality.LCD Monitor Quality and Pixel PolicyDuring the LCD monitor manufacturing process, it is not uncommon for one or more pixels to become fixed in an unchanging state. The visible result is a fixed pixel that appears as an extremely tinydark or bright discolored spot. In almost every case, these fixed pixels are hard to see and do not detract from display quality or usability. A display with 1 to 5 fixed pixels is considered normal andwithin competitive standards. For more information, see Dell Support site at: support.dell.com.Maintenance GuidelinesCleaning Your MonitorWARNING: Read and follow the safety instructions before cleaning the monitor.WARNING: Before cleaning the monitor, unplug the monitor power cable from the electrical outlet.For best practices, follow the instructions in the list below while unpacking, cleaning, or handling your monitor:To clean your antistatic screen, lightly dampen a soft, clean cloth with water. If possible, use a special screen-cleaning tissue or solution suitable for the antistatic coating. Do not use benzene,thinner, ammonia, abrasive cleaners, or compressed air.Use a lightly-dampened, warm cloth to clean the monitor. Avoid using detergent of any kind as some detergents leave a milky film on the monitor.If you notice white powder when you unpack your monitor, wipe it off with a cloth.Handle your monitor with care as darker-colored monitor may scratch and show white scuff marks more than lighter-colored monitor.To help maintain the best image quality on your monitor, use a dynamically changing screen saver and turn off your monitor when not in use.Back to Contents Pagefile:///T /htdocs/monitors/1909W/en/ug/about.htm[11/8/2012 2:53:29 PM]
Dell 1909W Flat Panel Monitor User's GuideBack to Contents PageSetting Up the MonitorDell 1909W Flat Panel Monitor User's GuideAttaching the StandConnecting the MonitorOrganizing Your CablesAttaching the Soundbar (optional)Removing the StandAttaching the StandNOTE: The stand is detached when the monitor is shipped from the factory.NOTE: This is applicable for a monitor with a stand. When the OptiPlexTM USFF 780/ OptiPlexTM SFF 980 AIO stand is bought, please refer to the respective AIO stand setupguide for set up instructions.To attach the monitor stand:1. Place the stand on a flat surface2. Fit the groove on the back of the monitor to the two tabs on the upper part of the stand.3. Lower the monitor so that the monitor mounting area snaps on to or locks on to the stand.Connecting Your Monitorfile:///T /htdocs/monitors/1909W/en/ug/setup.htm[11/8/2012 2:53:45 PM]
Dell 1909W Flat Panel Monitor User's GuideWARNING: Before you begin any of the procedures in this section, follow the Safety Instructions.To connect your monitor to the computer:1. Turn off your computer and disconnect the power cable.2. Connect either the white (digital DVI-D) or the blue (analog VGA) display connector cable to the corresponding video port on the back of your computer. Do not use both cableson the same computer. Use both the cables only when they are connected to two different computers with appropriate video systems.Connecting the white DVI cableConnecting the blue VGA cablefile:///T /htdocs/monitors/1909W/en/ug/setup.htm[11/8/2012 2:53:45 PM]
Dell 1909W Flat Panel Monitor User's GuideNOTE: The Graphics are used for the purpose of illustration only. Appearance of the computer may vary.Connecting the USB cableAfter you have completed connecting the DVI/VGA cable, follow the procedure below to connect the USB cable to the computer and complete your monitor setup:Connect the upstream USB cable (cable supplied) to the monitor upstream port and then to the appropriate USB port on your computer (see bottom view for details).Connect USB peripherals to the downstream USB ports (side or bottom) on the monitor. (See side or bottom view for details.)Plug the power cables for your computer and monitor into a nearby outlet.Turn on the monitor and the computer.If your monitor displays an image, installation is complete. If it does not display an image, see Solving Problems.5. Use the cable holder on the monitor stand to organize the cables.1.2.3.4.Organizing Your Cablesfile:///T /htdocs/monitors/1909W/en/ug/setup.htm[11/8/2012 2:53:45 PM]
Dell 1909W Flat Panel Monitor User's GuideAfter attaching all necessary cables to your monitor and computer, (See Connecting Your Monitor for cable attachment,) use the cable management slot to organize all cables as shownabove.Attaching the Dell SoundbarCAUTION: Do not use with any device other than Dell Soundbar.NOTE: Soundbar Power Connector 12V DC output is for optional Dell Soundbar only.1.Working from the rear of the monitor, attach the Soundbar aligning the two slots with the two tabs along the bottom rear of the monitor.2.Slide the Soundbar to the left until it snaps into place.3.Connect the soundbar to the Audio Power DC-out socket (see bottom view for details).4.Insert the lime-green mini stereo plug from the rear of the Soundbar into the computer's audio output jack.Removing the Standfile:///T /htdocs/monitors/1909W/en/ug/setup.htm[11/8/2012 2:53:45 PM]
Dell 1909W Flat Panel Monitor User's GuideNOTE: To prevent scratches on the LCD screen while removing the stand, ensure that the monitor is placed on a clean surface.NOTE: This is applicable for a monitor with a stand. When the OptiPlexTM USFF 780/ OptiPlexTM SFF 980 AIO stand is bought, please refer to the respective AIO stand setupguide for set up instructions.To remove the stand:1. Rotate the stand to allow access to the stand release button.2. Press and hold the Stand release button.3. Lift the stand up and away from the monitor.Back to Contents Pagefile:///T /htdocs/monitors/1909W/en/ug/setup.htm[11/8/2012 2:53:45 PM]
Dell 1909W Flat Panel Monitor User's GuideBack to Contents PageOperating the MonitorDell 1909W Flat Panel Monitor User's GuideUsing the Front Panel ControlsUsing the On-Screen Display (OSD) MenuSetting the Maximum ResolutionUsing the Dell Soundbar (Optional)Using the Tilt ,RotationRotating the monitorAdjusting the Rotation Display Settings of Your SystemUsing the Front PanelUse the control buttons on the front of the monitor to adjust the characteristics of the image being displayed. As you use these buttons to adjust the controls, an OSD shows the numeric valuesof the characteristics as they change.Front panel ButtonABDescriptionUse this button to directly access the "Brightness/Contrast" menu or to increase the values of the selected menu option.Brightness&ContrastUse Auto Adjust to activate automatic setup/adjustment or to increase the values of the selected menu option.The following dialogappears on a black screen as the monitor self-adjusts to the current input:file:///T /htdocs/monitors/1909W/en/ug/operate.htm[11/8/2012 2:54:10 PM]
Dell 1909W Flat Panel Monitor User's GuideAutomatic Adjust /AdjustUpAuto Adjustment allows the monitor to self-adjust to the incoming video signal. After using Auto Adjustment, you can further tuneyour monitor by using the Pixel Clock (Coarse) and Phase (Fine) controls under Image Settings.NOTE: Auto Adjust does not occur if you press the button while there are no active video input signals or attached cables.CUse this button to select the input source or to decrease the values of the selected menu option. Use the Input source button toselect one of the two different video signals that may be connected to your monitor:VGA inputDVI-D inputInput SourceSelect/Adjust DownororIf either VGA or DVI-D input is selected and both VGA and DVI-D cables are not connected, a floating dialog box as shown belowappears.orDUse the MENU button to launch the on-screen display (OSD) and select the OSD Menu. See Accessing the Menu System.MenuEUse the Power button to turn the monitor on and off.The Blue LED indicates the monitor is on and fully functional. An amber LED indicates DPMS power save mode.Power(with power lightindicator)file:///T /htdocs/monitors/1909W/en/ug/operate.htm[11/8/2012 2:54:10 PM]
Dell 1909W Flat Panel Monitor User's GuideUsing the On-Screen Display (OSD) MenuAccessing the Menu SystemNOTE: If you change the settings and then either proceed to another menu or exit the OSD menu, the monitor automatically saves those changes. The changes are also saved if youchange the settings and then wait for the OSD menu to disappear.1. Push the MENU button to launch the OSD menu and display the main menu.Main Menu for Analog (VGA) InputorMain Menu for DVI Inputfile:///T /htdocs/monitors/1909W/en/ug/operate.htm[11/8/2012 2:54:10 PM]
Dell 1909W Flat Panel Monitor User's GuideNOTE: AUTO ADJUST is only available when you use the analog (VGA) connector.andbuttons to move between the setting options. As you move from one icon to another, the option name is highlighted. See the following table for a complete list2. Push theof all the options available for the monitor.3. Push the MENU button once to activate the highlighted option.4. Pushandbutton to select the desired parameter.5. Push MENU to enter the slide bar and then use theandbuttons, according to the indicators on the menu, to make your changes.6. Select the "Menu/Exit" option to return to the main menu or exit the OSD menu.IconMenu andSubmenusDescriptionBRIGHTNESS& CONTRASTUse this menu to activate Brightness/Contrast adjustment.BrightnessBrightness adjusts the luminance of the backlight.Push theContrastbutton to increase brightness and push thebutton to decrease brightness (min 0 max 100).Adjust Brightness first, and then adjust Contrast only if further adjustment is necessary.button to increase contrast and push thebutton to decrease contrast (min 0 max 100).Push theThe Contrast function adjusts the degree of difference between darkness and lightness on the monitor screen.file:///T /htdocs/monitors/1909W/en/ug/operate.htm[11/8/2012 2:54:10 PM]
Dell 1909W Flat Panel Monitor User's GuideAUTO ADJUSTEven though your computer recognizes your monitor on startup, the Auto Adjustment function optimizes the display settings for use with your particularsetup.NOTE: In most cases, Auto Adjust produces the best image for your configuration.NOTE: AUTO ADJUST option is only available when you are using the analog (VGA) connector.INPUT SOURCEAUTO SelectVGADVI-DCOLOR SETTINGSUse the INPUT SOURCE menu to select between different video signals that may be connected to your monitor.Pushto select the Auto Select, the monitor will auto detect either VGA input or DVI-D input.Select VGA input when you are using the analog (VGA) connector. PushSelect DVI-D input when you are using the Digital (DVI) connector. PushUse the Color Settings to adjust the color setting mode and color temperature.There are different color setting sub-menus for VGA/DVI-D and Video input.file:///T /htdocs/monitors/1909W/en/ug/operate.htm[11/8/2012 2:54:10 PM]to select the VGA input source.to select the DVI input source.
Dell 1909W Flat Panel Monitor User's GuideInput Color FormatChoose the RGB option if monitor is connected to a PC or a DVD using a VGA or DVI cable. Choose the YPbPr option if monitor is connected to a DVD by aYPbPr to VGA or YPbPr to DVI cable or if the DVD color output setting is not RGB.Mode SelectionYou can choose Graphics or Video according to the input signal. Select Graphics if connecting a PC to your monitor; for connecting DVD, STB or VCR toyour monitor, Video is recommended.Preset ModesWhen you select Graphics, you can choose Standard, Multimedia, Game, Warm, Cool, or Custom (R,G,B);If you view media application like photo, clip etc via PC, choose "Multimedia" preset;If yo
About Your Monitor Dell 1909W Flat Panel Monitor User's Guide Package Contents Product Features Identifying Parts and Controls Monitor Specifications Plug and Play Capability Universal Serial Bus (USB) Interface Maintenance Guidelines Package Contents Your monitor ships with the componen