Transcription
Deploying WordPresswith AWS Elastic BeanstalkImplementation Overview forScalable WordPress-poweredWebsitesAndreas ChatzakisJanuary 2015(Please consult http://aws.amazon.com/whitepapers for the latest version of this paper.)
ion Walkthrough3Preparation3Environment Creation11Software Installation21WordPress Plugin Installation23Application Versioning29Auto Scaling Configuration30Additional considerations31AbstractWordPress is an open-source blogging tool and content management system (CMS)based on PHP and MySQL that is used to power anything from personal blogs to hightraffic websites. Amazon Web Services (AWS) provides a reliable, scalable, secure, andhighly performing infrastructure for the most demanding applications.A reference architecture that addresses common scalability and high availabilityrequirements has been outlined in the whitepaper, “WordPress: Best Practices on AWS”.To implement that architecture, you can leverage AWS Elastic Beanstalk—a service thatreduces complexity by automatically handling the details of capacity provisioning, loadbalancing, scaling, and application health monitoring. This whitepaper provides systemadministrators with an overview of the steps involved.IntroductionThe first version of WordPress was released in 2003, and as such it was not built withmodern elastic and scalable cloud-based infrastructures in mind. Through the work ofthe WordPress community and the release of various WordPress modules, thecapabilities of this CMS solution are constantly expanding. Today it is possible to build aWordPress architecture that takes advantage of many of the benefits of the AWSplatform.
Amazon Web Services provides a number of application management services fordevelopers and administrators. Provided at no additional charge, AWS ElasticBeanstalk, AWS OpsWorks, and AWS CloudFormation help you manage your AWScloud applications with added convenience and control. The following example showshow to use AWS Elastic Beanstalk to deploy a WordPress-powered website with ahighly available architecture.AWS Elastic Beanstalk is an application management service that facilitates quickdeployment and management of cloud applications. You simply upload your application,and AWS Elastic Beanstalk automatically handles the details of capacity provisioning,load balancing, Auto Scaling, and application health monitoring.Implementation WalkthroughThis section presents a walkthrough of an example installation of WordPress with AWSElastic Beanstalk. In this example AWS Elastic Beanstalk launches an Elastic LoadBalancing load balancer and multiple web servers in separate AWS Availability Zones. Italso launches an Amazon Relational Database Service (Amazon RDS) databaseinstance running MySQL. In addition to resources managed via AWS Elastic Beanstalk,this walkthrough also sets up an Amazon Simple Storage Service (Amazon S3) Bucketfor static assets, an Amazon CloudFront distribution, and an Amazon ElastiCachecluster running the Memcached engine. Integrating WordPress with the abovearchitecture is accomplished via W3 Total Cache, a third-party open source plugin.With this plugin you can do the following: Store static assets (e.g., media library, theme files, etc) on Amazon S3, thus creatinga stateless web tier and offloading this workload from your web servers. Serve those assets via Amazon CloudFront, Amazon’s content delivery network,thus reducing the latency for users around the globe. Use ElastiCache’s Memcached engine to perform database caching, thus improvingperformance and reducing the load on the database. Implement browser and CloudFront caching using cache-control, future-expireheaders and entity tags (ETag), thus further improving the end user experience.Unless otherwise specified, the links in the steps are to the related AWS servicedocumentation.Preparation1. First, create an AWS Identity and Access Management (IAM) user to be used by theWordPress plugin to access Amazon S3.
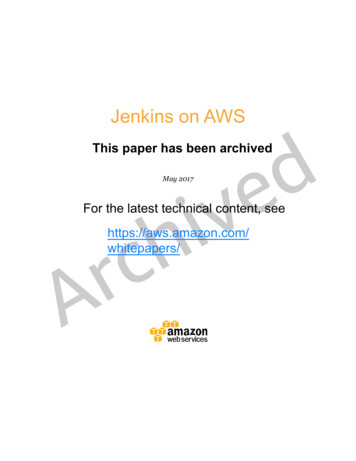
How to: Creating an IAM User in Your AWS Account.1Note: IAM roles provide a better way of managing access to AWS resources, but atthe time of writing the W3 Total Cache plugin does not support IAM roles.22. Next, take note of the user security credentials and store them in a secure manner:3. Now create an Amazon S3 bucket in the region of your choice.How to: Creating a rGuide/Using ket.html
4. Upload an index.html page. Amazon S3 returns this index document whenrequests are made to the root domain or any of the subfolders.How to: Uploading Objects into Amazon S3.45. Enable static website hosting for that bucket.How to: Configure a Bucket for Website Configuration.html
6. Attach an IAM policy to the IAM user created previously to allow access to thespecific bucket.How to: Managing IAM Policies.6{"Version": "2014-12-10","Statement": [{"Sid": "Stmt1389783689000","Effect": rGuide/ManagingPolicies.html
"Action": ],"Resource": ]}7. Download the WordPress application code to create your initial application codebundle (in this case wordpress-4.0.1.zip from http://wordpress.org/download/).8. Follow the included instructions to unzip this to your local file system. Create a copyof wp-config-sample.php and rename it wp-config.php.
9. Edit the wp-config.php file, by configuring database connectivity information withthe use of Amazon RDS environment variables7 that AWS Elastic Beanstalkmaintains automatically for you8. In addition you can add other environment variables(e.g., for the authentication unique keys and salts). To do that, you can takeadvantage of AWS Elastic Beanstalk’s ability to customize environment variables asexplained in Customizing and Configuring a PHP Environment.9For more details on the WordPress configuration, you can visithttp://codex.wordpress.org/Editing wp-config.php or see the example below. ?php/** Detect if SSL is used. This is required since we areterminating SSL either on CloudFront or on ELB */if (( SERVER['HTTP CLOUDFRONT FORWARDED PROTO'] 'https') OR ( SERVER['HTTP X FORWARDED PROTO'] 'https')){ SERVER['HTTPS'] 'on';}/** The name of the database for WordPress */define('DB NAME', SERVER["RDS DB NAME"]);/** MySQL database username */define('DB USER', SERVER["RDS USERNAME"]);/** MySQL database password */define('DB PASSWORD', SERVER["RDS PASSWORD"]);/** MySQL hostname */define('DB HOST', SERVER["RDS HOSTNAME"]);/** Database Charset to use in creating database tables. */define('DB CHARSET', 'utf8');/** The Database Collate type. Don't change this if indoubt. */define('DB COLLATE', '');/**#@ * Authentication Unique Keys and Salts.* Change these to different unique phrases!*/define('AUTH KEY', SERVER["AUTH KEY"]);define('SECURE AUTH KEY', SERVER["SECURE AUTH KEY"]);define('LOGGED IN KEY', SERVER["LOGGED IN KEY"]);define('NONCE KEY', SERVER["NONCE KEY"]);define('AUTH SALT', SERVER["AUTH SALT"]);define('SECURE AUTH SALT', SERVER["SECURE AUTH SALT"]);define('LOGGED IN SALT', SERVER["LOGGED IN SALT"]);define('NONCE SALT', SERVER["NONCE lk/latest/dg/create deploy PHP.rds.html8This is assuming you create an RDS instance as part of the Elastic Beanstalk Environment. In step 13 we willexplain why you might prefer not to do that in a production nstalk/latest/dg/create deploy PHP custom container.html
/**#@-*//*** WordPress Database Table prefix.*/ table prefix 'wp ';/*** WordPress Localized Language, defaults to English.*/define('WPLANG', '');/*** For developers: WordPress debugging mode.** Change this to true to enable the display of noticesduring development.*/define('WP DEBUG', false);/** Absolute path to the WordPress directory. */if ( !defined('ABSPATH') )define('ABSPATH', dirname( FILE ) . '/');/** Sets up WordPress vars and included files. */require once(ABSPATH . 'wp-settings.php');10. Now set the values for the Authentication Unique Keys and Salts environmentvariables. You could do this via the AWS console but instead—in our example—wecreate a folder called .ebextensions in the root folder of the local copy of theWordPress application code.Tip: If you are using Windows Explorer, you need to name the folder.ebextensions. in order to create a folder with a dot prefix. The last dot will beremoved automatically.
Inside the .ebextensions folder, add a file called keys.config with the followingcontent. Make sure you replace the authentication unique keys and salts withdifferent unique phrases, as this is for illustration only.option settings:- option name: AUTH KEYvalue: 'AJDSAHCMEWKRSODJFIEWRJSDFMKSDMADS'- option name: SECURE AUTH KEYvalue: 'SAJDSANCMEWKRSODJFIEWRJSDFMKSDMAD'- option name: LOGGED IN KEYvalue: 'DSAJDSADCMEWKRSODJFIEWRJSDFMKSDMA'- option name: NONCE KEYvalue: 'ADSAJDSAKCMEWKRSODJFIEWRJSDFMKSDM'- option name: SECURE AUTH SALTvalue: 'MADSAJDSAKCMEWKRSODJFIEWRJSDFMKSD'- option name: LOGGED IN SALTvalue: 'DMADSAJDSAKCMEPKRSODJFIEWRJSDFMKS'- option name: NONCE SALTvalue: 'SDMADSAJDSAKCMEWKHSODJFIEWRJSDFMK'- option name: AUTH SALT
value: 'KSDMADSAJDSAKCMEWKRSODJJIEWRJSDFM'Environment Creation11. Next, create an AWS Elastic Beanstalk environment. Specify a Web Server tier withthe default PHP container and of the type Load balancing, autoscaling.How to: Launching New Environments.10Zip the application code making sure you include the files and subfoldersthemselves, rather than zipping the parent folder - e.g. there should be no top-leveldirectory (subdirectories are fine). Then upload the zip file as the source of the initialapplication version:12. Type a unique environment name and latest/dg/using-features.environments.html
13. You can now enable the option to create an Amazon RDS MySQL instance as partof your Elastic Beanstalk environment. You will configure this in a subsequent step.Please note that in a production environment it is instead recommended to create theRDS instance separately – not via AWS Elastic Beanstalk but through the AmazonRDS console, CLI, or API. This would allow you to take advantage of ElasticBeanstalk’s more advanced features such as zero downtime deployments11. For thisexample we also did not select the ‘Create this environment inside a VPC’ option12which is another recommended configuration for production environments.In the next page, select an instance type for your web servers and specify an existingAmazon Elastic Compute Cloud (Amazon EC2) key pair to be able to login to theinstances of the environment via Secure Shell (SSH). If you have no Amazon EC2key pairs configured, you need to create one, as explained in the AWSdocumentation.13 You should also set up a simple health check for the Elastic LoadBalancing load balancer by configuring an application health check URL. In ourexample this will be a simple static file from the root folder of the nstalk/latest/dg/using-features.CNAMESwap.html12In practice if you are launching in a region where your account does not support the EC2 -Classic platform andyou don’t tick the ‘Create this environment inside a VPC’ option, your resources will be deployed in your DefaultVPC. You can read more at ide/default -key-pair
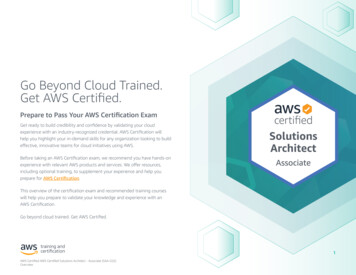
(HTTP:80/readme.html) that will be used to confirm Apache web server is runningand responding to HTTP requests.14. When you create a new environment, you can also specify tags to categorize theenvironment. Tags can help you identify environments in cost allocation reports,especially if you have many to manage. For example, you could create a key-valuepair for the website name so that this appears in cost reports:15. Use the next page to configure the Amazon RDS database. Since this is just a testenvironment, opt for the Single Availability Zone deployment. For actual productionworkloads, the Multiple Availability Zones option is recommended.
In a few minutes, your AWS Elastic Beanstalk environment is up and running:Click Show All and note the security group name information from the events list:This will be required in a subsequent step.16. The next step involves the creation of an ElastiCache Memcached cluster. Beforelaunching the cluster, we first need to create a security group to control access to theMemcached instances.
Please note that if you are running your ElastiCache nodes in Amazon VPC (includingDefault VPC14 as in our example), you control access to your cache clusters withAmazon VPC security groups. For more information on using ElastiCache in anAmazon VPC, see ElastiCache and Amazon Virtual Private Cloud15 and UsingElastiCache with Amazon Virtual Private Cloud (VPC)16. Instead if you are runningyour ElastiCache nodes in EC2-Classic you will need to create ElastiCache securitygroups.1717. You can now authorize the security group of your web servers (from step 15) byadding an inbound rule to the security group you created for your ElastiCachecluster. VPC Security groups are explained in the Amazon Virtual Private Cloud UserGuide.1818. You are now ready to launch the ElastiCache cluster with the Memcached engine,which in this example consists of two nodes.How to: Create a Cache atest/UserGuide/default /latest/UserGuide/VPC eateCluster.html
19. In the second step, specify that you want to spread the nodes across AvailabilityZones and select the security group you created earlier:
Please note that this example deploys the cluster into the Default VPC and uses thedefault Cache Subnet Group20. In addition we did not specify an Amazon SimpleNotification Service (Amazon SNS) notification topic. For a production environment, it isbest to configure those.Within a few minutes, the ElastiCache cluster is up and running. Keep a note of theendpoints of the ElastiCache nodes as we are going to need them in a subsequent step.20. Now create a CloudFront web distribution.How to: Task List for Creating a Web Distribution.2121. Set up your distribution so that by default it uses the Environment URL of the AWSElastic Beanstalk environment (from step 12) as its loperGuide/distribution -web-creating.html
In a production environment you might want to set the Origin Protocol Policy toMatch Viewer protocol so that if the viewer connects to CloudFront using HTTPS,CloudFront will connect to your origin using HTTPS as well, achieving end-to-endencryption. This requires that you install a trusted SSL certificate on the loadbalancer as explained in the AWS Elastic Beanstalk Developer Guide.2222. Because the default cache behavior associated with this origin will serve the dynamiccontent of the front end, use the following configuration:a. Allow all HTTP methods since the dynamic portions of the website require bothGET and POST requests (e.g., to support POST for the comment submissionforms).b. Forward only the cookies that vary the WordPress output—e.g., wordpress *,wp-settings-* and comment *. You will need to extend that list if you haveinstalled any plugins that depend on other cookies not in the list.c. Forward only the HTTP headers that affect the output of WordPress. Thisexample enables the CloudFront-Forwarded-Proto header (so that the samepage is cached separately if accessed via HTTP or HTTPS) and the threedevice-detection headers of CloudFront -Viewer, CloudFront-Is-Tablet-Viewer) that you can useto customize the HTML output of your themes based on the end user’s devicetype.d. Forward Query Strings as WordPress relies on k/latest/dg/using-features.managing.elb.html
23. Now create two more cache behaviors for dynamic content, one for the login page(path pattern: wp-login.php) and one for the admin folder (path pattern: wpadmin/*). Those two behaviors have the same exact settings. For example, for bothbehaviors you enforce the use of HTTPS and whitelist all cookies and HTTPheaders. The reason is that this section of the website is highly personalized andtypically has just a few users; caching efficiency is not a primary concern here. Youcan keep configuration simple and ensure maximum compatibility with any installedplugins by just passing all cookies and headers back to the origin.
Software Installation24. Once the CloudFront changes are deployed, point your browser to the host name ofthe CloudFront distribution,23 and follow the installation process:25. Submit this form to initialize the database content. The website is now functional.23In a real environment, you would instead use Amazon Route 53 to point to the actual domain name of the websiteyou are about to install.
26. The WordPress installation script sets the WordPress Address (URL) and SiteAddress (URL) settings to the host name of the Elastic Load Balancing loadbalancer. To correct this, visit the WordPress General Settings tab and set it to theright domain name for your web site (in this example simply the host name of theCloudFront distribution).
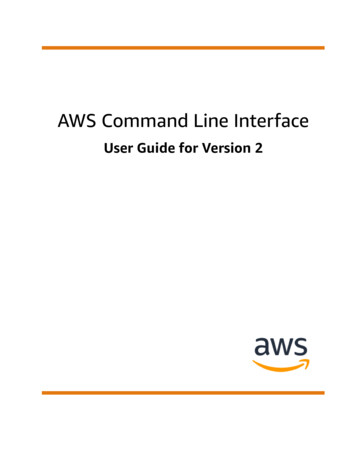
WordPress Plugin Installation27. Now log in to the WordPress admin panel and install the W3 Total Cache plugin viathe user interface:After the plugin is installed you will need to activate it:28. Next, start enabling the W3 Total Cache plugin features. A detailed description of allsettings of the plugin is beyond the scope of this article. Please refer to the W3 TotalCache plugin page at wordpress.org. In this example you first enable the DatabaseCache feature from the Plugin’s General Settings.
29. Then go to the Database Caching section of the plugin configuration to define theElastiCache nodes host names (from step 19).30. Now visit the Browser Cache section of the plugin's configuration and enable theexpires, cache control, and entity tag headers. Also activate the Prevent caching ofobjects after settings change option so that a new query string will be generatedand appended to objects when the policy changes.
Next, visit the CDN settings section of the plugin’s General Configuration. EnableCDN and select CloudFront as an Origin Push CDN configuration (this will haveAmazon S3 as its origin). Then visit the CDN section to define the details24:24Please note that W3 Total Cache has a 'Test S3 upload & CloudFront distribution' button. That test will fail unlessyou also add the s3:ListAllMyBuckets action access right to the IAM user. Since this privilege is not requi red forthe plugin to function correctly, we have not included it in our example.
31. You then need to export the media library and upload the wp-includes, theme files,and custom files to Amazon S3 via the plugin’s functions:32. Now that the static files are stored on Amazon S3, go back to the AmazonCloudFront configuration in the CloudFront console and configure Amazon S3 as theorigin for static content. To do that, add a second origin pointing to the Amazon S3bucket used for that purpose:
33. Then create two more cache behaviors, one for each of the two folders (wpcontent and wp-includes) that should use the Amazon S3 origin rather than thedefault Elastic Load Balancing origin.Configure both in the same manner:a. Serve GET HTTP requests only.b. Amazon S3 does not vary its output based on cookies or HTTP headers, so youcan improve caching efficiency by not forwarding them to the origin viaCloudFront.c. Despite the fact that these behaviors serve only static content (which accepts noparameters), you will forward query strings to the origin. This is so that you canuse query strings as version identifiers to instantly invalidate, for example, olderCSS files when deploying new versions. For more information, see the AmazonCloudFront Developer ont/latest/DeveloperGuide/ReplacingObjects.html
Application Versioning34. During installation and configuration of the W3 Total Cache plugin, certain changeshave been performed on the file system. For example the plugin code has beendownloaded and certain configuration files have been created. Those changes (thatyou implement after your initial AWS Elastic Beanstalk deployment) will be lost if theinstance is terminated. They will also not be applied to any new instances addedlater (e.g., Auto Scaling).To avoid this, as a first step you can use secure copy (SCP) to download the webfolder from the staging environment (folder /var/app/current/) locally.Then create a new .zip file (remember to also include the .ebextensions folder)and deploy it as a new application version. Please note that this now includes hardcoded values (e.g., the host names of the ElastiCache nodes in the W3 Total Cacheconfiguration) and as such is environment specific.
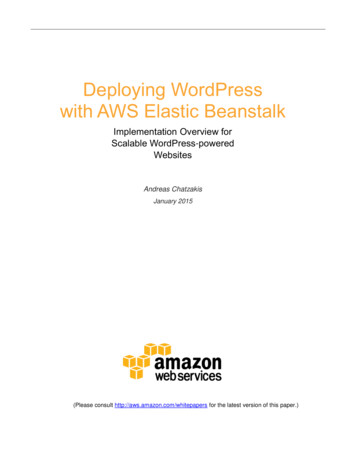
Auto Scaling Configuration35. As the last step you now need to set up the Auto Scaling options. In the Auto Scalingconfiguration page for your environment in the AWS Elastic Beanstalk console, setup a minimum of 2 and a maximum of 10 nodes across Availability Zones.On the same page, configure a scaling policy that will be triggered based on the CPUUtilization metrics:
Additional considerationsThe above example is a starting point implementation. For a production environmentthere are additional considerations around security, backups, operations etc. For furtherreading we recommend going through the following material in the AWS whitepapers26section:-Backup and Recovery Approaches Using AWS27-AWS Security Best Practices28-Operational Checklists for AWS2926AWS ackup Archive and Restore Approaches Using AWS.pdf28http://media.amazonwebservices.com/AWS Security Best AWS Operational Checklists.pdf
load balancing, Auto Scaling, and application health monitoring. Implementation Walkthrough This section presents a walkthrough of an example installation of WordPress with AWS Elastic Beanstalk. In this example AWS Elastic Beanstalk launches an Elastic Load Balancing load balancer and multiple we