Transcription
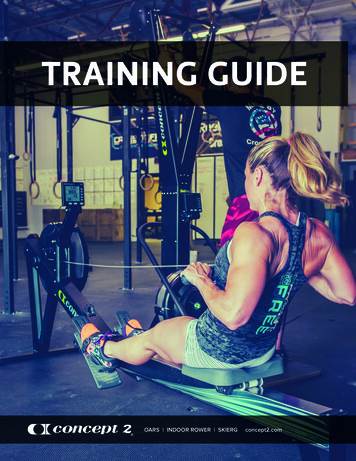
CONCEPT2 INDOOR ROWING FOUNDATIONINSTRUCTOR’S MANUAL
Table of ContentsCHAPTER 1: Concept2 Certification .5CHAPTER 2: Benefits of Rowing .9CHAPTER 3: Using the Concept2 Indoor Rower .12CHAPTER 4: Rowing Basics and Biomechanics .20CHAPTER 5: How to Teach Indoor Rowing .23CHAPTER 6: Fundamental Six Workouts .37CHAPTER 7: Workout Plans .48APPENDIX .660218INSTRUCTOR’S MANUAL3
Welcome to the Concept2 Indoor Rowing Foundation Certification!A team of rowing enthusiasts, fitness professionals, and professional educators workedtogether to create this educational program—one that is designed to prepare those on thefitness front lines to teach effective and rewarding indoor rowing.The goal of the Indoor Rowing Foundation Course is to give you the information and tools toprovide clients with an exciting and complete indoor rowing experience. Through this workshopand the Home Study course, you will learn to lead both group and one-on-one workouts.We look forward to establishing a relationship between trainers, clients and Concept2; andcreating a network that brings indoor rowing instruction to the public that is both exciting andhighly professional.For more information contact Concept2 at 800.245.5676.We hope you enjoy your workshop.4
CHAPTER 1 – Concept2 CertificationOBJECTIVES: Understand the Concept2 mission and story Understand the steps to complete the Indoor Rowing Certification Identify opportunities for continuing education through Concept2INSTRUCTOR’S MANUAL5
Mission StatementThe mission of Concept2 is to provide instruction, materials, and staff support to educate and promoteindoor rowing. This mission is directed toward individual rowers, on-the-water rowing coaches, healthclub fitness directors, personal trainers, and group exercise leaders.The Concept2 StoryConcept2 got its start in 1976 in the back of a bread truck when brothers Dick and Pete Dreissigacker,fresh from Olympic training, started making composite racing oars—now the oar of choice among theworld’s rowers. They went on to create the Concept2 Indoor Rower, now used worldwide by Olympicathletes, cardiac rehab patients and every caliber of rower in between.Since then Concept2 has grown to over 90 employees, and the product line includes the Concept2Indoor Rower, Dreissigacker Racing Oars, SkiErg and the BikeErg. Concept2 remains dedicated toproviding the most innovative rowing products and programs to our customers.Concept2 Indoor Rowing Certification ProcessIf you’ve already heard or experienced how rowing offers incredible full body aerobic and muscletoning benefits then you’ll also want to learn how to create rowing workouts specifically to help yourclients reach goals. Knowing proper rowing technique and understanding all of the tools available isessential to achieving optimum results.Completing this class allows you to teach individuals and groups as an approved Indoor RowingInstructor. This class was developed by Concept2 and approved by ACE (American Council onExercise).The Indoor Rowing Instructor Training process includes the following steps:Step 1: Participate in a one-day Indoor Rowing Foundation Training. In this training you will learn: How to complete your instructor trainingThe benefits of rowingHow to use the Concept2 Indoor RowerThe basic rowing stroke and biomechanics of rowingHow to teach indoor rowingStep 2: Complete the written testStep 3: Prepare a 9-minute video of sample instruction on rowing techniqueStep 4: Complete the course evaluation formStep 5: Submit all written materials and the video to your course instructor. If you have questions orcomments about the Instructor Training or course materials contact:Concept2, Inc.105 Industrial Park DrMorrisville, VT 05661cadyhp@concept2.com6
Continuing Education OpportunitiesConcept2 offers a comprehensive set of tools and courses to advance your knowledge ofrowing and to develop your skills as an instructor. Visit concept2.com/us/training andconcept2.com/training to access additional resources, learn about upcoming workshops and downloadtraining programs to use with clients.Concept2 Motivational ProgramsConcept2 maintains a variety of motivational programs that are easy to include as part of indoor rowingat your club. Some of these programs have been active since 1982 and include rowers from all overthe world. Others are more recent innovations, often based on customer feedback. Participants rangein age from 8 to 80, from Olympic medalists to retirees.The programs can be used to: Increase challenge, incentive and fun for your members. Attract and serve members who are unable to attend classes or choose not to. Encourage the use of your indoor rowers and make the most of your investment.Concept2 provides the following suggestions for engaging and motivating indoor rowing enthusiasts:KEEP A LOGBOOKMonitoring your progress gives you a tangible record of what you’ve rowed so you cansee improvement over time. You can keep a written log or set up a free Online Logbook atconcept2.com/logbook.PICK A REGULAR WORKOUT TIME EACH DAY/WEEKAdhering to a schedule makes it easier to stay on track and helps to create a regular routine.CONSIDER COMPETING IN AN INDOOR ROWING RACEHundreds of indoor rowing races are now held around the world each year. Some are small—ahandful of people at a local club; others are huge, with over 2000 competitors. The racedistance is 2000 meters and anyone can participate. It is a great training goal. To learn more,visit concept2.com.ROW WITH FRIENDSThere’s nothing like exercising with friends or a group for camaraderie and sense of a sharedgoal. If you don’t have access to a support group in your area, try joining an online group withthe Affiliation Standings and Team challenges. You can also read about what other rowers aredoing in our Update newsletter.ROW FOR INCENTIVESTry rowing for the distance-based Million Meter Club or online challenges.To learn more about the exciting opportunities for engaging and motivating rowing enthusiasts. Visitconcept2.com/challenges.As you and your members take part, you will discover that the fitness activity of indoor rowing hasevolved into a sport of its own with worldwide participation.INSTRUCTOR’S MANUAL7
Additional Programming Support from Concept2For additional ideas on programming, visit the Concept2 website at:concept2.com/training.Concept2 offers a variety of tips and workouts to help you and your clients stay motivated, including: Concept2 Challenge Calendar: a comprehensive yearly calendar with descriptions of Concept2’schallenges, designed to keep you motivated! Logbook Page: if you prefer to keep your logbook on paper rather than online, you can downloadand print a logbook page. Winter Workout Plan: three weeks of workouts to get you started on a good winter trainingprogram. Thirty-Minute Workouts: A selection of workouts that you can do in 30 minutes.8
CHAPTER 2 – Benefits of RowingOBJECTIVES: Understand the reasons for rowing Identify benefits to group rowing in a health club settingINSTRUCTOR’S MANUAL9
Why Row?As a sport, rowing provides the following benefits: Exercises all of the major muscle groups: legs, arms, back, abdomen, and buttocks. Muscles stretch and joints move to a greater degree than during other types of workouts,exercising muscles through a winder range of motion. Provides aerobic, anaerobic and strength conditioning. Is a great calorie burner. Research shows that rowing burns more calories than many othersports. Is a time-efficient workout. Is an exercise of smooth motion, both rhythmic and low-impact. A workout can occur: inside, outside, on water, on land, competitively or just for fun. Aids in weight loss, reduces blood pressure and builds lean muscle mass. Can be used as a source of cross-training for other sports.Benefits for Health ClubsRowing has many qualities that make it well suited for the club environment. Rowing is a sport thatcan be experienced as an individual or a team. Some rowers love the solo experience of the singlescull, while others love the exquisite teamwork required in an eight-man crew. This carries overnicely to the club environment, where some members choose to exercise alone and others love thecamaraderie and motivation offered in a rowing class.Rowing in a group setting promotes: Motivation: Group members keep each other motivated throughout the workout, therebyenhancing the quality and results. Commitment: By agreeing to row together at a certain time, group members are less likely toskip the workout. Technique: Group members can watch each other’s technique and compare it with thetechnique poster. Camaraderie: Your workout becomes a chance to get together with friends or make newfriends. Workout Variety: Group members can take turns designating the workout, thereby introducingmore variety to the group’s training. Synchrony: In on-water rowing, there are team boats of 2, 4, and 8 people. Rowing is a uniqueteam sport because all the rowers must be in sync, catching the water with their oars at exactlythe same moment. This synchrony can add to the quality of your indoor rowing workout.10
In addition to being a new and intriguing way of attracting members, it provides a great theme for clubdécor, special events and membership promotions.If your goal is to set up a program at a facility, visit concept2.com to learn more about programmingand steps to move ahead.In addition to assisting with your training needs, Concept2 is here to provide resources forprogramming, instruct your staff, and help make the most of your investment.For more information, contact Concept2 at 800.245.5676 or info@concept2.com.INSTRUCTOR’S MANUAL 11
CHAPTER 3 – Using the Concept2 Indoor RowerOBJECTIVES:12 Identify the main components of the Concept2 Indoor Rower Adjust the indoor rower settings Understand how to use the Performance Monitor (PM) and Pace Chart Identify the indoor rower maintenance schedule Recognize basic safety tips
The Concept2 Indoor RowerThe indoor rower is built with the following key features: FlywheelDamperMonorailFlexfootHandle hookPerformance Monitor (PM)Performance MonitorDamperHandle hookMonorailFlywheelFlexfootFLYWHEELThe harder you pull, the more resistance you will feel. This is because theConcept2 Indoor Rower uses air resistance, which is generated by the spinningflywheel. The faster you get the wheel spinning, the more resistance there willbe.DAMPERThe damper setting is like bicycle gearing. It affects the feel of the rowing butdoes not directly affect the resistance. With a little experimentation, you will findthe damper setting that gives you the best workout and results.It is important to understand that setting the damper is not the action thatdetermines the intensity of your workout. The work level you are achieving byyour effort is the indication of your level of exertion (how hard you are rowing).The damper setting will change the relationship of the force you exert and thespeed of your pull through.Changing the damper is like changing the kind of boat you are rowing in. Thelower numbers on the damper are like a sleek, fast racing shell. The highernumbers are like a slow rowboat loaded with fish. You can imagine that in eitherof these boats you can row hard and try to go fast or you can row easy andgo slowly. You would not get a better workout in the heavy boat with the fishunless you worked harder and longer than you would in the sleek, racing boat. Infact, you might find that you would be more likely to work harder and longer inthe fast boat because too high a force did not overtax your muscles.The stroke rate may vary as the rower tries to keep a constant work levelreading on the monitor as the damper setting changes.INSTRUCTOR’S MANUAL 13
Many new rowers find it more comfortable to row in the higher numbered damper settings. This isbecause they can move more slowly through the stroke and still generate a decent force. As onebecomes more skilled at the rowing motion you will be able to apply your power more quickly andgenerate high forces even at the lowest numbered damper setting.Rowing at the higher settings (slower pull through and higher forces) can put too much strain on yourmuscles and cause you to stop your workout without getting full aerobic benefits.We recommend a damper setting of 3-5 for the best aerobic workout.MONORAILThe monorail should be attached and locked prior to use. Attach and detach the monorail only asneeded, according to the image below.FLEXFOOTThe flexfoot should be set so that the strap crosses the ball of the foot of each shoe. This settingshould permit the shins to be perpendicular to the floor.If the shins go beyond the perpendicular, raise the flexfoot toe one or two holes. As the rower movesclose to the flywheel, the heels can lift. Shift the flexfoot up and down according to foot length. Lockin to the plastic pegs at the correct setting.HANDLE HOOKPlace the handle in the handle hook to make it easier to reachwhen you are seated on the indoor rower.14Handlehook
Performance MonitorThe monitor is used to measure the work that a rower does while rowing and provide feedback onperformance.You can view your performance in pace, watts and calories. The PM displays your output in a choice ofunits and display options. You can choose the units and displays that work best for you.Sample DisplayStrokes per minute (s/m).Total elapsed time.Pace (time/500m) A faster pace is indicated by ashorter time to cover the distance.Total meters.Average pace (in time) per 500mThis is the average for your entireworkout.Split meters. The number ofmeters in a given distance ortime. Splits are five minutes long.UNITSPush to change units betweenMeters (m), Pace, Watts andCalories (Cal).Heart rate(Optional. Requires additional chest belt.)MemoryProjected meters in 30 minutes if the currentaverage pace is maintained.MENUPush to power up the PM, display the previousmenu or save workout results.DISPLAYPush to change display between All Data, Force Curve, Paceboat and Large Print.You can row as hard or as easy as you wish. The indoor rower will not force you to row at any setintensity level. It is up to you. As you put more effort into your rowing, you will go faster, produce morewatts, and burn more calories. All of these outputs will be measured and displayed by the PerformanceMonitor (PM).Keep your goals in mind. For example, if your goal is to burn a lot of calories, it is more important to rowfor a long time than to row hard. If you row too hard, you won’t last as long. Use the pace chart on page17 to assist in reading the monitor and pacing a workout.The indoor rower is a variable resistance machine. The amount of muscle force applied determines theamount of resistive force encountered. More muscle force produces more resistive force, and vice versa.Your stroke output is displayed on the Performance Monitor. Watch the 1500m display window of themonitor and you will notice the number changes at the end of each drive. This number shows you theoutput of the stroke you just finished.The number will seldom be the same from stroke to stroke as it will take time to develop consistentpower application.HOW IS WORK MEASURED?The monitor can display your stroke output in three different units of measure; boat speed as time per500 meters, watts, and calories per hour. Boat speed is most widely used among rowers. The time per500 meters is to a rower what time per mile is to a runner. Tell any runner that you do sub 5-minute milesand he will know how fast you run. On the Concept2 Indoor Rower, boat speed is related to the amountof power you are producing to make the flywheel spin. You can view your effort as units of power inINSTRUCTOR’S MANUAL 15
watts. If you row at 100 watts, you are producing the amount of power it takes to keep a 100-wattlight bulb lit. The harder you work, the more watts you produce, and the less time it will take to go500 meters. When you produce power, your body burns calories. The Performance Monitor makes anapproximation of the rate you are burning calories based on the amount of power you are producing.As you do different types of rowing workouts, you will use the stroke output number (pace, Caloriesor watts) as your guide to tailor the effort to the length of time intended to row. For example, thetarget work level during a 30-minute steady row will be slower than your target for 2-minute intervalswith rest. A seasoned rower will know his or her pace and will monitor their progress based onimprovements in the paces he or she can maintain for various workouts.There are multiple display options, including:MemoryForce Curve16Main MenuAll DataPace BoatBar ChartForce CurveLarge PrintPace Boat
Concept2 Indoor Rower Pace ChartUse this chart to predict your final time or distance for the workouts shown.Averagepace perYour time will be:Your distance will 49:2050:0050:4030 60816000592160 STRUCTOR’S MANUAL 17
Recommended Maintenance ScheduleThe maintenance schedule below should be followed when using groups of indoor rowers regularlyfor classes. Refer to the User Manual and Concept2 website for more detailed instructions on indoorrower maintenance.DAILYWipe monorail with a cloth or non-abrasive scouring pad after use.WEEKLYClean and lubricate the chain with a teaspoon of purified mineral oil, 3-IN-ONE oil, or 20W motor oil.MONTHLY Inspect chain for stiff links. If thorough lubrication does not help, thechain should be replaced. Inspect chain-handle connection for wear. If the hole has becomeelongated, or the U-bolt is worn halfway through, the entire connectionshould be replaced. Tighten the shock cord if the handle does not return all the way to the fanenclosure. Check the socket screws used to install the front leg for tightness. Loosen or tighten the nuts on the Performance Monitor arm joints asnecessary. Check for dust inside flywheel with a flashlight and vacuum if needed.18 INSTRUCTOR’S MANUAL
Safety Tips1. Do not let handle fly into chain guide.2. Place handle against the chain guide or in handle hook before letting go.3. Pull straight back with both hands.4. Never twist chain or pull from side to side.5. Do not row with one hand only. Abuse of the chain can result in injury.6. Keep clothing free of seat rollers.7. Keep children and fingers away from seat rollers. Seat rollers can cause injury.8. Perform proper maintenance as described on page 18.9. ALWAYS PUT THE FRAME LOCK IN THE LOCKED POSITION BEFORE MOVING THE INDOORROWER.123456879INSTRUCTOR’S MANUAL 19
CHAPTER 4 – Rowing Basics and BiomechanicsOBJECTIVES: Learn the basic rowing stroke Learn the anatomy and biomechanics of rowing20
The Basic Rowing Stroke: Movement and BiomechanicsThere are four movements to the basic rowing stroke. All four movements should be executed in asmooth, continuous, and fluid manner:1. Catch2. Drive3. FinishMOVEMENTTHE CATCH4. RecoveryBIOMECHANICSThe catch begins by grasping the handleevenly with both hands, with the seat slidforward so the knees are tucked into thechest and shins are vertical (or as close tovertical as your flexibility will allow). Thearms are stretched out in front and the bodyis leaning slightly forward from the hips.The erector spinae muscles of the back arerelaxed to allow for trunk flexion, which isprovided by the abdominals. The psoas majorand minor and the iliacus flex the pelvis and hips.The sartorius muscle rotates the thighs whichallows the body to flex between the thighs toobtain maximum reach. The hamstrings andgastrocnemius are contracting while the kneesare in flexion. The quadriceps are elongated andstretched, yet the rectus femoris is contributingto hip flexion. The ankles are dorsiflexed bythe tibialis anterior. The elbows are extendedby the triceps brachii. The grip on the handle isaccomplished by the flexor muscles of the fingersand thumb.THE DRIVELegsThe drive uses the power of the legs, bodyswing and arms pulling through to completethe phase. To begin the drive, press firmlyagainst the foot stretchers until the legsare almost fully extended, but not locked.The torso should then swing back to a100-degree angle with the seat. Let thearms “go for the ride” as you slowly pullthem toward the abdomen.The initial portion of the drive demands maximalpower from the legs. The quadriceps extendthe knee, and the feet are plantar flexed by thesoleus and gastrocnemius muscles. A numberof stabilizing muscles aid in supporting thelower back. All the muscles of the shoulderare contracting. These include the supra andinfraspinatus, subscapularis, teres major andminor, and the biceps brachii. The scapula isstabilized by the serratus anterior and trapeziusmuscles.Body SwingAs the knees are finishing their extension, thehip is also extending by the contraction of thegluteus and hamstring muscles. Back extension isoccurring by contraction of the erector spinae. Inthe upper body, elbow flexion is occurring via thebiceps, brachialis, and the brachioradialis muscles.continued on next pageINSTRUCTOR’S MANUAL 21
MOVEMENTTHE DRIVE continuedBIOMECHANICSArm Pull ThroughThe knees are maximally extended, and theankles are plantar flexed. In addition, hip and backextension are being completed. The upper bodymusculature is contracting with high force to finishthe drive. The elbow flexors are dominant. Theflexor and extensor carpi ulnaris muscles of theforearm contract to stabilize and adduct the wrist.The shoulder is extended and adducted. The upperarm is internally rotated by the latissimus dorsi andpectoralis major. The teres minor, posterior deltoid,and long head of the biceps are acting on theshoulder joint. The scapula is rotated downwardby the pectoralis minor and then drawn backwardby the trapezius and rhomboid muscles.THE FINISHThe knees and ankles remain constant as the hipscomplete a full extension. The back extensors arecontinually contracting, and the upper arms areinternally rotated by the contracting latissimusdorsi. The triceps are extending the elbowsslightly.In the finish, the arms are pulled all theway into the abdomen with the legs fullyextended and your torso leaning back toapproximately 100 degrees.THE RECOVERYFor the recovery, extend the arms, leanforward from the hips, and bend your legs.As you do this, slide forward to start thenext catch. The arms must pass over theknees before the knees bend.22The arms are pushed forward and away from thebody by the triceps until the elbows reach fullextension. The anterior deltoids contract alongwith the coracobrachialis and biceps, and theupper arms pass over the extended knees. Theabdominals flex the torso, and once the handshave cleared the extended knees, the slide beginsits forward motion through ankle dorsiflexion andhip and knee flexion.
CHAPTER 5 – How to Teach Indoor RowingOBJECTIVES: Identify an instructor’s responsibilities Recognize general rowing problems and how to modify them Identify the five bad habits of beginning rowers Prevent technique errors through cueing and drills Learn proper pre- and post-workout stretches Identify basic elements to set up for successful group rowing Learn the basic format used and emphasis in programming a workout Find additional resources for building workoutsINSTRUCTOR’S MANUAL 23
INSTRUCTOR’S RESPONSIBILITIES Lead, guide, and coach a safe and effective rowing workout Make recommendations for personal enhancement of an individual’s rowing technique Empower rowers to direct their own workouts Provide verbal correction and motivation Facilitate motivational programsGENERAL ROWING PROBLEMS AND MODIFICATIONSWhen instructing, note any of the following issues that impact form during a workout. Modify, asneeded, using the tips below.24 Stroke should be smooth and continuous, no stopping at any point. Shoulders remain down and relaxed, not up around the rower’s ears. Wrists should be flat. Carry the handle parallel to the floor on drive and recovery. Avoid tension in the grip; allow the fingers to wrap softly around the handle. Raise the monitor arm to improve a rower’s head position and posture. Raising and lowering the flexfoot piece on the footstretcher may affect the compression of thelegs at the catch. A larger or less flexible person may prefer a lower flexfoot. Stroke rate is not an indicator of how hard a person is working. The center window of theperformance monitor displays pace and is determined by the intensity of the drive. Prompt rowers to keep the number in the center window of the Performance Monitor asconstant as possible. Then pull harder and watch what happens to the number. If a person is struggling or rushing, prompt them to slow down and row at a slower strokerate—fewer strokes per minute (SPM).
Five Bad Habits of Beginning RowersThe following habits have been found to be the most common among beginning rowers:8 INCORRECT4 CORRECTEXCESSIVE FORWARD LEAN/REACHThe seat nearly hits the heels,the shins are past the vertical,the body leans too far forward,and the head and shouldersdrop toward the toes. This putsthe body in a weak position forthe start of the next stroke.The seat remains at least 7–10inches from the heels, the shinsare nearly vertical, the body leanscomfortably forward, and thehead and shoulders stay up andrelaxed.ROCKING ON (OPENING BACK TOO EARLY)The rower pulls the handle byleaning back rather than bypressing the legs. This wastesthe power of the legs and maystrain the back.The legs should start the drivewith the body still leaningforward. The back then graduallyopens, prying against theextended legs.SHOOTING THE TAIL (OPENING THE BACK TOO LATE)The rower starts the drive byextending the legs withoutmoving the handle. The powerof the legs is wasted.The body needs to come alongwith the legs, thereby transferringthe legs power into the handle.The back then gradually opens,prying against the extended legs.Hips and handle move together.EARLY KNEE BEND ON THE RECOVERYOn the recovery, the rower letsthe knees come up before thearms are fully extended. As aresult, either the knees andhands collide (thud!) or the handsare forced to travel upward ina big arc to avoid the knees(unnecessary work for arms!)The rower should extend thearms completely and lean theupper body forward from thehips BEFORE bending the kneesto slide forward. This gets thehands out nicely ahead of theknees.EXCESSIVE LAYBACK AND PULLING UP THE CHINThe rower leans back too far atthe finish and/or pulls the handleall the way up to the chin. This isan inefficient use of the arms andexposes the back to potentialstrain.The handle should be pulled towithin one inch of the abdomen,halfway between the lap and thechest. The upper body shouldhave a 5–10 degree backwardlean.INSTRUCTOR’S MANUAL 25
Cueing for Good TechniqueAs with any sport, improper technique can result in injury. Recognizing errors is extremely important,but correcting them is even more critical to your role as an instructor.Repeat these reminders during various points in the class. The goal is to create muscle memory.Repetition of movement and use of imagery help athletes accomplish physical goals.Use the following verbal cues while instructing during each phase of the stroke.AT THE CATCH: Extend your arms straight toward the flywheel.Lean your upper body slightly forward with back straight but not stiff.Slide forward on the seat until your shins are vertical. It’s okay if heel lifts slightly.DURING THE DRIVE: The arms are long like a rope at the beginning of the drive.Wrists should be flat or slightly above the knuckles.Begin the drive by pressing down your legs.Legs and hips are the pump for the drive.Keep your arms straight and hold your back firm to transfer your leg power up to the handle.Back and arms keep the drive alive.Gradually swing back with your u
Instructor. This class was developed by Concept2 and approved by ACE (American Council on Exercise). The Indoor Rowing Instructor Training process includes the following steps: Step 1: Participate in a one-day Indoor Rowing Foundation Training. In this training you will learn: How to complete your