Transcription
View metadata, citation and similar papers at core.ac.ukbrought to you byCOREprovided by Institutional Repository of the Anjuman-I-Islam's Kalsekar Technical CampusAUTO IRRIGATION USING ARDUINOSubmitted in partial fulfillment of the requirementsof the degree ofBachelor of EngineeringBySHAIKH SHEROZ MOHD HASAN12ET55Supervisor :Asst. Prof. BANDANAWAZ M. KOTIYALDepartment of Electronics and Telecommunication EngineeringAnjuman-i-Islam Kalsekar Technical Campus,New PanvelMUMBAI UNIVERSITY2015-2016
Project Report Approval for B.EThis project report entitled AUTO IRRIGATION USING ARDUINIO bySHAIKH SHEROZ MOHD HASAN is approved for the degree of Bachelor inEngineering.Examiners:1. .2. .Supervisor(s):Asst. Prof. BANDANAWAZ M. KOTIYALH.O.D (EXTC):Asst. Prof. MUJIB A. TAMBOLIDate:Place:
DECLARATIONWe declare that this written submission represents our ideas in our own words and where other sidesor words have been included, we have adequately cited and referenced the original sources. We alsodeclare that we have adhered to all principles of academic honesty and integrity and have notmisrepresented or fabricated or falsified any idea/data/fact/source in my submission. We understandthat any violation of the above will be cause for disciplinary action by the Institute and can alsoevoke penal action from the sources which have thus not been properly cited or from whom properpermission has not been taken when needed.SHAIKH SHEROZ MOHD HASAN12ET55Date:Place:
ACKNOWLEDGEMENTThe project work is the fruit of many hardworking hands. It‟s those small inputs from Asst. Prof. ZARRARKHAN and Asst. Prof. AFZAL SHAIKH as well as some different people that have lent a helping to ourproject.I take this opportunity to express my profound gratitude and deep regards to my guide Asst. Prof.Bandanawaz M. Kotiyal for his exemplary guidance, monitoring and constant encouragement throughoutthe course of this project work.I also take this opportunity to express a deep sense of gratitude to Asst.Prof. MUJIB A.TAMBOLI, HOD ofE.X.T.C. Deptartment for his cordial support, valuable information and guidance, which helped me incompleting this task through various stages.I am obliged to staff members of AIKTC, for the valuable information provided by them in their respectivefields. I am grateful for their cooperation during the period of my project work.
ABSTRACTIndia is the agriculture based country. Our ancient people completely depended onthe agricultural harvesting. Agriculture is a source of livelihood of majority Indians andhas great impact on the economy of the country. In dry areas or in case of inadequaterainfall, irrigation becomes difficult. So, it needs to be automated for proper yield andhandled remotely for farmer safety. Increasing energy costs and decreasing watersupplies point out the need for better water management. Irrigation management is acomplex decision making process to determine when and how much water to apply to agrowing crop to meet specific management objectives. If the farmer is far From theagricultural land he will not be noticed of current conditions. So, efficient watermanagement plays an important role in the irrigated agricultural cropping systems.A low cost alternative solution for efficient water management currently in use isdrip irrigation systems that consist of an automated controller to turn on & off the controlvalues, which in turn helps the farmers by managing the water supply to the crop fieldsand further maintains the moisture levels of soil that helps in better crop production. Thisproject probes into the design of the automated irrigation system based on Arduino. ThisEmbedded project is to design and develop a low cost feature which is based onembedded platform for water irrigation system. This project uses temperature and soilmoisture sensors to detect the water quantity present in agriculture. The project usesArduino micro controller which is controller to process the information.The aim of the implementation was to demonstrate that the automatic irrigationcan be used to reduce water use.
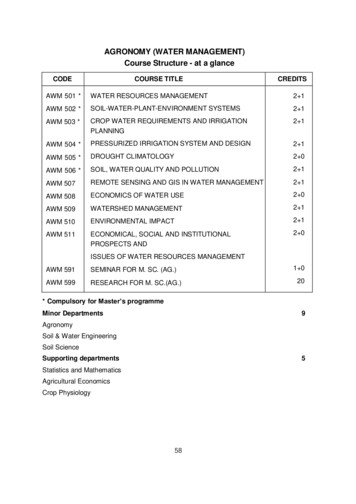
TABLE OF CONTENTPROJECT REPORT APPROVAL FOR B.EDECLARATIONACKNOWLEDGEMENTVIABSTRACTVTABLE OF CONTENTSVI1. INTRODUCTION12. OBJECTIVE OF PROJECT23. LITERATURE SURVEY34. PROBLEM STATEMENT45. SCOPE OF PROJECT56. ADOPTED METHODOLOGY66.1 BLOCK DIAGRAM76.2 HARDWARE REQUIREMENT86.3 SOFTWARE REQUIREMENT287. ADVANTAGE OF PROPOSED SYSTEM358. CONCLUSION & FUTURE SCOPE369. REFERENCES37
Auto Irrigation Using Arduino 20161. IntroductionBy using the concept of modern irrigation system a farmer can save water up to50%. This concept depends on two irrigation methods those are: conventional irrigationmethods like overhead sprinklers, flood type feeding systems i.e. wet the lower leavesand stem of the plants. The area between the crop rows become dry as the large amountof water is consumed by the flood type methods, in which case the farmer depends onlyon the incidental rainfalls. The crops are been infected by the leaf mold fungi as the soilsurface often stays wet and is saturated after irrigation is completed.Overcoming these drawbacks new techniques are been adopted in the irrigationtechniques, through which small amounts of water applies to the parts of root zone of aplant. The plant soil moisture stress is prevented by providing required amount of waterresources frequently or often daily by which the moisture condition of the soil will retainwell. The diagram below shows the entire concept of the modern irrigation system. Thetraditional techniques like sprinkler or surface irrigation requires / uses nearly half ofwater sources. Even more precise amounts of water can be supplied for plants. As far asthe foliage is dry the plant damage due to disease and insects will be reduced, whichfurther reduces the operating cost.The dry rows between plants will leads to continuous federations during theirrigation process. Fertilizers can be applied through this type of system, and the costrequired for will also reduces. The erosion of soil and wind is much reduced by the recenttechniques when compared with overhead sprinkler systems. The soil characteristics willdefine the form of the dripping nature in the root zone of a plant which receives moisture.As the method of dripping will reduce huge water losses it became a popularmethod by reducing the labor cost and increasing the yields. When the components areactivated, all the components will read and gives the output signal to the controller, andthe information will be displayed to the user (farmer). The sensor readings are analog innature so the ADC pin in the controller will convert the analog signals into digital format.Then the controller will access information and when the motors are turned On/Off it willbe displayed on the LCD Panel.-1-
Auto Irrigation Using Arduino 20162. Objective of ProjectThere is an urgent need for a system that makes the agricultural process easier andburden free from the farmer‟s side. With the recent advancement of technology it hasbecome necessary to increase the annual crop production output entirely agro-centriceconomy.The ability to conserve the natural resources as well as giving a splendid boost tothe production of the crops is one of the main aims of incorporating such technology intothe agricultural domain of the country.To save farmers effort, water and time. Irrigation management is a complexdecision making process to determine when and how much water to apply to a growingcrop to meet specific management objectives.If the farmer is far from the agricultural land he will not be noticed of currentconditions. So, efficient water management plays an important role in the Irrigatedagricultural cropping systems.-2-
Auto Irrigation Using Arduino 20163. Literature SurveyIt is a simple project more useful in watering plants automatically without any humaninterference. We know that people do not pour the water on to the plants in their gardens whenthey go to vacation or often forget to water plants. As a result, there is a chance to get the plantsdamaged. This project is an excellent solution for such kind of problems. Many irrigationsystems exits such as,1. Monitoring of rice crops using GPRS and wireless sensors for efficient use of water andElectricity.2. Wireless Sensor Based Remote Monitoring System for Agriculture Using ZigBee andGPS.3. Design of Embedded System for the Automation of Drip Irrigation.4. A Survey of Automated GSM Based Irrigation System.5. Wireless Sensor Networks Agriculture: For Potato Farming.6. Design and Implementation of GSM based Irrigation System Using ARM7.7. Automated Irrigation System Using a Wireless Sensor Network and GPRS Module.8. Automated Irrigation System Using Solar Power.9. Review for ARM based agriculture field monitoring system.10. Automatic Irrigation Control by using wireless sensor networks.11. Remote Sensing and Control of an Irrigation System Using a Distributed Wireless SensorNetwork.-3-
Auto Irrigation Using Arduino 20164. Problem StatementIrrigtion of plants is usually a very time- consuming activity, to be done in areasonable amount of time, it requires a large amount of human resources.Traditionaaly all the steps were executed by humans. Nowadays some systems usetechnology to reduce the number or workers or the time required to water the plants. Withsuch systems, the control is very limited, and many resources are still wasted.Water is one of these resources that are used excessively. Many irrigation is onemethod used to water the plant. This method represents massive losses since the amountof water given is in excess of the plants needs. The excess water is evacuated by the holesof the pots in greenhouses, or it percolates through the soil in the fields.The contemporary preception of water is that of a free renewable resource thatcan be used in abundance. It is therefore reasonable to assume that it will soon become avery expensive resource everywhere.In adition to the excess cost of waterm labour is becoming more and moreexpensive. As a result, if no effort is invested in optimising these resources, there will bemore money involved in the same process. Technology is probably a solution to reducecosts and prevent loss of resource, this project can be a strong way to tackle such asituation.-4-
Auto Irrigation Using Arduino 20165. Scope of projectDay by day, the field of electronics is blooming and have caused great impact onhuman beings. The project which is to be implemented is an automated irrigation methodand has a huge scope for future development. The project can be extended to greenhouseswhere manual supervision is far and few in between. The principle can be extended tocreate fully automated gardens and farmlands. Combined with the principle of rain waterharvesting, it could lead to huge water savings if applied in the right manner. Inagricultural lands with severe shortage of rainfall, this model can be successfully appliedto achieve great results with most types of soil.By developing a Smart Wireless Sensor and by using upcoming techniques afarmer can increase his profit by solving different problems that are faced by the farmerin his routine life. And also to involve Arduino – Controller with a video capturing byusing an MMS facility about the crop position and at the same time sending video to thefarmer.-5-
Auto Irrigation Using Arduino 20166. Adopted MethodologyPROJECT PLANNINGa. Analysis of the exiting situation and the exact nature of problem faced throughdiscussions with the project guide.b. Study of process of different technologies used in the system.c.With the help of the guide the specifications of the program were decided and thenimplemented in the project.d. Use of Accelerometer sensor to interface the computer and embedded system meant forprocess and control.e. Testing, development and troubleshooting still underway to enhance user interface.-6-
Auto Irrigation Using Arduino 20166.1 Block DiagramAbove is the manner in which we are going to implement the circuit. The first partof the block diagram are different sensors and the second part is an LCD Panel andmotors for supplying water. The major hardware modules which are needed: Arduinoprocessor, motor, different sensors and an LCD Panel .-7-
Auto Irrigation Using Arduino 20166.2 Hardware and Software RequirementsCOMPONENTS:I.Temperature Sensor (LM35):The temperature sensor used to measure the temperature at the field is LM35. TheLM35 series are precision integrated-circuit temperature sensors, whose output voltage islinearly proportional to the Celsius (Centigrade).The LM35 does not require any externalcalibration or trimming to provide typical accuracies of degree C at room temperatureand degree C over a full -55 to 150C temperature range. Low cost is assured bytrimming and calibration at the wafer level. The LM35‟s low output impedance, linearoutput, and precise inherent calibration make interfacing to readout or control circuitryespecially easy.The device is used with single power supplies, or with plus and minus supplies.As the LM35 device draws only 60 μA from the supply, it has very low self-heating ofless than 0.1 C in still air.Features1.Calibrated Directly in Celsius (Centigrade)2.Linear 10-mV/ C Scale Factor3.0.5 C Ensured Accuracy (at 25 C)4.Rated for Full 55 C to 150 C Range5.Suitable for Remote Applications6.Low-Cost Due to Wafer-Level Trimming7.Operates from 4 V to 30 V8.Less than 60-μA Current Drain9.Low Self-Heating, 0.08 C in Still Air10.Non-Linearity Only ¼ C Typical11.Low-Impedance Output, 0.1 Ω for 1-mA Load-8-
Auto Irrigation Using Arduino 2016II.Humidity Sensor (DHT11) :A Humidity sensor also called a hygrometer, measures and regularly reports therelative humidity in the air. A humidity sensor senses relative humidity. This means thatit measures both air temperature and moisture. Relative humidity, expressed as a percent,is the ratio of actual moisture in the air to the highest amount of moisture air at thattemperature can hold. The warmer the air is, the more moisture it can hold, so relativehumidity changes with fluctuations in temperature. The most common type of humiditysensor uses what is called “capacitive measurementThis system relies on electrical capacitance, or the ability of two nearby electricalconductors to create an electrical field between them. The sensor itself is composed oftwo metal plates with a non-conductive polymer film between them. The film collectsmoisture from the air, and the Moisture causes minute changes in the voltage between the-9-
Auto Irrigation Using Arduino 2016two plates. The changes in voltage are converted into digital readings showing theamount of moisture in the airFig. DHT11 Sensor- 10 -
Auto Irrigation Using Arduino 2016III.Soil Moisture Sensor:Although soil water status can be determined by direct (soil sampling) andindirect (soil moisture sensing) methods, direct methods of monitoring soil moisture arenot commonly used for irrigation scheduling because they are intrusive and laborintensive and cannot provide immediate feedback. Soil moisture probes can bepermanently installed at representative points in an agricultural field to provide repeatedmoisture readings over time that can be used for irrigation management. Special care isneeded when using soil moisture devices in coarse soils since most devices require closecontact with the soil matrix that is sometimes difficult to achieve in these soils.Most of the currently available volumetric sensors suitable for irrigation aredielectric. This group of sensors estimate soil water content by measuring the soil bulkpermittivity (or dielectric constant) that determines the velocity of an electromagneticwave or pulse through the soil. In a composite material like the soil (i.e., made up of- 11 -
Auto Irrigation Using Arduino 2016different components like minerals, air and water), the value of the permittivity is madeup by the relative contribution of each of the components. Since the dielectric constant ofliquid water is much larger than that of the other soil constituents, the total permittivity ofthe soil or bulk permittivity is mainly governed by the presence of liquid water. Thedielectric methods use empirical (calibrated) relationships between volumetric watercontent and the sensor output signal (time, frequency, impedance, wave phase). Thesetechniques are becoming widely adopted because they have good response time (almostinstantaneous measurements), do not require maintenance, and can provide continuousreadings through automation. Although these sensors are based on the dielectric principlethe various types available (frequency domain reflectometry-FDR, capacitance, timedomain transmission-TDT, amplitude domain reflectometry-ADR, time domainreflectometry-TDR, and phase transmission) present important differences in terms ofcalibration requirements, accuracy, installation and maintenance requirements and cost.Soil moisture is an important component in the atmospheric water cycle, both on asmall agricultural scale and in large-scale modelling of land/atmosphere interaction.Vegetation and crops always depend more on the moisture available at root level than onprecipitation occurrence. Water budgeting for irrigation planning, as well as the actualscheduling of irrigation action, requires local soil moisture information. Knowledge ofthe degree of soil wetness helps to forecast the risk of flash floods, or the occurrence offog.Soil water content is an expression of the mass or volume of water in the soil,while the soil water potential is an expression of the soil water energy status. The relationbetween content and potential is not universal and depends on the characteristics of thelocal soil, such as soil density and soil texture.The basic technique for measuring soil water content is the gravimetric method.Because this method is based on direct measurements, it is the standard with which allother methods are compared. Unfortunately, gravimetric sampling is destructive,rendering repeat measurements on the same soil sample impossible. Because of thedifficulties of accurately measuring dry soil and water volumes, volumetric watercontents are not usually determined directly.- 12 -
Auto Irrigation Using Arduino 2016Measuring soil moisture is very important in agriculture to help farmer formanaging the irrigation system. Soil moisture sensor is one who solves this. This sensormeasures the content of water. Soil moisture sensor uses the capacitance to measure thewater content of soil. It is easy to use this sensor. Simply insert this rugged sensor intothe soil to be tested, and the volumetric water content of the soil is reported in percent.Soil moisture sensors measure the volumetric water content in soil.Since the direct gravimetric measurement of free soil moisture requiresremoving, drying, and weighting of a sample, soil moisture sensors measure thevolumetric water content indirectly by using some other property of the soil, such aselectrical resistance, dielectric constant, or interaction with neutrons, as a proxy for themoisture content. The relation between the measured property and soil moisture must becalibrated and may vary depending on environmental factors such as soiltype, temperature, or electric conductivity. Reflected microwave radiation is affected bythe soil moisture and is used for remote sensing inhydrology and agriculture. Portableprobe instruments can be used by farmers or gardeners.Soil moisture sensors typically refer to sensors that estimate volumetric watercontent. Another class of sensors measure another property of moisture in soilscalled water potential; these sensors are usually referred to as soil water potential sensorsand include tensiometers and gypsum blocks.- 13 -
Auto Irrigation Using Arduino 2016IV.Arduino Micro-controller:Arduino is an open-source prototyping platform based on easy-to-use hardwareand software. Arduino boards are able to read inputs - light on a sensor, a finger on abutton, or a Twitter message - and turn it into an output - activating a motor, turning onan LED, publishing something online. We can tell your board what to do by sending a setof instructions to the microcontroller on the board. To do so we use the Arduinoprogramming language (based on wiring), and the Arduino Software(IDE), basedon Processing.The Arduino Uno can be powered via the USB connection or with an externalpower supply. The power source is selected automatically. External (non-USB) powercan come either from an AC-to-DC adapter (wall-wart) or battery. The adapter can beconnected by plugging a 2.1mm center-positive plug into the board's power jack. Leadsfrom a battery can be inserted in the Gnd and Vin pin headers of the POWER connector.The board can operate on an external supply of 6 to 20 volts. If supplied with less than7V, however, the 5V pin may supply less than five volts and the board may be unstable.If using more than 12V, the voltage regulator may overheat and damage the board. Therecommended range is 7 to 12 volts.- 14 -
Auto Irrigation Using Arduino 2016Arduino- 15 -
Auto Irrigation Using Arduino 20164.1 What Does it Do?The Arduino hardware and software was designed for artists, designers,hobbyists, hackers, newbies, and anyone interested in creating interactive objects orenvironments. Arduino can interact with buttons, LEDs, motors, speakers, GPS units,cameras, the internet, and even your smart-phone or your TV! This flexibility combinedwith the fact that the Arduino software is free, the hardware boards are pretty cheap, andboth the software and hardware are easy to learn has led to a large community of userswho have contributed code and released instructions for a huge variety of Arduino-basedprojects.4.2 What's on the board?There are many varieties of Arduino boards (explained on the next page) that canbe used for different purposes. Some boards look a bit different from the one below, butmost Arduinos have the majority of these components in common4.3 Power (USB / Barrel Jack)Every Arduino board needs a way to be connected to a power source. TheArduino UNO can be powered from a USB cable coming from your computer or a wallpower supply (like this) that is terminated in a barrel jack. In the picture above the USBconnection is labeled (1) and the barrel jack is labelled (2). The USB connection is alsohow you will load code onto your Arduino board.4.4Pins (5V, 3.3V, GND, Analog, Digital, PWM, AREF)The pins on your Arduino are the places where you connect wires to construct acircuit (probably in conjuction with a breadboard and some wire. They usually have blackplastic „headers‟ that allow you to just plug a wire right into the board. The Arduino hasseveral different kinds of pins, each of which is labeled on the board and used fordifferent functions.GND (3): Short for „Ground‟. There are several GND pins on the Arduino, any ofwhich can be used to ground your circuit.- 16 -
Auto Irrigation Using Arduino 20165V (4) & 3.3V (5): As you might guess, the 5V pin supplies 5 volts of power, andthe 3.3V pin supplies 3.3 volts of power. Most of the simple components used with theArduino run happily off of 5 or 3.3 volts.Analog (6): The area of pins under the „Analog In‟ label (A0 through A5 on theUNO) are Analog In pins. These pins can read the signal from an analog sensor (like atemperature sensor) and convert it into a digital value that we can read.Digital (7): Across from the analog pins are the digital pins (0 through 13 on theUNO). These pins can be used for both digital input (like telling if a button is pushed)and digital output (like powering an LED).PWM (8): You may have noticed the tilde ( ) next to some of the digital pins (3,5, 6, 9, 10, and 11 on the UNO). These pins act as normal digital pins, but can also beused for something called Pulse-Width Modulation (PWM). We have a tutorial on PWM,but for now, think of these pins as being able to simulate analog output (like fading anLED in and out).AREF (9): Stands for Analog Reference. Most of the time you can leave this pinalone. It is sometimes used to set an external reference voltage (between 0 and 5 Volts) asthe upper limit for the analog input pins.4.5 Reset ButtonJust like the original Nintendo, the Arduino has a reset button (10). Pushing it willtemporarily connect the reset pin to ground and restart any code that is loaded on theArduino. This can be very useful if your code doesn‟t repeat, but you want to test itmultiple times. Unlike the original Nintendo however, blowing on the Arduino doesn‟tusually fix any problems.4.6 Power LED IndicatorJust beneath and to the right of the word “UNO” on your circuit board, there‟s atiny LED next to the word „ON‟ (11). This LED should light up whenever you plug yourArduino into a power source. If this light doesn‟t turn on, there‟s a good chancesomething is wrong. Time to re-check your circuit!- 17 -
Auto Irrigation Using Arduino 20164.7 TX RX LEDsTX is short for transmit, RX is short for receive. These markings appear quite abit in electronics to indicate the pins responsible for serial communication. In our case,there are two places on the Arduino UNO where TX and RX appear – once by digitalpins 0 and 1, and a second time next to the TX and RX indicator LEDs (12). These LEDswill give us some nice visual indications whenever our Arduino is receiving ortransmitting data (like when we‟re loading a new program onto the board).4.8 Main ICThe black thing with all the metal legs is an IC, or Integrated Circuit (13). Thinkof it as the brains of our Arduino. The main IC on the Arduino is slightly different fromboard type to board type, but is usually from the A Tmega line of IC‟s from the ATMELcompany. This can be important, as you may need to know the IC type (along with yourboard type) before loading up a new program from the Arduino software. Thisinformation can usually be found in writing on the top side of the IC. If you want to knowmore about the difference between various IC‟s, reading the datasheets is often a goodidea.4.9 Voltage RegulatorThe voltage regulator (14) is not actually something you can (or should) interactwith on the Arduino. But it is potentially useful to know that it is there and what it‟s for.The voltage regulator does exactly what it says – it controls the amount of voltage that islet into the Arduino board. Think of it as a kind of gatekeeper; it will turn away an extravoltage that might harm the circuit. Of course, it has its limits, so don‟t hook up yourArduino to anything greater than 20 volts.4.10 The Arduino FamilyArduino makes several different boards, each with different capabilities. Inaddition, part of being open source hardware means that others can modify and producederivatives of Arduino boards that provide even more form factors and functionality- 18 -
Auto Irrigation Using Arduino 2016V.LCD Panel :A liquid-crystal display (LCD) is a flat-panel display or other electronic visualdisplay that uses the light-modulating properties of liquid crystals. Liquid crystals do notemit light directly.LCDs are available to display arbitrary images (as in a general-purpose computerdisplay) or fixed images with low information content, which can be displayed or hidden,such as preset words, digits, and 7-segment displays as in a digital clock. They use thesame basic technology, except that arbitrary images are made up of a large number ofsmall pixels, while other displays have larger elements.LCDs are used in a wide range of applications including computer monitors,televisions, instrument panels, aircraft cockpit displays, and signage. They are commonin consumer devices such as DVD players, gaming devices, clocks, watches, calculators,and telephones, and have replaced cathode ray tube (CRT) displays in nearly allapplications. They are available in a wider range of screen sizes than CRT and plasmadisplays, and since they do not use phosphors, they do not suffer image burn-in. LCDsare, however, susceptible to image persistence.Each pixel of an LCD typically consists of a layer of molecules aligned betweentwo transparent electrodes, and two polarizing filters (parallel and perpendicular), theaxes of transmission of which are (in most of the cases) perpendicular to each other.Without the liquid crystal between the polarizing filters, light passing through the firstfilter would be blocked by the second (crossed) polarizer.Before an electric field is applied, the orientation of the liquid-crystal molecules isdetermined by the alignment at the surfaces of electrodes. In a twisted nematic (TN)device, the surface alignment directions at the two electrodes are perpendicular to eachother, and so the molecules arrange themselves in a helical structure, or twist. Thisinduces the rotation of the polarization of the incident light, and the device appears gray.If the applied voltage is large enough, the liquid crystal molecules in the center of the- 19 -
Auto Irrigation Using Arduino 2016layer are almost completely untwisted and the polarization of the incident light is notrotated as it passes through the liquid crystal layer. This light will then be mainlypolarized perpendicular to the second filter, and thus be blocked and the pixel will appearblack. By controlling the voltage applied across the liquid crystal layer in each pixel, lightcan be allowed to pass through in varying amounts thus constituting different levels ofgray.As most of present-day LCDs used in television sets, monitors and smart phoneshave high-resolution matrix arrays of pixels to display arbitrary images usingbacklighting with a dark background when no image is displayed, different arrangementsare used. For this purpose, TN LCDs are operated between parallel polarizer‟s, whereasIPS LCDs feature crossed polarizer‟s. In many applications IPS LCDs have replaced
Auto Irrigation Using Arduino 2016 - 2 - 2. Objective of Project There is an urgent need for a system that makes the agricultural process easier and burden free from the farmer‟s side. With the recent advancement of technology it has become necessary to increas