Transcription
User's GuideContentsIntroduction . 1Reminder Alert .18Effective Use of YourCommunicator (PIC) . 2Private Time . 19Getting Started . 3Quiet Mode . 20Battery Information. 3Installing/Replacing the Battery. 4Control Buttons. 6ALT-mode Functions . 8Turning Your Communicator (PIC) On . 9Turning Your Communicator (PIC) Off . 9Messaging Service Instructions . 10Sending a Test Message to Yourself. 10Backlight . 11Setting Up Your Communicator (PIC) . 12Using the Main Menu. 12Creating a Signature . 13 Personal Interactive CommunicatorTime and Date . 14Setting the Time and Date . 14Alerts . 15Setting the MailBox Alert Mode . 15Setting the News/Info Alert Mode . 16Setting News/Info InBox Alerts . 16Setting the Alert Volume . 17Model T900FLEX TechnologyUsing Info-On-Demand . 34Setting News AutoPreview. 35Alarms . 36Setting the Alarm . 36Folders . 37Using Your Personal Folder. 37Using Your News/Info Folder . 38InBoxes . 39Using Your News/Info InBox . 39Creating an InBox. 39Viewing InBox Message History . 40Setting the InBox History . 40Moving an InBox Up/Down . 41Deleting an InBox . 41Vital Signs . 42Checking Vital Signs . 42Checking the Battery Status .42Checking Message Memory Status .42Displaying Communicator (PIC)Information .42Features . 43Setting the Key Click .44Setting Transmitter Off Mode .44Care & Maintenance . 45Cleaning Your Communicator (PIC).45Questions?.46Patent Information .46FCC Compliance . 47Safety Information . 48Electronic Devices .49Aircraft.50Blasting Areas .50Potentially Explosive Atmospheres .50Warranty . 52NOTESDeleting Messages from an InBox . 33Advanced Messaging . 34Setting Private Time .19Setting the Quiet Mode .20Addresses . 21Creating an Address Book Record.21Searching the Address Book .22Editing Addresses.22Deleting Addresses.23Messages . 24Selecting an Address .24Composing a Message .25Sending a Message .26Mailbox.26Previewing and Reading Messages .27Previewing Messages .27Reading Messages .28Replying to Messages .29Forwarding Messages.30Resending Messages from the MailBox .31Deleting Messages.32Deleting All Read Messages .32
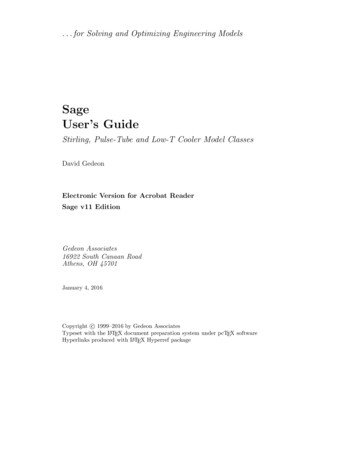
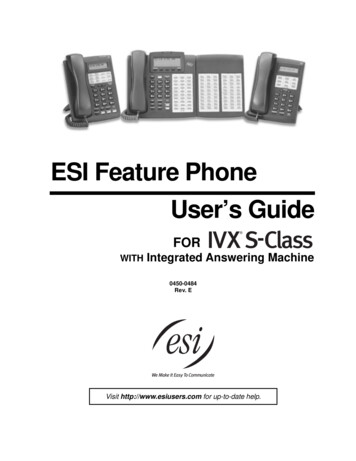
IntroductionA detachable quick reference card is included on the back cover for yourconvenience.INTRODUCTIONThis guide contains operating instructions that explain how to use your newcommunicator (PIC), and it provides helpful suggestions for first-time, as wellas experienced, users.Effective Use of Your Communicator (PIC)INTRODUCTIONCongratulations on your purchase of the TalkAboutTM T900 PersonalInteractive Communicator (PIC). Whether receiving or sending messages, withits unique capabilities the TalkAbout T900 Personal InteractiveCommunicator can become a vital part of your business and personal life andchange the way you communicate with family, friends, and business associates.12Getting StartedYour Personal Interactive Communicator (PIC) can help you keep in contactwith everyone important to you. This communicator (PIC) features a fullybacklit keyboard enabling you to send wireless messages to internet emailaddresses and other communicator (PIC) devices, yet it is small enough tocomfortably wear on your belt or fit in a pocket. By supplying businessassociates, family members, and friends with your wireless addressinformation, you can be contacted whenever needed.Installing/Replacing the BatteryBattery InformationA battery gauge is provided within the Vital Signs feature which can beaccessed from the Main menu. See “Checking Vital Signs” on page 42.If displays, the AA-battery is low. Replace the AA-size battery.If it has been a while since the battery was replaced, you may need to allow theinternal transmit power source to charge overnight (or for a number of hours)to ensure the proper operation of your communicator (PIC).Note: This product may contain a Nickel-Cadmium (NiCd) rechargeable batterythat must be recycled or disposed of properly. Recycling facilities may not beavailable in all areas.GETTING STARTEDTwo AA-size batteries are provided with your communicator (PIC). The firstbattery already installed in your communicator (PIC) keeps the internaltransmit power source charged and may not last long. Use the second AA-sizeto replace the first battery.Slide LatchGETTING STARTEDYour T900 Personal Interactive Communicator operates with a single AA-sizealkaline battery (do not use carbon-zinc batteries). The AA-size battery alsorecharges the internal transmit power source.Slide Door000092-O34
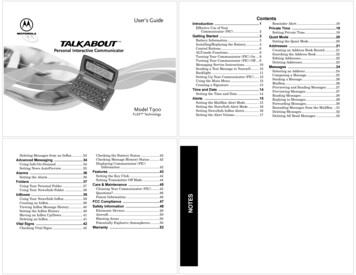
Holding the communicator (PIC) face down, slide the latch toward theControl ButtonsCaution: Note the polarity markings ( ) and (-). Do not insert the batterybackwards. This causes all messages to be erased.GETTING STARTED Remove the old battery, noting the polarity. Insert a new battery so the positive ( ) and negative (-) polarity markingson the battery match the polarity diagram near the battery compartment. Replace the battery door cover and lock the battery door latch.GETTING STARTEDbattery door. Slide the battery door in the direction of the arrow tounlatch the battery door. Lift the battery door to DeleteCAPSSymbolMenu/SpaceEnter6ALTNavigation ButtonsALT-mode Functions}U{ CAPSMenu/SpaceEnterUsed to access the Main menu or to insert a space in text whilecomposing a message.Used to select the highlighted option or to save settings.NavigationbuttonsPress y or z to highlight and scroll between menu options.Press w or x to page through menu options.ALTActivates the Alt-mode control keys, which are color coded yellowon the keyboard. The status icon ) displays on the right of thescreen. The next key pressed indicates the Alt-mode function.MessageUsed to acknowledge incoming message alerts while the pager isAcknowledge in the holster.DeleteThe key sequences displayed below provide access to the correspondingALT-mode functions.GETTING STARTEDHEscape/BacklightHouses and protects the LCD screen. Opening the flip awakensthe communicator (PIC). Closing the flip puts the screen into sleepmode.Used to return to the preceding screen without accepting anyoption or changes you may have made.Also used to access the Status screen from the Main menu and toturn on and off the backlight.When pressed, the next character typed is capitalized.GETTING STARTEDFlip78When pressed, the character to the left of the cursor is deleted. ALT-Lock— Activates the Alt-mode control keys, which arecolor-coded yellow on the keyboard. To exit Alt-Lock-mode,press again. Cancel— Clears the entire message screen when composinga message. }CAPS Lock— Activates the CAPS Lock-mode. All letters aretyped in upper case. To exit CAPS Lock-mode, press }again. {Carriage Return— Places a carriage return in the messagebeing composed after the current cursor position. USymbols— Activates the Symbols key. Seventeen (17) additional symbols can be used when writing a message. Whenthis key sequence is pressed, the available symbols are displayed at the bottom of the screen. Press w or x to highlightthe desired symbol and press {. The selected symbol isinserted at the cursor.
If you do not select a menu item, the PIC goes into standby mode. If you have one or more unread messages, 1 flashes on the Standbyscreen.Note: If the communicator (PIC) does not turn on, see “Safety Information” onpage 48.Turning Your Communicator (PIC) OffYou can turn off your communicator (PIC) to save battery power. (Thecommunicator (PIC) receives messages stored by the system when the unit isturned back on within the coverage area.) From the Main menu, press y or z to highlight /press {. Highlight ? and press {.Messaging Service InstructionsGETTING STARTED Ensure that a fresh battery is properly installed as described in“Installing/Replacing the Battery” on page 4. Open the flip and press any key to turn your PIC on. The PIC emits a 4second power-up alert, and the Status screen displays. From the Status screen, press any key to display the Main menu.GETTING STARTEDTurning Your Communicator (PIC) On910Power Off andYesBacklightTo begin messaging service, contact your service provider for activationinstructions. The phone number of the messaging service can be found in theliterature provided by the service provider.Sending a Test Message to YourselfAfter you have activated your service, it’s a good idea to test yourcommunicator (PIC) and service by sending a message to yourself. Start byusing the telephone number, web site, or email address (and a wirelessaddress) provided by your service provider. Then, enter a short message. If youare sending a word message from a telephone, an operator will assist you;otherwise, press the telephone buttons to enter a numeric message or type amessage and send it. While you are waiting for the message to reach yourcommunicator (PIC), refer to “Reading Messages” on page 28 for informationabout how to read a message. If your communicator (PIC) does not receive themessage within a few minutes, contact your service provider. After you havetested the communicator (PIC), read the rest of this guide to learn about themany useful features of your new communicator (PIC).Setting Up Your Communicator (PIC)To manually turn the backlight off, press and hold H.Using the Main MenuGETTING STARTEDThis section explains how to set the time and date, alarm time, alert mode,News/Info Inbox alerts, and other features via the Preferences menu.GETTING STARTEDIn low-light conditions, press and hold H to turn on the backlight. Thebacklight remains illuminated until the communicator (PIC) times out andreturns to the Standby screen.1112Use the Main menu for the following features: Access the MailBox Access the New/Info InBox Send Messages Access Info-On-Demand (If Info-On-Demand services are available) Access the Address Book Access the Personal Folder Access the News/Info Folder Delete all read messages in the InBoxes Change Preferences Display Vital Signs Turn the communicator (PIC) OffFrom the Standby screen, press U, {, or a navigation button to displaythe Main menu.Press w, x, y, or z to highlight the desired feature and then press {.
Creating a SignatureTime and DateYour TalkAbout T900 Personal Interactive Communicator’s messagingfeatures allow you to create a signature for your messages and automaticallyappend your signature to each message you send. To do so, proceed as follows.Setting the Time and DateSignaturemessages and press {. Your signature is applied to each message yousend.TIME AND DATEPreferencesPreferencesGETTING STARTED From the Main menu, press y or z to highlight tandpress {. Press y or z to highlight 6and press {. Using the keyboard, type your signature as you want it to appear in your From the Main menu press y or z to highlight tandpress {. Press z to highlight Mand press {. Press y or z to change the hour, minutes, and date. Press w or x to movebetween fields. When you are finished setting the time and date, press { to accept your1314Set Time & DateAlertschanges and return to the Preferences menu. Press H at any time to exitwithout saving your changes.Setting the News/Info Alert ModeSetting the MailBox Alert Mode From the Main menu press y or z to highlight tpress {. Press y or z to highlight Land press {. Press w, x, y, or z to highlight the desired alert and press {.Your communicator (PIC) provides the capability to set the alert modes forinformation messages differently than for personal messages to distinguishbetween message types. You can set a unique alert for News/Info InBoxmessages that have not been assigned to an InBox.Preferences andMailBox Alert If @ Silent is selected, no alert icon is displayed on the Status screen. Alert durations are shortened when the battery is low.ALERTS If an audible alert is selected, l displays on the Status screen. If k Vibrate is selected, k displays on the Status screen. From the Main menu press y or z to highlight tpress {. Press z to highlight Land press {. Press w, x, y, or z to highlight the desired alert and press {.Preferences andALERTS To sample an alert, highlight the desired alert and press U.News/Info AlertSetting News/Info InBox AlertsYour communicator (PIC) provides the capability to set an alert for eachinformation inbox. From the Main menu press y or z to highlight jand press {. Press y or z to highlight the desired inbox and press U. Press y or z to highlight Land press {. Press y or z to highlight the desired alert option and press {.News/Info InBoxSet InBox Alert1516
Setting the Alert VolumeReminder Alert From the Main menu press y or z to highlight tand press {. Press y or z to highlight and press {. Press z or w to decrease the volume or y or x to increase the volume andPreferencesWhen this feature is turned on, it instructs the communicator (PIC) togenerate periodic reminder alerts when there are unread personal messages inthe communicator (PIC). The communicator (PIC) does not emit reminderalerts for News/Info messages, or messages with an alert setting of Silent. Toturn the reminder alert on or off, proceed as follows.Alert VolumeALERTS To sample an alert volume, press U.ALERTSpress {. From the Main menu, press y or z to highlight tandpress {. Press y or z to highlight and press {. Press y or z to highlight ? or @ and press {.PreferencesReminder AlertYesNoReminder Alert Types If any audible alert is selected, the reminder alert is a chirp. If a vibrate alert is selected, the reminder alert is a short vibration. If a chirp and vibrate alert is selected, the reminder alert is a a chirpfollowed by a 1-second vibration. If a vibrate and beep alert is selected, the reminder alert is a 2-secondvibration followed by a chirp.1718Private TimeQuiet ModeSetting Private TimeSetting the Quiet ModePrivate Time mode allows you to specify a time period during which thecommunicator (PIC) receives messages and performs all functions without anaudible or vibrate alert.Set Private Time and press {.Note: When Private Time is turned on, h displays next to the time in theSet Private Time screen. When it is turned off, i is displayed. Press w and x to navigate between fields, and y and z to change thehighlighted value. After setting the time, repeat Step 4 to set the time. When finished, press {.On From the Main menu press y or z to highlight tandpress {. Press y or z to highlight kand press {. Press y or z to highlight ? and press {. If the current Main Alert setting is audible or vibrate, a flashing e displaysPreferencesQUIET MODEPreferences andPRIVATE TIME From the Main menu press y or z to highlight tpress {. Press y or z to highlight h Press y or z to activate Private Time mode.When active, Quiet Mode allows you to temporarily override audible alerts. Allaudible alerts are changed to vibrator alerts.1920OffQuiet ModeOnon the Status screen. If the Main Alert is set to silent, an alert icon does notdisplay on the Status screen.
AddressesSearching the Address BookThe TalkAbout T900 Personal Interactive Communicator (PIC) contains anAddress Book for storing the address information for up to 250 people. You caninclude a name, wireless address, pager number, email address, hometelephone number, work telephone number, mobile telephone number, fax/other number, and notes for each Address Book entry.Address BookNew EntryADDRESSES From the Main menu press y or z to highlight #and press {. Press y or z to highlight 6and press {. In the Name field, type the name for the entry that you want shown in theAddress Book and press {. Press y or z to highlight the desired option and press {. Type the appropriate text in each field and press {. Repeat Steps 4 and 5 until all Address Book fields are complete. Press y or z to highlight #and press {.jumps to the first matching entry and continues to refine the search basedon the number of letter entered. To select the Address Book entry, press {. Press U to display theEntry Options menu.Editing Addresses From the Address Book menu, press y or z to highlight the desired entryand press {.OrSee “Searching the Address Book” on page 22 to locate the desired entry.Save EntryENTRY SAVED displays when complete. Press U to display the Entry Options menu. Press y or z to highlight 6and press {.Edit Entry2122 Press y or z to highlight the field you want to edit and press {. Make the desired changes in each field and press {. Repeat Steps 4 and 5 until you have completed all desired changes. Press y or z to highlight #and press {.MessagesThis section discusses how to select an addressee, compose a message, andsend messages with your Personal Interactive Communicator (PIC).Save EntryENTRY SAVED displays when complete.Selecting an Addressand press {.OrSee “Searching the Address Book” on page 22 to locate the desired entry. Press U to display the Entry Options menu. Press y or z to highlight Jand press {. Press y or z to highlight ? and press {.Delete EntryMESSAGES From the Address Book menu, press y or z to highlight the desired entryADDRESSESTo select an address from your Address Book, proceed as follows.Deleting AddressesYes From the Address Book menu, press y or z to highlight !and press {. Type the first few characters of the addressee’s name. The Address BookSearchADDRESSESCreating an Address Book RecordYou can search for Address Book entries without scrolling through the AddressBook by using the search function. From the Send Message menu, press y or z to highlightEand press {. Press y or z to highlight #and press {. Press y or z to highlight the desired recipient.Select AddressAddress BookOrFollow the procedures in “Searching the Address Book” on page 22 to locatethe desired recipient. Press y or z to highlight the desired address for the recipient andENTRY DELETEDpress {.displays when your communicator (PIC) has finished deleting the entry.Note: To change the addressee for a message, repeat Steps 1 through 4.2324
Specifying an Address Not in Your Address BookSending a Message From the Send Message menu, press y or z to highlightand press {.E Press y or z to highlight the desired address type and press {. Type the desired address in the field provided and press {.Select Address From the Send Message menu, press y or z to highlight 6and press {. After you finish composing the message, press {.WriteMessageSend MessageMESSAGESYour TalkAbout T900 Personal Interactive Communicator has a keyboard thatallows you to quickly type and send your message. For information on Alt-modekeys and Symbols, see “ALT-mode Functions” on page 8. To compose and send amessage, proceed as follows.Note: Press { to insert a carriage return.Q\QSending in Progress (Flashing)Sent SuccessfullyMessage in QueueSend Message Failed To read a message, (while previewing) press y or z to highlight the desiredmessage and press {. Press y or z to scroll through the text of a message or press { to pageMESSAGESthrough the message.2728message listing.9 displays to the left of messages you previously viewed and read.\ displays when a reply was successful.x displays when a reply was unsuccessful. displays to the left of any unread MailBox message with custom replychoices attached.The MailBox allows you to read, save, respond, forward, and delete messages.It provides a transmission status log for messages sent and acts as a holdingarea for unsent messages, which are categorized into the following types:Reading MessagesMESSAGES From the Main menu, press y or z to highlight E or j and press { todisplay a list of the first 4 messages. If you have more than 4 messages, use y or z to highlight the desiredMailbox26Previewing and Reading MessagesPreviewing Messageswas sent to the selected addressee.x25 When you receive a personal or information service message, theStatus screen displays and the communicator (PIC) alerts according to theMailBox or News/Info Alert setting. A flashing E or j displays on theMain menu indicating which type of message has been received. To stop the alert, press the side button or open the flip. The d on theStandby screen and E or j on the Main menu flash until you have readall received Mailbox or News/Info service messages. If reminder alerts were preset, the communicator (PIC) periodically alertsto remind you of any unread Mailbox messages. From the Send Message menu, press y or z to highlightTand press {. displays to inform you that your messageMESSAGE TRANSMITTINGMESSAGESComposing a MessageOnce you have selected an addressee and composed a message, you can send it.Note: If preset, the time and date the message was received displays as the lastline of each message. At the end of the message, a highlighted menu bar is displayed. Press {to reply, forward, move, or delete the message, or press H to return to theMessage Preview screen.Note: At any time, while previewing or reading a message, press U toaccess the Message Options menu with 7 Next Message, b Replyto Message, 0 Forward Message, D Move to Folder,and J Delete Message options.
Sending a Custom ReplyReplying to MessagesFor your convenience, your TalkAbout T900 Personal InteractiveCommunicator (PIC) has several pre-programmed reply messages. To reply toa message using one of the pre-programmed replies, proceed as follows.Reply to MessageSending a Pre-Programmed Reply Press y or z to highlight the desired reply and press {. Yourcommunicator (PIC) displays MESSAGE TRANSMITTING.Q flashes to the left of the message to indicate the reply is in progress. If themessage reply was successful, \ displays to the left of the message on theMessage Preview screen. If the message reply was unsuccessful, x displaysto the left of the message.MESSAGESReply to MessageYour communicator (PIC) displays the list of pre-programmed replymessages from which you can choose.Custom ReplyMESSAGES While previewing or reading a message, press U to access the MessageOptions menu. Press y or z to highlight band press {. While viewing a message, press U to display the Message Optionsmenu. Press y or z to highlight band press {. Press y or z to highlight 6and press {. Type the message reply and press {. To send the reply, press y or z to highlight TandSend Messagepress {.Forwarding MessagesYour TalkAbout T900 Personal Interactive Communicator (PIC) allows you toappend and forward your received messages without retyping them. To do so,proceed as follows. While viewing a message, press U to display the Message Optionsmenu. Press y or z to highlight 0and press {.Forward Message2930 If you want to append a message to the message being forwarded, pressand press {.y or z to highlight 6 After you finish composing the message, press {. Press y or z to highlight Eand press {. Select the desired address and press {, (See “Selecting an Address” onDeleting MessagesWrite MessageYou can delete any or all messages from your T900 Personal InteractiveCommunicator (PIC). To delete the message currently being viewed, proceed asfollows.Select AddressYou can resend messages that were not sent successfully. From the Main menu, press y or z to highlight the message you want toresend and press U. Press y or z to highlight band press {.Resend MessageMESSAGESResending Messages from the MailBoxMESSAGESpage 24.) or type the desired addresses manually. While viewing a message, press U to display the Message Optionsmenu. Press y or z to highlight Jand press {.Delete Message To exit without deleting the message, press H.Deleting All Read MessagesAll read messages in the inboxes can be deleted via the Main menu. Messagesin your Personal Folder and News/Info Folder are not affected by this option. From the Main menu, press y or z to highlight Jand press {. Press y or z to highlight ? and press {.MessagesYes3132Delete
Advanced MessagingDeleting Messages from an InBox From the Main menu, press y or z to highlight the inbox containingUsing Info-On-Demand Press y or z to highlight JJ Press y or z to highlight ?Delete Read Messages orDelete All Messages and press {.Yes and press {.MESSAGESCaution: If you select J Delete All Messages, both Read andUnread messages are deleted.33ADVANCED MESSAGINGthe messages you want to delete and press U.The Info-On-Demand feature provides you with the ability to requestinformation such as News, Sports, Stocks, etc. This information is sent to yourcommunicator (PIC) as a MailBox message. To request information, proceed asfollows. From the Main menu, press y or z to highlight tand press { to display the topic inbox list. Press y or z to highlight the desired topic and press { to send yourrequest. After you send your request,displays onthe Status screen. While the communicator (PIC) retrieves the requested information, the iconInfo-On-DemandREQUEST TRANSMITTINGfor the corresponding topic flashes. When the request is complete, the topicicon stops flashing (or Request Failed is displayed on the Status screenaccompanied by an alert if the request was unsuccessful). If the request wassuccessfully sent to the system, a message is received (typically within 2-3minutes). See “Reading Messages” on page 28.34Alarms From the Main menu, press y or z to highlight tandpress {. Press y or z to highlight rand press {. Press y or z to highlight ? or @ and press {.PreferencesNews AutoPreviewYesNoThe alarm can be set for either a specific time and date, or it can be used as adaily alarm.Setting the Alarm From the Main menu, press y or z to highlight tandpress {. Press y or z to highlight Kand press {. The alarm on W and alarm off V symbols indicate the status of the alarm.To change the alarm status, press z or z when the symbol is highlighted. Press w or x to move between fields and y or z to increase to decrease thevalue in each field. At any time, press { to save the changes and return to the PreferencesPreferencesALARMSWhen this feature is turned on, it causes the communicator (PIC) toautomatically jump to the News/Info InBox when you press any key afterreceiving an information service message. To turn on News AutoPreview,proceed as follows.ADVANCED MESSAGINGSetting News AutoPreviewSet Alarmmenu. Or press H to exit without saving your changes. To set a Daily Alarm, increment the month (or day) field past 12 (or 31)to display --/--/--. K displays on the Status screen indicating that an alarm is set. Pressany key to silence an alarm.3536
FoldersUsing Your News/Info FolderUsing Your Personal FolderUse your News/Info Folder to save News/Info messages. To move a messagefrom the News/Info InBox to your News/Info Folder, proceed as follows.Use your Personal Folder to save personal messages. To move a message fromthe MailBox to your Personal Folder, proceed as follows. Press y or z to highlight the message you want to move and press U. Press y or z to highlight the message you want to move to your PersonalMove to Folder and press {.Messages in your Personal Folder can be deleted individually, but are protectedfrom the J Delete Messages option and from automatic deletionwhen memory is full. To delete a message from your Personal Folder, proceedas follows.FOLDERS Press y or z to highlight DOrWhile reading a message, press U to display the Message Options menu.FOLDERSFolder and press U.OrWhile reading a message, press U to display the Message Options menu. Press y or z to highlight the message you want to delete and press U.Move to Folder and press {. Press y or z to highlight the message you want to delete and press U.OrWhile reading a message, press U to display the Message Options menu. Press y or z to highlight JOrWhile reading a message, press U to display the Message Options menu. From the Message Options menu, press y or
Open the flip and press any key to turn your PIC on. The PIC emits a 4-second power-up alert, and the Status screen displays. From the Status screen, press any key to display the Main menu. If you do not select a menu item, the PIC goes into standby mode. If you have one or mor