Transcription
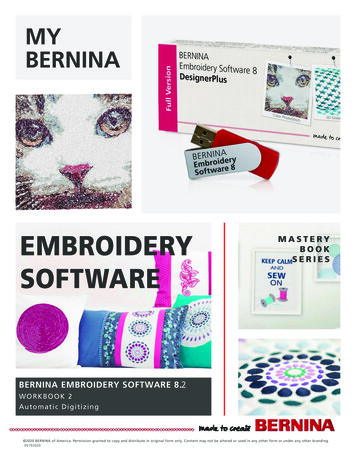
Sail AwayMy passion is the Sea, boats and sailing and this is often reflected in my textile work. My father taught me to sail at ayoung age, I met my husband at a yacht club and in the 1980’s was one of very few women racing on large racingyachts at international level. With my husband we spent a year sailing halfway around the world before we hadchildren. Our two sons who are now 30 and 27 years old both decided at a young age that they loved sailing as welland racing in offshore races across the English Channel. Their bedrooms were full of boats so of course they had tohave boat duvet covers and cushions which I could not buy so made with my trusty Bernina sewing machine. Thiswas before embroidery machines and software!Andrew, our youngest son drew boats all the time, so I used his drawings as inspiration to create applique designsfor duvet covers, and boat shaped cushions. This is an updated design using Bernina Embroidery Software that canbe used as a cushion, a doorstop, or as an applique for a duvet cover.However, if you do not have an embroidery machine just use the PDF pattern pieces and create the design on asewing machine. You could use rick rack, some cord, or a decorative stitch along the top of the hull, felt circles forthe portholes, small sew on anchors are often found in haberdashery. Let your imagination run wild!Finished size.I created 2 sizes, a medium size which fits into 145 x 240 hoop as every embroidery machine has this hoop, and alarge size for the mega, jumbo, and maxi hoopMedium. The finished size of this design is approximately 35cms high x 23cms wide.Large. The finished size is approximately 42 high x 28 wide. It is actually 120 percent of the size of the mediumcushion.The instructions show the medium sized design.Requirements for medium cushionHull fabric 15 x 60 cmsMainsail 35 x 49 cms
Jib 35 x 30 cmsSmall pieces of fabric for flag and portholesMast 60 cms of 1.5cm wide ribbon, bias binding, or seam binding.Embroidery threadsTemporary adhesive spray or fabric glue stick if you have themScotch tape or sellotapePolyester stuffingInstructions1. Print Pattern pieces at actual size. Measure the 4cm square to check size is correct and join pattern piecesfor sails together using marks to help. 1cm seam allowances are included.2. Fold each piece of fabric in half and cut out 2 hulls, 2 mainsails, and 2 jibs. Tip If using cotton fabric spraywell with spray starch before cutting the fabric. This makes cutting accurately easier and gives moresupport to the fabric when embroidering it.3. The circles on the pattern pieces are alignment marks to help with positioning each piece of fabric in thehoop so mark them carefully. Tip these marks are important.4. Download embroidery files to embroidery machine. Start with Hull embroidery.Hulls5. Hoop tear away stabiliser. The first line to stitch is the placement line.6. The cut piece of fabric for the hull is slightly wider at the top and bottom than can be stitched in the hoop soplace alignment marks carefully on stitched alignment marks to help align sides and line up the top edge of
the cut piece of fabric to the stitched line. Use temporary adhesive spray or fabric glue stick to hold in placeif you wish.7. The next stitched line tacks down the fabric and are large stitches so easy to remove later.8. The portholes are embroidered first using an applique technique, (see my previous blogs if this is a newtechnique for you), then the anchor and finally the hull line. The rope motif line I designed myself.147235689. Remember to use the reversed hull embroidery design for the second hull piece.
Mainsails and Jibs10. To save stabiliser I embroidered both jibs and both mainsails in one hoop.11. Stitch the first alignment lines and then using the alignment marks on your fabric align the cut sail piecewhich is then held in place with a tack down line.12312. When embroidery is finished fold the bottom piece of the sail back and hold in place with a piece of scotchtape or pin before embroidering the alignment marks for the second sail.45613. Embroider the Jib using the same process as the mainsail.14. Unpick all the tack down stitches on all embroidered pieces and tear away any excess stabiliser.15. Create a small flag by drawing a triangle on a double piece of fabric and sewing along lines. Turn right sidesout.
To complete the cushion.1. Sew Jib and mainsail together and press seams open.2. Position flag where you wish, then sew down the ribbon or bias binding for the mast over the seam betweenthe sails.3.4. Sew sails to Hull matching seam of sails to marks on hull.5.6. Press this seam towards the bottom of the boat and topstitch.7. Sew front and back of boat together, leaving an opening at the bottom. Clip corners and curves, asnecessary. Tip. Use a piece of scotch tape to fold in the flag over the mast to ensure it does not get sewninto the seam!8. Turn right side out and stuff. Hand sew opening shut.DoorstopIf you wish to make a doorstop sew a small cotton bag, fill with sand, and place inside the boat towards the bottom.
was before embroidery machines and software! Andrew, our youngest son drew boats all the time, so I used his drawings as inspiration to create applique designs for duvet covers, and boat shaped cushions. This is an updated design using Bernina Embroidery Software that can be used as a