Transcription
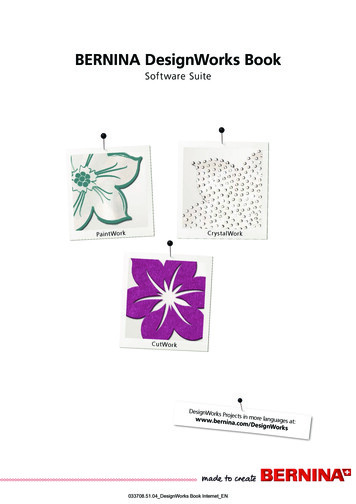
BERNINA DesignWorks BookSoftware SuiteCrysta lWorkPa int W or kCu tW or kDesignWorks Projects inmore languagw w w.bernes at:ina.com/DesignWorks033708.51.04 DesignWorks Book Internet EN
2Table of contentsCopyright 03Registration 05System Requirements 06Installation 07Projects 16Tips & Tricks 24Quick Reference Guide 27File Export 28edding color palette 31033708.51.04 DesignWorks Book Internet EN
3BERNINA DesignWorksCopyrightational AG,«COPYRIGHT 2009-2012 BY BERNINA InternALL RIGHTS RESERVED»No parts of this publication or the accompanying software may be copied or distributed,transmitted, transcribed, stored in a retrieval system or translated into any human orcomputer language, in any form or by any means, electronic, mechanical, magnetic,manual, or otherwise, or disclosed to any third party without the express writtenpermission of:BERNINA International AGSeestrasse 1618266 Steckborn / Switzerlandwww.bernina.com033708.51.04 DesignWorks Book Internet EN
4BERNINA DesignWorksCopyrightL ic e nc e Agr e e me n t !NOTEThe screen illustrations in this publication are intended to berepresentations, not exact duplicates of the screen layoutsgenerated by the software.PRINTED USER MANUAL & Printed DesignWorks BookRegistered users of BERNINA DesginWorks Software/CutWorkSoftware are permitted to create one (1) copy of the BERNINADesignWorks Software User Manual for their personal use. Thiscan be printed with a personal printer or through a commercialprinting company.LIMITED WARRANTYBERNINA International AG warrants for a period of 90 days,commencing from the date of delivery of the software to you, thatthe USB Security Key (Dongle or Hardware Key) and the BERNINACutWork, PaintWork and/or CrystalWork Accessory (collectivelyreferred to as «the Products») are free from defects in materialsand workmanship. Your exclusive remedy for breach of warrantyis to return the products together with proof of purchase to BERNINAor its authorized dealers within the warranty period, and theywill be replaced free of charge. You are responsible for the costof shipping and insurance, and bear the risk of loss, damage andmisplacement of «the Products». The purchaser relies on his ownskill and judgement in selecting the software for his own use andassumes the entire risk as to the results and performance of thesoftware. Subject to warranties and conditions imposed by law,BERNINA International AG expressly disclaims all other warrantiesand conditions, whether expressed or implied, including withoutlimitation, warranties and conditions of merchantability, fitnessfor a particular purpose, title and non-infringement. BERNINAInternational AG specifically does not warrant that the softwarewill meet the purchaser’s requirements or run without interruptionor error, or appear precisely as described in the accompanyingdocumentation and onscreen documentation.the BERNINA CutWork, PaintWork and/or CrystalWork Accessoryand accompanying documentation, regardless of the basis of theclaim and even if BERNINA, its licensors or an authorized BERNINArepresentative have been advised of the possibility of suchdamages. Some states or jurisdictions do not allow the exclusionof incidental, consequential or special damages, so the abovelimitation or exclusion may not apply to you.TERMINATIONYour License to use the BERNINA DesignWorks Software is effectiveas long as you comply with the terms and conditions of the EndUser License Agreement (EULA). Your license to use the BERNINADesignWorks Software will terminate automatically without noticefrom BERNINA International AG or its licensors if you fail to complywith any of the terms of the EULA. You may terminate this licenseat any time by returning the BERNINADesignWorks Softwareand all copies thereof, the USB Security Key (dongle), the donglesecurity device cable, the BERNINA CutWork, PaintWork and/orCrystalWork Accessory and all accompanying documentation toBERNINA International AG.CONTACTIf you have any questions, please contact your BERNINA distributor,orBERNINA International AGCH-8266 Steckborn / Switzerlandwww.bernina.comSoftware Copyright 2009-2012DRAWstitch Ltd. All rights reserved.Artwork and manual Copyright 2009 BERNINA InternationalAG. All rights reserved. BERNINA is a trademark and/or registeredtrademark of BERNINA International AG.DRAWstitch is a trademark and/or registered trademark ofDRAWstitch Ltd.LIMITATIONS OF LIABILITYTo the maximum extent permitted by applicable law, in noevent will BERNINA International AG or its developers, officers,employees, licensors or affiliates be liable to you for anyconsequential, incidental or indirect damages (including butnot limited to damages for loss of business profits, businessinterruption, loss of business information and the like), whetherforeseeable, or unforeseeable, arising out of the use of or inabilityto use the software or accompanying USB Security Key, cable, or033708.51.04 DesignWorks Book Internet EN
5BERNINA DesignWorksRegistrationRegistrationTo receive warranty benefits, software service packs, and information about future productenhancements, register online and receive a free DesignWorks design. Only new softwarethat was purchased from an authorized BERNINA Dealer is covered under warranty.Please register under www.bernina.comClick «Support», then «Software Registration».Se rvic e -Pa ckWe recommend to download and install the current DesignWorks Service Pack Update.www.bernina.com/downloads033708.51.04 DesignWorks Book Internet EN
6BERNINA DesignWorksSystem RequirementSystem RequirementsMinimumRecommendedCPU: Minimum 1,5 GHz Intel or AMD processorCPU: Minimum 1,5 GHz Intel or AMD processorRAM: 1 GB of RAM (for Windows XP O/S) or 2 GB of RAM (forWindows VistaTM & Windows 7), 3GB of RAM (for WindowsVistaTM 64-bit and Windows 7 64-bit)RAM: 2 GB of RAM (for Windows XP O/S) or 3 GB of RAM (forWindows VistaTM & Windows 7), 4GB of RAM (for WindowsVistaTM 64-bit and Windows 7 64-bit)Hard disk: 1 GB of free uncompressed spaceHard disk: 1 GB of free uncompressed spaceCD-ROM: For installationCD-ROM: For installationGraphics card: Minimum: 3D DirectX 9 accelerator with at least128 MB dedicated RAM, 32-bit color.Graphics card: 3D DirectX 10 accelerator with at least 512 MBdedicated RAM, 32-bit color.If the machine has Windows Vista/7 it must be Aero capableIf the machine has Windows VistaTM /7 it must be AerocapableMonitor Resolution: 1024 x 768Monitor Resolution: 1024 x 768O/S: Windows XP , or Windows VistaTM, Windows 7 withthe latest Service PacksO/S: Windows XP , or Windows VistaTM, Windows 7 (32-64bit) with the latest Service PacksPorts: Available USB port for the USB Security Key. Available USBport for BERNINA USB stick or sewing machine connection (aurora),active internet connection necessaryPorts: Available USB port for the USB Security Key. Available USBport for BERNINA USB stick or sewing machine connection (aurora)Mouse: availableMouse: availablePrinter: Windows-compatiblePrinter: Windows-compatible033708.51.04 DesignWorks Book Internet EN
7BERNINA DesignWorksInstallationInstallationInserting installation mediaInsert the BERNINA DesignWorks installation CD into your CDROM drive. It is recommended that you close all running programsbefore you proceed. If your computer does not have the CDROM AUTORUN feature activated, open Windows Explorer andfrom the CD-ROM drive run the «setup.exe» program. If yourcomputer has the «CD-ROM AUTORUN feature», you will see thefollowing window on your screen. Select Run Setup.exe to startthe installation.A. If you are NOT the Administrator of the system the followingDialog will appear. In order to install the software you have to loginas Administrator by entering the User name and the Passwordin the relevant fields. Afterwards by clicking the «OK»-button theinstallation will continue normally.User Account Control (Windows Vista /7 only)B. If you are running Windows Vista operating system asAdministrator, the following dialog will appear. In this screenyou have to select the Allow option, in order to continue theinstallation.Start the Installation of BERNINA DesignWorks If you are running the installation in Windows Vista operatingsystem and you have the User Account Control optionenabled a Security Warning will appear informing you aboutthe new software and if you are allowing it to be executed. Wait for a while until the installer prepares your system for theinstallation. When the following dialog appears you are ready tostart installing files. Press «Next»-button on this dialog to continue.By pressing «Help» you have access to this installation guide. Before you proceed, make sure that none of the followingdevices is attached (connected) on your computer:Unplug the USB security key and turn off yourembroidery machine before continuing withinstallation.USB Security keyBERNINA embroidery machine Wait until the installation wizard prompts you to plug thesedevices on a USB port.033708.51.04 DesignWorks Book Internet EN
8BERNINA DesignWorksInstallationLicense agreementChange Current Destination Folder window The following screen is the License Agreement window Clickon the first «radio»-button of this window to confirm that youaccept the terms of the license agreement.In this window you can select another directory to install BERNINADesignWorks or keep the current one that is shown in the dialog.Browse by the navigation controls of this window to a folder youprefer and the click «OK»-button to continue.CAUTION!PLEASE READ CAREFULLY THE TERMS & CONDITIONS OF THELICENSE AGREEMENT Then click the «Next»-button.Setup typeProgram destination folderSelect installation type window. The Destination Folder dialog will appear. You can either press«Next»-button to leave the default destination folder or byclicking the «change»-button you will be prompted to useanother folder. In case you want to change the installation folderby clicking next you will be directedA. If you choose Complete all program features will be installedautomatically. If you press the «Next»-button the installationprocedure will proceed to the Ready to install dialogB. If you choose Custom, you have to specify which features of theprogram you want to install (recommended only for experiencedusers). Click the «Next»-button.033708.51.04 DesignWorks Book Internet EN
9BERNINA DesignWorksInstallationCustom setupReady to installThe Custom Setup Window will appear. In this window you canadd or remove specific features that you choose. The main fields,which you can modify, are Image Tracer and Samples. If youclick the symbols placed on the left of the choices, you canexpand all subsequent features and components. By clicking on anicon you get 3 options to choose from:You are now ready to install. Click Install for installation to begin.At this point you must select whether you like to install the EC onPC 3.1 (BERNINA embroidery machine control software), or not.In case that you don’t want to directly connect a BERNINA aurorafamily embroidery machine, leave this option unchecked.It is recommended that you install EC on PC 3.1 on your computerin order to be able to save to the BERNINA USB Stick and use theExport to BERNINA functionality of the software. This feature will be installed on local hard disk. Thisoption is active only on the final subsections. Example: With thisoption you can activate one or more color table. In case that allsub-features are not enabled, the main feature is marked withtheicon. This feature and all sub-features will be installed on localhard disk. This option is active on features that have subfeatures. Example: With this option you can activate all availableoptions of the Color tables section. A main feature that all of itsicon.sub-features are enabled is marked with the This feature will not be available. This option can disablethe specific feature that you choose in case of subfolder, ordisable all the options of the main feature. This is marked withtheicon.If you select to install EC on PC 3.1 on your computer theinstallation will start immediately. In case that a previous version isfound you will be prompted to remove it and then the installationwill automatically proceed with the installation.Once the installation of EC on PC 3.1 is finished the installation ofBERNINA DesignWorks will automatically continue.Notice: The installation of EC on PC may need to add .Net Framework2.0 that is a prerequisite for EC on PC 3.1. This installation maytake a while so please be patient. Once you have selected the features you want to add/remove,click on the «Next»-button.033708.51.04 DesignWorks Book Internet EN
10BERNINA DesignWorksInstallationCompleting installation – Installing DirectXUSB Key Remote Upgrade utilityOnce the installation is completed, the following figure appearsconfirming that the installation has been completed. In the samedialog you are notified that after this installation has finished,DirectX 9.0c will be installed in your system. Click on the «Finish»button to complete the Installation of BERNINA DesignWorksand the installation of DirectX 9.0c will start automatically. Atthis point you can connect your embroidery machine and the USBSecurity key.After the installation ends the USB Key Remote Upgrade Utilitywill appear.NOTICE: If you have already upgraded your USB Key Click Cancel. If you are upgrading form an older version you must insert one(or more) 16-bit Upgrade code(s), that you have received fromyour distributor, in the respective Code fields.Follow the instructions of DirectX installation as shown in thefollowing figuresMake sure that you are connected to the internet and click the«Upgrade»-button. If the upgrade is completed successfully asuccess message will appear.Otherwise if you receive an error code message please contactyour dealer / distributor for support.If you prefer to upgrade your USB Key at a later stage, you canaccess the USB Key Remote Upgrade Utility. From within thesoftware using the tools Menu Security Keys. Enter your codeand select update.In case that you see an error like in the figure below «Check yourinternet connection», make sure that you are connected to theinternet and-or disable your firewall.033708.51.04 DesignWorks Book Internet EN
11BERNINA DesignWorksInstallationRestarting InstallationRestart requiredAt this point the installation has ended and a dialog will appearprompting to restart your system in order to work with yournewly installed program. You can press Yes to restart immediatelyor No if you are planning to restart later. Before pressing Yes makesure that all other programs have already been closed in order toavoid data loss.In case you want to cancel the installation in any of the previoussteps, press the «cancel»-button. The following window willappear. A rollback of actions will be done and your system willbe restored to pre installation time. In case you have accidentallypressed the «cancel»-button and stopped installation, you have tostart over again. So, using Windows explorer, locate the CD-ROMdrive, that contains the BERNINA DesignWorks installation CD anddouble-click it so that the installation starts over again.Program maintenanceBERNINA DesignWorks software has been successfullyinstalled on your computer. To execute/run the software openthe Windows Start menu, click Programs BERNINADesignWorks and then click on BERNINA DesignWorks.You can also Double click the BERNINA DesignWorks icon onyour desktop.Once you have BERNINA DesignWorks installed in yourcomputer, you can use the BERNINA DesignWorks CD in order tomodify and repair parts of the existing program or even removeBERNINA DesignWorks from your computer. In order to activatethe program maintenance options please do the following:Insert the BERNINA DesignWorks installation CD into your CDROM drive. If you don’t have the AUTORUN function enabled, openthe Windows Explorer, go to CD-ROM drive and click on «setup.exe». If you are running the installation in Windows Vista/7operating system and you have the User Account Control optionenabled a Security screen will appear informing you about thenew software and if you are allowing it to be executed. If you are NOT the Administrator of the PC the following Dialogwill appear. In order to install the software you have to login asAdministrator by entering the User name and the Passwordin the relevant fields. Afterwards by clicking «OK»-button theinstallation will continue normally.033708.51.04 DesignWorks Book Internet EN
12BERNINA DesignWorksInstallationModify If you are running Windows Vista operating system asAdministrator, the following dialog will appear. In this screenyou have to select the Allow option, in order to continue theinstallation.The following window will appear:Click on the «Next»-button to continue selecting maintenanceoptions.From the general maintenance screen you can select the choiceModify and then click «Next»-button in order to modify theinstalled program. The following window will appear. This windowenables you to change the program features that are installed,by adding/removing Color tables and other parts. Once youhave selected the features you want to add/remove, click on the«Next»-button.The 3 main fields, which you can modify, are image Tracer andSamples. If you click the symbols placed on the far left of thechoices, you can expand all subsequent features and components.By clicking on an icon you get 3 options to choose from: This feature will be installed on local hard disk. This optionis active only on the final subsections. Example: With this optionyou can activate the Image Tracer add-on. In case that all subfeatures are not enabled the main feature is marked with theicon. This feature and all sub-features will be installed on localhard disk. This option is active on features that have subfeatures. Example: With this option you can activate all availableoptions of color table section. A main feature that all of its subfeatures are enabled is marked with theicon. This feature will not be available. This option can disable thespecific feature that you choose in case of subfolder or disable allthe options of the main feature. This is marked with theicon.From this window you can choose to Modify, Repair or RemoveBERNINA DesignWorks software from your computerThe following window will appear.Click on the «Install»-button.The installation of additional features will begin.033708.51.04 DesignWorks Book Internet EN
13BERNINA DesignWorksInstallationRemoveOnce the installation is completed, the following window willappear confirming that the installation has been completed. Clickon the «Finish»-button to complete the process.The last maintenance option is to remove the program. From theinitial maintenance window select the remove option and clickon the «Next»-button. This feature is used to remove BERNINADesignWorks and its installed accessories from your computer.On the appearing window shown above, click the «Remove»button to uninstall the program.RepairThe next maintenance option is Repair. This option helps yourepair errors caused by improper use or because of missing partsof the program. It also fixes missing or corrupt files, shortcutsand registry entries. Select Repair from the main maintenancewidow and click on the «Next»-button. The following windowwill appear. Click on the «Install»-button. The automatic repair ofthe program will begin.Once the removal is completed, the following window will appearconfirming that the removal has been completed. Click on the«Finish»-button to complete the installation process.Once the installation is complete, the following window willappear confirming that the installation has been completed. Clickon the «Finish»-button to complete the process.033708.51.04 DesignWorks Book Internet EN
14BERNINA DesignWorksInstallationCustomize 3D properties of your graphics cardIf you experience any problems in opening BERNINA DesignWorks you may need to adjust the 3D configuration of the software fromStart All Programs BERNINA DesignWorks Config3D. If your graphic card has 64 Mb RAM and above with the latest driversand the DirectX 9.0C or later installed, there will be no problem in working with BERNINA DesignWorks. Whenever you load «BERNINADesignWorks Config3D» the following dialog box will appear.Generally in this dialog you need to adjust BERNINADesignWorks 3D preview settings depending on thecapability of your graphic card.When you click «Advanced»-button of BERNINA DesignWorks3D config dialog the Info list appears showing your «Videocard capabilities». Those are technical information about thegraphic card that is installed in your computer. This list with allthe information can be send via email by clicking on the Sendvia email. You can also select the Technology you want to use,optimize the 3D settings and view useful technical informationabout your graphic card.Select TechnologyFrom this part of the dialog you can select between the twotechnologies that BERNINA DesignWorks supports.DirectX 9.0C or newer is the default 3D technology thatBERNINA DesignWorks uses. So it’s required «DirectX 9.0c ornewer» to be installed on your PC in order for BERNINADesignWorks to work properly. This option must be selectedin order to be able to enjoy high quality 3D preview throughBERNINA DesignWorks application.OpenGL can be used by compatible graphic cards. OpenGLoption can be used as alternative way of viewing 3D in BERNINADesignWorks. It is an option that we suggest to use in case thatyour graphic card has problems with Direct3D graphics. In bothcases you have to keep always the drivers of your graphic card upto date, by downloading them from the official site of theirmanufacturer. If you have a laptop computer you have todownload the drivers for your graphic card from the official siteof the laptop manufacturer.In order to find out if the technology is supported, select theOpenGL option and from the Info list that appears when youclick on the «Advanced»-button, check if the «SupportsOpenGL» option from the «Property» list, has the «Value» Yes.033708.51.04 DesignWorks Book Internet EN
15BERNINA DesignWorksInstallationOptimize settings forThe options that are listed in this area have to do with the qualityof the 3D preview of stitches in BERNINA DesignWorks. Theoptions areStability, by selecting Stability, the 3D preview of the softwarewill be set at the lowest level of quality giving priority toperformance.Speed, By selecting Speed the 3D preview of the software will beset at medium level of quality together with good performance.When you finish setting 3D you have to click on the «Save Usersettings»-button to confirm the changes you have made. Byclicking on the «Save User settings»-button, the 3D settings thatyou have selected will be applied only on the current Windows user. If you click on the «Save Global Settings»-button, the 3Dsettings that you have selected will be applied to all Windows users. The next time that BERNINA DesignWorks will start willhave the new 3D settings running. If the software does not startyou have to reduce the quality of 3D in BERNINA DesignWorks 3Dsetup, save the settings and try again.By selecting Quality, in this case 3D preview of the stitch part ofBERNINA DesignWorks will be set at good level of quality withoutaffecting its performance.High Quality, finally 3D preview will be set to the best possibleaccording to your graphic card.I usually openIn this section of the dialog you can define the number of designsthat you may usually need to work at the same time. The numberof designs that you can have open is directly connected to thepower of your graphic card. If you have a good graphic card, youcan have many instances of BERNINA DesignWorks with Highquality 3D preview. On the other hand, if you do not have a goodgraphic card you can open less BERNINA DesignWorks instances.Few concurrent BERNINA DesignWorks windows option willkeep the quality of 3D preview high in a way to allow you to openfew BERNINA DesignWorks instances.Many concurrent BERNINA DesignWorks windows optionwill set an average quality to the 3D preview but will allow you toopen many instances of BERNINA DesignWorks. Select the onethat fits to your everyday use of the software and let it chooseyour 3D settings.033708.51.04 DesignWorks Book Internet EN
16BERNINA DesignWorksProjectsProjec ts033708.51.04 DesignWorks Book Internet EN
17BERNINA DesignWorksProjectsPreparing DesignWorksOpen the file Doubleclick on Desktop-Icon to startthe software. In «Open» click on «Libraries» and «Documents». Select the desired file in the folder «BERNINA Design Workssamples». Click on «Open Existing» in the window «New Design» and«Browse».The design is opened.Prepare the design for the BERNINA embroiderycomputer. See chapter: «Export your Design».Please note:Designs with Crystal are saved separately.033708.51.04 DesignWorks Book Internet EN
18BERNINA DesignWorksProjectsPaintWorkPaintWorkImportant:As the texture of fabrics and pens affects the look of the designsit is strongly recommended to create a sample first! Hoop the fabric along with the recommended stabilizer in thesuggested embroidery hoop and attach the hoop to theembroidery module. Depending on the material, read the information given in thetutorial «Tips & Tricks» if necessary. Open the Paintwork Design in the machine.A paint sequence is illustrated in the color information bar.Tip: Use the Stitch plate/CutWork/straight orange whenadding stitches. Attach and select PaintWork Tool # 93, insert the appropriatepen adapter. Select the pen color according to the color displayed and hoop. Adjust the pen height according to the desired line density of thepen. Start the machine. Paint each color in series according to color information bar. Fix the color as recommended by the pen manufacturer.033708.51.04 DesignWorks Book Internet EN
19BERNINA DesignWorksProjectsCutWorkCutWork Hoop the fabric along with the recommended stabilizer in theembroidery hoop and attach the hoop to the embroidery module.See «Tips and Tricks» for more information on handling differentmaterials. Attached the Stitch plate/CutWork/straight orange. Remove the needle and fix the CutWork Tool. Attach and select the presser foot # 44C. Open CutWork Design on the machine. A cut sequence isdisplayed in the color information bar with a CutWork Tool symbol. Depending on the machine, the individual cuttingpositions are displayed in different colors. Adjust the CutWork Tool according to the respective cuttingposition as it is displayed in the color information bar. Start the machine. Work through all of the four cutting positions as displayed in thecolor information bar.033708.51.04 DesignWorks Book Internet EN
20BERNINA DesignWorksProjectsCrystalWorkCrystalWorkMaterials Carrier paper (baking paper from the roll) Template material (green) Backingboard (cardboard) Transfer TapeHoop the carrier paper for the templates Following carrier paper for template material is recommended byBERNINA Freezer Paper Baking paper from the roll, to fit hoop.Important:The CrystalWork container is placed beneath the hoop;therefore the carrier paper must be on the inner hoop, unlikeembroidering where the material is hooped under the innerhoop.For designs with many different stone sizes and colors it isrequired to create separate templates for every size or color. Put the carrier paper on the inner hoop. Attach the outer hoop and tighten the carrier paper from allsides. Remove excess paper. Cut the template material (green) to size according to the size ofthe design (print preview). Place the template material on the hoop.Tip: The exact position of the template material on the hoopcan be determined on the sewing computer via the function Virtual positioning .033708.51.04 DesignWorks Book Internet EN
21BERNINA DesignWorksProjectsOpening CrystalWork Design on sewing computerIn the color information bar of the machine displays aCrystalWork Design with a crystal symbol and the respectivecrystal size and color. After finishing the design, remove the template material from thecarrier paper and stick on working in a tray to cardboard. Pour crystals on the template and gently brush in a circularmovement into position. Face up: remove excess crystals. Attach and select the CrystalWork foot # 48Insert and select the Stitch plate/CutWork/straight orangeAttach appropriate punch stamp and the die plateAttach the hoop to the module, remove template materialbacking and adhere Start the machine Depending on the size of the Crystal Designs the CrystalWorkcontainer must be emptied. The filling level of the container isdetermined automatically. If the maximal filling quantity isattained, a message appears to empty the container. Remove thehoop and empty the CrystalWork container. Attach the container and the hoop again and continue in theDesign.Attention:When changing from one design sequence to the next, makesure to insert the appropriate punch stamps and die platesaccording to the size of the stones. The four sizes of thepunch stamp SS06, SS10, SS12 and SS16 are engraved on thedie plate and the punch stamp.033708.51.04 DesignWorks Book Internet EN
22BERNINA DesignWorksProjects Cut transfer tape according to the size of the design and place iton the crystals. Apply pressure. Remove the tape with the Crystal Design slowly. Being carefulthat all the crystals stick to the tape. Place the Design on the desired surface and press with a dry ironabout 20 seconds. Remove the tape slowly.Attention: The ironing temperature as well as the length of time whenironing has to suit the fabric. Use a press cloth for delicate fabrics.033708.51.04 DesignWorks Book Internet EN
23BERNINA DesignWorksProjectsCombinedCombined designs Hoop the fabric along with the stabilizer in the predefinedembroidery hoop and attach the hoo
To receive warranty benefits, software service packs, and information about future product enhancements, register online and receive a free DesignWorks design. Only new software that was purchased from an authorized BERNINA Dealer is covered under warranty. Please register under www.bernina.com Click «Support», then «Software Registration».
