Transcription
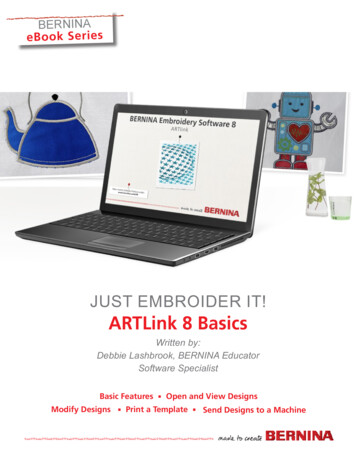
BERNINAeB oo k Se rie sJUST EMBROIDER IT!ARTLink 8 BasicsWritten by:Debbie Lashbrook, BERNINA EducatorSoftware SpecialistBasic Features § Open and View DesignsModify Designs § Print a Template § Send Designs to a Machine
ARTlink 8 is a basic software program that allows you to open an embroidery design, makebasic adjustments, and write the design directly toyour embroidery machine or to a removable device, such as a USB stick.Here’s what ARTlink can do: Open embroidery designs of different file formats Convert embroidery designs to another format Send embroidery designs with the proper format to your BERNINA embroidery machineusing a direct connection or USB stick Rotate designs Scale (resize) designs Mirror Horizontal or Vertical Skew Assign thread colors Print a paper templateOpen ARTlink 8Double click on the desktop icon to openBERNINA ARTlink 8.Calibrate the ScreenThe first time you open ARTlink, it is recommended thatyou calibrate the screen, especially with Windows 7.This is found by clicking Settings Calibrate screenfrom the Menu Bar.First, change to Metric measurements byselecting it from the drop-down choices inthe first row of icons.Use a metric ruler to measure the dimensions of thedialog box, and enter your measured values. Click OK.Here’s what ARTlink can’t do: Create embroidery designsOpen an Embroidery Design Combine embroidery designs Digitize artwork into an embroidery designClick the Open icon (the file folder) or clickon File Open from the menu. Digitize fonts or lettering Add lettering to a designYou may also open a recent file by clickingon the Open Recent File icon. The type of file defaults to .ART. To open a differentfile type, click on the drop-down arrow to select thefile format you wish to open or select All Files. Browse to the location of the embroidery design youwish to open. Select the design; then click on Open. ARTlink 8 comes with 43 built-in designs. They arefound in this file path: C:\Users\Public\Public Embroidery\BERNINA 8 Embroidery.For more so ware features, check out BERNINAEmbroidery So ware DesignerPlus at bernina.com.To download a free Trial of BERNINAEmbroidery Software, click on this link.ARTlink Installation InstructionsDownload ARTlink on the BERNINA consumerwebsite: bernina.com.
Viewing the Design: Artistic vs. Design ViewChanging the View of the ScreenOpen the design, WP009 following the file path,C:\Users\Public\Public Embroidery\BERNINA 8Embroidery\Animals and Bugs.There are additional icons in the View Menu that affectwhat is seen on screen.You can view the design in two ways; either in Design View or Artistic View (a rendering of the actual stitches). To change from one view to theother, click on the icon, Show Artistic View.A yellow icon means that the icon is active. Thefirst time the software opens, it will open the design in Artistic View. Whatever view is active whenyou close the software determines how the designwill open the next time you use the software.Design ViewArtistic ViewSwitch to Design View and then click onthe Points icon. All needle penetrationsare displayed in the design as whitedots. To turn this view off, click on thePoints icon again.Show Hoop:Left click on the Show Hoop icon to hide orshow the hoop. When the icon is yellow, thehoop will be shown.Right click on the icon to show a list of possible hoops.Choose your machine, the hoop size, and the foot.Press OK to activate the changes.ZoomingMouse scroll wheel: You can zoom in and outusing the center scroll wheel on your mouse.You can also use selections from the ZoomToolbar in the first row of icons.To Fit: The design will fill the screen.To Hoop: The hoop will fill the screen.Show Template100: Select 100 from the list and the design will beshown onscreen at its actual size if the screen hasbeen calibrated.When Show Template is activated, the plastictemplate that comes with your machine will beshown.Magnifying Glass:Show GridThe cursor turns into a magnifying glass. Click and drag abox around the area you wantto focus on. When you releasethe mouse, that area will fill thescreen.When Show Grid is activated, a grid will beshown on the design. Alter the size of the grid byright clicking on the icon and entering new values.Press OK in the dialog box to activate the changes.Pan: You can move the position of the design on the screen withoutchanging the position within the hoop.Show RulerClick on Show Ruler to hide or show the horizontal and vertical rulers.
Selecting the DesignModify the Design (continued)Select, Artistic View: To make adjustments tothe design, first select it by clicking anywhere onthe design. Black control handles appear aroundthe design when the design is selected.Rotate 45 Degrees CCW / CW:Black handles indicate the design is selected.With the design selected, click either of the rotate 45degree icons. Each time you click the icon, the design will rotate another 45 degrees.Rotate by Percent:With the design selected, enter a value in degreesinto the rotate box and press Enter. The design willrotate and the value will be reset to 0.Rotate by Dragging:Select, Design View: When the view isswitched to Design View and the design is selected, the design turns pink.Deselect: Deselect the design by pressing theEsc key or by clicking anywhere on the screenaway from the design.Modify the DesignOnce the design is selected, the icons will be activated and will appear in color. If the design is notselected, the icons will appear grayed out.Click on the design twice and the control handles willappear hollow instead of black. To rotate the designvisually, click on one of the corner handles and dragin the direction you wish to rotate the design.An outline of the rotated design appears as you rotate and the degree of rotation appears in a flag.When the mouse is released, the design will be rotated.Scale Down / Up:Each time the Scale Down icon is clicked, the designis reduced in size by 20%. After the design is scaled,the new size is 100%. The same is true for ScaleUp, but the design is increased in size.Design is selected; icons appear in color:Stiches are added when the design is increased insize; stitches are taken away when the design is decreased in size.Design is not selected; icons are grayed out.
Changing the Scale VisuallyMirror Horizontal:Click and drag on one of the corner control handles to scale the design up or down. The white boxnear the design shows the X and Y position of thedesign and the percent the design has beenscaled. Once the mouse is released, the newmeasurement of the design becomes 100%.Select the design and click the Mirror Horizontal icon to reverse the image horizontally.Mirror Vertical:Select the design and click the Mirror Verticalicon to reverse the image vertically.An outline of the resized design appears until themouse is released.Changing the Design Size by a SpecificAmount:Change the design by a specific percentage or bya specific measurement through the measurementbox in the second row of icons.To change the dimensions proportionally, keepProportional Scaling in the locked position. Theratio between the length and width will be maintained.To change the length or width independently of the other dimension, click on Proportional Scaling to open the lock.Enter the desired dimensions in actual amounts orin a percentage and press Enter to activate thechange.The percentage will revert back to 100% after thechange and the new dimensions will be shown.Skewing a Design:Skew a design by entering a value in theSkew box and pressing Enter.To visually skew a design, change the black selection control handles to hollow rotate control handlesby clicking on the design.Click on the middle diamond-shaped handles toskew the design. These diamond-shape handlesappear in the horizontal and vertical middle of thecontrol handles. A flag appears showing the degreeof the skew. Release the mouse to create theskewed design.
Print a TemplateA printed template is helpful for previewing the design on the item to be embroidered and as an aidto proper placement on that item. Select the Print Preview icon or File Print Preview. Click Options. Select 100% for Zoom. Select OK. Select Print Now to print your template.Stitching the Design Click on the Write to Card/Machine iconor select File Write to Card/Machine. The Device Selection Box will appear. Select the appropriate type. Click OK.Write/Read designs in EXP format to/from USBstickWrite/Read designs in EXP format to/from Deco330/340 MemoryCard or Deco 340USB stickLoad design directly to machinefor stitchingWrite/Read designto/from machine’smemory or USBstick plugged intothe machineWrite/Read designs in EXP format to artista 165185 or serialReader/Writer boxWrite/Read designin Art V4 format toUSB stick forartista 200/730
For More InformationThis guide is intended to get you up and runningquickly and easily using ARTlink 8.For in-depth instruction, open the ARTlink 8 software and select Help Reference Manual from themenu. Below is the Table of Contents from themanual.Frequently Asked QuestionsQuestion: How do I save a design in ARTlink?Answer: .ART designs that are opened andchanged in ARTlink 8, may be saved in .ART formatby selecting File Save As. You may save the designs as Version 3, 4, 5, 6, 7, or 8 designs and a fewother all-in-one formats.Question: How do I convert another design format to .ART format?Answer: Embroidery designs that were originally created as another format cannot be convertedto .ART. If you attempt to Save As the .ART format,you will see the error message below. However,when a design of another format is opened in thesoftware and written to the BERNINA machine orUSB stick using the Write to Machine icon, the software automatically converts the design to the formatneeded by the model chosen in the Device Selectionbox.Note: A list of ARTlink Shortcut keys can be found onpage 52 of the manual. Read about the Stitch Player in Chapter 3.Stitch Player lets you simulate the actual embroidery stitchout on screen. For more information about controlling startand end positions, see Chapter 4. To learn more about thread colors and charts,see Chapter 5 of the manual.To get more detailed information about howdesigns are exported to embroidery machines,please see Chapter 8. This will detail how designs are exported to BERNINA machines andUSB sticks.Question: How do I convert a design to anotherformat (other than .ART)?Answer: With the design open onscreen, selectFile Export Machine File, and select the desiredformat from the drop-down choices of Save As Type.Click Save, being sure to note the folder locationwhere you are saving the file. ARTlink 8 can openand convert many of the most popular embroideryformats.
Question: I can’t get ARTlink 8 installed on mycomputer.Question: What has changed from ARTlink 7?Answer: Open a help ticket with BERNINASoftware Technical support by visiting: bernina.com/help.Answer: ARTlink 8 is Windows 10 and 4K compatible and can be updated through the automated updatefunction. This allows ARTlink to be updated to new operating systems.Question: Will ARTlink 8 work with my auroramodel?New features and functions have been added, including:Answer: Yes, ARTlink 8 includes EC on PCwhich is necessary for embroidery with auroramodel machines. Feedback Reporter Exporting & Saving Designs Hoop Templates Print Options Auto Start & End OptionsQuestion: Will ARTlink 8 work on a Mac?Answer: ARTlink 8 may be installed and operated on a Macintosh computer, and is supportedby BERNINA under the following configuration: The Mac is running OSx Lion or newer Bootcamp 4.0 is correctly configured Windows 7, 8, or 10 is installed on theBootcamp partition Question: What format design does my BERNINA machine accept?Answer: Most current machines accept theBERNINA .exp format. This format consists ofthree files for each design: .exp is the embroidery design .bmp is the thumbnail image of the design .inf is the thread color informationThe only exceptions are the older artista machinemodels, 200 and 730. These machines acceptthe .ART Version 4 format.To send a design to your BERNINA machine in the proper format, simply openthe design in ARTlink, then click on theWrite to Card/Machine icon and choose the appropriate selection. The software will convert the design and write the appropriate files for use in yourmodel.Please consult the ARTlink Reference Manual formore detailed information about these new functions inARTlink.
Download ARTlink on the BERNINA consumer website: bernina.com. Open ARTlink 8 Double click on the desktop icon to open BERNINA ARTlink 8. Calibrate the Screen The first time you open ARTlink, it is recommended that you calibrate the screen, especially with Windows 7. This is found by