Transcription
DLP ProjectorUser manual
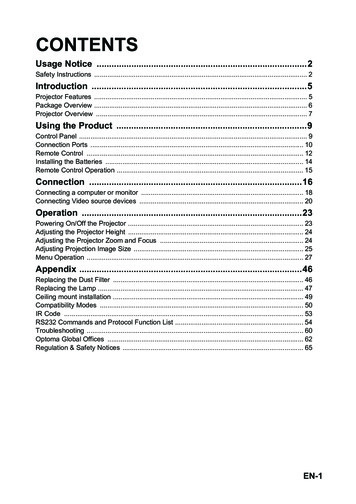
Table of contentsTable of contents. 1Usage Notice. 3EnglishSafety Information.3Precautions.4Eye Safety Warnings.6Introduction. 7Package Overview.7Product Overview.8Main Unit. 8Connection Ports. 9Remote Control. 10Installation. 11Connecting the Projector.11Connect to Notebook. 11Connect to Video Sources. 12Powering On/Off the Projector.13Powering On the Projector. 13Powering Off the Projector. 14Warning Indicator. 14Adjusting the Projected Image.15Adjusting the Projector’s Height. 15Adjusting the vertical image position. 15Adjusting Projection Image Size (WXGA). 16Adjusting Projection Image Size (1080p). 17Adjusting Projection Image Size (1080p short throw). 18User Controls. 19Remote Control.19On-screen Display Menus.21How to operate. 21Menu Tree.22Image. 24Image Advanced. 26Image Advanced Color Matching. 28Image Advanced Signal. 29Display. 30Display 3D. 32Setup. 33Setup Language. 35Setup Security. 36Setup Audio Settings. 39Setup Advanced. 40Setup Network. 411
Table of contentsSetup LAN Settings. 42Setup Control Settings. 43Options. 44Options Input Source. 47Options Remote Settings. 48Options Advanced. 49Options Lamp Setting. 51LAN RJ45.53Appendices. 63Troubleshooting.63Image. 63Other. 64Projector LED Status Indicator. 65Remote Control. 66Replacing the Lamp.67Compatibility Modes.70Video Compatibility. 70Video Timing Detail Describe. 70Computer Compatibility - VESA standards. 71Input Signal for HDMI/DVI-D . 72True 3D Video Compatibility table. 73RS232 Commands and Protocol Function List.74RS232 Pin Assignments (projector side). 74RS232 Protocol Function List. 75Telnet Commands.79AMX Device Discovery commands.79PJLink supported commands.80Trademarks.82Ceiling Mount Installation.84Optoma Global Offices.85Regulation & Safety Notices.87Ver.:12
Usage NoticeEnglishSafety InformationThe lightning flash with arrow head within an equilateral triangle isintended to alert the user to the presence of uninsulated “dangerousvoltage” within the product’s enclosure that may be of sufficientmagnitude to constitute a risk of electric shock to persons.The exclamation point within an equilateral triangle is intended to alertthe user to the presence of important operating and maintenance(servicing) instructions in the literature accompanying the appliance.WARNING: TO REDUCE THE RISK OF FIRE OR ELECTRIC SHOCK, DO NOTEXPOSE THIS APPLIANCE TO RAIN OR MOISTURE. DANGEROUS HIGHVOLTAGES ARE PRESENT INSIDE THE ENCLOSURE. DO NOT OPEN THECABINET. REFER SERVICING TO QUALIFIED PERSONNEL ONLY.Class B emissions limitsThis Class B digital apparatus meets all requirements of the CanadianInterference-Causing Equipment Regulations.Important Safety Instruction1. Do not block any ventilation openings. To ensure reliable operation ofthe projector and to protect from over heating, it is recommended toinstall the projector in a location that does not block ventilation. As anexample, do not place the projector on a crowded coffee table, sofa,bed, etc. Do not put the projector in an enclosure such as a book caseor a cabinet that restricts air flow.2. Do not use the projector near water or moisture. To reduce the risk offire and/or electric shock, do not expose the projector to rain ormoisture.3. Do not install near heat sources such as radiators, heaters, stoves orany other apparatus such as amplifiers that emits heat.4. Clean only with dry cloth.5. Only use attachments/accessories specified by the manufacturer.6. Do not use the unit if it has been physically damaged or abused.Physical damage/abuse would be (but not limited to): Unit has been dropped. Power supply cord or plug has been damaged. Liquid has been spilled on to the projector. Projector has been exposed to rain or moisture. Something has fallen in the projector or something is loose inside.Do not attempt to service the unit yourself. Opening or removing coversmay expose you to dangerous voltages or other hazards. Please callOptoma before you send the unit for repair.7. Do not let objects or liquids enter the projector. They may touch dangerous voltage points and short out parts that could result in fire or electricshock.8. See projector enclosure for safety related markings.9. The unit should only be repaired by appropriate service personnel.3
Usage NoticePrecautionsPlease follow all warnings, precautions andmaintenance as recommended in this user’sguide.NoteoteWhen the lamp reachesthe end of its life, theprojector will not turnback on until the lampmodule has beenreplaced. To replacethe lamp, follow theprocedures listed under"Replacing the Lamp"section on page 67.4 Warning-Do not look into the projector's lens when thelamp is on. The bright light may hurt your eyes. Warning-To reduce the risk of fire or electric shock, donot expose this projector to rain or moisture. Warning-Please do not open or disassemble theprojector as this may cause electric shock. Warning-When replacing the lamp, please allow the unitto cool down. Follow instructions as describedon page 67. Warning-This projector will detect the life of the lampitself. Please be sure to change the lamp when itshows warning messages. Warning-Reset the "Lamp Reset" function from theon-screen display "System Lamp Setting" menuafter replacing the lamp module(refer to pages 51-52). Warning-When switching the projector off, please ensurethe cooling cycle has been completed beforedisconnecting power. Allow 90 seconds for theprojector to cool down. Warning-Do not use lens cap when projector is in operation. Warning-When the lamp is approaching to the end of itslife time, the message "Replacement suggested"will show on the screen.Please contact your local reseller or service center to change the lamp as soon as possible.
Usage Notice T urn off and unplug the power plug from the AC outlet beforecleaning the product. U se a soft dry cloth with mild detergent to clean the displayhousing. Disconnect the power plug from AC outlet if the product is notbeing used for a long period of time.Do not: B lock the slots and openings on the unit provided forventilation. U se abrasive cleaners, waxes or solvents to clean the unit. U se under the following conditions:- In extremely hot, cold or humid environments. Ensure that the ambient room temperature iswithin 5 - 40 C Relative Humidity is 10 - 85% (Max.), non-condensing- In areas susceptible to excessive dust and dirt.- Near any appliance generating a strong magnetic field.- In direct sunlight.5EnglishDo:
Usage NoticeEye Safety WarningsNoteoteKeep this manual forfuture reference.6 Avoid staring/facing directly into the projector beam at alltimes. Keep your back to the beam as much as possible. When projector is used in a classroom, adequately supervisestudents when they are asked to point out something on thescreen. In order to minimize the lamp power, use room blinds toreduce ambient light levels.
IntroductionPackage OverviewProjector with lens capPower Cord 1.8m15 pin D-sub VGA CableRemote Control2 x AAA BatteriesCarrying CaseEnglishUnpack and inspect the box contents to ensure all partslisted below are in the box. If something is missing,please contact Optoma customer service.NoteoteDue to differentapplications in eachCountry, some regionsmay have differentaccessories.Documentation : User's Manual Warranty Card Basic User’s Manual7
IntroductionProduct OverviewMain Unit456712891031.2.3.4.5.6.7.8.9.10.11.811IR ReceiverTilt-Adjustment FeetLens CapFunction KeysLED IndicatorsPower ButtonLENS SHIFT(Not available in 1080p short throw)Zoom(Not available in 1080p short throw)FocusLensConnection Ports
IntroductionConnection Ports2345 5.141312 11Power SocketUSB Power Out(5V J-45Kensington MicrosaverTM Lock PortVIDEOAUDIO2-IN (L and R)AUDIO1 INAUDIO OUT12V OUT9
IntroductionRemote Control1. Power On/Off2.3. Freeze4. USB mouse Left click5. Four Directional SelectKeys6. Enter7. Laser (DO NOT POINT INEYES)CAUTION8.PageUse of controls,9. V Keystone /adjustments orperformance of10./1(Number Button forprocedures otherpassword input)than those specifiedherein may result in11. HDMI/4hazardous laser light12. User1/7exposure.13. SourceComplies with14. Menu/2FDA performancestandards for laser15. VGA/5products except for16. Switchdeviations pursuant toLaser Notice No. 50, 17.dated June 24, 2007.NoteoteDue to generic remote,function is modeldependent.1018.19.20.21.22.23.24.25.26.USB mouse Right clickPage Volume 920102111221223132414251526
InstallationConnecting the ProjectorEnglishConnect to NotebookVGA, DVI, HDMI123NoteoteDue to the differencein applications for eachcountry, some regionsmay have differentaccessories.E62405SPR5641. VGA Input Cable2. DVI/HDMI Cable (Optional Accessory)3. HDMI Cable (Optional Accessory)4. Power Cord5. Audio Cable (Optional Accessory)6. RS232 Cable (Optional Accessory)11
InstallationConnect to Video SourcesDVD player, Set-top BoxHDTV receiverDVD player, Set-top BoxHDTV receiver12NoteoteDue to the differencein applications for eachcountry, some regionsmay have differentaccessories.Noteote12V OUT is aprogrammable trigger.E62405SP3R4Video Output1 SCART RGB/S-Video Adapter (Optional Accessory)2. HDMI Cable (Optional Accessory)3. Power Cord4 Composite Video Cable (Optional Accessory)12
InstallationPowering On/Off the ProjectorEnglishPowering On the Projector1. Remove the lens cover.2. Connect the power cord to the projector.NoteoteTurn on the projectorfirst and then select thesignal sources.3. Turn On the connected devices.4. Ensure the Power LED is flashing and then press the powerbutton to turn On the projector.The projector’s startup logo screen displays and connecteddevices are detected. If the connected device is a laptop, pressthe appropriate keys on the computer keyboard to switch thedisplay output to the projector. (Check the user manual of thelaptop to determine the appropriate Fn key combination to changedisplay output.)See Security Settings on page 36 if security lock is enabled.NoteoteDue to the differencein applications for eachcountry, some regionsmay have differentaccessories.Noteote5. If more than one input device is connected, press the “Source”button sequentially to switch between devices.For direct source selection, see page 20.12V OUT is aprogrammable trigger.13
InstallationPowering Off the Projector1. Press the "" button on the remote control or "POWER" buttonon the panel of the projector to turn off the projector. First push ofbutton will display the following message on the screen.Press the button again to confirm the shut down. If the button is notpressed, the message will disappear in 5 seconds.2. The Power LED flashes green (1 sec on, 1sec off) and the fans willspeed up during shut down cooling cycle. The projector reachesstand-by mode as soon as the Power LED flashes green (2 sec on,2 sec off).If you wish to turn the projector back on, you must wait until theprojector has completed the cooling cycle and has entered standbymode. Once in standby mode, simply press "POWER" button onthe rear of the projector or "" on the remote control to restart theprojector.3. Disconnect the power cord from the electrical outlet and theprojector only when the projector is in stand-by mode.Warning IndicatorNoteoteContact the nearestservice center if theprojector displaysthese symptoms. Seepage 85 for moreinformation.14 When the Lamp LED indicator lights red, the projector willautomatically shut itself down. Please contact your localreseller or service center. See page 65. When the Temp LED is on a steady (not flashing) red, theprojector will automatically shut itself down. Under normalconditions, the projector can be switched on again after ithas cooled down. If the problem persists, you should contactyour local dealer or our service center. See page 65.
InstallationAdjusting the Projected ImageNoteoteEnglishAdjusting the Projector’s HeightThe projector is equipped with tilt-adjuster feet foradjusting the image height.To adjust the angle of the picture, turn the tilt-adjuster rightor left until the desired angle has been achieved. The projectortable or standshould be leveland sturdy. Position theprojector so thatit is perpendicularto the screen. For personalsafety, pleasesecure the cablesproperly.Adjusting the vertical image positionThe Lens Shift function can be used to adjust theposition of the vertically.Lens shift adjustment for WXGAThe display positioncan be shifted upwardup to 7% and down to4.5% elevation of thedisplay.Lens shift adjustable rangeShift to top7%VShift range7%1V4.5%VShift range4.5%Lens shift center positionLens shift adjustment for 1080PNoteoteLens Shift is notavailable in 1080p shortthrow.The display positioncan be shifted upwardup to 9% and down to5% elevation of thedisplay.Shift to topLens shift adjustable range9%VShift range9%1V5%VShift range5%Lens shift center position15
InstallationImage HeightAdjusting Projection Image Size (WXGA)Keystone Correction AngleProjection DistanceDiagonallength (inch) sizeof 16:10 ScreenNoteote300" (overdrive) forAsia.16Screen Size W X H (16:10)(m)(feet)Width Height Width HeightProjection distance (D)(m)(feet)widetelewideteleOffset 52
InstallationImage HeightEnglishAdjusting Projection Image Size (1080p)Keystone Correction AngleProjection DistanceDiagonallength (inch) sizeof 16:9 ScreenScreen Size W X H (16:9)(m)(feet)Width Height Width HeightProjection distance (D)(m)(feet)widetelewideteleOffset 8417
InstallationImage HeightAdjusting Projection Image Size(1080p short throw)Keystone Correction AngleProjection DistanceDiagonallength (inch) sizeof 16:9 Screen18Screen Size W X H (16:9)(m)(feet)WidthHeightWidthHeightProjection distance (D)(m)(feet)widewideOffset 116.251.695.560.290.94
User ControlsUsing the Remote ControlPower On/Off/SwitchRefer to the “Powering Off the Projector” on page 14.Refer to the “Powering On the Projector” on page 13.When connecting your PC to the projector throughUSB, press “Mouse Switch” to activate/ inactivate themouse mode and control your PC using the remote.EnglishRemote ControlDisplay blank & Audio muteFreezeFreezeMuteLUSB mouse Left clickRUSB mouse Right clickFourDirectionalSelect KeysEnterNoteotePage-Due to the differenceLaserin applications for eachcountry, some regionsPage may have differentaccessories.Noteote1. Use to select items or make adjustmentsto your selection.2. In the mouse mode, use as emulation ofdirectional keys.1. Confirm your item selection.2. In the mouse mode, as emulation keyboard enterkey.Page Down key for emulation of USB keyboard viaUSB when OSD offPress Laser to operate the on-screen pointer.DO NOT POINT IN EYES.Page Up key for emulation of USB keyboard via USBwhen OSD offAdjusts image distortion caused by tilting the projector.V Keystone /- ( 40 degrees for WXGA/1080P, 20 degrees for 1080pshort throw)Due to generic remote,Volume /function is modeldependent.Press “Volume /-” to adjust volume.19
User ControlsUsing the Remote Control/1Refer to the“Format” on page 30.Menu/2Press “Menu” to launch the on-screen display (OSD)menu. To exit OSD, press “Menu” again.3D/3Press “3D” to turn on/off 3D menu.HDMI/4Press “HDMI” to choose HDMI source.VGA/5Press “VGA” to choose source from VGA- INconnector.Video/6Press “Video” to choose Composite video source.User 1/7Refer to the “User 1” on page 48User 2/8Refer to the “User 2” on page 48User 3/9Refer to the “User 3” on page 48/0Brightness mode menu on/offSourcePress “Source” to search for source.Re-syncAutomatically synchronizes the projector to the inputsource.NoteoteNoteoteDue to the differencein applications for eachcountry, some regionsmay have differentaccessories.NoteoteDue to generic remote,function is modeldependent.20Remote control number is for password used.
User ControlsThe Projector has multilingual On-screen Display menusthat allow you to make image adjustments and change avariety of settings. The projector will automatically detectthe source.How to operate1. To open the OSD menu, press “Menu” on the Remote Control orControl Panel.2. When OSD is displayed, use keys to select any item in themain menu. While making a selection on a particular page, press or “ENTER” key on the Remote Control or “Enter” on theControl Panel to enter sub menu.3. Use keys to select the desired item and adjust the settingsby key.4. Select the next item to be adjusted in the sub menu and adjust asdescribed above.5. Press “ENTER” key on the Remote Control or “Enter” on theControl Panel or “Menu” to confirm, and the screen will return tothe main menu.6. To exit, press “Menu” again. The OSD menu will close and theprojector will automatically save the new settings.Main MenuSettingSub Menu21EnglishOn-screen Display Menus
User ControlsMenu TreeIMAGEDisplay M AdvancedResetFilm/Video/Graphic/StandardGammaIMAGE or t/ExitColor MatchingAuto/RGB/YUVColor SpaceColor Space*HDMI onlyAuto/RGB(0-255)/RGB(16-235)/YUVNoise ReductionSignalAutomatic/Frequency/Phase/H. Position/V. Position/ExitExitDISPLAYFormatEdge Mask4:3/16:9 or 16:10/LBX/Native/Auto (WXGA)4:3/16:9/LBX/Native/Auto (1080p)ZoomImage ShiftH/VV Keystone*3DDISPLAY 3D3D ModeDLP-Link/IR/Off3D- 2D3D/L/R3D FormatAuto/SBS/Top and Bottom/Frame Sequential3D Sync InvertOn/OffExitSETUPLanguageBahasa IndonesiaProjectionMenu LocationScreen typeNoteote (#) “Color” and“Tint” is onlysupported infor YUV videosources. (*) “3D” is onlyavailable when acompatible signalis supplied.16:10/16:9(WXGA)SecurityProjector IDAudio SettingsAdvancedNetworkSETUP SecuritySecuritySecurity TimerOn/OffMonth/Day/Hour/ExitChange PasswordExitSETUP Audio SettingsInternal SpeakerMuteOn/OffOn/OffVolume0 10Audio InputDefault /Audio 1/Audio 2ExitSETUP AdvancedLogoDefault/Neutral/UserLogo CaptureClosed CaptioningOff/CC1/CC2ExitSETUP NetworkLAN SettingsControl Settings22Network Status/DHCP/IP Address/Subnet Mask/Gateway/DNS/Apply/MAC Address/ExitCrestron/Extron/PJ Link/AMX Device Discovery/Telnet/Exit
User ControlsHDMI-1/HDMI-2/VGA/VideoSource LockOn/OffHigh AltitudeOn/OffInformation HideOn/OffKeypad LockOn/OffTest PatternNone/Grid/White12V TriggerOn/Off/Auto 3DBackground ColorBlue/Black/Red/Green/WhiteEnglishInput SourceOPTIONSRemote SettingAdvancedLamp SettingsOPTIONS Remote SettingNoteote (**)WhenDynamicBlackis On, andBrightnessMode is setto Bright, theDynamic rangeis 100% 30%.When brightnessmode is onEco. Mode, thedynamic range is80% 30%OPTIONS st/Sleep Timer/ Color Matching/Color Temp/Gamma/ Source Lock /Projection/Lamp Settings/Zoom/Test Pattern/Freeze/ HDMI1/HDMI2User2LAN/Brightness/Contrast/Sleep Timer/ Color Matching/Color Temp/Gamma/ Source Lock /Projection/Lamp Settings/Zoom/Test Pattern/Freeze/ HDMI1/HDMI2User3LAN/Brightness/Contrast/Sleep Timer/ Color Matching/Color Temp/Gamma/ Source Lock /Projection/Lamp Settings/Zoom/Test Pattern/Freeze/ HDMI1/HDMI2IR FunctionOn/OffDirect Power OnOn/OffSignal Power OnOn/OffAuto Power Off (min)Sleep Timer (min)Power Mode (Standby)Active/ECOQuick ResumeOn/OffOSD Time-Out5 sec./15 sec./30 sec./60 sec./NeverExitOPTIONS Lamp SettingLamp HourLamp ReminderOn/OffBrightness ModeBright/Eco.DynamicBlackOn/Off**Lamp ResetYes/NoExit23
User ControlsImageDisplay ModeThere are many factory presets optimized for various types ofimages. Presentation: Good color and brightness from PC input. Bright: Maximum brightness from PC input. Movie: For home theater. sRGB: Standardised accurate color. Blackboard: This mode should be selected to achieve optimumcolor settings when projecting onto a blackboard(green). DICOM SIM: T his display mode simulates the grayscale/gamma performance of equipment used for“Digital Imaging and Com munications in Medicine”(DICOM).Important: This mode should NEVER be used for medicaldiagnosis, it is for education/training purposes only. User: User’s own settings. 3D: User adjustable setting for 3D viewing.BrightnessAdjust the brightness of the image. Press to darken image. Press to lighten the image.24
User ControlsContrastEnglishThe contrast controls the degree of difference between thelightest and darkest parts of the picture. Press to decrease the contrast. Press to increase the contrast.SharpnessAdjusts the sharpness of the image. Press to decrease the sharpness. Press to increase the sharpness.ColorAdjusts a video image from black and white to full color saturation. Press to decrease the amount of color in the image. Press to increase the amount of color in the image.TintAdjusts the color balance of red and green. Press to increase the amount of green in the image. Press to increase the amount of red in the image.AdvancedEnter the Advanced menu. Select advanced display options suchas Gamma, BrilliantColor , Color Temp., Color Matching, ColorSpace, Noise Reduction, Signal, and Exit. See page 26 formore information.25
User ControlsImage AdvancedGammaChoose the Gamma type from Film, Video, Standard.BrilliantColor This adjustable item utilizes a new color-processing algorithm andsystem level enhancements to enable higher brightness whileproviding true, more vibrant colors in picture. The range is from1 to 10. If you prefer a stronger enhanced image, adjust towardthe maximum
Optoma before you send the unit for repair. 7. Do not let objects or liquids enter the projector. They may touch danger-ous voltage points and short out parts that could result in fire or electric shock. 8. See projector enclosure for safety related markings. 9. The unit