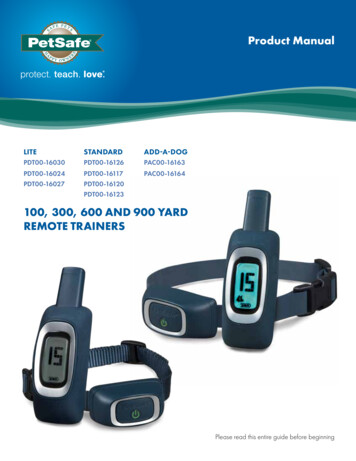
Transcription
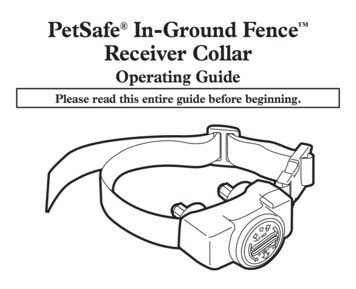
Remote Training Collaroperating and training guideFor 1 Dogp-collar 320For 2 Dogsp-collar 320BPLEASE READ THIS ENTIRE GUIDE BEFORE BEGINNINGB-320-TEX-011(1)
Important Safety InformationNot for use with aggressive dogs. Do notuse this Product if your dog is aggressive,or if your dog is prone to aggressivebehavior. Aggressive dogs can cause severe injury and evendeath to their owner and others. If you are unsure whether thisproduct is appropriate for your dog, please consult yourveterinarian or certified trainer.Safety during on-leash training. It is vitallyimportant that you and your dog remainsafe while learning during on-leash training.Your dog should be on a strong leash, long enough for him toattempt to chase an object, but short enough for him not to reacha road or other unsafe area. You must also be physically strongenough to restrain your dog when he tries to chase.Risk of skin damage. Please read and followthe instructions in this manual. Proper fit ofthe collar is important. A collar worn for toolong or made too tight on the pet’s neck may cause skin damage.Ranging from redness to pressure ulcers; this condition iscommonly known as bed sores.Avoid leaving the collar on the dog for more than 12 hours per day.When possible reposition the collar on the pet’s neck every1 to 2 hours.Check the fit to prevent excessive pressure; follow theinstructions in this manual.Never connect a lead to the electronic collar; it will causeexcessive pressure on the contacts.When using a separate collar for a lead, don’t put pressureon the electronic collar.3
Wash the dog’s neck area and the contacts of the collarweekly with a damp cloth.If a rash or sore is found, discontinue use of the collar untilthe skin has healed.If the condition persists beyond 48 hours, see your veterinarian.These steps will help keep your pet safe and comfortable.Millions of pets are comfortable while they wear stainless steelcontacts. Some pets are sensitive to contact pressure. Youmay find after some time that your pet is very tolerant of thecollar. If so, you may relax some of these precautions. It isimportant to continue daily checks of the contact area.If redness or sores are found, discontinue use until the skinhas fully healed.4Table of ContentsComponents.Other Items Yo u May Need.Main Features.Overview.6678Operating Guide. 9How to turn the p-collar 320 on/off. 9How the transmitter buttons work. 10Collar fitting. 12How to find the best Vibration/Shock level. 13To maximize the distance. 14The LCD & LED indicator. 15Charging the unit. 16How to pair the Transmitter and Receiver Collar. 18How to use the Test Light. 19Gerneral Training Tips. 20Frequently Asked Questions. 21Troubleshooting. 22Warranty and Repair Informatiion. 23Reference Size for Difference Dogs. 27Reference Weight for Dogs. 275
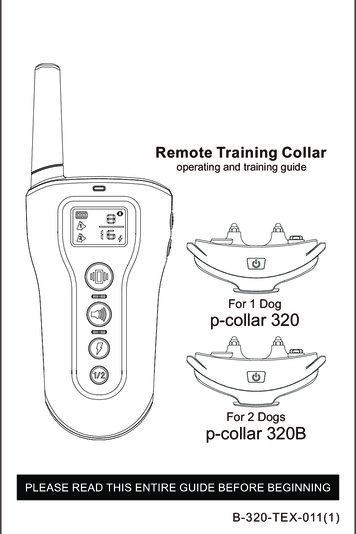
Main FeaturesVibration, Tone and ShockDog 1 Receiver CollarDog 2 Receiver Collar8 Adjustable Intensity Levels for Vibration and16 Adjustable Intensity Levels for Shock100% Waterproof Receiver CollarTest LightFor 1 Dogp-collar 3202-hour Rapid Charging Lithium Polymer BatteryFor 2 Dogsp-collar 320BBattery Charger300M Remote Training Rangefor TransmitterUser Expandable to a Two-dog Systemfor ReceiverCollarUSB PortTouch Distinguishing Mode ButtonsWrist StrapOther Items You May NeedBacklit LCD Display Shows Intensity Level, Batteryand Dog 1/2Ÿ ScrewdriverŸ ScissorsŸ Lighter67
OverviewOperating GuideAntennaLED Indicator LightWhite BacklitLCD DisplayIntensity LevelAdjustmentAction ButtonsBlind OperationIdentification PointEasily distinguishand send the correcttraining commandwithout eyes on bytouching and feelingon buttons withdifferent structure.Selecting ChannelsStep How to turn the p-collar 320 on/off1To turn the Transmitter on1. Press any ofto active the Transmitter.The backlight on.2. Backlight will stay for about 30 seconds. if no operationthen, backlight off.3. LCD display will stay for about 5 minutes. if no operationthen, LCD display shuts off.To turn the Receiver Collar onPressonce, the green light on and will flash every5 seconds under working mode.To turn the Receiver Collar off1. Press and hold the On/Off Button until the Red LEDlight shuts off.(This takes approximately three seconds.)Wrist Strap Pin2. Release the On/Off Button.TransmitterNote: To extend the life of the batteries, turn the ReceiverCollar off when it is not in use.Contact PointsCharging Jack(with cover)On/OffButtonReceiver Collar89
Step How the Transmitter buttons work2Dog 1/2 Button1. Press1/2once to switch between Dog 1 and Dog 2.2. Press and hold 1/2 until the Vibration digitPress “ - “ to adjust Vibration Level from 1-8.3. Press and hold 1/2 until the Shock digitPress “ - “ to adjust Shock Level from 1-16.flashes.flashes.Up ButtonDown ButtonVIBRATONESHOCKDog 1/2 Button1. Pressonce to send a vibration, tone,shock command to Receiver Collar.2. Press and hold, Receiver Collar will have acontinuous vibration/shock, and stop after 10 seconds.Note: Do not suggest to press and holdfor longtime to avoid physical or psychological hurt to the dog.1011
Step Collar fitting3The Receiver/Collar should be fitted so that the surgicalstainless steel contact points press firmly against thedog’s skin. When properly fitted, you should be ableto fit a finger or two snugly in between the collar andStep How to find the bestVibration/Shock Level4The unit comes with Up and Down buttons to controlthe Vibration/Shock Level, with Level 1 being thelowest level for Both Vibration and Shock, Level 8you dog’s skin. When properly fitted, the Receiver/Collarbeing the highest for Vibration and Level 16 beingshould not move on the dog. The best location forthe highest for Shock.the Receiver/Collar box is either side of the dog’sThe level of Vibration/Shock best suited for your dogwindpipe.depends on your dog’s temperament and thresholdA loose fit can allow the Receiver/Collar to movefor Vibration/Shock. Always start at the lowest levelaround on the dog’s neck. When this happens, thecontact points may rub the skin and cause irritation.and work your way up.The appropriate level can be found when the dogIf the Receiver/Collar is too tight, the dogs may haveresponds to the Vibration/Shock with a mild reaction,difficulty breathing.such as a tensing of the neck muscles. The Vibration/Shock Level may vary depending on the trainingsituation. When highly distracted, dogs will require ahigher level of Vibration/Shock.1213
Step To maximize the distanceStep The LCD & LED indicator56The unit has a 300 meter range. The range may varydepending on the way the Transmitter is held. Holdthe Transmitter away from your body to receive thegreatest range. For maximum signal strength, keepthe device properly charged.Indicates Vibration levels ranging from 1-8,and appears in the right upper part.Indicates Shock levels ranging from 1-16,and appears in the right lower part.Indicates the active dog receiver andappear in the left part.Indicates battery’s power level.Note: The battery indicator will flash everysecond to indicate low battery.Transmitter LED Indicator Light – Function and ResponseButtonButton FunctionTransmitter IndicatorLight ResponseDelivers audible tone to collar Red LED on forlength of button pressMaximum rangeTypical rangeMinimum range*Avoid touching the antenna or the range maydecrease substantially.Delivers vibration to collarbase on current level shownon Digital Display (vibrationwill time-out if pressedcontinuously for 10 secondsand will reset after releasethe VIBRA button)Red LED on forlength of button pressDelivers shock to collar baseon current level shown onDigital Display (shock willRed LED on fortime-out if pressedcontinuously for 10 seconds length of button pressand will reset after releasethe SHOCK button)1415
Receiver Indicator Light – Function and ResponseReceiver Collar FunctionGreen LED ResponsePower onFlashes onceNormal operation- Good battery1 flash every 5 secondsTraining toneOn length of TONE button pressIn pairing positionFlashes once every secondwithin 15 secondsPairing CompleteCharging CompleteFlashes rapidly for five timesOn length of the charger connectedReceiver Collar FunctionPower offRed LED ResponseOn for 3 secondsNormal operation- Low batteryFlashes rapidllyVibration/ShockOn length of VIBRA/SHOCKbutton pressOn length of charging within2-3 hoursChargingStep Charging the unit7The indicator light on the Transmitter or Receiver will not come on.The indicator light on the Transmitter or Receiver comes onmomentarily when any of the Mode Buttons is pushed.Battery Charging ProcedureNOTE: The unit has a partial charge when it leaves our facility,upon receipt of the collar, be sure to give it a 4-hour initial chargebefore the first use.1. Plug the charger into a standard wall outlet.2. Lift the rubber covers protecting the Transmitter/ReceiverCollar Charging Jack.3. Connect the charger connectors to the Transmitter andReceiver Collar Charging Jack, and as shown below.4. Connect the USB port to the Charging Adapter.5. Charge the unit for 4 hours for the first charge. Rechargestake only 2-3 hours.Note: The Battery Indicator on the Transmitter will scroll andthe indicator light in steady red while charging; and the BatteryIndicator will become steady, and the LED Indicator Lightflashes when fully charged.The indicator light on the Receiver Collar will be in steady redwhile charging and green light turned on when fully charged.6. When charging is completed, remove the charger connector.The unit uses Lithium-Polymer batteries.1. Charge the unit before using the unit for the first time.2. Do not charge the unit near any flammablesubstances.3. Fully charge if the unit is to be stored without use fora period of 3 months or more.Recharge the unit if:The indicator light on the collar is emitting a red colorand flashes rapidly.The 3 bar indicator on the Transmitter LCD shows just1 bar.1617
Step How to pair the RemoteTransmitter & Receiver Collar8If your Receiver Collar does not beep when the TONEButton of the Remote Transmitter is pushed,or if youfeel the Receiver Collar is not responding to the RemoteTransmitter, follow these steps to pair:1. With the Receiver Collar off your pet, turn theReceiver Collar off. Restart, press and hold the On/OffButton until the Green LED flashes every second onthe Receiver Collar. This continues for 16 seconds,within which pairing should be completed.2. Press and hold the TONE , VIBRA or Shock Buttonof the Remote Transmitter until the Green LED Lighton the Receiver Collar flashes rapidly for 5 times,indicating pairing is completed.Step How to use the Test Light91. Turn the Receiver Collar on.2. Hold the Test Light Contacts to the Contact Points.3. Press the SHOCK Button on the Remote Transmitter.4. The Test Light will flash.Note: At higher Shock Levels, the Test Light will flashbrighter.5. Turn the Receiver Collar off.Save the Test Light for future testing.Note: If the Test Light does not flash, recharge theReceiver and re-test. If Test Light still does not flash,contact us for Customer Service.Two Dog SystemNOTE: If you wish to add another Receiver Collar tothe training system, extra Receiver Collars are availablewhere you bought your unit.Remote Transmitter1. Switch Dog1 to Dog2 by pressing and releasing theDog 1/2 Button.2. Turn on the Receiver Collar for Dog 2, press anyMode Buttons to verify function.3. If Dog 2 Receiver Collar does not respond. Pairingmay be needed.Repeat steps in How to pair the RemoteTransmitter & Receiver Collar above.1819
Training GuideGeneral TipsEliminate one misbehavior or teach one obediencecommand at a time. If you move too fast with training,your pet may become confused.Be consistent. Correct your pet every time he misbehaves.Unless you can supervise him, it is recommended thatyou restrict your pet from situations in which he has ahistory of misbehaving. However, setting up a situationas a training session can dramatically improve yourchances of success.If your pet reacts to the tones by hiding or acting fearful,redirect his attention to a simple and appropriate behavior,such as the “sit” command.Pets should be at least 6 months old before using theTraining Collar.Only let responsible family members use the TrainingCollar. It is not a toy!Other pets in hearing range will be affected by thetraining tones. Therefore, training sessions should beconducted out of hearing range of other pets.Never use the Remote Training Collar tocorrect or eliminate any form of aggressivebehavior. We recommend you contactyour local veterinarian or professionaltrainer to determine if your pet might beaggressive. See page 3 for more information.20Frequently Asked QuestionsIs the Vibration/Shocksafe for my pet?While the Vibration/Shock isunpleasant, it is harmless to yourpet. Electronic training devicesrequire interaction and training fromthe owner to achieve desired results.How old does my pethave to be beforeusing the RemoteTraining Collar?Your pet should be able to recognizebasic obedience commands such as“Sit” or “Stay”. Pets should be atleast 6 months old before using theTraining Collar.Once my pet is trainedand has been obeyingProbably not. You may need tomy commands, will hereinforce training with the Receiverhave to continue toCollar from time to time.wear the ReceiverCollar?Is the Receiver Collarwaterproof?Yes.Will I get exactly 300meters of range withthe Remote TrainingCollar?The range of the Remote Trainingwill vary according to terrain,weather,vegetation, as well as transmissionfrom other radio devices. See “Tomaximize the distance” for tips onmaximizing your range.How long can Icontinuously deliverVibration/ Shock tomy pet?The maximum amount of time youcan press the Vibration/Shock Buttonand deliverVibration/Shock to yourpet continuously is 10 seconds. Afterthis, Vibration/Shock cannot bedelivered until You release andpress the button again.21
Troubleshooting Make sure the Receiver Collar hasbeen turned on. If your range has reduced from the firsttime you used the Remote TrainingCollar, the battery(s) may be low ineither the Remote Transmitter orReceiver Collar. Terrain, weather, vegetation,transmission from other radio devicesMy pet does notand many other factors can impact therespond when Iamount of range you have with the unit.press a button. Test the Receiver Collar. See “How touse the Test Light” for details. Increase the Vibration/Shock Level.Referto “How to find the best Vibration/ShockLevel” for more information. Make sure the Receiver Collar’s ContactPoints are placed snugly against yourpet’s skin. Refer to “Collar fitting” formore information. Make sure the Receiver Collar hasThe ReceiverCollar will notturn on.The ReceiverCollar is notresponding tothe RemoteTransmitter.22been charged. For the initial charge,be sure to charge it for 4 hours.Subsequent charges only take2-3 hours. Verify the Receiver Collar is on. If the Indicator Light does not come onwhen any button is pressed on theTransmitter, ensure that the batteriesare fully charged. If the first two solutions did not resolveyour problem, see “How to pair theRemote Transmitter & the Receiver Collar”.Warranty and repair information1-Year Limited Lifetime WarrantyThe original purchaser for this unit is provided with 1-YEARWARRANTY.The warranty begins from the date of purchase. For the firstyear, coverage is for both Parts and Labor on warranty repairservices.Accessories such as chargers, splitter cables, antennas, straps,and batteries are covered for the first year only. After the firstyear, the Limited Lifetime Warranty covers Parts only and doesnot cover Labor Fees and Accessories. All shipping feesincurred, the cost of Accessories after the first year, and Laborfees associated with out of warranty repair work, are thecustomer’s responsibility. Labor fees wil be variable dependingon the extent of the work required. The Limited LifetimeWarranty expires 5 years after a model is discontinued fromproduction.To Qualify for the WarrantyAll products must provided a proof of purchase is required toinitiate repair work under warranty. We strongly recommendkeeping the original receipt. If a proof of purchase is notavailable at the time of service, we will estimate the age ofunit by the serial number. Serial number estimates can differfrom the actual purchase date. A serial number estimate isthe only method of determining an apporoximate date ofpurchase without a proof of purchase.Not Covered Under WarrantyWe DO NOT offer warranty for products that have beenbought secondhand or as a resold product.We DO NOT23
replace defective units or provide refunds forproducts purchased from us after 30 days from the date ofpurchase.Issues of replacement and refunds on units purchased lessthan 30 days from an authorized dealer must be addressedto the dealer directly. If the products purchased from anauthorized dealer are after 30 days from the date of purchase,please send the units to us for service and repair.We DO NOTcover the cost of repairs and replacements due to misuse bythe owner or dog, improper maintenance, and/or lost units.Any water damage on the Water Resistant Transmitters andthe Water Resistant Receivers of our product series will notbe covered. All replacement costs for either the transmitteror receiver will be the owner’s responsibility.The warranty is void if the unit has been altered or anunauthorized person has damaged the unit while attemptingrepair work.Battery replacement by the customer during the first year ofthe Limited Lifetime Warranty is not recommended. If thecustomer chooses to replace the batteries, any damage tothe unit during the change-out by the owner will void thewarranty.We reserve the right to retain and discard any partsor accessories that have been found damaged uponreplacement and repair.Procedure for Repair WorkIf the unit is malfunctioning, please refer to the “TroubleshootingGuide” in the Operating and Training Guide before sending itback for Service.The cost of shipping products under warranty back is thecustomer’s responsibility. We are not responsible for unitsdamaged or lost in transition. We are not responsible for lossof training time or inconvenience while the unit is in for repairwork. We do not provide loaner units or any form of24compensation during the repair period.A copy of the sales receipt showing the purchase date maybe required before warranty work is initiated.Please includea brief explanation outlining the problem and include yourname, address, city/state/zip code, daytime phone number,evening phone number, and email address.ComplianceFCC - USAThis device complies with part 15 of the FCC Rules. Operationis subject to the following two conditions: (1) This device maynot cause harmful interference, and (2) this device must acceptany interference received, including interference that maycause undesired operation.CAUTION: Modification or changes to this equipment notexpressly approved by Patpet Technology Co., Ltd mayvoid the user’s authority to operate the equipment.NOTE: This equipment has been tested and found to complywith the limits for a Class B digital device, pursuant to part 15of the FCC Rules. These limits are designed to providereasonable protection against harmful interference in aresidential installation. This equipment generates,uses, andcan radiate radio frequency energy and, if not installed andused in accordance with the instructions, may cause harmfulinterference to radio communications. However, there is noguarantee that interference will not occur in a specificinstallation. If interference does occur to radio or televisionreception, which can be determined by turning the equipmentoff and on, the user is encouraged to try to correct theinterference by one or more of the following measures: Reorient or relocate the receiving antenna. Increase the separation between the equipment and the receiver.25
Connect the equipment to an outlet on a circuit different fromthat to which the receiver is connected. Consult customer care, the dealer, or an experienced radio/TV technician for help.Reference Size for Different ierPoodle,Pomeranian9-1113.7-16.511Maltese Dog,Shih 225.621.6-24.436.2-39.327.5Schnauzer,EnglishCocker SpanielGolden Retriever,Old EnglishSheepdogLarge Dog(Body height above 24 inch, Weight above 88 lbs)Medium Dog(Height 16-24 inch, Weight 24.2-66 lbs)Small Dog(Height 10-16 inch, Weight 8.8-22 lbs)Mini Dog(Height under 10 inch, Weight under 8.8 lbs)2627
300M Remote Training Range User Expandable to a Two-dog System Touch Distinguishing Mode Buttons Backlit LCD Display Shows Intensity Level, Battery 8 Adjustable Intensity Levels for Vibration and 16 Adjustable Intensity Levels for Shock 6 7 Dog 2 Receiver Collar Collar for Transmitter for Receiver USB Port and Dog 1/2 p-