Transcription
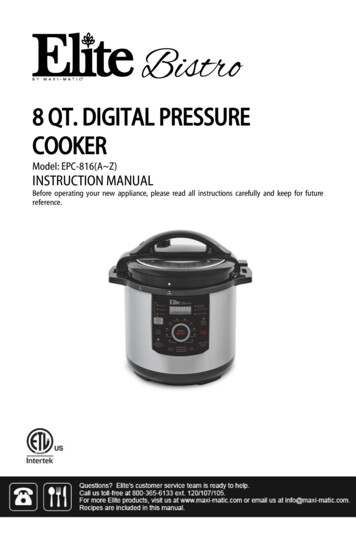
8 QT. DIGITAL PRESSURECOOKERModel: EPC-816(A Z)INSTRUCTION MANUALBefore operating your new appliance, please read all instructions carefully and keep for futurereference.
TABLE OF CONTENTSIMPORTANT SAFEGUARDSSAFETY WARNING/ADDITIONAL SAFETY TIPSE4 ERROR INDICATORSHORT CORD PURPOSE/POLARIZED PLUGABOUT YOUR PRESSURE COOKERPARTS IDENTIFICATIONGLASS LID ASSEMBLY/PRESSURE COOKER LID MARKINGSPRESSURE LIMITING VALVE WARNINGBEFORE FIRST USElid assemblyrubber seal ring assemblywater testPREPARING YOUR PRESSURE COOKEROPERATING INSTRUCTIONShow to use the menu select functionsnotes & Tips #3-6how to cook ricehow to use the pressure cook time functionhow to steam simmer sautéhow to use the slow cook functionhow to use the delay timerhow to use the keep warm functionhow to cook with frozen foodshow to use the canning/preserving functionHELPFUL TIPSHOW TO CLEAN YOUR PRESSURE COOKERTROUBLESHOOTINGCOOKING TIME CHARTRECIPESsavory pressure cooker recipesdessert recipescanning recipesslow cooker recipesWARRANTY AND RETURN 35-7335-5656-6162-6566-7273-74info@maxi-matic.com
IMPORTANT SAFEGUARDSWhen using pressure cookers, basic safety precautions should always be followed:1. Read all instructions before operation.2. Do not operate while unattended.3. Do not touch hot surfaces. Use handles or knobs.4. Close supervision is necessary when the pressure cooker is used near children.5. DO NOT allow children to operate under any circumstance.6. Do not place the pressure cooker in a heated oven.7. Extreme caution must be used when moving a pressure cooker containing hotliquids.8. Do not use pressure cooker for other than intended use.9. Never immerse product in water or other liquids.10. This appliance cooks under pressure. Improper use may result in scalding injury.11. Make certain unit is properly closed before operating. See” Operating Instructions”.12. Do not fill the unit over 2/3 full. When cooking foods that expand during cookingsuch as rice or dried vegetables, do not fill the unit over 1/2 full. Over filling maycause a risk of clogging the vent pipe and developing excess pressure. Failure tofollow this procedure can result in injury to person(s) and/or damage to the unit.13. Be aware that certain foods, such as applesauce, cranberries, pearl barley, oatmealor other cereals, split peas, noodles, macaroni, rhubarb, or spaghetti can foam, froth,and sputter, and clog the pressure release device (steam vent). These foods shouldnot be cooked in a pressure cooker.14. When the normal operating pressure is reached, turn the heat down so all the liquidwhich creates the steam does not evaporate.15. Always check the pressure release devices for clogging before use.16. Do not open the pressure cooker until the unit has cooled and all internal pressurehas been released. If the handles are difficult to push apart, this indicates that thecooker is still pressurized – do not force it open. Any pressure in the cooker can behazardous. See Operating Instructions.17. Do not use this pressure cooker for pressure frying with oil.18. DO NOT place the product near flammable materials or use in a humid environment.19. DO NOT damage the Seal Belt and DO NOT replace it with anything other than thereplacement belt designated for this unit.20. DO NOT tamper with the Steel Ring in the Lid (2) with any tools or external forces. Ifthe Steel Ring is damaged, please stop using immediately and replace the Lid.21. Clean the Filter (17) regularly to keep the cooker clean.22. NEVER use additional weight on the Pressure Limiting Valve (3) or replace thePressure Limiting Valve (3) with anything not intended for use with this unit.23. The surface of contact between the Inner Pot (6) and inner surface of Main Body (13)should always be clean. DO NOT use the Inner Pot with other heating sources. DONOT replace the Inner Pot with a container other than what is recommended by themanufacturer.24. The Inner Pot consists of a non-stick layer surface. To avoid scratching the non-sticksurface, please use wooden or plastic utensils.www.maxi-matic.com2info@maxi-matic.com
IMPORTANT SAFEGUARDS25. Food should not be kept warm for more than 4 hours in order to maintain thefreshness of the food. The pressure cooker should not be used for more than 6hours continuously. Serious Injury and/or damage may occur if any safeguards areignored.26. If steam releases around the Lid (2) during the cooking process, please unplug fromthe power supply immediately, let cool, remove contents and return the product tothe manufacturer for exchange or repair. The Pressure Discharging Device hasactivated. This is a safeguard to alert the user that the Pressure Limiting Device ismalfunctioning27. If there is any malfunction of the cooker during the cooking process, please stopusing the device and return to the manufacturer for repair or exchange.28. Do not let cord hang over edge of table or counter, or touch hot surfaces.29. Unplug from outlet when not in use and before cleaning. Allow to cool beforeputting on or taking off parts.30. Do not operate this appliance with a damaged cord or plug or after it malfunctionsor has been damaged in any manner. Bring it to a qualified technician forexamination, repair or electrical or mechanical adjustment. DO NOT disassemble theproduct, or replace parts with parts not intended for this unit.31. Always attach plug to appliance first, then plug cord into the wall outlet. Todisconnect, turn any control to off, then remove plug from wall outlet.32. Do not use outdoors.33. Do not place on or near a hot gas or electric burner, or in a heated oven.34. Any other servicing should be performed by an authorized service representative.35. The use of accessory attachments not recommended by the appliance manufacturermay cause injuries.36. Some countertop and table surfaces, such as Corian , wood and / or laminates, arenot designed to withstand prolonged heat generated by certain appliances. It isrecommended by countertop manufacturers and Maxi-Matic that a hot pad or trivetbe placed under your appliance to prevent possible damage to the surface.SAVE THESE INSTRUCTIONSFOR HOUSEHOLD USE ONLYwww.maxi-matic.com3info@maxi-matic.com
SAFETY WARNINGThere is a potential risk of fire, electric shock or injury to persons if the product is notused as instructed. Protection against electric shock is assured only if the mainpower cord is connected to a properly grounded 120V 60Hz power receptacle.This product is to be used in an indoor environment only and is not intended forcommercial use. Dry locations only.All parts and accessories for this appliance must be used properly according to theinstructions. All parts and accessories must be the original provided frommanufacturer. All other parts or accessories that is not intended for use with thisappliance is strictly prohibited.The use of an extension cord, power adapter or other electric devices is highly notrecommended.CAUTION: Be sure to fully insert both ends of power plug into receptacle of pressurecooker socket and wall socket. Failure to do so could result in extreme over-heatingof power cord.IMPORTANT: This is NOT a Stovetop Pressure Cooker. Under NO circumstancesshould this Pressure Cooker or any of its parts or components be placed ON or NEARa Stovetop, Range, or Open Flame. Doing so will cause serious damage to thePressure Cooker and/or injury to person.NOTE: The Inner Pot (6) consists of a non-stick surface. To avoid scratching the nonstick surface, please use wooden or plastic utensils.ADDITIONAL SAFETY TIPSAlways keep hands and face away from Pressure Release Device when releasingpressure.Use extreme caution when removing the lid after cooking. Always tilt the lid awayfrom you, so any remaining steam is away from your face.Never attempt to open lid while cooking, or before float valve (4) has dropped. Donot attempt to defeat this safety feature by forcing lid open.Do not cover or block the pressure valves.Do not touch the pot or lid except for the handle immediately after using.To avoid burns, allow food to cool before tasting. The temperature of the food getsconsiderably hotter than with conventional cooking.LED ERROR INDICATORIf any of the below error codes appear on the pressure cooker display, unplug thepower cord and re-plug after 10 minutes. If the error code remains, contact themanufacturer for a replacement part.See Troubleshooting on page 31 for instructions regarding an E4 error.Indicator CodeProblems/CausesE1Open Circuit of the SensorE2Short Circuit of the SensorE3OverheatingE4Signal Switch Malfunctionwww.maxi-matic.com4info@maxi-matic.com
SHORT CORD PURPOSENOTE: A short power cord is provided to reduce the risk of personal injury resulting frombecoming entangled in or tripping over a longer cord.Longer power-supply cords or extension cords are available and may be used if care isexercised in their use.If an extension cord is used: (1) the marked electrical rating of the extension cord shouldbe at least as great as the electrical rating of the product; (2) the extension cord shouldbe arranged so that it will not drape over the countertop or tabletop where it canunintentionally be pulled on or tripped over by children or pets.POLARIZED PLUGIf this appliance is equipped with a polarized plug (one blade is wider than the other),please follow the below instructions:To reduce the risk of electrical shock, this plug is intended to fit into a polarized outletonly one way. If you are unable to fit the plug into the electrical outlet, try reversing theplug. If the plug still does not fit, contact a qualified electrician. Never use the plug withan extension cord unless the plug can be fully inserted into the extension cord. Do notalter the plug of the product or any extension cord being used with this product. Do notattempt to defeat the safety purpose of the polarized plug.www.maxi-matic.com5info@maxi-matic.com
ABOUT YOUR PRESSURE COOKERThis digitally controlled and automatic pressure cooker uses advanced technology so youand your family can enjoy the benefits of better, faster and healthier cooking. Your EliteBistro Pressure Cooker seals in steam to cook hotter and faster while maintainingimportant nutrients for healthier meals. Cooking fast and with less water saves vitalnatural resources and energy! The unit features easy touch-button settings, acountdown timer, and a very large cooking pot big enough for family gatherings! It’s theeasiest pressure cooker to use on the market. It may seem like a complicated unit butrest assured, this pressure cooker is simple to use, makes meals quick and easy, andoverall it saves you money! Please accept our thanks for purchasing an Elite BistroPressure Cooker and Enjoy!PRESSURE COOKER WITH MULTIPLE FUNCTIONS: Multiple functions for cooking, stewing, braising, simmering, and roasting. Cooking will be done automatically by selecting the different menu choices onthe unit. When the food has completed its cooking cycle, there will be a (3)beep indicator, followed by the unit automatically switching to the Keep Warmmode. A delay timer allows the user to delay the start of cooking by up to 24-hours.When the timer is set, the count-down will start. At the end of the countdown,the cooker will start to heat up. The pressure cooker also has its own memory. During interruptions such as apower failure, the unit will automatically renew the cooking cycle where theunit left off when the power resumes.RAPID COOKING; TIME & POWER SAVING: By using high pressure (high temperature), food will be cooked much morerapidly. This will reduce the cooking time and consumption of power. Forexample: when cooking rice, this pressure cooker will save up to 20% of theelectricity and up to 15% of the time when compared to a conventional ricecooker. When cooking stew, soups or braising meats, this cooker will savemore than 40% of time and more than 45% of power as compared to aconventional slow cooker. Cooking can also be done at high altitudes.PRESERVES NUTRIENTS & PROMOTES HEALTHY EATING: Airtight cooking methods preserve nutrients and original flavor of food.www.maxi-matic.com6info@maxi-matic.com
PARTS IDENTIFICATIONFloat Valve(Internal Viewunderneath the Lid)1.2.3.4.5.6.7.8.9.9164Condensation leLidPressure Limiting ValveFloat ValveMeasuring CupInner PotSpoonHandleLid Rest (lid latchesonto the side handle)Control PanelPower CableCondensation CupMain BodyRack-lifting TongsHigh and Low RacksSeal Ring for Float ValveFilterRubber Seal RingGlass Lid (use withSteam, Simmer, SlowCook functions)5715143412ThecondensationCup is the clearplastic piece thatsnaps into theback side of thepressure cooker.as shown on theright.Top View of Lidwww.maxi-matic.com7info@maxi-matic.com
GLASS LID ASSEMBLY**Your Pressure Cooker is equipped with aTempered Glass Lid (19) that can be used withthe STEAM, SIMMER, and SLOW COOK functions.Please do not use this Glass Lid (19) with anyother functions on this Pressure Cooker.Assembly of the Knob on the Glass Lid willrequire a Phillips Screwdriver (not included).Follow the diagram on the right to assemblethe knob on the Glass Lid (19).1.3.4.5.6.Handle 2. Handle Base (Pre-assembled)Glass Lid BodySilicon GasketGasketM4 ScrewPRESSURE COOKER LID MARKINGSPlease note the "OPEN" and "CLOSE" markings onthe rim of the pressure cooker body (13) andthe“ ”on the rim of the Lid (2). To properlyclose and secure the pressure cooker Lid (2),always line up the "CLOSE" marking on the UpperRing (9) and the “ ”on the rim of the Lid (2).PRESSURE LIMITING VALVE WARNINGWARNING: Avoid serious injury. Always usetongs or a long kitchen tool to set the valve toEXHAUST.CAUTION HOT STEAM: KEEP HANDS AND FACE AWAYFROM THE PRESSURE LIMITING VALVE WHENROTATING TO EXHAUST.www.maxi-matic.com8info@maxi-matic.com
BEFORE FIRST USEWorkingPressure0 70kPaMaximumPressure90kPaPSI12 PSIKeep WarmTemperature140ºF 175 ºFDelay Timer0.5 24 HRRemove packaging materials such as cardboard, plastics or Styrofoam and discardappropriately.2. Clean all the parts by wiping with a soft damp cloth or sponge and dry thoroughly.1.LID ASSEMBLY:How to open the lid: Hold the handle (1) firmly, turn the lid (2) clockwise until it loosensand lift vertically. (Figures 1-2); the lid (2) can stand on the Lid Rest (9) (Figure 3).Note: For new units, the seal of the lid (2) may be slightly stronger than normal and maybe slightly difficult to unlock. Once the lid (2) has been opened and closed several times,it will loosen up.OPENOPENOPENFig.1Fig.2Fig.3How to close the lid: Take the lid (2) off the lid rest (9) (Figure 4), hold the handle (1) andclose it downwards at the Opened Lid position (Figure 5). Turn counter-clockwise untilyou reach the Closed Lid position. (Figure 6info@maxi-matic.com
BEFORE FIRST USE (CONT.)RUBBER SEAL RING ASSEMBLYAlways ensure the Rubber Seal Ring (18) is securely fitted onto the metal X-Ring in theinterior of the Lid (2). The Rubber Seal Ring (18) should fit around the outside of theentire X-Ring. Make sure the crease in the Rubber Seal Ring (18) meets with the X- Ringall the way around. Then place the X-Ring and Rubber Seal Ring (18) back into the Lid (2)making sure the hole in the center of the X-Ring's cross-section is lined up with the metalpin in the center of the Lid (2). Press down firmly until the X-Ring is secured onto the Lid(2). (Figures 7- 8)Fig.8Fig.7WATER TESTTo ensure correct assembly of the Rubber Seal Ring (18), fill the Inner Pot (6) with waterabout 2/3 full, place the Lid on the cooker, rotate the Pressure Limiting Valve (3) to theAirtight position and run on CANNING/PRESERVING mode for 10 minutes. When cycle iscomplete, using tongs or another long kitchen tool, carefully rotate the Pressure Valve tothe Exhaust position allowing all pressure to escape.*CAUTION HOT STEAM: KEEP HANDS AND FACE AWAY FROM THE PRESSURE LIMITINGVALVE WHEN ROTATING TO EXHAUST. Let the appliance cool to room temperature. Pourout the water. Rinse and towel dry the Inner Pot (6). The Elite Bistro pressure cooker isnow ready for use.www.maxi-matic.com10info@maxi-matic.com
PREPARING YOUR PRESSURE COOKER1.2.3.4.5.6.Remove the inner pot (6) and add desired ingredients. The amount of water andfood should not exceed 2/3 of the height of the inner Pot (6) (Figure 9). For foodthat will expand in water, the level should not exceed 1/2 of the Inner Pot (6) (Figure10). The minimum level for cooking would be 1/5 of the Inner Pot (6) (Figure 11).23912Fig.9Fig.1010Fig.11Be certain the inner receptacle, where theElectronic Heater is located, is clean and drybefore inserting the Inner Pot (6) into thepressure cooker and adjust the pot left and rightto ensure optimal contact between the Inner Potand the Electronic Heater (Figure 12).Closing the Lid: Make sure the Rubber Seal RingFig.12(18) is fitted properly onto the X-Ring inside the lid (2). Observethe Rubber Seal Ring (18) inside the lid (2) and ensure that it isfitted onto the outer part of the X-Ring all the way around. (Caution: If the rubberseal ring is damaged, do not use the pressure cooker. Contact Customer Service torepair or replace).Hold the handle (1) and turn it Counter-Clockwise to the “LOCKED” position. (Aclamping sound can be heard.Note: To ensure you are properly closing the lid (2), make sure the pressure limitingvalve (3) is on your left side when you are facing the front of the pressure cooker (whenfacing the control panel (10)).Adjust the Pressure Limiting Valve (3) to the “Air Tight” position , and ensure thatthe Float Valve (4) sinks.When adjusting the Pressure Limiting Valve (3) to either the "Airtight" or the"Exhaust" positions, line up the marking on the Pressure Limiting Valve (3) with thearrow on the Handle (1) as shown in Figures 13 and o@maxi-matic.com
OPERATING INSTRUCTIONSHOW TO USE THE MENU SELECT FUNCTIONS:There are ten MENU SELECT functions programmed for your pressure cooker. The defaulttimes are programmed for quick and easy cooking for small portions of food. (Whencooking food that is more than 3lbs. or more than 6-cups, please use the Timed Cookingfunction.) Each of the default times is programmed to detect the weight of food beingcooked and how much liquid is inside the pot during the cooking cycle. The unit willautomatically build up the pressure, cook the food and go to KEEP WARM when cookingis complete.DEFAULT COOK TIMES FOR MENU SELECT es15-minutes40-minutes18-minutes4-minutesPrepare desired food and place into cooking pot.Secure the Lid (2) onto the unit, turn it Counter-clockwise to lock it properly in place.Make sure the Pressure Limiting Valve (3) is set to the “Airtight” position.Plug the power cord into a 120V power outlet.The LED screen will display 00 00.Press the MENU SELECT button to scroll through the Menu Functions. The CookTime will display for each selection. Press START once you have selected the desiredMENU Function.Once you press START, the LED screen will display 00 XX (XX stands for the selectedcook time).When proper pressure is achieved,the unit will beep once and thedisplay will show P: XX. The"HOLDING PRESSURE" indicatorlight will illuminate and the cooktime will begin to count downFig.15(Figure 15).NOTES & TIPS #1:When selecting a MENU function, the unit may take approximately 5 minutes up to 30minutes to build up pressure depending on the quantity of food you are cooking.NOTES & TIPS #2:**At any point during the selection process or the cooking process, you can press theCANCEL button to cancel your selection or to cancel the cooking process.www.maxi-matic.com12info@maxi-matic.com
OPERATING INSTRUCTIONS (CONT.)9.10.11.12. 13.14.15.The unit will begin to pressure-cook the food. You may hear quiet hissing or sizzlingsounds coming from inside of the unit during this time. **See Notes & Tips #4 onpage 15 if there is steam escaping from the Lid (2) or the Pressure Limiting Valve (3).When cooking has completed, the pressure cooker will beep 3-times andautomatically go to KEEP WARM. The display will show bb.The KEEP WARM indicator light willilluminate (Figure 16) and thePressure Cooker will beginnaturally releasing the pressure.(See Notes & Tips #6 on page 15).Depending on the contents inside,Fig.16natural pressure release may take some timeto fully release. As a safety feature,the lid will not open unless all pressure is released. DO NOT FORCE THE LID OPEN.Once all pressure has released, the Float Valve (4) should sink and the lid shouldopen easily. If the lid feels tight, please allow additional time for pressure to fullyrelease before attempting to open the lid.You may also Quick Release the pressure. To use QuickRelease, move the Pressure Limiting Valve (3) to the“Exhaust” position to release the pressure until theFloat Valve (4) sinks. (Figures 17-19)CAUTION HOT STEAM - RISK OF SCALDING: USE TONGS ORA LONG UTENSIL AND CAREFULLY ROTATE THEPRESSURE LIMITING VALVE (3) TO THE EXHAUSTPOSITION (Figure 17) TO FULLY RELEASEFig.17PRESSURE/STEAM INSIDE THE COOKER.KEEP HANDS AND FACE AWAY FROM PRESSURELIMITING VALVE (3) WHILE IN THE EXHAUST POSITION(Figures 18-19). ALWAYS USE AN OVEN MITT TO REDUCERISK OF INJURY. FAILURE TO COMPLY MAY CAUSESERIOUS INJURY.To avoid liquid splatter, do not use Quick Release forfoods with a high volume of liquid (Stews, soups,Fig.18porridges, etc.).Make sure that all the steam has dissipated from thecooker. Carefully turn the handle clockwise to open.Always open the lid away from you to avoid skincontact with any remaining heat or steam.Always be certain the pressure is released completelybefore unlocking the lid (2) and opening it.Press CANCEL to end operation or allow the unit toremain in KEEP WARM mode. (It is not recommendedto keep food warm for over .com
OPERATING INSTRUCTIONS (CONT.)NOTES & TIPS #3:Please note the Pressure Limiting Valve (3) will be loose when not in use. It will rock slightly andturn 360 manually. Once the pressure cooker is in use and has fully pressurized, the PressureLimiting Valve (3) will tighten and resemble a bobble-head on the surface. Once all pressure hasreleased, it will become loose again.NOTES & TIPS #4:During the Pressurizing process, you may notice steam or pressure escape from the PressureLimiting Valve (3). Carefully adjust the valve by gently tapping it side to side using tongs until itseals properly.If steam is escaping around the lid, it means the Rubber Seal Ring (18) may not have formed a tightseal when the Lid (2) was locked. This can happen to brand new units. Try pressing down firmly onthe Lid (2). This should allow the Rubber Seal Ring (18) to seal and stop any more steam fromreleasing.Please note that steam escaping from the Valve (3) or around the lid is normal for the first 5minutes or so during the Pressurizing process. If it continues beyond 10 minutes or steam is stillreleasing when the timer has begun counting down, press down firmly on the Lid (2) to help form atighter seal. If this does not fix the issue, press the KEEP WARM/CANCEL button and follow theinstructions to release all pressure before removing the lid to check the Float Valve (4) or theRubber Seal Ring (18). See page 11 on how to install the Rubber Seal Ring (18). Note that the FloatValve (4) is properly assembled and you are able to pull it up and down with ease by grasping theFloat Valve Seal Ring (16). Reposition and secure the lid. Start the cooking process again.NOTES & TIPS #5:When cooking soups or stews with other hearty ingredients such as potatoes or meat, as much as 5or 6 cups of liquid must be used to prevent ingredients from over-cooking or burning.NOTES & TIPS #6:NATURAL RELEASE is recommended when cooking foods that will not have the tendency toovercook such as Potatoes, Beans, Soups & Stews. During the Natural Release time period, thepressure cooker may still be heated and cooking the food slightly. In Natural Release, do not movethe Pressure Limiting Valve (3) to EXHAUST immediately after cooking. Depending on the contentsinside, Natural Release may take some time to fully release. Gently tap the Valve (3) using an ovenmitt or utensil. If it is loose and turns easily and no steam is released from the Valve (3), then allpressure has been released. As a safety feature, the lid will not open unless all pressure is released.Do not force the lid open. Once all pressure has released, the Float Valve (4) should sink and the lidshould open easily. If the lid feels tight, please allow additional time for pressure to fully releasebefore attempting to open the lid.QUICK RELEASE is recommended when cooking foods that you wish to be Medium or Medium-Raresuch as Beef Roasts or Lamb. This will release the pressure quickly and prevent the food from overcooking.CAUTION: Use an oven mitt or long utensil. Keep hands and face away from Pressure Limiting Valve(3) while in Exhaust position. Failure to comply may cause serious injury .www.maxi-matic.com14info@maxi-matic.com
OPERATING INSTRUCTIONS (CONT.)**HOW TO COOK RICE: When cooking rice, the maximum amount of rice allowed for this 8 quart pressurecooker is 16 cups of uncooked rice. Normally one cup of rice requires one cup of water. This may vary according totaste. Only measure rice with the included measuring cup. For best results rinse measured rice until the water becomes relatively clear.1.2.3.4.5.6.Place rinsed rice in the pot, add water.For 6 cups of uncooked rice (yields 12 cups of cooked rice), use 6 full scoops of rice tothe line indicated on the measuring cup and add to inner pot.Add water to the 6 cup line on the markings inside the pot. Always add the rice tothe pot BEFORE adding water to the pot. The water level marked on the inner pot isbased upon having rice already added.Press the MENU SELECT button until the RICE function is selected.Press START.Follow steps 8-15 on pages 13-14 to finish the cooking process.HOW TO USE THE “PRESSURE COOK TIME” FUNCTION:Setting your own cook time is ideal for cooking meat or poultry that weighs more than 3pounds. It is also suggested for slow-cooking certain recipes that require cooking formore than 30-minutes. The programmed cook time can be set up to 99-minutes.1.2.3.4.5.6.7.8.Prepare desired food and place into cooking pot.Secure the Lid (2) onto the unit, turn it Counter-clockwise to lock it in place properly.Make sure the Pressure Limiting Valve (3) is set to the “Airtight” position.Plug the power cord into a 120V power outlet.The LED screen will display 00 00.Press the PRESSURE COOK TIME button once, then press the MIN button to thedesired time frame. Each incremental press of the button increases the cookingtime by 1 minute. Hold the button down for rapid increase of cooking time. (EX: Ifyou set the cook time to 30-minutes, the LED screen will display P 30).Once the time has been selected, press the START button and the display will show00 30.Follow steps 8-15 on pages 13-14 to finish the cooking process.www.maxi-matic.com15info@maxi-matic.com
OPERATING INSTRUCTIONS (CONT.)HOW TO USE THE STEAM SIMMER SAUTÉ FUNCTIONS:DEFAULT COOK es**STEAM FUNCTION1. Place a wire rack (included) into Inner Pot.2. Place heat resistant dish or container on top of wire rack.3. Add water to a level just below the top of the rack.4. Place food in heat resistant container on the rack. Do not fill pot more than 2/3 fullwith food. If steaming rice, place rice in an 8 inch or smaller bowl and place on rack.5. Place the Tempered Glass Lid (19) onto the pressure cooker.6. Plug the power cord into a 120V power outlet.7. The LED screen will display 00 00.8. Press STEAM SIMMER SAUTÉbutton once; the indicator light forSTEAM will illuminate (Fig 20) andthe display will show P 20 (equals20-minutes of cooking time).Fig.209. Press the START button to begin steaming and the display will show 0020. Once enough steam pressure has built up, the timer will begin counting downto zero.10. When cooking has completed, the pressure cooker will beep 3-times andautomatically go to KEEP WARM. The display will show bb during KEEP WARM.11. The KEEP WARM indicator light will illuminate and the Pressure Cooker will begincooling down. This will take approximately 10-15 minutes.12. Press the CANCEL button to end operation. CAUTION! Never put your face or hands directly over the cooker when removing lid,escaping steam can cause serious burn injury.**SIMMER FUNCTION1. Prepare desired food and place into cooking pot.2. Place the Tempered Glass Lid (19) onto the pressure cooker.3. Plug the power cord into a 120V power outlet.4. The LED screen will display00 00.Press STEAM SIMMER SAUTÉ button twice until theindicator light for SIMMERilluminates (Fig 21) and the displayshows P 40 (equals 40-minutes ofcooking 1
OPERATING INSTRUCTIONS (CONT.)5.Press the START button to begin simmering and the display will show 00 40. Oncethe internal temperature has been reached, the timer will begin counting down tozero.6. Follow steps 10-12 on page 17 to finish the cooking process. CAUTION! Never put your face or hands directly over the cooker when removing lid,escaping steam can cause serious burn injury.**SAUTÉ FUNCTIONBefore Pressure Cooking, most recipes will benefit from the golden color, richer flavorsand moist results gained from SAUTE/Sautéing.1.2.3.4.5.6.7.Remove lid (2) and plug the power cord into a 120V power outlet.The LED screen will display 00 00.Press STEAM SIMMER SAUTÉ button 3-times untilthe indicator light for SAUTÉilluminates (Fig
and your family can enjoy the benefits of better, faster and healthier cooking. Your Elite Bistro Pressure Cooker seals in steam to cook hotter and faster while maintaining important nutrients for healthier meals. Cooking fast and with less water saves vital natural resources an